Martin Rattler
Retro Guru
Re:
 13.3no2 by JuanM58, on Flickr
 13.3no1 by JuanM58, on Flickr
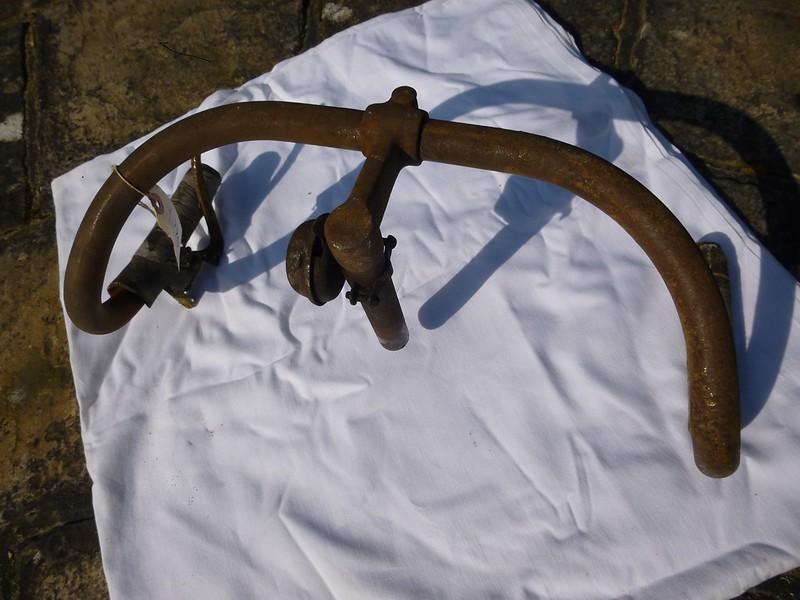
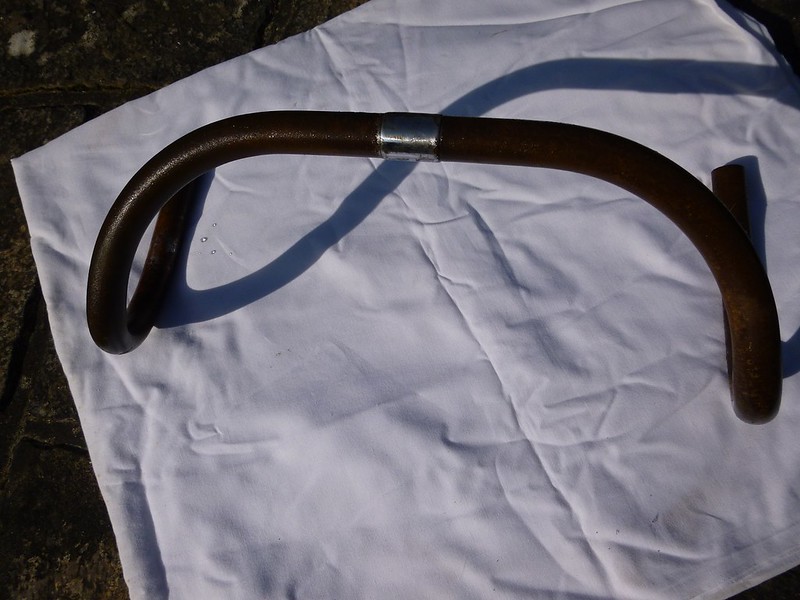
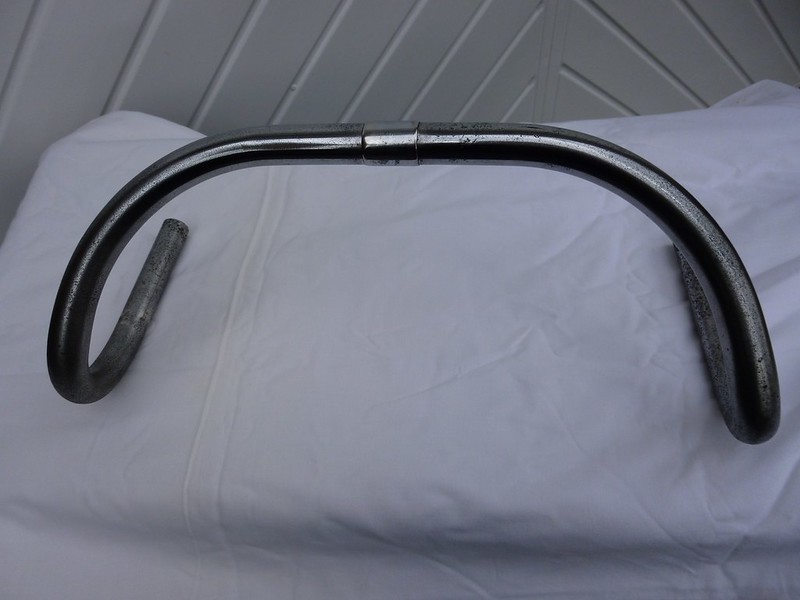
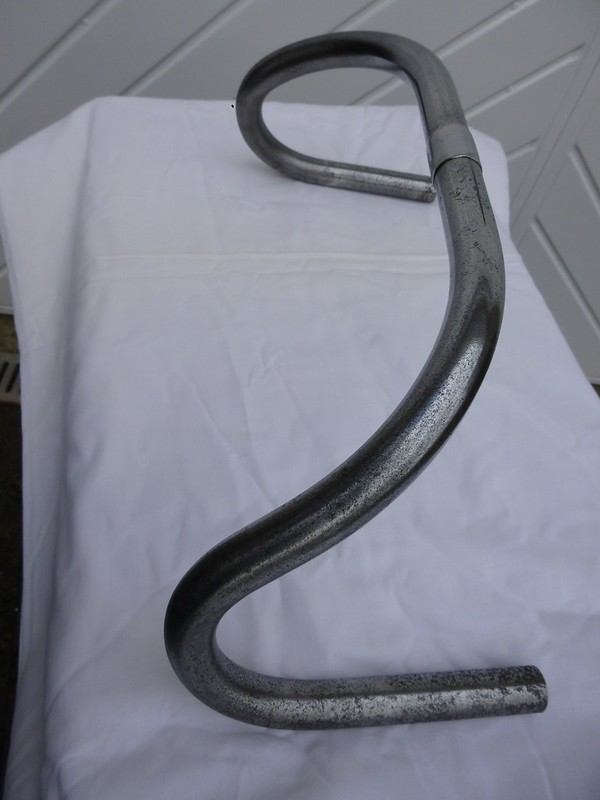
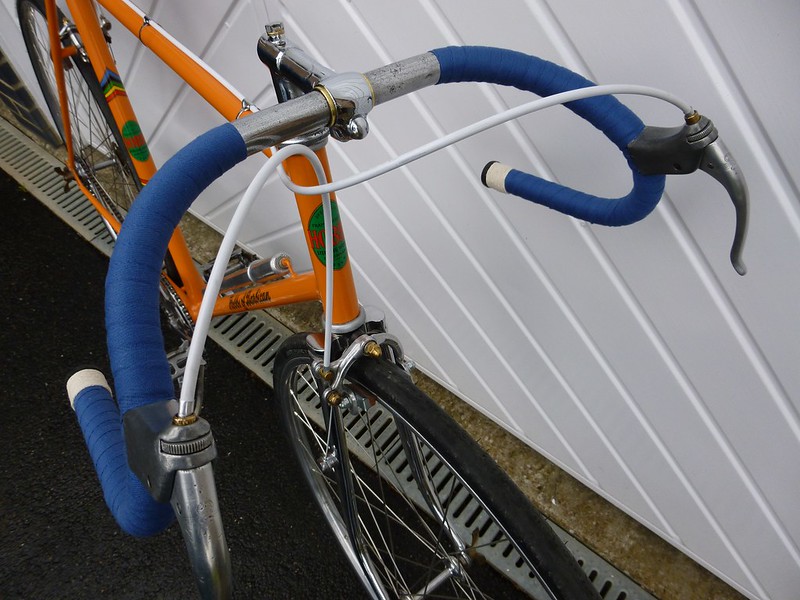
The Hobbs is now on the road, at least in its initial form. The chainline was sorted out fairly easily with new spacers being turned up on the lathe; it pretty much worked OK first time, one of the beauties of being a single speed machine I guess. My 10-speed Gillott took an age to settle down. Similarly the Universal brake callipers fitted well with the revised arrangements although there is still little room for adjustment at the front. The arrangement at the rear allows the whole calliper to be moved sideways rather than just pivoting which serendipitously makes it a good deal easier to adjust. One day all bicycles will be made like this. GB Superhood levers, my favourite type from this era were installed. The tyres were changed for some rather tatty and moth-eaten 1” white wall tyres that were hanging on a nail in the garage which helped with the chainstay clearances. The bars were changed for a modern pair of alloy moustache bars which were partially wrapped with some blue cloth tape that I had in stock although sadly insufficient to cover the bars above the brake levers. In the longer term I want to fit steel bars of a similar shape although possibly not quite as flat, I think I have tracked down a well patinated pair and am currently awaiting delivery. Brooks toeclips were fitted to the pedals with leather straps and we are pretty much ready to go.
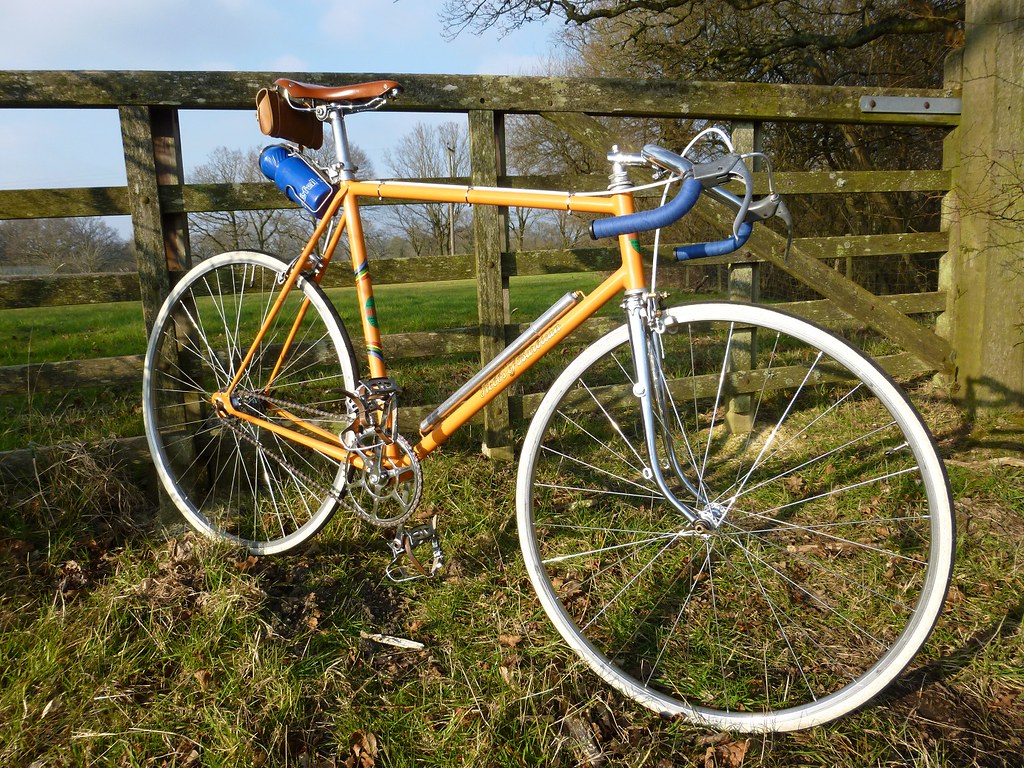
The ride feels taut and responsive and it goes and stops well. The gearing feels about right, perhaps a little low but that suits me. I haven’t tried running it on the fixed sprocket yet, I think I’ll leave that until the summer when I will feel more like experimenting. Despite a chilly North Easterly this afternoon I was out running about the local lanes, looking for a nice spot to take some pics. A mile or so after I took these the rear wheel suffered a violent blow-out which caused the tyre to run off the rim. I managed to keep the machine upright so it could have been worse and luckily I was carrying a spare tube so after fitting it I made my way home rather gingerly. So perhaps the ancient Slovenian tyres aren’t really up to it but as you all know, the choice of 27” tyres is rather limited. As soon as I was safely home I ordered a pair of 1 1/8” Conti Super Sport Pluses from Wiggle; hopefully they will do the trick otherwise it’s back to the bulbous 1 1/4s. These new tyres appear to have some element of puncture resistance which is good news as I have never had much luck with Contis. Anyway, we’ll see.
13.3no2 by JuanM58, on Flickr13.3no1 by JuanM58, on FlickrThe Hobbs is now on the road, at least in its initial form. The chainline was sorted out fairly easily with new spacers being turned up on the lathe; it pretty much worked OK first time, one of the beauties of being a single speed machine I guess. My 10-speed Gillott took an age to settle down. Similarly the Universal brake callipers fitted well with the revised arrangements although there is still little room for adjustment at the front. The arrangement at the rear allows the whole calliper to be moved sideways rather than just pivoting which serendipitously makes it a good deal easier to adjust. One day all bicycles will be made like this. GB Superhood levers, my favourite type from this era were installed. The tyres were changed for some rather tatty and moth-eaten 1” white wall tyres that were hanging on a nail in the garage which helped with the chainstay clearances. The bars were changed for a modern pair of alloy moustache bars which were partially wrapped with some blue cloth tape that I had in stock although sadly insufficient to cover the bars above the brake levers. In the longer term I want to fit steel bars of a similar shape although possibly not quite as flat, I think I have tracked down a well patinated pair and am currently awaiting delivery. Brooks toeclips were fitted to the pedals with leather straps and we are pretty much ready to go.
The ride feels taut and responsive and it goes and stops well. The gearing feels about right, perhaps a little low but that suits me. I haven’t tried running it on the fixed sprocket yet, I think I’ll leave that until the summer when I will feel more like experimenting. Despite a chilly North Easterly this afternoon I was out running about the local lanes, looking for a nice spot to take some pics. A mile or so after I took these the rear wheel suffered a violent blow-out which caused the tyre to run off the rim. I managed to keep the machine upright so it could have been worse and luckily I was carrying a spare tube so after fitting it I made my way home rather gingerly. So perhaps the ancient Slovenian tyres aren’t really up to it but as you all know, the choice of 27” tyres is rather limited. As soon as I was safely home I ordered a pair of 1 1/8” Conti Super Sport Pluses from Wiggle; hopefully they will do the trick otherwise it’s back to the bulbous 1 1/4s. These new tyres appear to have some element of puncture resistance which is good news as I have never had much luck with Contis. Anyway, we’ll see.
")