hawkhill97
Retro Guru
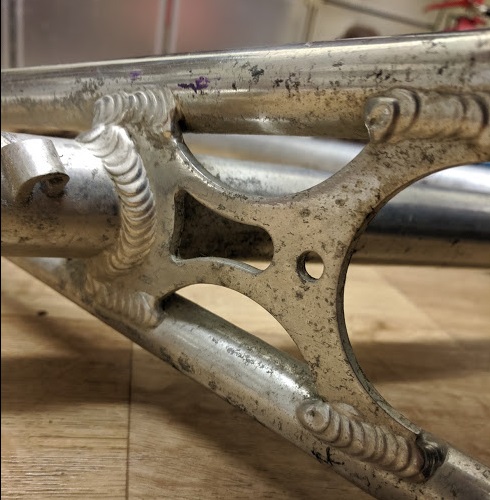
I've always loved the classic GT triple triangle frame, especially the older ones with a horizontal top tube.
My "proper" MTB is a souped up 2010 GT Avalanche but although it's smart enough in a more modern way, the classic 90s Zaskar builds I see on here always look much smarter and bring me much envy!
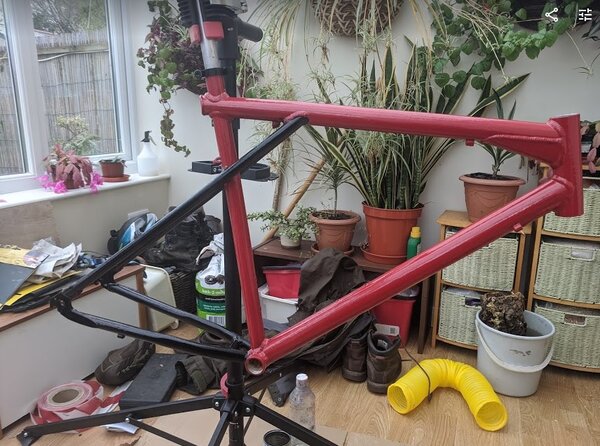
So when I saw this frame going cheap near me I thought it's got to be worth a punt for a bit of a winter project now it's too dark to ride after work.
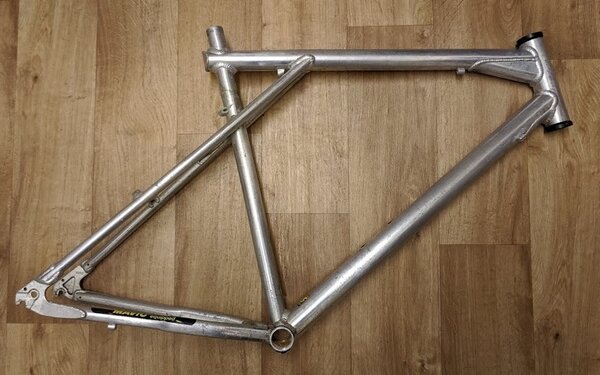
It looks like a pretty massive frame so might turn out to be too big for me... but the top tube is not insanely long so as long as I can deal with the standover height it should be alright.
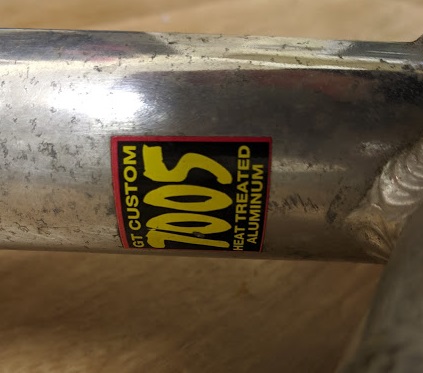
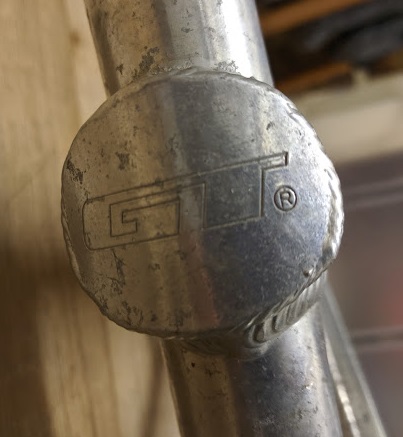
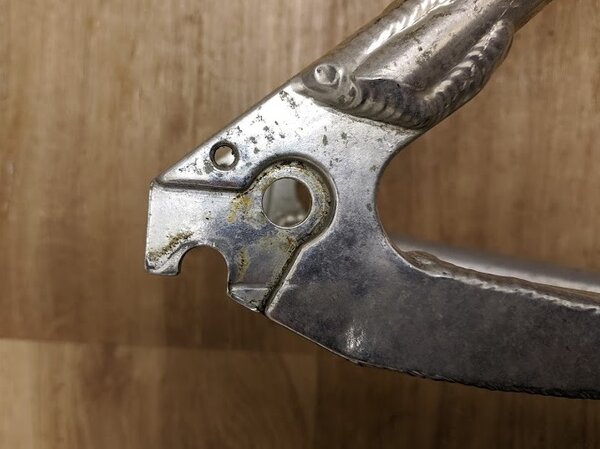
There wasn't much info in the ad, and I had my fingers crossed it would be a Zaskar, but as far as I can tell it's turned out to be a 1996 Avalanche - guessing this from the 7000 series tubing, the curved pantographed end cap on the top tube, and by comparison with google image pics.
It's missing the mech hanger but I've got one on the way in the post - was easier & cheaper to source than I feared, just hope it fits when it turns up!
My "proper" MTB is a souped up 2010 GT Avalanche but although it's smart enough in a more modern way, the classic 90s Zaskar builds I see on here always look much smarter and bring me much envy!
So when I saw this frame going cheap near me I thought it's got to be worth a punt for a bit of a winter project now it's too dark to ride after work.
It looks like a pretty massive frame so might turn out to be too big for me... but the top tube is not insanely long so as long as I can deal with the standover height it should be alright.
There wasn't much info in the ad, and I had my fingers crossed it would be a Zaskar, but as far as I can tell it's turned out to be a 1996 Avalanche - guessing this from the 7000 series tubing, the curved pantographed end cap on the top tube, and by comparison with google image pics.
It's missing the mech hanger but I've got one on the way in the post - was easier & cheaper to source than I feared, just hope it fits when it turns up!
")