Hi All,
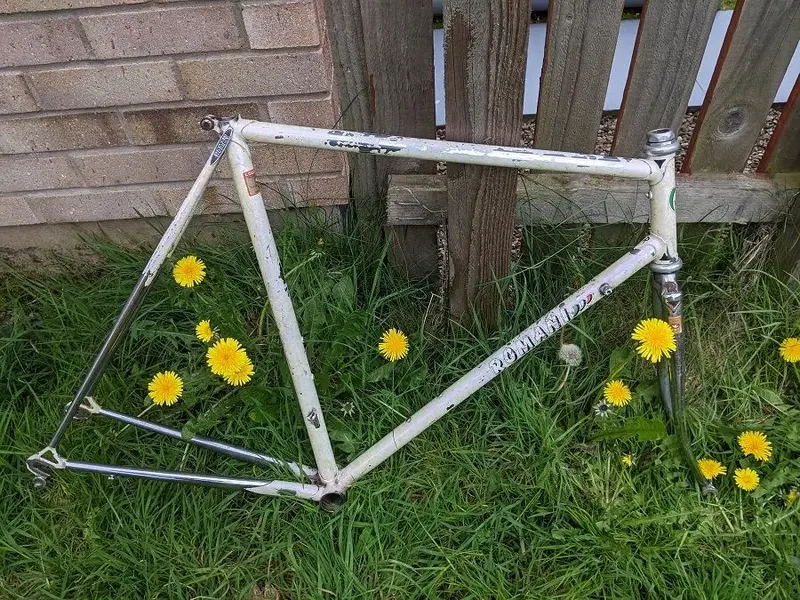
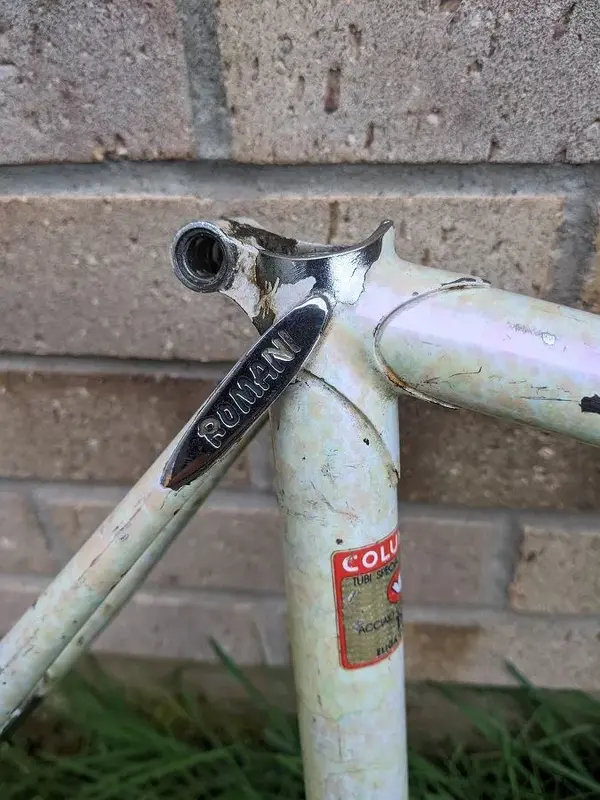
Recently impulse-bought a frame on evilbay - a nice shiny restoration candidate came up for sale locally and caught my eye. As an added bonus, the frame builder's name is the same as mine
Here's the thing - I've never owned a steel framed bike in my life. Had some steel BSOs when I was a kid, but this would be my first "real steel" frameset, so any advice is welcome.
I believe the frame is from 1980s. It shows some nice maker's marks on the lugs, internal routing for the rear brake cable, DT shifter mounts. Cosmetically, paintwork is trashed, but the frame is fully chromed, and most of the chrome is in quite decent nick. Rust seems to be light & surface only. The frame seems to have rather tight clearances, so fits more of a "summer bike" profile (36cm from axle to brake mount; I can just about fit 28mm tyre up front, but the rear is more at home with a 25mm).
As this was an impulse-buy, I don't have a clear plan for the frame yet. The extremes are as follows:
The wall art approach: Build it up with shiny retro components (campy?), hunt down parts on ebay for months, spend a fortune, take it out for an eroica ride once a year. Even with best intentions, realistically, I will probably spend the rest of the time keeping the bike in the shed and licking the chrome, as I probably won't be picking it over my current modern ti summer bike that often.
The practical approach: Build it up with whatever I can find, retrofit full guards and pannier rack, and use it for commuting to work a couple times a week, about 45 miles a day. This means stuffing the frame with modern parts, quill-to-threadless adapters, riser stem, potentially bastardising the dropouts with new braze-ons for guards & rack (if that can even be reliably done on 0.6mm thin-walled tubes?). I can probably even go down to 650B wheels if that helps create guard clearance. Single speed set-up's fine, plenty of spare parts in the parts bin.
The main advantage is that this little beauty will gain a new life & will be clocking at least a 100 miles a week.
And I can still reasonably quickly swap modern components for caveman stuff like friction DT handles for the eroica. And I get to sell my current commuter that, to tell you the truth, I'm not really that fond of.
I'll list my thoughts soon on treating the frame internally and externally for your comments and suggestions. But for now, I'd welcome any advice on turning racing frames into rack & guard equipped commuters, either temporarily, or by permanently modifying the frame (braze-ons? drill & tap an M5 hole in the "Cham-pag-nay" dropouts, anyone?). I've seen tubus QR-mounted rack kits and SKS raceblade "reacharound" guards, but would prefer a more solid solution. The idea of fixing a rear flat with cold fingers, in the rain & in the dark, while the rear QR carries the temp rack & guards mounts is rather depressing. And I'd rather have full guard coverage (think PDWs, but I don't think they will fit with sufficient clearance, even with a 23mm tyre).
Technical questions:
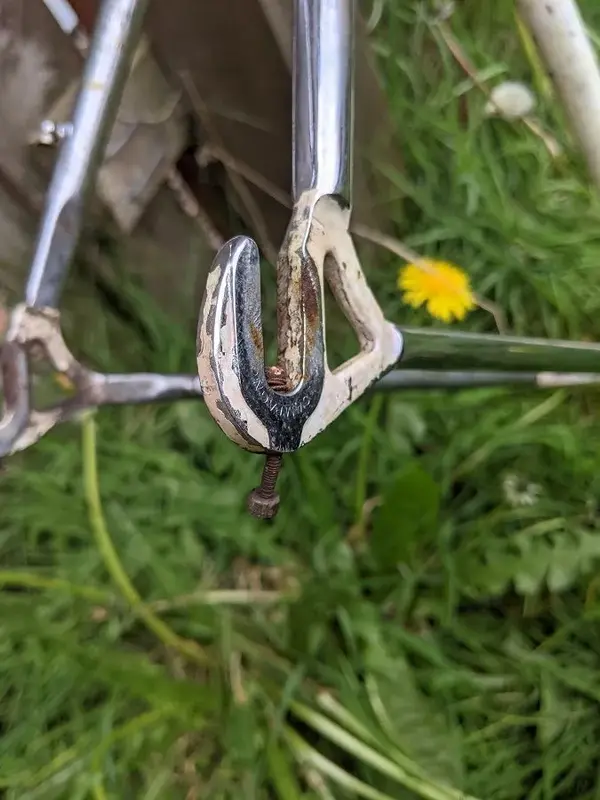
How do you call them adjuster bolts in horizontal dropouts? (mine are buggered & might need to be drilled out).
Is there an easy way to check the rear triangle alignment? The dropouts appear slightly bent.
I would be grateful for a link to a good practical guide on cold-setting a 126mm frame to 130mm - assuming that it's a better way of fitting a 130mm rear hub into a 126mm spaced frame, rather than just spreading the sides & forcing it in.
In the meantime I'm going to hit the gym - the frameset is a bit of a boat anchor at about 2.6kg - a kg heavier than my carbon frameset and half a kilo more than my ti+cf bike. I think I need to man up and build some muscle if I want to join the steel bike club.
Recently impulse-bought a frame on evilbay - a nice shiny restoration candidate came up for sale locally and caught my eye. As an added bonus, the frame builder's name is the same as mine
Here's the thing - I've never owned a steel framed bike in my life. Had some steel BSOs when I was a kid, but this would be my first "real steel" frameset, so any advice is welcome.
I believe the frame is from 1980s. It shows some nice maker's marks on the lugs, internal routing for the rear brake cable, DT shifter mounts. Cosmetically, paintwork is trashed, but the frame is fully chromed, and most of the chrome is in quite decent nick. Rust seems to be light & surface only. The frame seems to have rather tight clearances, so fits more of a "summer bike" profile (36cm from axle to brake mount; I can just about fit 28mm tyre up front, but the rear is more at home with a 25mm).
As this was an impulse-buy, I don't have a clear plan for the frame yet. The extremes are as follows:
The wall art approach: Build it up with shiny retro components (campy?), hunt down parts on ebay for months, spend a fortune, take it out for an eroica ride once a year. Even with best intentions, realistically, I will probably spend the rest of the time keeping the bike in the shed and licking the chrome, as I probably won't be picking it over my current modern ti summer bike that often.
The practical approach: Build it up with whatever I can find, retrofit full guards and pannier rack, and use it for commuting to work a couple times a week, about 45 miles a day. This means stuffing the frame with modern parts, quill-to-threadless adapters, riser stem, potentially bastardising the dropouts with new braze-ons for guards & rack (if that can even be reliably done on 0.6mm thin-walled tubes?). I can probably even go down to 650B wheels if that helps create guard clearance. Single speed set-up's fine, plenty of spare parts in the parts bin.
The main advantage is that this little beauty will gain a new life & will be clocking at least a 100 miles a week.
And I can still reasonably quickly swap modern components for caveman stuff like friction DT handles for the eroica. And I get to sell my current commuter that, to tell you the truth, I'm not really that fond of.
I'll list my thoughts soon on treating the frame internally and externally for your comments and suggestions. But for now, I'd welcome any advice on turning racing frames into rack & guard equipped commuters, either temporarily, or by permanently modifying the frame (braze-ons? drill & tap an M5 hole in the "Cham-pag-nay" dropouts, anyone?). I've seen tubus QR-mounted rack kits and SKS raceblade "reacharound" guards, but would prefer a more solid solution. The idea of fixing a rear flat with cold fingers, in the rain & in the dark, while the rear QR carries the temp rack & guards mounts is rather depressing. And I'd rather have full guard coverage (think PDWs, but I don't think they will fit with sufficient clearance, even with a 23mm tyre).
Technical questions:
How do you call them adjuster bolts in horizontal dropouts? (mine are buggered & might need to be drilled out).
Is there an easy way to check the rear triangle alignment? The dropouts appear slightly bent.
I would be grateful for a link to a good practical guide on cold-setting a 126mm frame to 130mm - assuming that it's a better way of fitting a 130mm rear hub into a 126mm spaced frame, rather than just spreading the sides & forcing it in.
In the meantime I'm going to hit the gym - the frameset is a bit of a boat anchor at about 2.6kg - a kg heavier than my carbon frameset and half a kilo more than my ti+cf bike. I think I need to man up and build some muscle if I want to join the steel bike club.


 .
.