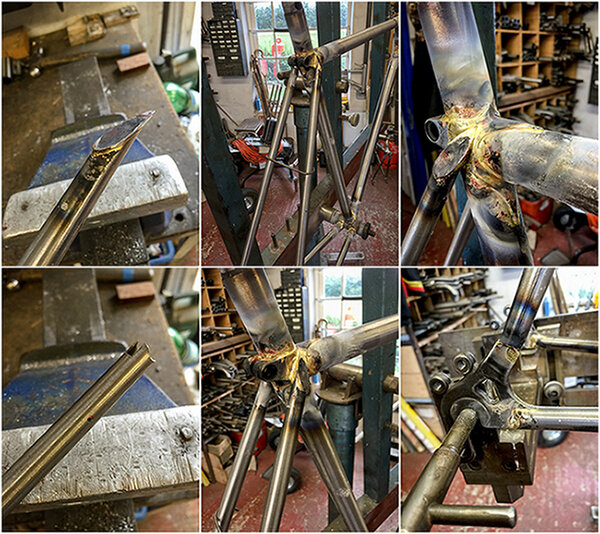
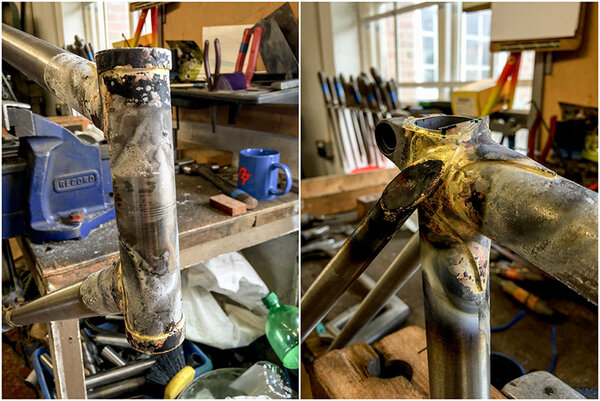
Day 3 started with completing and attaching the rear stays so that the frame could come out of the jig. The seat stay caps are fitted to the stays in the vice with brass and then shaped before the stay is fitted to the seat lug. Stays held in place with a wire hook. The stays are 'tacked' at the dropout so that rear end frame alingment can be checked and 'tweaked' before completing the full braze on the dropout.
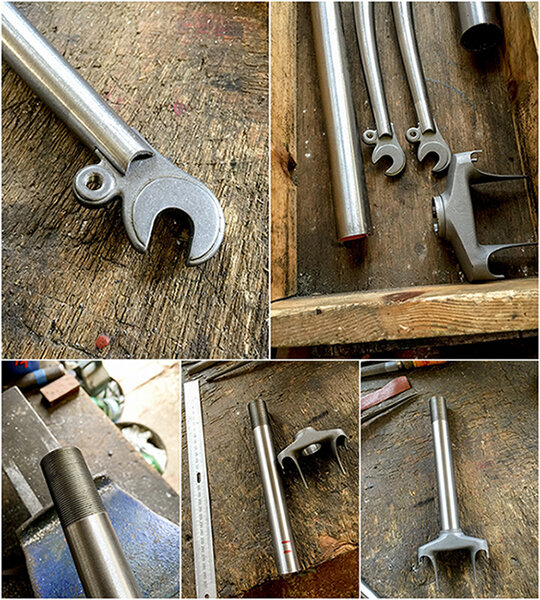
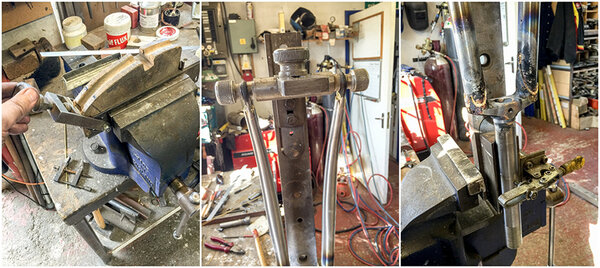
While that is cooling in the jig, I could start my fork build. Because I've slotted and filed the ends of both stays, the fork blade ends were much easier and quicker. So 2 blades, 2 dropouts, a crown and steerer tube were needed. The steerer was measured to allow for crown depth, seat depth, head tube length and stack height before cutting it off at the crown (butted) end and then fitting into the lathe for a precise 1 x 24tpi (british) thread cut.
There is no jig needed for the first part of the fork brazing. The dropouts and fluxed and fitted to the ends of the blades and clamped in a vice. The steerer is also clamped in a vice upside down so that plenty of brass can flow down over and fill the crown/steerer joint. Lots of heat required for this joint so it needs to cool for a long time.
While that is cooling the frame came out the jig and excess head tube and seat tube are cut off. Head tube will be faced and the seat tube will be shaped with a file.
It actually looks like a frame although Dave simply calls it a collection of tubes that look like bike shaped :-(
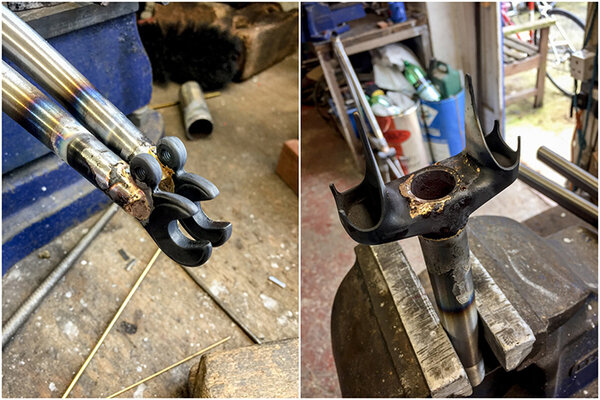
Next thing to do is mark, drill and countersink the front brake bolt hole in the crown.
I'll never look at a set of forks the same again. There is so much to appreciate in building forks. Even just drilling the brake hole. If it is not exactly central under the steerer, your caliper will be off centre, won't work properly and look odd. So after placing the steerer and crown on a surface table and using straight edges, we got a centre line marked to drill on. A 6mm hole is drilled through, then an 8mm in the back of the crown then a 8/10mm countersink bit is used to produce the countersink which will allow the recessed allen key bolt to sit in.
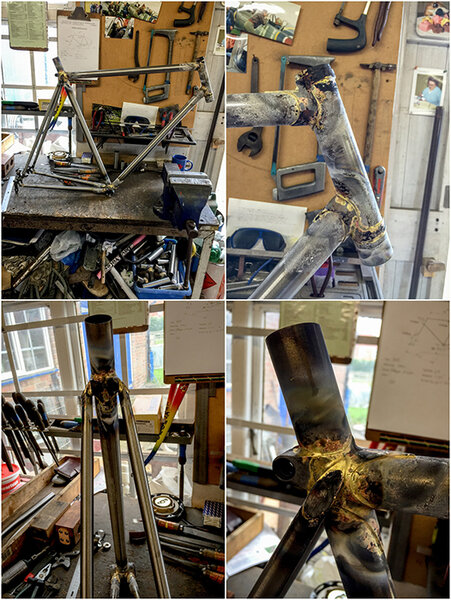
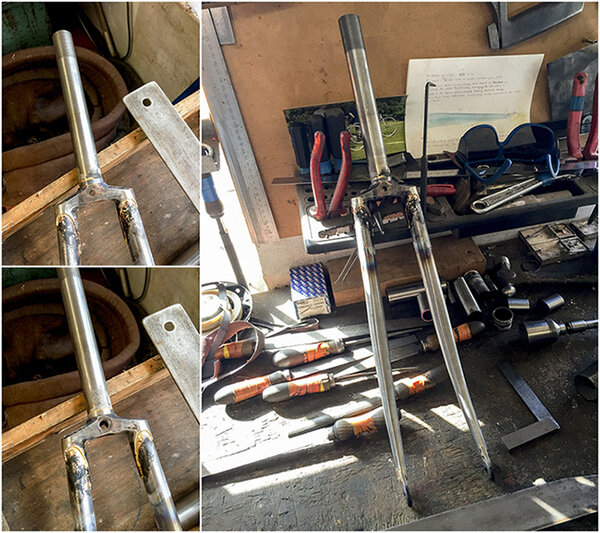
Next up is bending the already curved blades to the correct rake/offset, 45mm in my case. A wooden block jig is used with brute force to get the shape required. Even positioning the blades in the jig is critical to ensure the bend is in the same place on both blades. The blades are then cut to the correct length. 365mm for me. That is enough for a 25mm tyre, short reach Shimano caliper and mudguard. The blades and crown are fluxed, fitted to the fork jig, placed upside down and brazed.
I now have a set of Reynolds forks ready for shot blasting and cleaning.
Tomorrow is all about fitting the chainstay bridge, brake bridge and whatever braze-ons we need. It will then be shot blasted.
I now have serious respect for any one who can build a usable frame and fork. Just the amount of thought and work that goes into building forks is immense!