boy"O"boy's 1991 Raleigh Dynatech Endeavour x2!!

kingbling":1bf986cg said:
Such a nice colour really pops in the sun light, do you work in a body shop ?

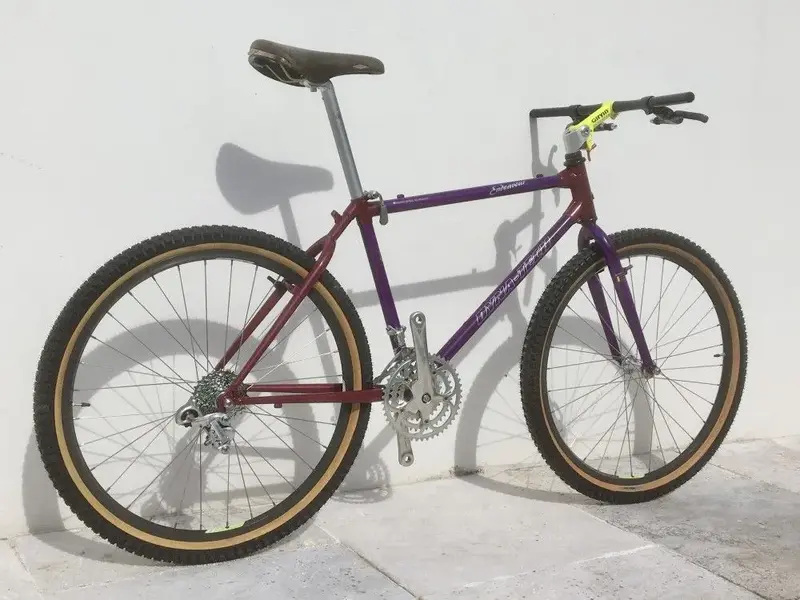
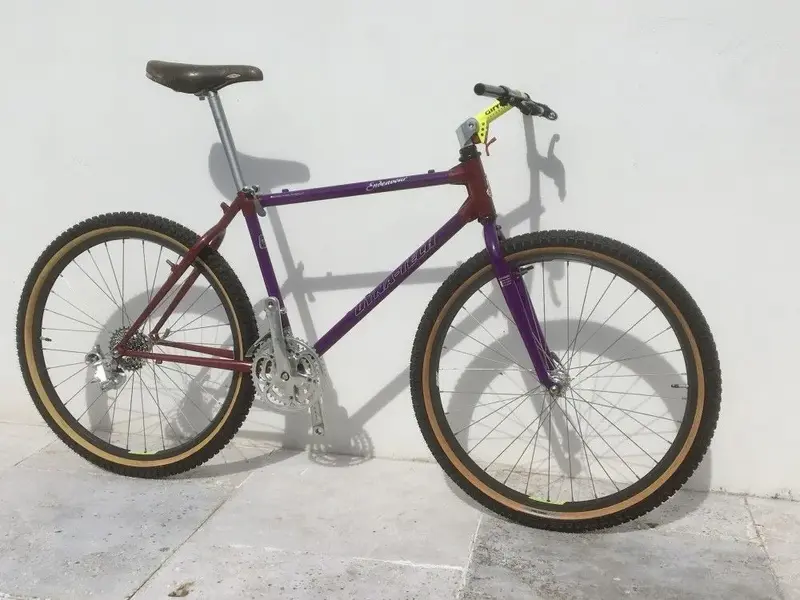
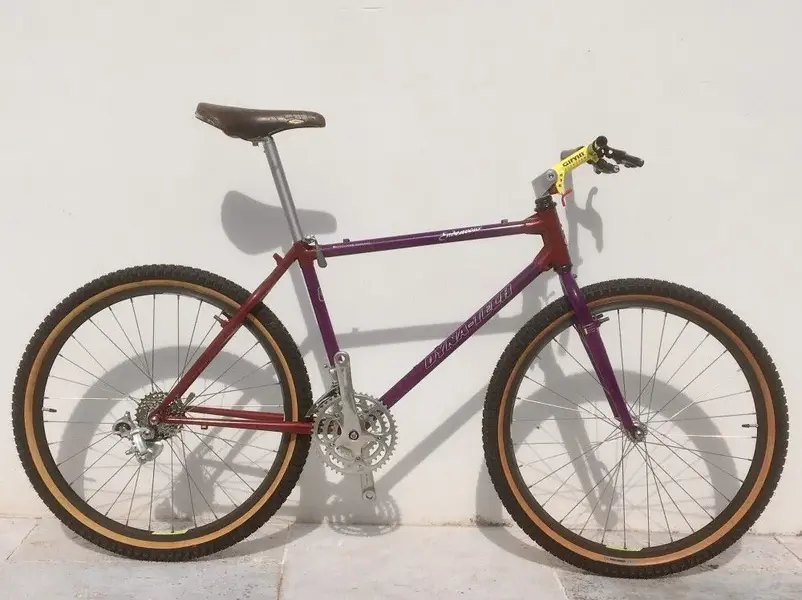
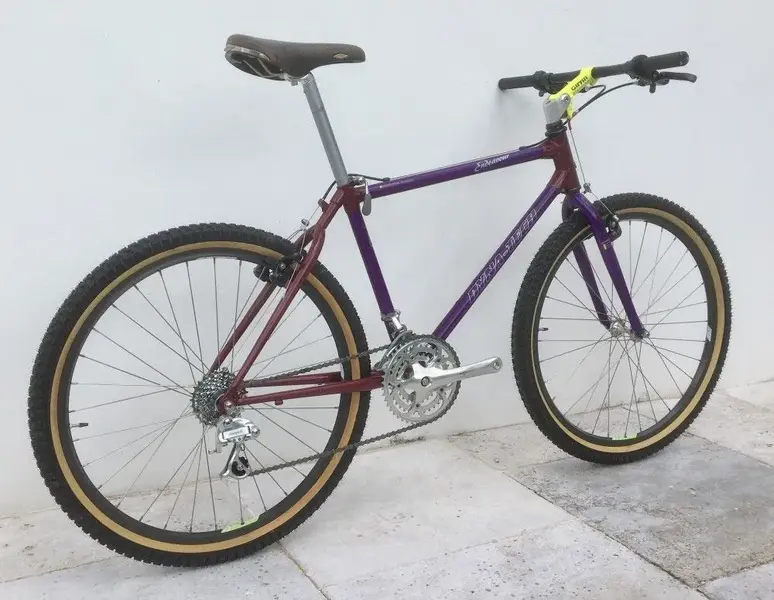
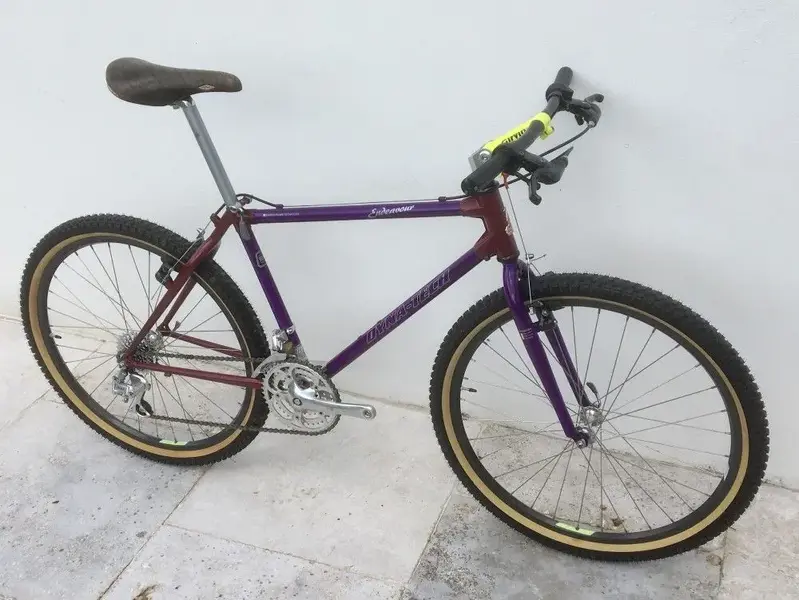
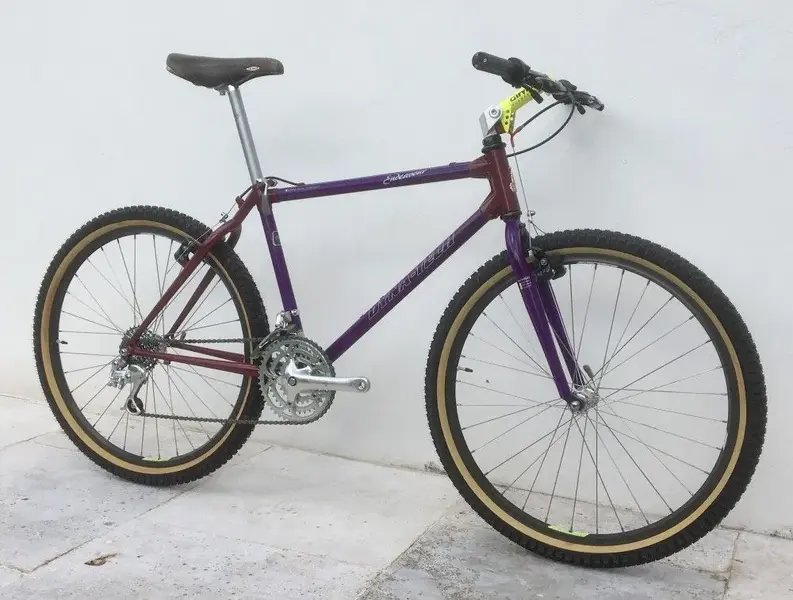
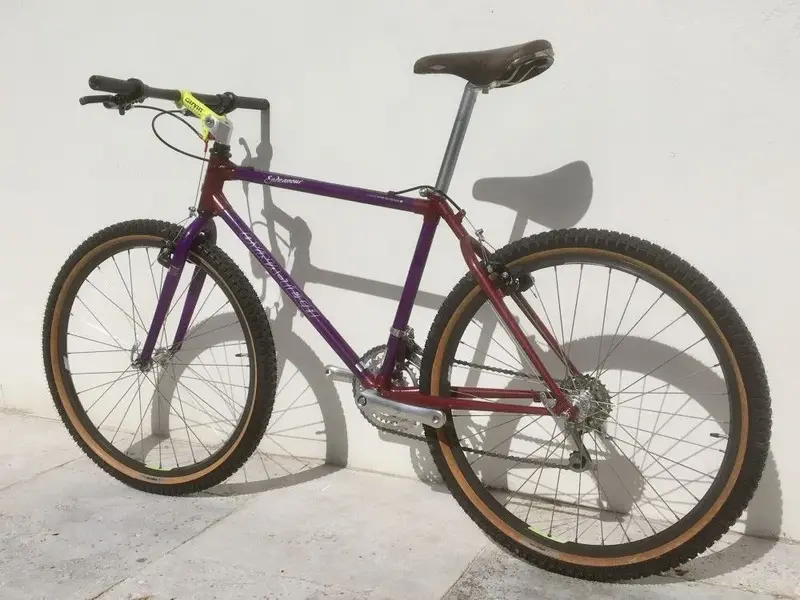
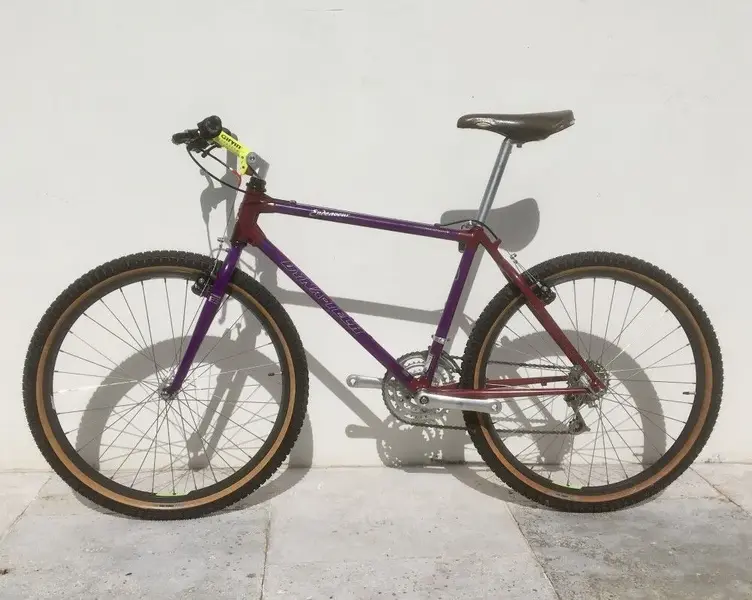
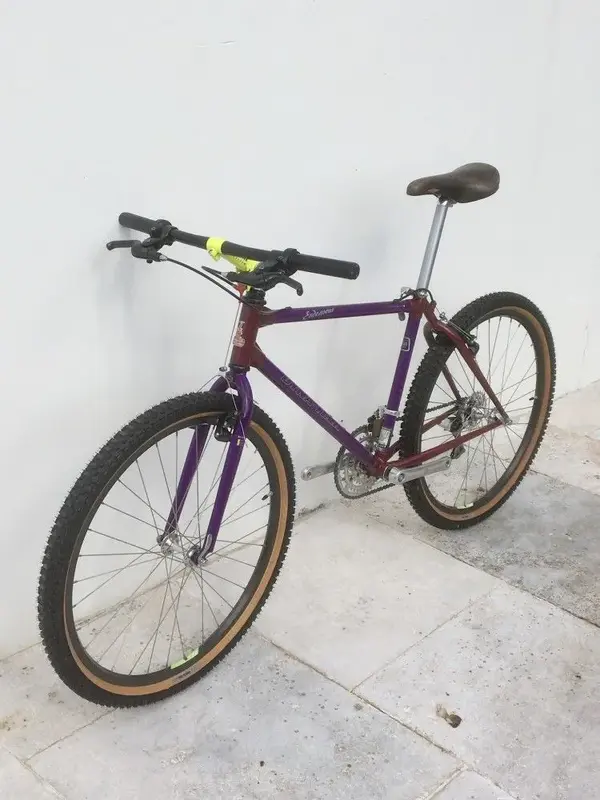
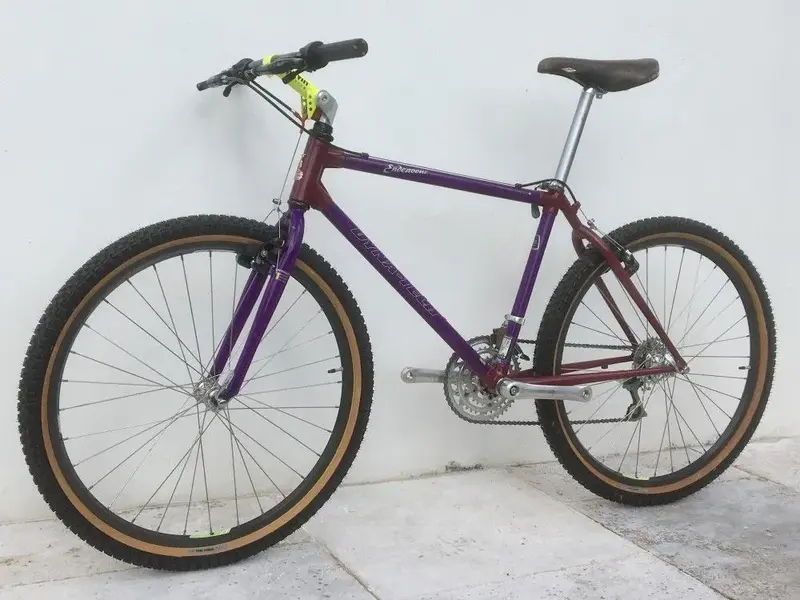
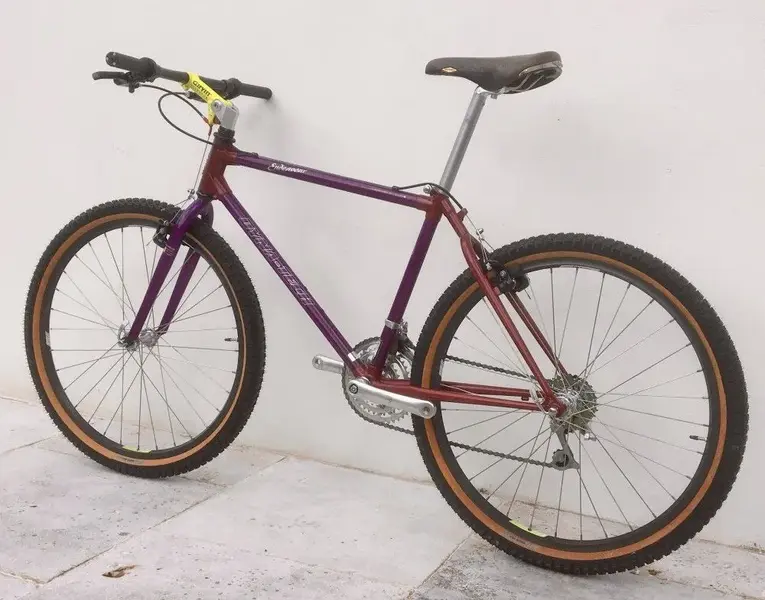
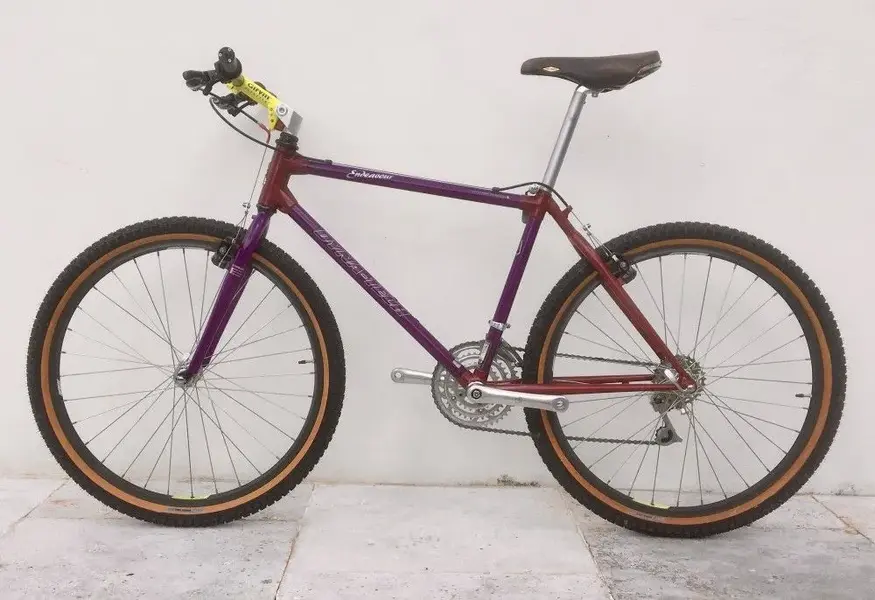
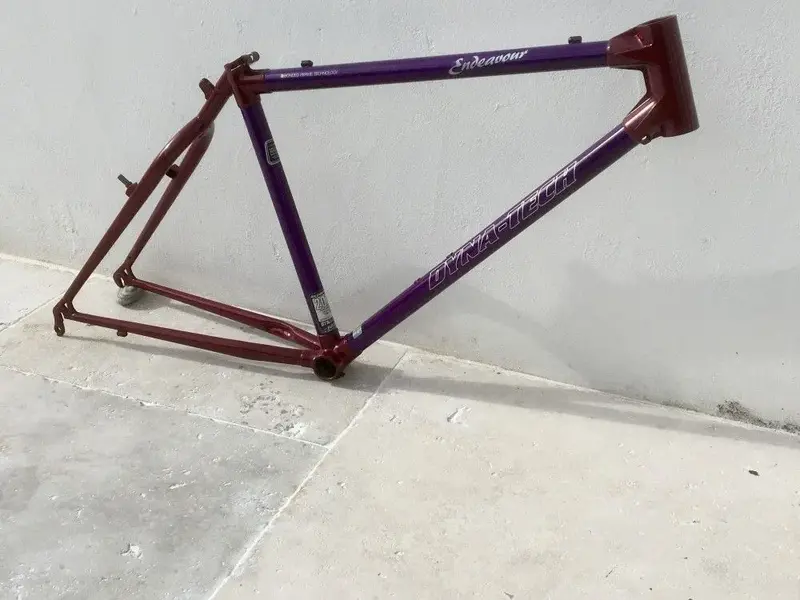
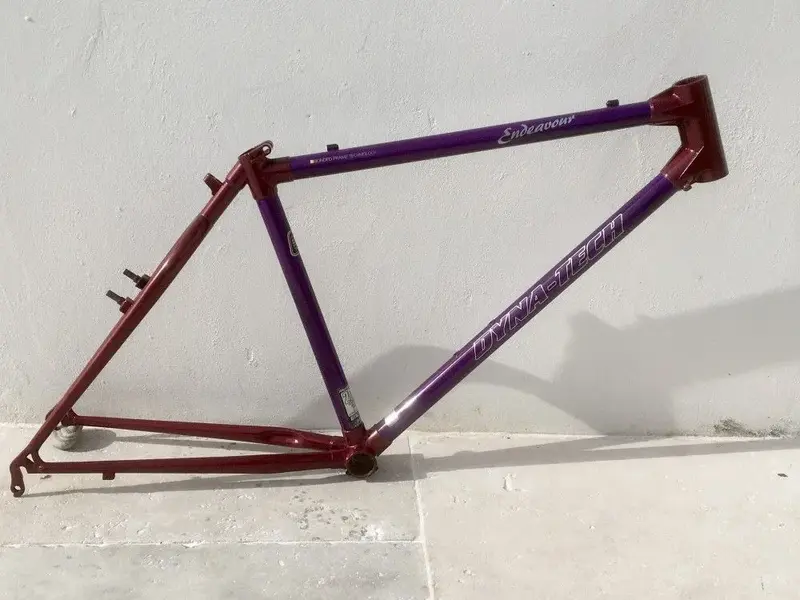
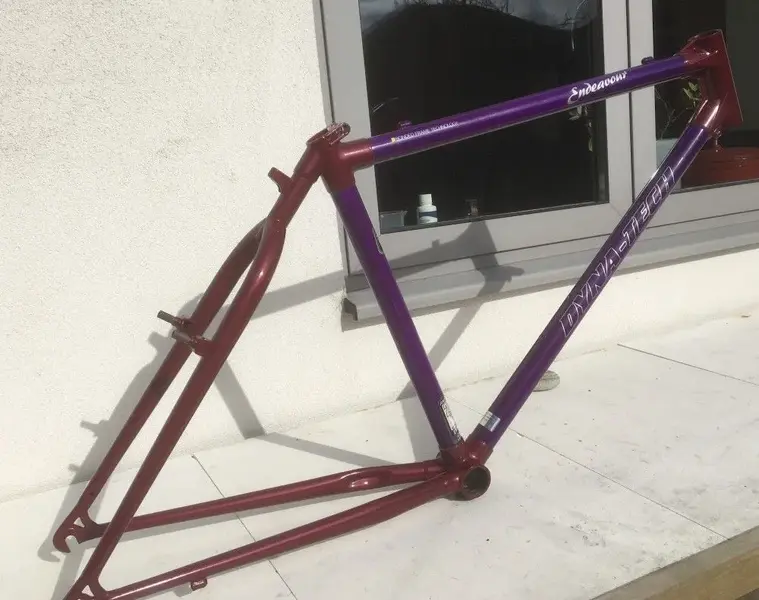
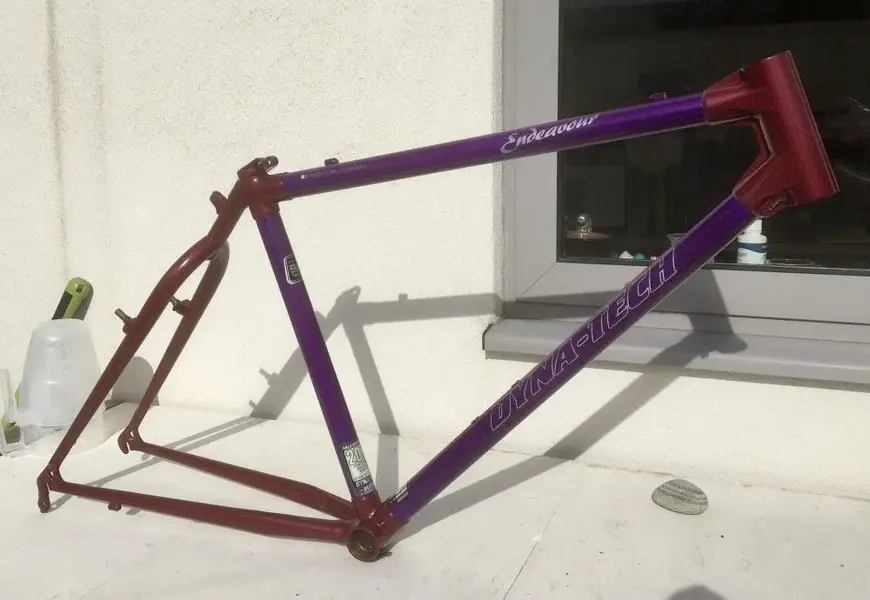
Cheers kingbling. Can't seem to capture the depth of colour with an iPhone, but the depth of metallic is really nice on this!

No, I don't work in a body shop. I'm a clay modeller for the automotive Industry by trade, but have plenty of experience in hard modelling, painting, rapid prototyping etc.
My Pine Mountain Browning Suspension was a rattle can repaint in the garden too. I was understandably stoked to win a BOTM with a home done paint job!

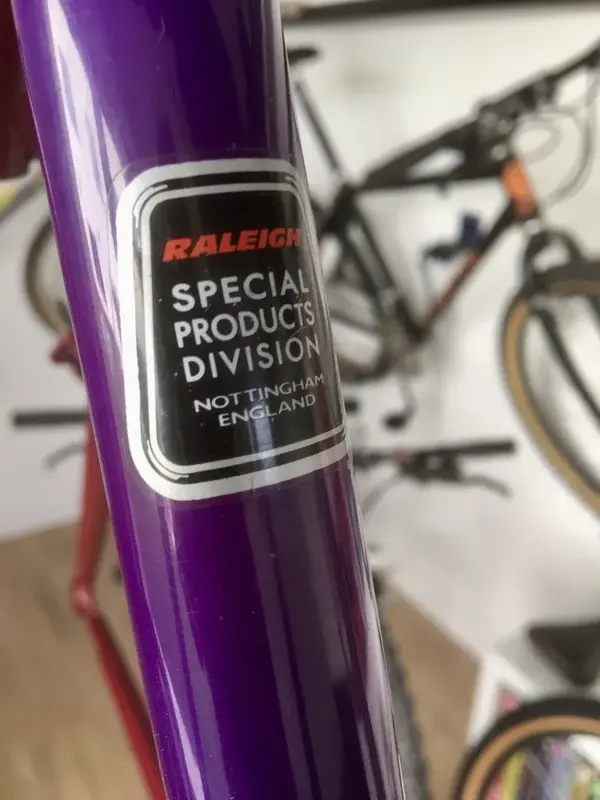
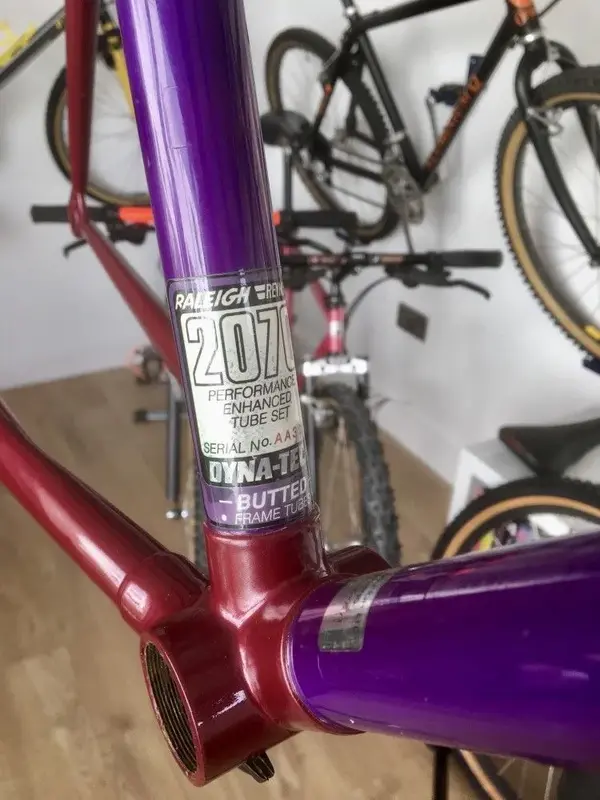
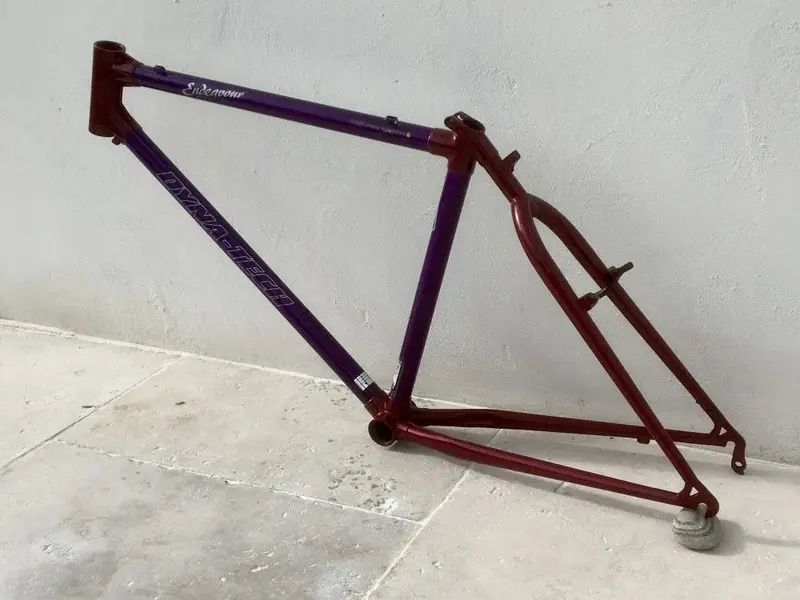
Hopefully I'll take some of the masking off tomorrow and see the real effect of the paint. The main tubes with the decals were in very good condition, it was just the magenta that let it down.

Cheers
boy"O"boy
 
Ah ok boy"O" boy, did you ever meet Dave scanditurbo?
He's in Suffolk.
Will be watching this thread with interest.
Looking great. :)
 
Kona-Ian":3byzlgh3 said:
Ah ok boy"O" boy, did you ever meet Dave scanditurbo?
He's in Suffolk.
Will be watching this thread with interest.
Looking great. :)

Cheers Ian. No - never did meet Scanditurbo, even though we lived a few villages out from Sudbury. Someone in Cavendish has a very nice black 2dr 99 turbo though.

Here's today's update.

Day 5
Dynatech Endeavour


Lacquer still hardening, but decided to remove all the masking from the original tube colour. It's pretty much ready to be assembled next weekend, just waiting on the proper peg spanner to install the Campagnolo bottom bracket.

Here's the latest pics.

boy"O"boy
 

Attachments

  • image.jpeg
    image.jpeg
    116.2 KB · Views: 634
  • image.jpeg
    image.jpeg
    111.8 KB · Views: 636
  • image.jpeg
    image.jpeg
    120.3 KB · Views: 635
  • image.jpeg
    image.jpeg
    117.4 KB · Views: 634
  • image.jpeg
    image.jpeg
    94.2 KB · Views: 634
Re:

More pics.

The bottom 2 pics seem to be the best capture of the true colours using an iPhone. Tubes are the original decals.

boy"O"boy
 

Attachments

  • image.jpeg
    image.jpeg
    84.7 KB · Views: 635
  • image.jpeg
    image.jpeg
    105.3 KB · Views: 635
  • image.jpeg
    image.jpeg
    118.5 KB · Views: 635
  • image.jpeg
    image.jpeg
    117 KB · Views: 629
Re:

Hi All.

Day 7
Dynatech endeavour

Hopefully build begins this weekend. So tempting to start and install the headset/ forks, but previous experience says let the lacquer dry fully!

Patience is a virtue.....but so want to see this together, especially seeing as the Dynatech appreciation thread is currently showing some fantastic examples. :cool:

So.... Assembled the saddle and seat post.
The NIB Campy Centaur is a 27.0mm X 350mm length. There's absolutely no chance I'm going to score the original Campagnolo Electra pneumatic saddle ( well not without spending £220 + :shock: :shock: ) so I've opted for a period San Marco with a similar feel. I think I may actually like this more.....

Seat q/r release is new in its packet! - something I bought from MatBH5 ages ago with the full intention of adding it on the build.

Reynolds 753 bars added to the flexstem. Catalogue spec says they should be 531 ..... But I don't think Reynolds actually made them. They were only available as 501 or 753. (Well according to the MBUK ads I have)

More updates soon.

boy"O"boy
 

Attachments

  • image.jpeg
    image.jpeg
    87.6 KB · Views: 572
  • image.jpeg
    image.jpeg
    85.2 KB · Views: 570
  • image.jpeg
    image.jpeg
    101 KB · Views: 570
  • image.jpeg
    image.jpeg
    84.2 KB · Views: 571
  • image.jpeg
    image.jpeg
    95.8 KB · Views: 571
  • image.jpeg
    image.jpeg
    96.8 KB · Views: 573
  • image.jpeg
    image.jpeg
    95.7 KB · Views: 572
Re: dynatech

Nice work. Looks good. I renovated a white/blue dynatech diablo dx a few years ago but sadly sold it afterwards. Build thread is on here. Good luck with the rest of the build.
 
Re: dynatec

jimbog":xjn4apb7 said:
Nice work. Looks good. I renovated a white/blue dynatech diablo dx a few years ago but sadly sold it afterwards. Build thread is on here. Good luck with the rest of the build.

Cheers jimbog. Thanks for adding to the build thread.

Day 10
Dynatech endeavour

So. Updates from the weekend.
The peg spanner I ordered turned up so was able to install the NOS centaur bottom bracket.
With the lacquer now sufficiently hardened to handle, next up was the headset install - a 1 1/8" tioga oversize.
Then onto pretty much everything else. A productive Saturday night in the man cave..... Bike building with the iPod on random shuffle, whiskey for those pause and reflect moments. Doesn't get better than this.

Apart from the bottom bracket pic, these pics were taken in the garden in the Sunday sunshine, post 25 mile 'permitted exercise' ride on the road carbon.....in readiness for Sunday evening's continued build.
 

Attachments

  • image.jpeg
    image.jpeg
    111.9 KB · Views: 499
  • image.jpeg
    image.jpeg
    109.3 KB · Views: 498
  • image.jpeg
    image.jpeg
    106.2 KB · Views: 501
  • image.jpeg
    image.jpeg
    103.9 KB · Views: 500
Re:

Day 11
Dynatech Endeavour

Sunday night in the man cave. (No Whiskey this time!)
Spent most of the evening struggling with the Campagnolo bullet shifters. Once I'd removed the grips and worked out how to install them (peachy's guide to this proved invaluable)
I'm not convinced they work - the RHS doesn't feel like it has any spring to it and doesn't ratchet to each of the 8 shift locations. The LHS has more spring to it and makes satisfy 'clicks' through each of the shift positions. So I decided to hang fire pending further investigation and more onto the brakes.
These were a joy to set up. A NOS boxed set of Centuar brakes. Absolutely stunning in the dark metallic and really well made. Very straightforward to install.

.... Then pause and have a think about those shifters again. They came as part of the package when I bought the frame and forks. Perhaps with everything else being NOS, why scrimp on the shifters and save myself a load of hassle? - perhaps go straight for a NOS set.

Here's some pics taken today of Sunday night's progress. Note the prossecco cork holding the front mech onto the upper ring!
 

Attachments

  • image.jpeg
    image.jpeg
    107.8 KB · Views: 489
  • image.jpeg
    image.jpeg
    122 KB · Views: 490
  • image.jpeg
    image.jpeg
    118.7 KB · Views: 490
  • image.jpeg
    image.jpeg
    118.7 KB · Views: 488
  • image.jpeg
    image.jpeg
    115.3 KB · Views: 488
  • image.jpeg
    image.jpeg
    96.2 KB · Views: 489
Re:

.....and pics from non- drive side.

The bottom pics show the colour better when the sun came out!


So, nearly there. But not ready yet. Need to.....

i) investigate those bullet shifters. Wether or not to go NOS replacement and save the hassle of working out why the RHS is not engaging the ratchet and has no 'click'

ii) Pedals needed. Got to be Campagnolo Centaur- going to be pricey but needs these to complete. Anyone got NOS pedals going?

iii) centaur crank caps needed. Those crank bolts are currently Suntour ones... The only ones I had in the cache that were silver. The proper crank caps would be far nicer!

iv) The hubs need a complete regrease. That's probably the easier of the still to do.....to-do!!

v) and any other issues yet to emerge. ;)

Cheers all.
boy"O"boy
 

Attachments

  • image.jpeg
    image.jpeg
    118 KB · Views: 485
  • image.jpeg
    image.jpeg
    116.2 KB · Views: 486
  • image.jpeg
    image.jpeg
    109.1 KB · Views: 486
  • image.jpeg
    image.jpeg
    104.2 KB · Views: 487
  • image.jpeg
    image.jpeg
    114.3 KB · Views: 488
  • image.jpeg
    image.jpeg
    119 KB · Views: 488
  • image.jpeg
    image.jpeg
    100.3 KB · Views: 486
Back
Top