Tell you what mate that's what I meant when I said these frames shine looks like a brand new frame you can't see the touch ups good job the white you used do you think it would match a clockwork with the orange white fade cheers
@Fam Allen Great progress Lewis! - I've been meaning to get round to adding something here for ages.
Firstly. Thanks for the kind words on The Endeavour. It was good to meet you when I dropped it off. Looking forward to seeing what direction you take that one in.
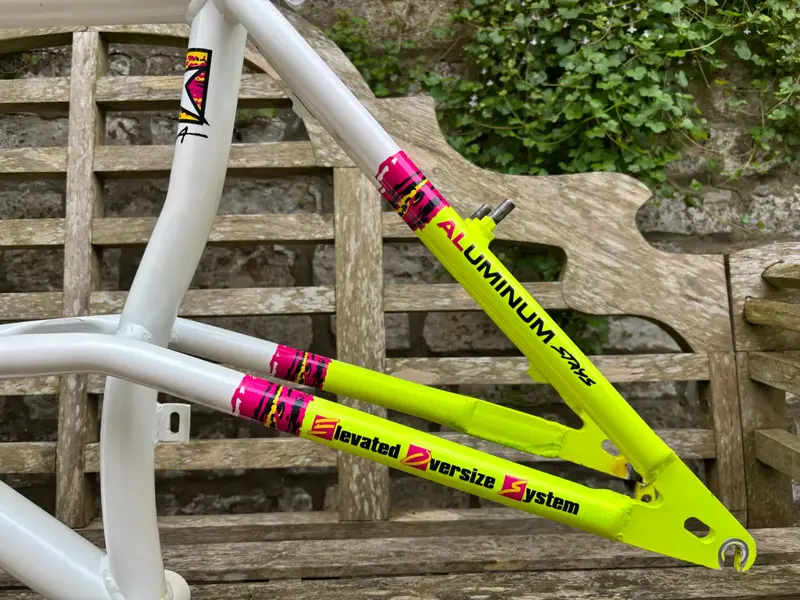
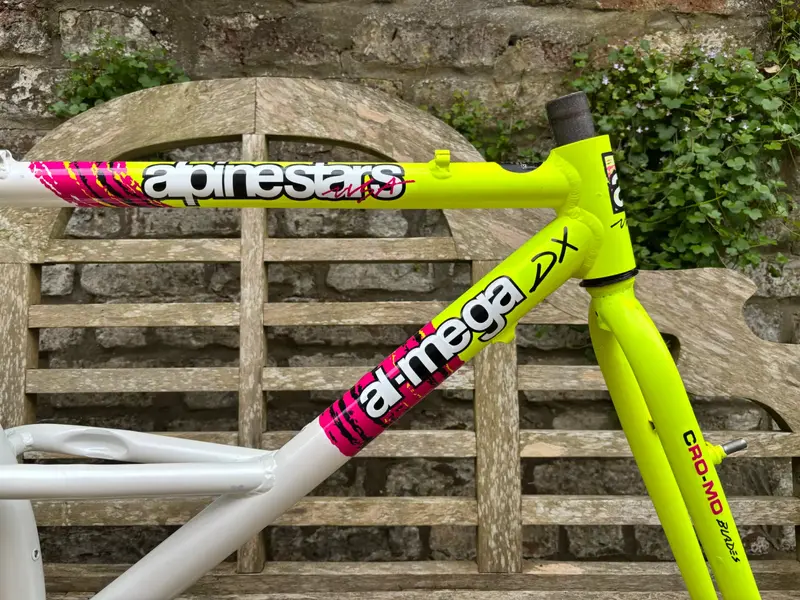
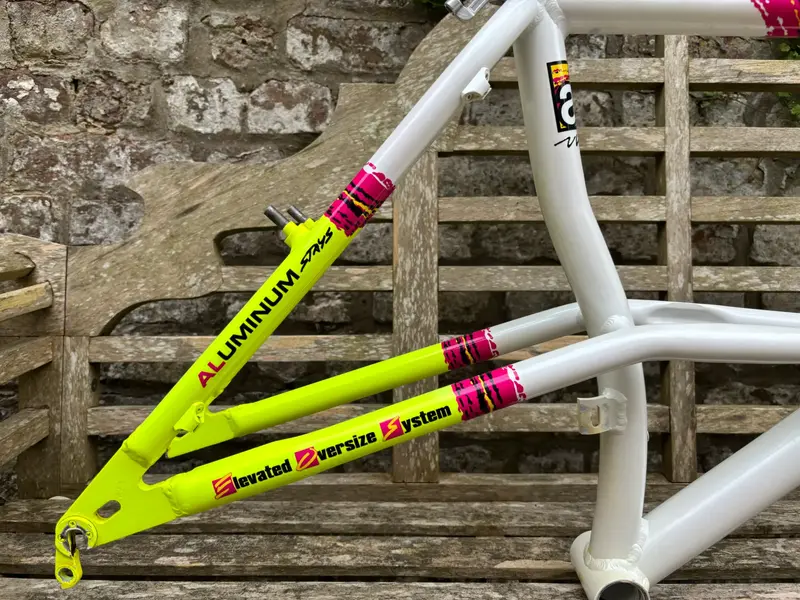
Secondly. The Al-Mega DX. Great project and the progress you've made so far looks really good. One of the Iconic early 90's Colourways - absolutely of it's time and a definite favourite. I am biased though.....going back a good 12 years + now, I did my own Al-Mega DX restoration. (Sadly long gone....although I still have the matching Jersey!) Getting things like the decals wasn't as easy then. I wish I'd have had something like the set you've got for yours - I ended up creating my own from Vinyl cuts and adding those tiny neon parts all by hand.
Mine was a full respray - The neon yellow was Halfords but the Pearlescent white came from the excess paint mix of a Ford Kuga show car!
You've done well with you touch up's to getting the frame looking so good!
Keep up the good work! - here's my thread ..and some pics for inspiration.
Purchased from GT-Steve as a frame and fork sometime ago - Progress on my Alpinestars AL -Mega DX has been painfully slow.
The frame and fork had been painted in a green airbrush fade that I could only describe as an 'A-Level design project'.
First thing was to hand strip the paint using nitromors to reveal the condition of the frame and fork. At some point in it's life, there had been a small lengthways fracture in the top tube that had been repaired.
Unfortunately, to get to the bare metal, they'd taken an angle grinder to a localised area and had ground...
I’ve been meaning to do a quick review of components for the build before I get too far down the line.
The original bike retained so many of its original components it was quite a result, but there are some changes that have been made since new.
Original catalogue spec pulled from the ’91 catalogue is as follows:
For context, my frame measures up as the 45cm frame size.
Running down the list the non-original stuff:
Tyres
Rear is a later Specialized Black Wall Tyre rather than the original Ritchey Megabyte. The rear is still the original Megabyte I believe, but I’m not convinced whether it will clean up well enough yet to put back on the bike.
Bars
Bars are Radius? Not heard of the brand and don’t appear to be anything more than a budget offering. This should be an Alpinestars Mega-Lite Bar I believe.
Stem
Stem is a Kalloy Uno in chrome finish and with quite a decent rise, unlike the catalogue spec’d 3-degree rise. I wonder if this was the option given to eth owner when they recalled the original stems which were very prone to cracking and breaking.
Seatpost
I questioned the seatpost when I first looked over the bike, because catalogue spec states Kalloy. The post on the bike is a Post Moderne one. Looking around since, it does seem like UK bikes (and possibly other territories) all came with these Post Moderne posts. The real shame with this was that the previous / original owner cut this one down so much that it’s now useless for me.
With so much of the original componentry in hand I’m feeling pretty excited about rebuilding the frame to catalogue spec.
So my parts WANTED list is unusually short :
Pair of period correct 2.1” Ritchey Megabyte tan walls.
Alpinestars Mega-Lite Bar – 28.6 clamp
Alpinestars Mega-Lite Stem – 1 ¼” quill stem with 28.6mm clamp – If any still exist uncracked. Possibly an Alpinestars cro-mo warranty replacement version in black.
Post Moderne period correct 31.6mm black seatpost 250-300mm length.
Hex Foam grips – as close as possible to the originals. May go with the Ritchey Hex Foam grips that are still available.
New Ritchey Vantage Comp Rim decals (One wheel is missing it’s decal)
All the misc. stuff like cabling, tubes etc.
Everything else I plan on servicing and refurbishing as best I can!
Been meaning to do a parts review and finally got around to it this afternoon. See above. I'm very much in the catalogue spec/original componentry camp due to how original the bike came to me as. Pretty excited about that too!
Tell you what mate that's what I meant when I said these frames shine looks like a brand new frame you can't see the touch ups good job the white you used do you think it would match a clockwork with the orange white fade cheers
Thanks mate. much appreciated. I'm not so familiar with the clockwork paint so not 100% sure. The paint code I used is metallic finish. Is the Clockwork a metallic or flat white do you know?
@Fam Allen Great progress Lewis! - I've been meaning to get round to adding something here for ages.
Firstly. Thanks for the kind words on The Endeavour. It was good to meet you when I dropped it off. Looking forward to seeing what direction you take that one in.
Secondly. The Al-Mega DX. Great project and the progress you've made so far looks really good. One of the Iconic early 90's Colourways - absolutely of it's time and a definite favourite. I am biased though.....going back a good 12 years + now, I did my own Al-Mega DX restoration. (Sadly long gone....although I still have the matching Jersey!) Getting things like the decals wasn't as easy then. I wish I'd have had something like the set you've got for yours - I ended up creating my own from Vinyl cuts and adding those tiny neon parts all by hand.
Mine was a full respray - The neon yellow was Halfords but the Pearlescent white came from the excess paint mix of a Ford Kuga show car!
You've done well with you touch up's to getting the frame looking so good!
Keep up the good work! - here's my thread ..and some pics for inspiration.
Purchased from GT-Steve as a frame and fork sometime ago - Progress on my Alpinestars AL -Mega DX has been painfully slow.
The frame and fork had been painted in a green airbrush fade that I could only describe as an 'A-Level design project'.
First thing was to hand strip the paint using nitromors to reveal the condition of the frame and fork. At some point in it's life, there had been a small lengthways fracture in the top tube that had been repaired.
Unfortunately, to get to the bare metal, they'd taken an angle grinder to a localised area and had ground...
The rear hub felt pretty dry and not terribly smooth spinning, so stripped it down, cleaned and regreased. First hub I've stripped down, so was a valuable learning experience for me.
There's a bit of movement in the free hub, but didn't have the right tool to get into it so that will have to come later.
I think I probably also used grease that was way too thick to pack the hub bearings. Wheel doesn't spin as freely as I hoped or expected. Lesson learnt!
Despite the dirt and cobwebs the wheels actually came up nicely when cleaned. Hub logos are complete and unworn. Spokes were all pretty taught, and both wheels run true. I did notice that the spoke nipples were rusting and corroded so thought I'd get the tin foil out and try to clean them up a bit. Reasonably satisfied with the result. Here's a before and after to show the difference:
Really happy with how the wheels now look.
Also have replacement decals for the rims which will go on shortly and should give the wheelset a final pep up.


 - Progress on my Alpinestars AL -Mega DX has been painfully slow.


