Complete rebuild of 1990's MTB to 2016 XT spec 1x10

Hi Bartsince1975

I know my local bike shop I visited looked at me like I was growing a second head when I explained my plans. I love building and designing things and this project really is an extension of that.
 
Re:

Welcome to the site, I love this sort of thread with lots of love and care going into making a "normal" bike into what will be for you a great rider.
 
Tonight I have just finished lining up the frame and correcting the frames overall alignment. It has taken close to three hours to correct a difference of +6mm within the symmetry of the drive side of the bike compared to the non drive side. I think this only worked on the original 2x5 set up because there was so much tolerance in how the position of the wheel can sit and be square to the seat post. A friend brought round a 10 speed wheel tonight and the tolerances are extremely tight hence the need to correct the frame alignment. Fit was in the end perfect to 0.45mm on the seat post to string measure points.

My rear wheel and cassette arrive tomorrow so looking forward to trying it.
 

Attachments

  • IMG_3081.jpg
    IMG_3081.jpg
    38.2 KB · Views: 570
  • IMG_3082.jpg
    IMG_3082.jpg
    76.7 KB · Views: 570
This is brilliant. Any form of time/money analysis would tell you to stop immediately. But if you have the skills and you're having fun then please keep going. And please keep us updated.
 
As pointed out by cce I need an adaptor in order to convert from a single piece crank to a modern bottom bracket design. Over the weekend I looked into the various options available and decided in the end to order the following:

Truvativ Bottom Bracket BMX American-Euro convertor

This design seems the strongest to me and due to being an interference fit product should provide a really strong connection on the bike to ensure it will last a long time once in use. Ordered bracket off Amazon and due beginning of next week. For reference some of the sales/website images below.
 

Attachments

  • Unknown-1.jpeg
    Unknown-1.jpeg
    3.4 KB · Views: 557
  • Unknown.jpeg
    Unknown.jpeg
    6 KB · Views: 557
Bung it in the freezer for an hour before you fit it. Ive done same with head set cups and motorbike crankcase bearings. I'd also suggest bunging in a BB straight away to pull it true.
Cheers
Rich
 
Parcel arrived today from Tredz containing the following parts:

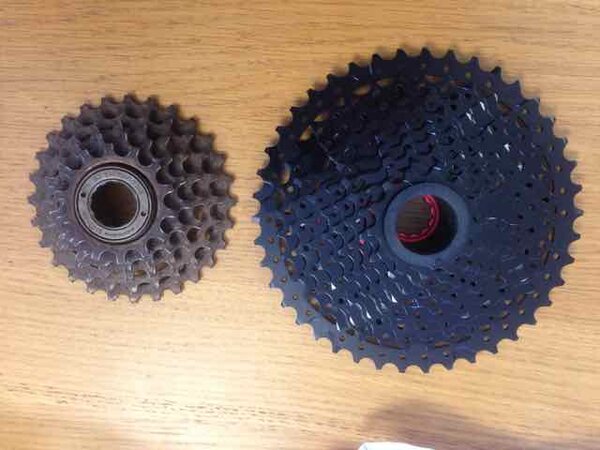
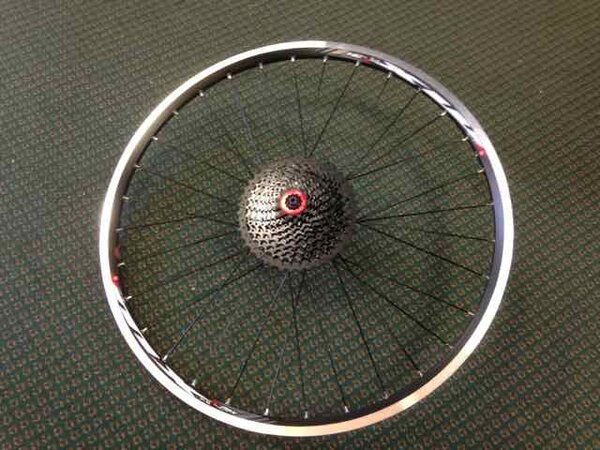
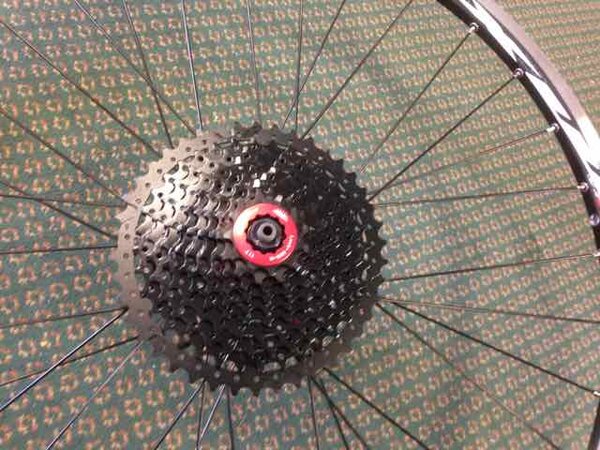
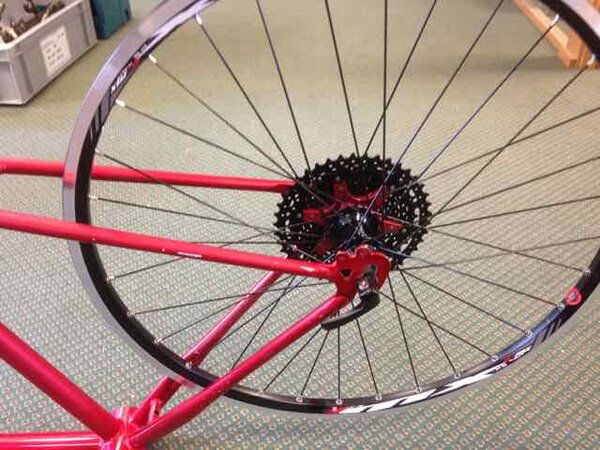
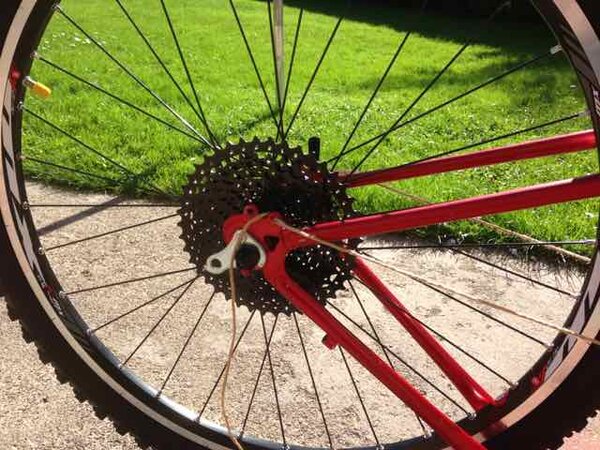
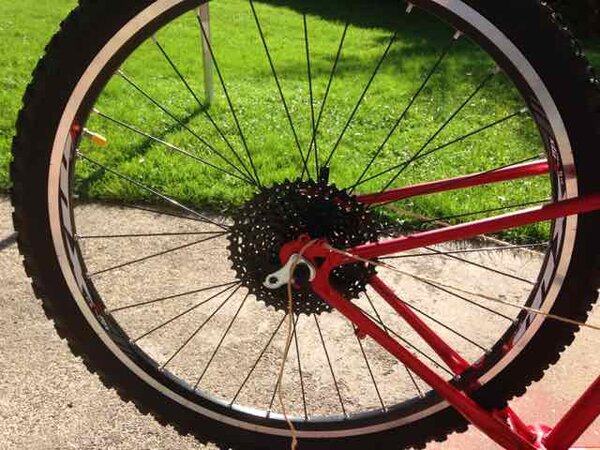
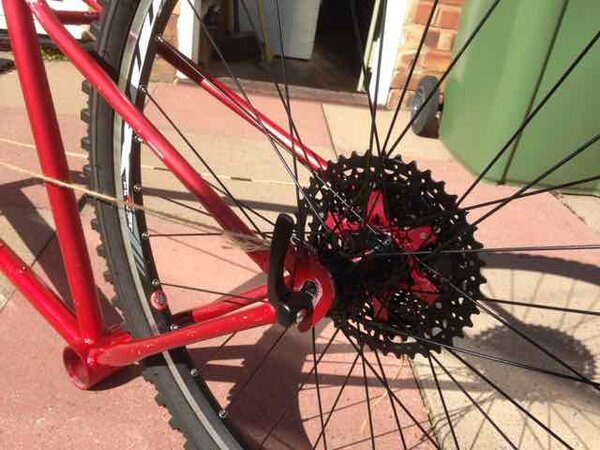
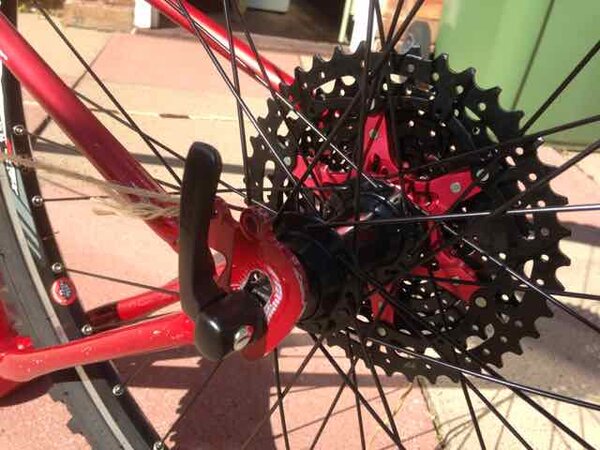
- Aluminium Mach 1 MX rim with rear 9 speed freewheel Shimano Deore hub
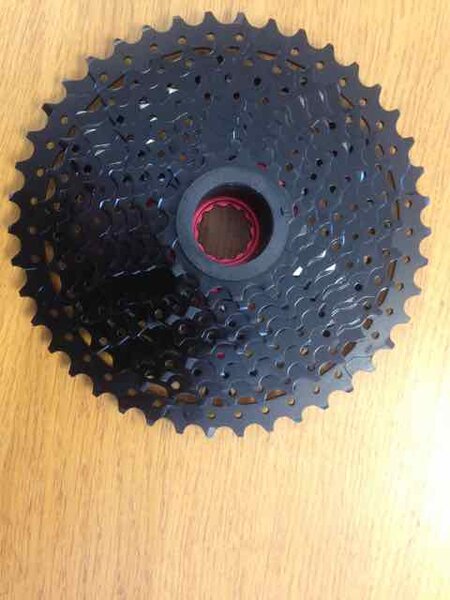
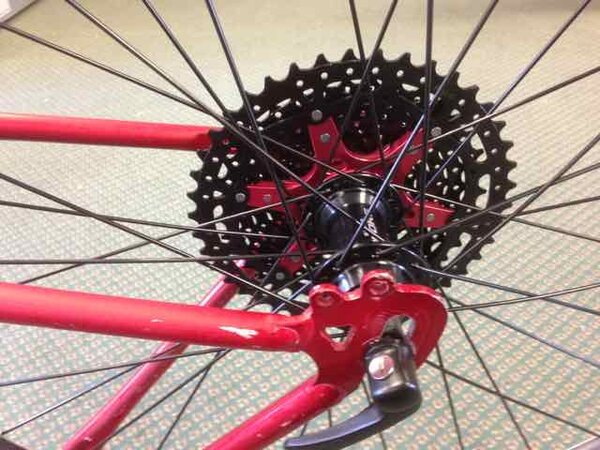
- Sunrace MX3 10 speed 11t - 42t rear cassette
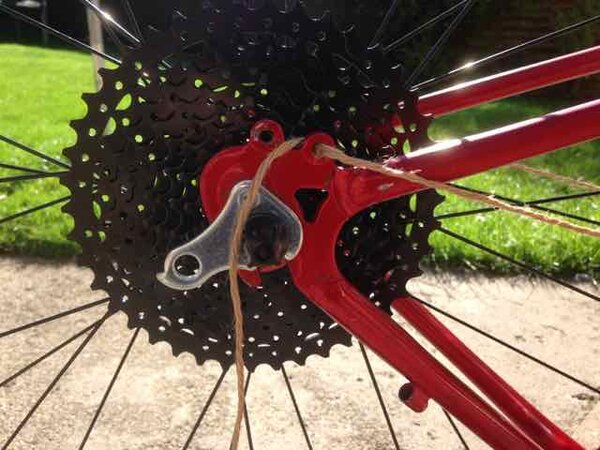
- Pressed rear derailleur holder

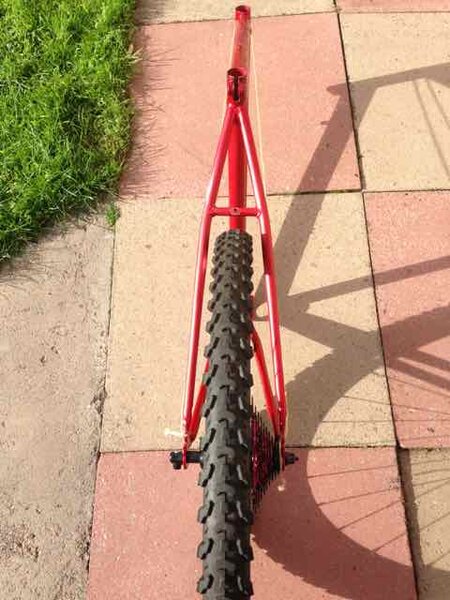
Having mounted the Sunrise cassette onto the new wheel and fully torqued it up, I tried it within the frame and the fit is practically perfect. Two issues that have appeared are that the 11t catches onto the tubing just where it is welded onto the dropout to the point I need to have someone to just pull on the frame slightly to be able to insert the wheel without the 11t scratching the paint.

The other issue is that the piece of 10 speed chain i have rubs against the frame ever so slightly on the rear mounting piece of the derailleur when it is put into the 11t. After a little experimentation I placed a stainless steel 1.2mm thick washer on the drive side axle, and now the chain clears easily by just 0.8mm.

So progress is coming along well. I have ordered a Shimano Deore XT M786 shadow plus derailleur today so with any luck it will be here by the weekend.

This weekend I am also going to start designing my new derailleur hanger that will mount in the traditional manner but will allow the derailleur to sit within a new adjusted position to allow for the 42t low gear and attach to it using the direct mount method.

New wheel is much lighter than my original steel wheel, which will help with the finished bike weight. Will weigh things over the weekend and report back.

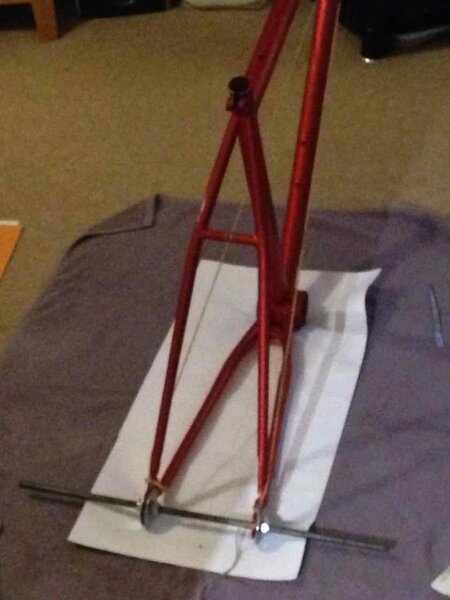
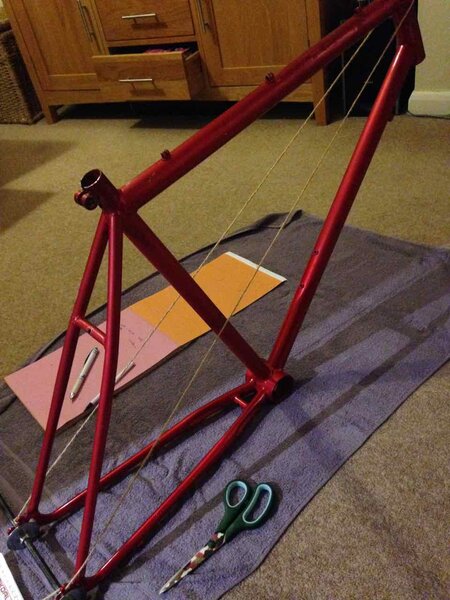
Photos below of work so far.
 

Attachments

  • IMG_3068.jpg
    IMG_3068.jpg
    24.3 KB · Views: 501
  • IMG_3069.jpg
    IMG_3069.jpg
    24.7 KB · Views: 501
  • IMG_3072.jpg
    IMG_3072.jpg
    34.3 KB · Views: 501
  • IMG_3073.jpg
    IMG_3073.jpg
    39.6 KB · Views: 501
  • IMG_3076.jpg
    IMG_3076.jpg
    36.6 KB · Views: 501
  • IMG_3077.jpg
    IMG_3077.jpg
    36.2 KB · Views: 501
  • IMG_3083.jpg
    IMG_3083.jpg
    32.5 KB · Views: 501
  • IMG_3084.jpg
    IMG_3084.jpg
    29.2 KB · Views: 501
Some additional images of work so far!!
 

Attachments

  • IMG_3106.jpg
    IMG_3106.jpg
    40.5 KB · Views: 501
  • IMG_3107.jpg
    IMG_3107.jpg
    38.1 KB · Views: 501
  • IMG_3108.jpg
    IMG_3108.jpg
    33 KB · Views: 501
  • IMG_3109.jpg
    IMG_3109.jpg
    34.8 KB · Views: 501
  • IMG_3110.jpg
    IMG_3110.jpg
    34.5 KB · Views: 501
Back
Top