Cinelli Supercorsa, Let's Try Again Shall We

Skynet

Senior Retro Guru
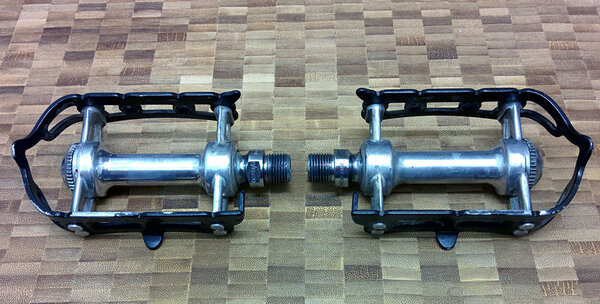
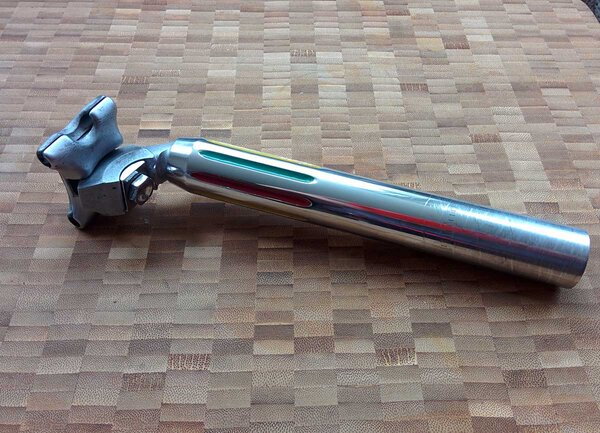
The Moser ended up being a, very good value, parts bike. See that thread for what went on and what I've already polished.

Ideally I wanted a replacement frame of the same period, '81, but being short in leg the choice isn't great.

As I wasn't in a massive rush I'd decided to be patient for a change but then thought about retro modern frames. Part of the reason for that is 2 of the last 3 frames I've bought have had problems, yes I got money back but that doesn't really help.

So looked at the new Holdsworth Pro's, good looking paint scheme, available off the shelf in my size, cheapest but English threads. De Rosa Nouvo Classico, nice especially in cromovelato red, most expensive, couple months wait. Then there was the Cinelli Super Corsa, a timeless design but a 4-6 month wait, just too long.

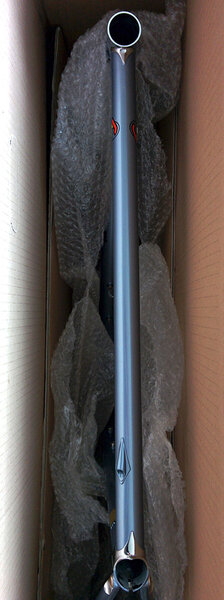
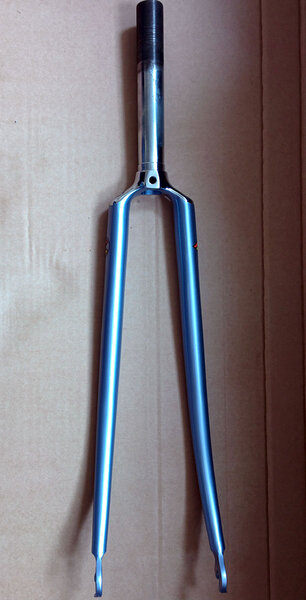
Couldn't decide what to do so thought, give it a month or two. Then a shop who had a brand new 2014 Cinelli in classic laser blue (which often looks grey depending on the light!) for a really good price, but initially wouldn't post to the UK, contacted me again and said he'd changed his mind.

So, after some super fast shipping, the frame has just arrived and, fortunately with no import duty, still would have been cheap but obviously a bit less of a bargain. Liked the Cinelli slogan on the box "Happy to make another rider happy".

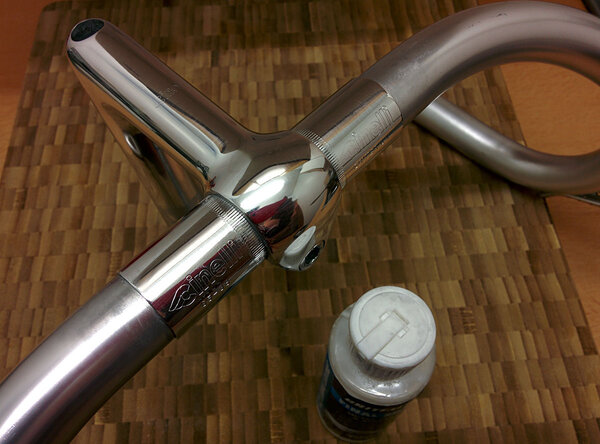
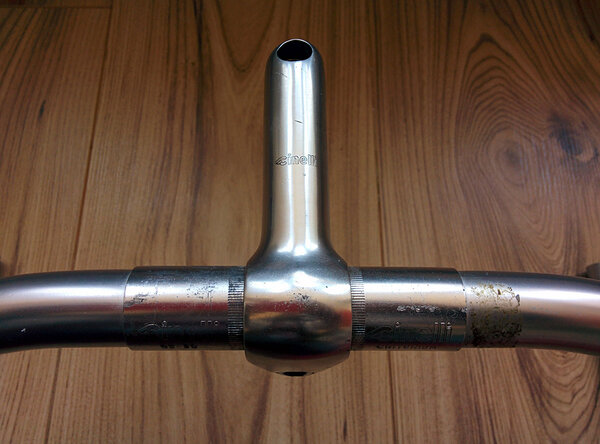
So it will be an opposite retro build to what most do, including me, new frame old parts.

Geometry if anyone's interested:
  • Seat tube: 500mm c-t-c
  • Top tube: 520mm
  • Head angle: 72.5 degrees
  • Seat angle: 74.5 degrees
  • Chainstay: 402mm
  • Fork rake: 50mm
  • Wheelbase: 964.5mm
 

Attachments

  • frame-f.jpg
    frame-f.jpg
    82.1 KB · Views: 2,571
  • forks-f.jpg
    forks-f.jpg
    90.5 KB · Views: 2,572
The only polishing I've done recently was the stem and bar sleeve. I was half tempted to leave them, they didn't look as bad the pic makes them look. But as the seatpost had been polished and the frame's new I decided they just had to be.

There are still some faint swirls, could have spent another hour on them, but they're going on a bike, a perfect finish wouldn't be perfect for long anyway. They're plenty shiny enough. I didn't get rid of all marks on the sleeve, wanted to take as little metal off as possible, but they look fine.

As before I used Final Shine to seal them, still have to see how good a job it does.
 

Attachments

  • Cinelli-Bars-and-Stem-After-f.jpg
    Cinelli-Bars-and-Stem-After-f.jpg
    130 KB · Views: 2,569
  • Cinelli-Bars-and-Stem-Before-f.jpg
    Cinelli-Bars-and-Stem-Before-f.jpg
    126.4 KB · Views: 2,569
Oh, the NOS hoods and straps arrived. Like I said I wasn't spending £50+ for either, eventually managed to find them for just over £20 each, which is plenty for what they are. The straps are embossed with Cinelli which is fortuitous.
 

Attachments

  • hood-straps-f.jpg
    hood-straps-f.jpg
    212.8 KB · Views: 2,566
While I remember, top tip for de-anodising the stem and seatpost. As you don't normally want to reduce the diameter below the insertion mark wrap that section with masking tape, the oven cleaner then won't touch the anodising. Obvious really but..
 
Nice results on the stem. What oven cleaner do you use to take the anodising off then? And how long do you leave it on? I have the same Cinelli stem and it looks a bit out of place on my bike because it's anodised and nothing else is.
 
Thanks. I ordered Tesco cheapo with my weekly shop which I've used before, but they substituted with Mr.Muscle. Tesco's didn't foam up at all from what I remember whereas Mr Muscle does. Just put it in a plastic bag, squirt all over (do that outside, it's nasty) seal and leave (you can massage it around from time to time).

Usually around an hour's enough but I took it out after about 1 ¼ and it hadn't done much so did it again for about the same again. It's weak enough that leaving it a bit too long isn't going to ruin anything, but not long enough and sanding off remaining anodising's more of a pain.

Then it the usual wet sanding and polishing. There weren't too many low spots to get rid of which takes the time. Strips of wet and dry used like polishing shoes worked well, don't want flat spots. I also used the 3M jewellery polishing cloths towards the end. Polish was just Peek then Final Shine at the end.
 
Anyone who has the fairing style bottom bracket, do you put bare cables through as normal or are you meant to have some sort of outer on where it goes through?

For an expensive frame you'd think they could clean the crap out of the bottom bracket threads.
 
Just want to put everything together so some posts on the polished parts from the Moser thread.

First is the Iscaselle Tornado Targa saddle that was in a pretty sad state especially at the back. Still not got the scuff as shiny as the rest but looks OK. Will see if we end up using it as a Cinelli Volare SLX would be an obvious choice. Would be a shame though, spent long enough on it.

Couldn't save the decals on the spoiler but saved the finish.
 

Attachments

  • Saddle-f.jpg
    Saddle-f.jpg
    188.4 KB · Views: 2,459
  • Saddle-Before-2f.jpg
    Saddle-Before-2f.jpg
    100.5 KB · Views: 2,459
  • Saddle-Before-1f.jpg
    Saddle-Before-1f.jpg
    138.2 KB · Views: 2,459
The pedals didn't take much work at all but a definite improvement. I've basically polished any Campag parts that weren't anodised.
 

Attachments

  • Pedals-After-f.jpg
    Pedals-After-f.jpg
    180.5 KB · Views: 2,458
  • Pedals-Before-f.jpg
    Pedals-Before-f.jpg
    214.5 KB · Views: 2,458
Not a very good pic, looks shinier than this. Anyway the Moser was packed up and sent by a local bike shop who instead of removing the saddle and post pushed it down in to the frame so scratched the heck out of it.

There are still a couple of really fine marks, didn't want to take off any more than need be. I notice them as I know where they are but my brother didn't until I pointed them out.
 

Attachments

  • Seatpost_f.jpg
    Seatpost_f.jpg
    186.4 KB · Views: 2,457
Back
Top