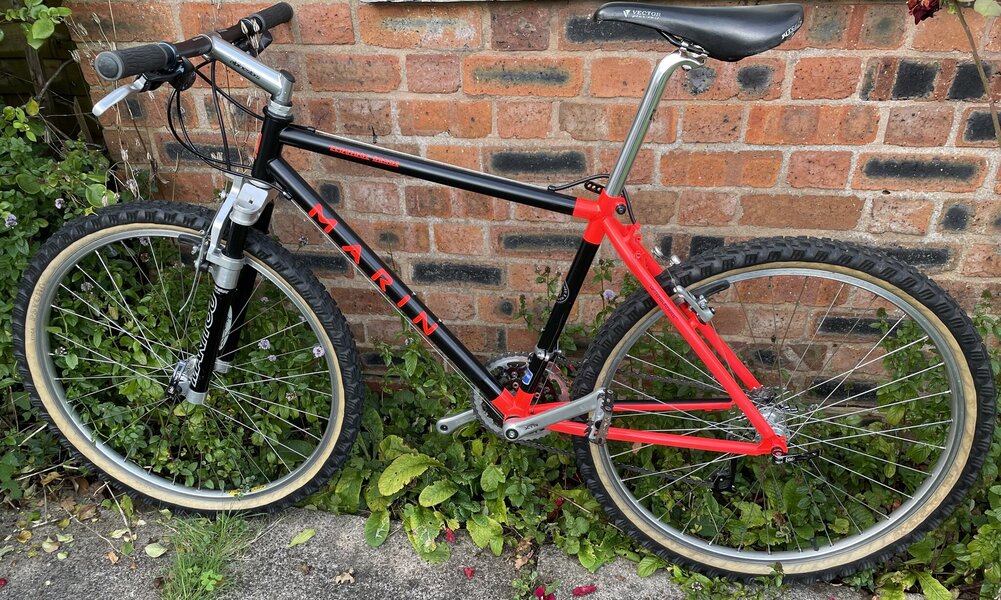
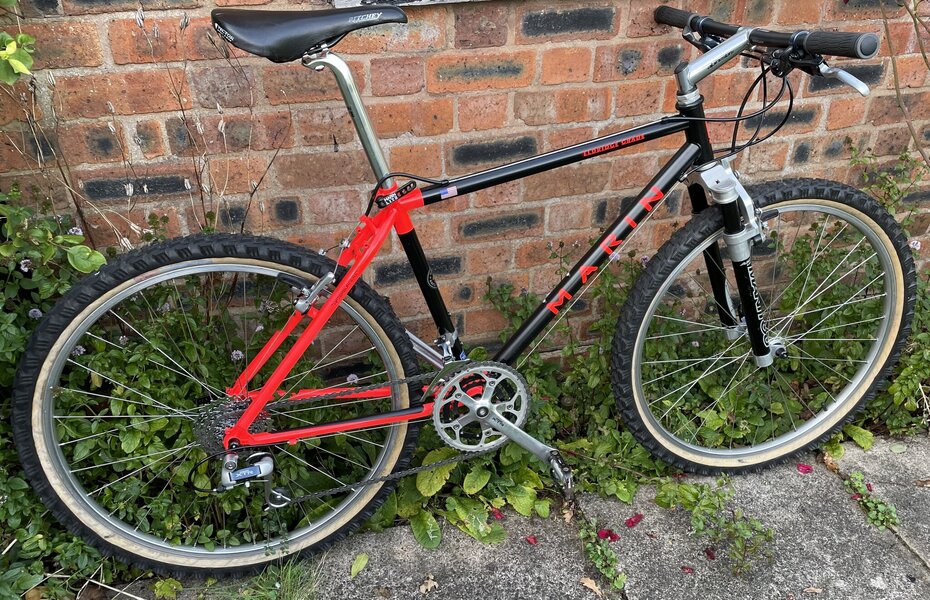
Misterfixit's 1992 Marin commuter hack budget build.

misterfixit

Old School Hero
Hi Folks.. I usually spend a lot of spare time fettling various machines and fun old kit to keep life interesting. I have for the last three winters commuted on a bike that needs saving from a fourth. I wanted a cheap 'project', and had a pretty clear idea of where I wanted it to go.

Part #1. The skeleton.

I started looking for an old marin to fix up. I last had one in the mid 1990s and liked the geometry and the spritely ride. I wanted a cheap as chips bike that rides nicely and has the high contrast neon marin looks.
This rusty crusty mess is what I found on ebay for £25,I let the auction finish and offered £15 so this boat anchor found its way to me, I bought it in April '22. I'm not lanky and I really don't like the long head tube of the 18" frames, this 17* was the perfect base to work with.
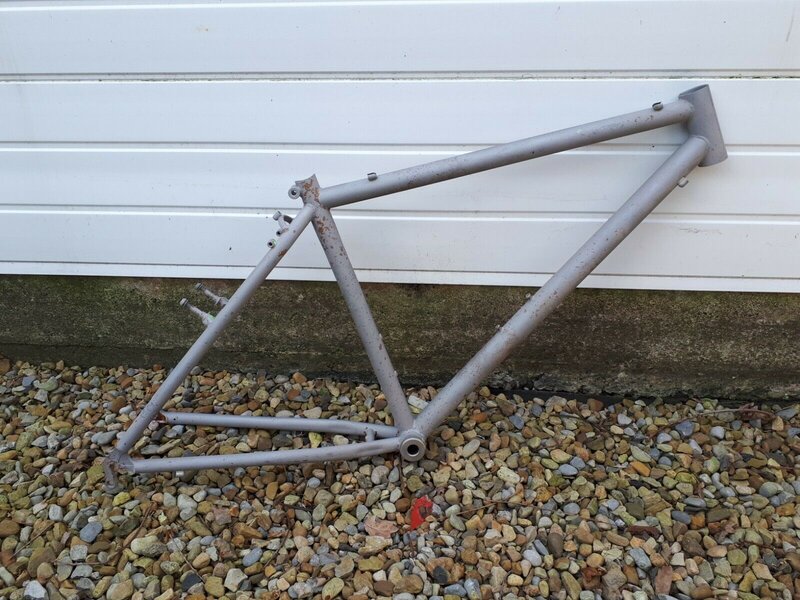
92 marin001.jpg


After a bit of elbow grease it was cleaned up with a stanley knife and wire brush till it was a gleaming frame:
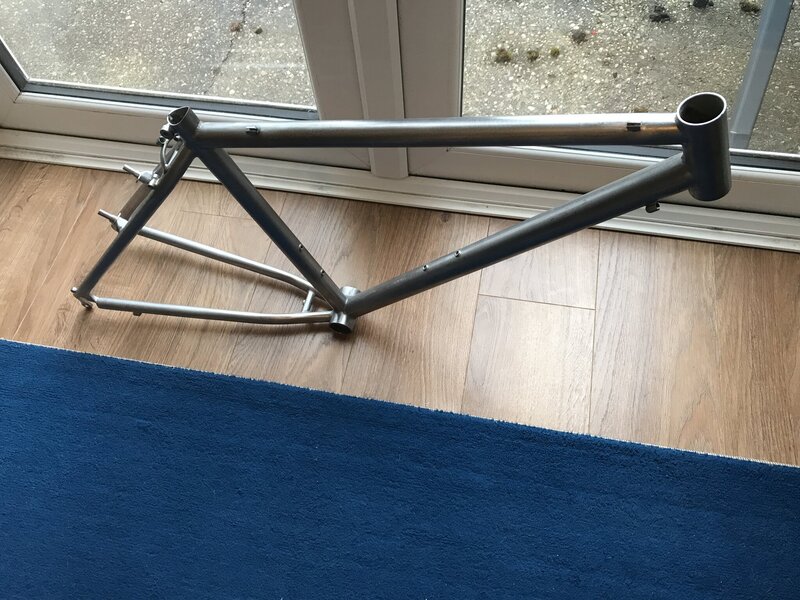
IMG_6539.JPG
I used sheet sandpaper taped along one edge to a broom handle to clean the inside seatpost tube and inside and the headstock, the frame looked lovely in raw steel. I cleaned it with carb cleaner and this is how you see it here. My son suggested I lacquer it as was, but he‘s never seen neon marins about like they were, and that's where this one is heading..

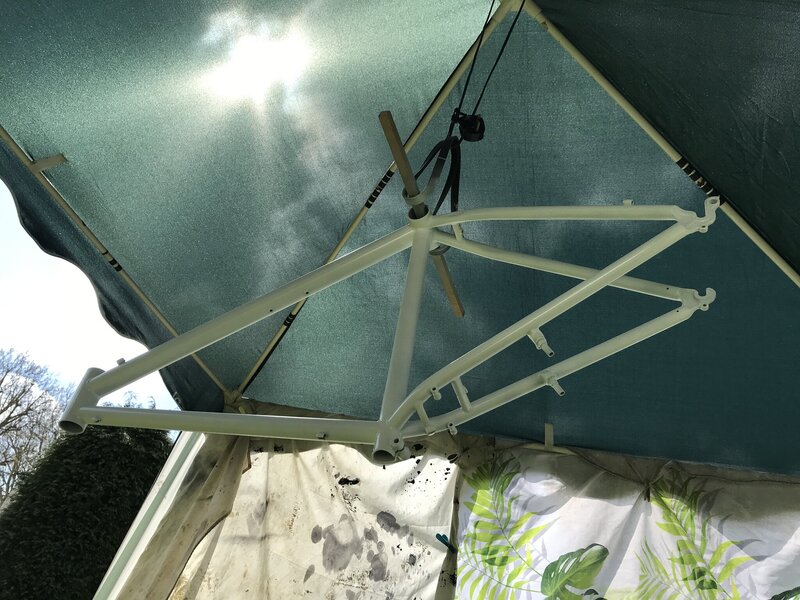
I really like the neons, so it was painted over a week or two in the garden under a gazebo and gardening sheets clipped to the side using toolstation primer and cheap metallic white and neon paint

Primer:
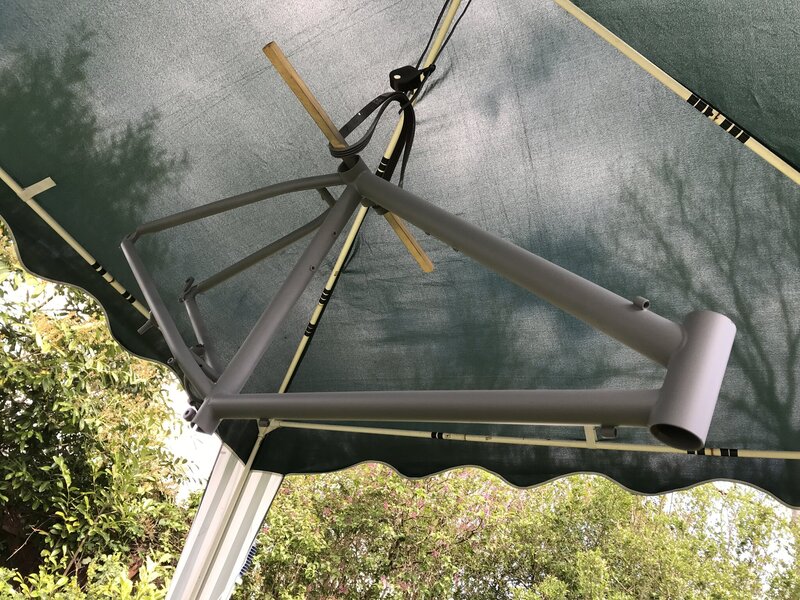
IMG_6767.JPG
Metallic white:
IMG_6776.JPG

Neon red. It's hard to explain how dyno-rod this bike was at this point!: IMG_6790.JPG
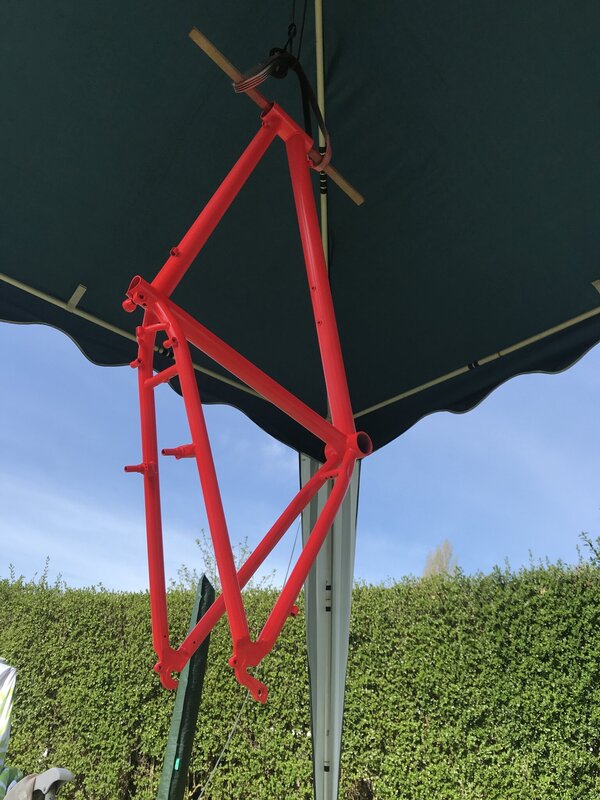
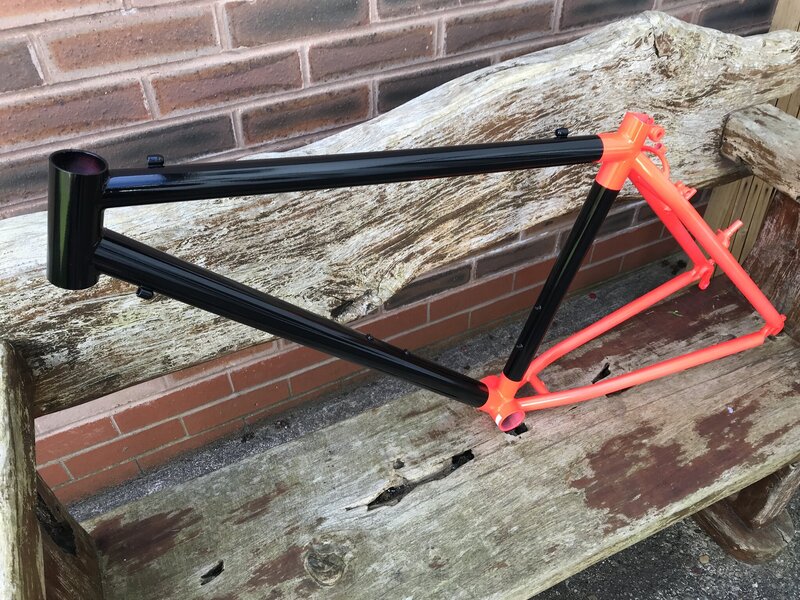
Next with some careful measurement and masking the satin black:
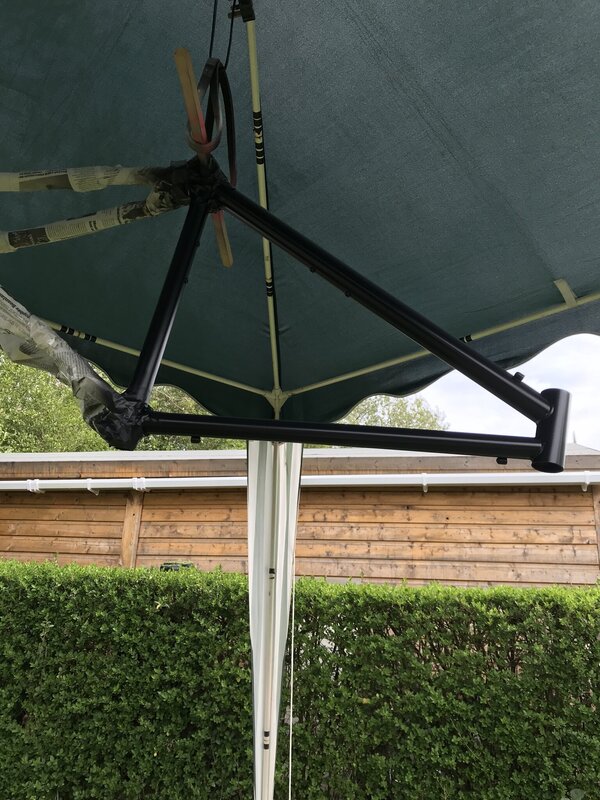
IMG_6800.JPG
The paint finished looks like this!:
IMG_6806.JPG
The observant folks will also see I masked the white patch on the bb shell to look factory!

The bike is finished now and I've been commuting it the last two weeks so I'll post the build and the little gems I documented on the way.. It spent nearly a year as a frameset while I settled on a wheelset. I'm sure you'll like the finished article... I do.
 
Last edited:
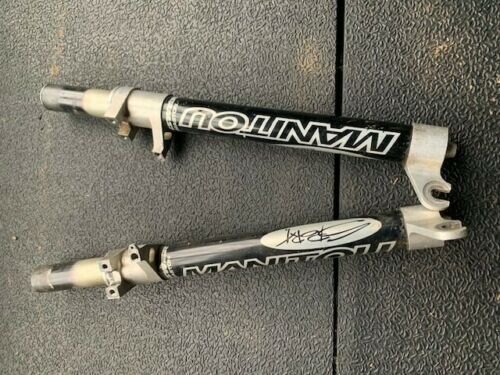
#2 Frameset bits.. The siezed, the free and the ugly.

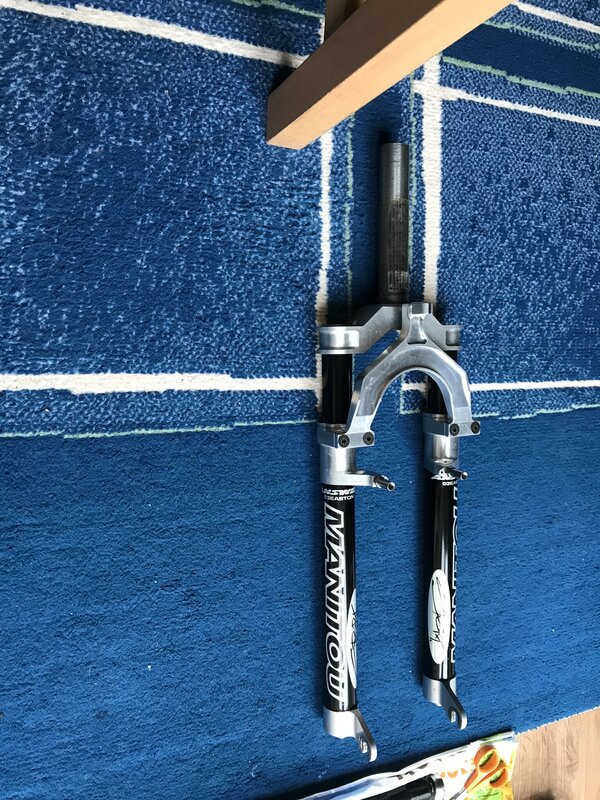
I like Manitou forks, they are made from parts that just work, and when they gunk up and get crusty they are very similar to motorbike parts in terms of techniques to free up and clean up. Elbow grease, whitening toothpaste and t-cut are your freinds and you can make the most scummy forks come nice again.

I'd acquired a pair of siezed '94 manitou 3 sport legs.with collapsed elastomer gunk in the bottom.
Manitou Sport legs.jpg
In other leftovers I'd got a machined brace for the fork (only on the lower spec forks as it wasn't tennoned into the legs. and I also found a spare crown I could use. So a rebuild and a spruce up after painting and lacquering the stanchions I have some nice sweet, black looking Manitou sport forks. from three seperate sources.
John deverill Supplied a nice set of elastomers and they got built to look like this:
IMG_7138.JPG

I found an 1-1/8" headset with the correct seal and cup config that if painted right would look like a nice ritchey logic set.
Pulled it all apard and scraped the gunk, the scale and the rust off till I had a nice clean base to work with. The headset was painted in component form on an old CV joint as a support skewer and looks lovely. The raceways were masked and the plastic bits were cleaned with babywipes.

A new (cheap) old stock Kalloy bendy seat post was had for the same as the price of the frame (it's the same as the original marin lite in look, but has two advantages. 1 it has no makers printing, and it was longer by not being slash cut at the end.)

The other little nugget was about £5 delivered for a very tatty blue marin lite qr. This was stripped back to its component parts and bare aluminium. The steel was cleaned and rust removed. I primed and painted the alloy parts and lacquered all the bits then reassembled it.

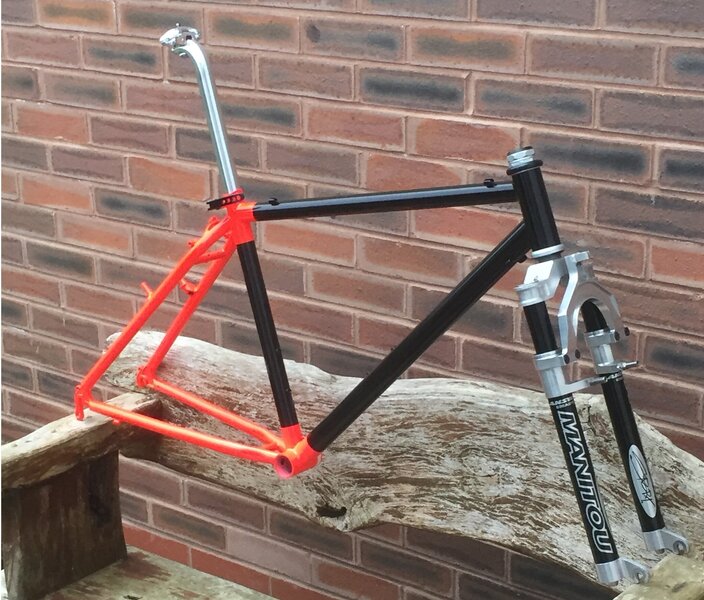
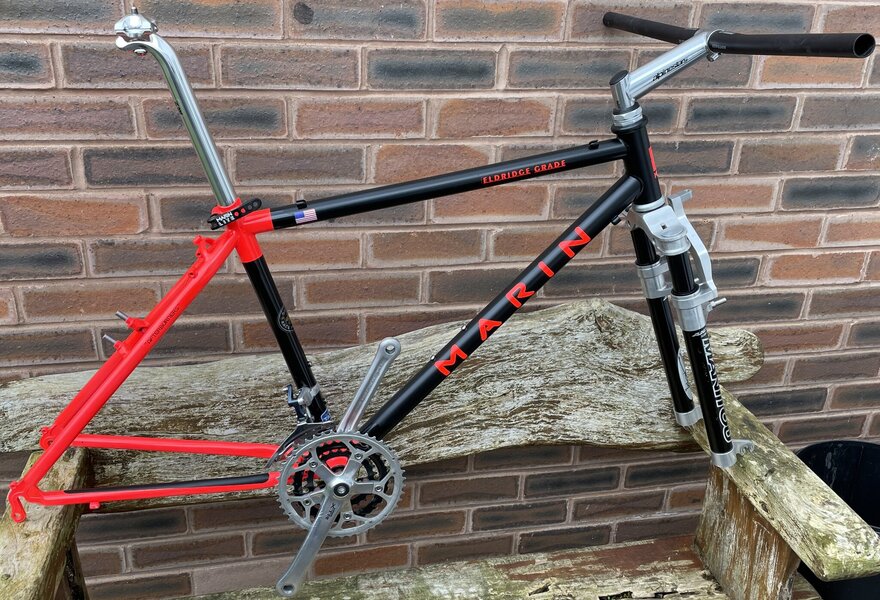
Here's the frameset thrown together to test fit:
IMG_1952 - Copy.JPG
 
Last edited:
#3 Components.

It then took a while for me to work out what I wanted to do for components. I wanted it to look 'nice' and be cheap. The the M900 group was the group to have, but commands crazy prices. It has a really nice look though.

I posted a little ago that the XTR colour is basically a Volvo S40 Blue, I took a smashed XTR shifter pod (I’d acquired with a magura perch) to the local paint shop and that's what it matched as.
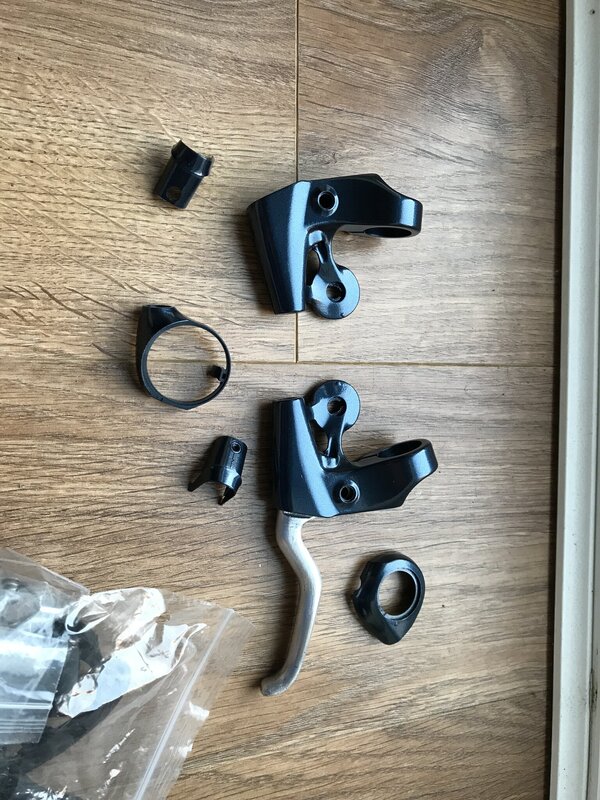
I also found a set of M075 'DX' rapidfire + that had had a very hard life and stripped them to component parts.

The lever parts looked like this painted:
IMG_7226.JPG
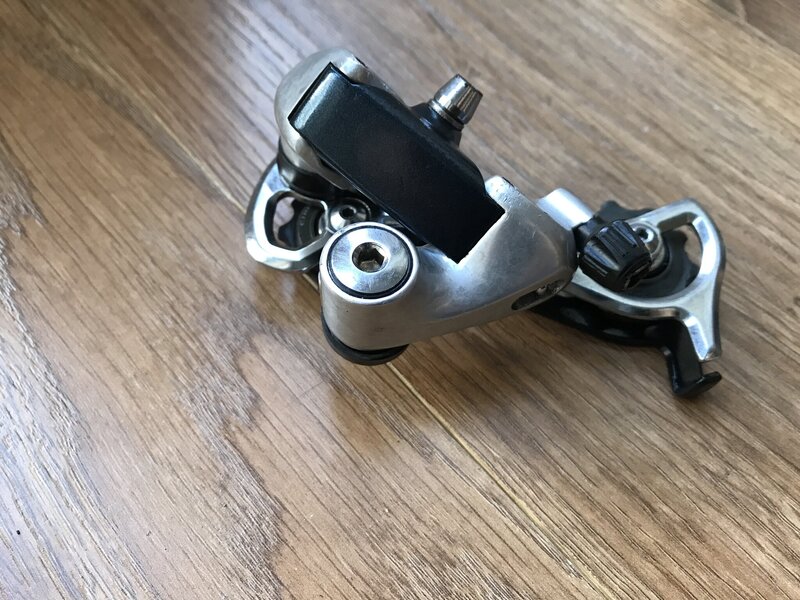
In my junk box i found a late M735 rear mech and and old M520 mech. I tore both down and the medium cages off the M520 are the same length and look of the XTR. The cage plates from the M520 fitted the M735 parallelogram and then after painting the salvaged franken mech looked like this:
IMG_8082.JPG
Not spot on, but close :)

The front mech was made from a M320 cage plate and a cx400 clamp and parallelogram that was stripped, painted and lacquered. I managed to save a set of hinge pins from disassembling. I swaged the ends to reuse them.

The crank was an old m550 set of arms that looked horrendous.. After a liberal application of brake fluid and wire wool they are shiny.. Married up with a set of '93 sg-x rings they look quite nice. The outer is off of the messy m560. lx and the other two are off of the basic altus at20. Black steel, but hard as nails and with sg-x shift ramps.

The bb is a short axle un-71, i needed a free shell years ago and this was the cheapest way to get the removable part. It had sat in a box for many years and pairing it with a nylon cup it gives the nice nickel plate finish on the axle.

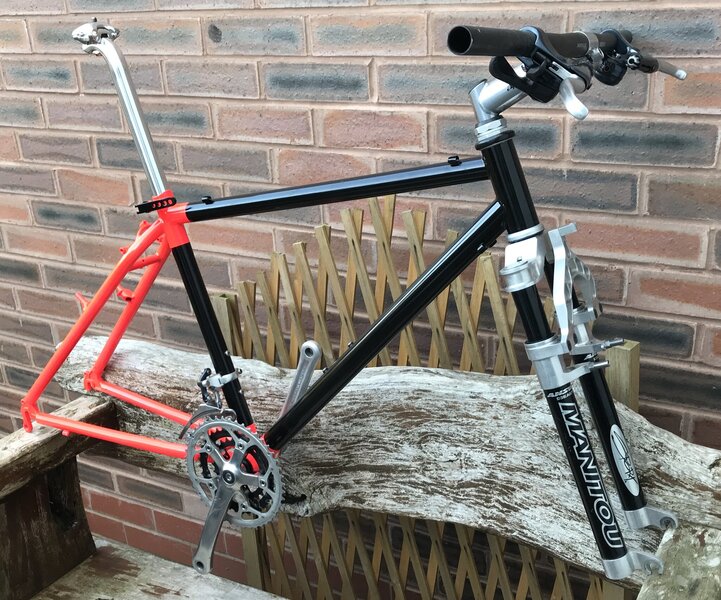
Trial fitting parts it now looked like this:

IMG_7169 - Copy.JPG
IMG_7739 - Copy.JPG
The stem is a sameness one from a 1993 alpinestars stem that had a nice nickel finish and the reach is 120mm. I bought it cheap for something else, but it again sat for years. The Bar was a real find at £15, and at 620mm it has a nice look and feel.

I spent a long time talking with the marin sticker man to get sizing right and the neon red available. I bought a cutter plotter and made the chainstay protector and a wide spaced canti bridge sticker. After some trials and resetting with measurements off of other bikes found in old magazines here it is with branding :)
IMG_9220 - Copy.JPG


Lookiing well isn’t it :)

I bet you are reading this saying that'll never be a commuter. My son was laughing at me too saying no way..
 
Last edited:
Looks good, it coul be a nice and fun bicycle to ride and to look at.

I find fun to restore or rebuilt some components with bad life.
 
Last edited:
What did you clear coat it with? Just wondering.....
Some cheap as chips plastikote lacquer from bnm or the range, can’t remember which. I‘d had a can open and that was what i’d used on the front. the rear end was fresh new tins. You’ll see with the stickers it’s more satin, thats because the can I did the front with had gone off and all the lacquer was peeling off in sheets. It was weird as i paint allsorts of little bits and bobs with the stuff and it’s usually ok. I discovered this applying the stickers as they were coming off with the carrier film. So an evening of cups of tea and a reel of masking tape pulled it all back off the black bits of the frame
 
Part #4. Wheels. Now the bike pops, how do I solve wheels to do it justice for as little as possible?

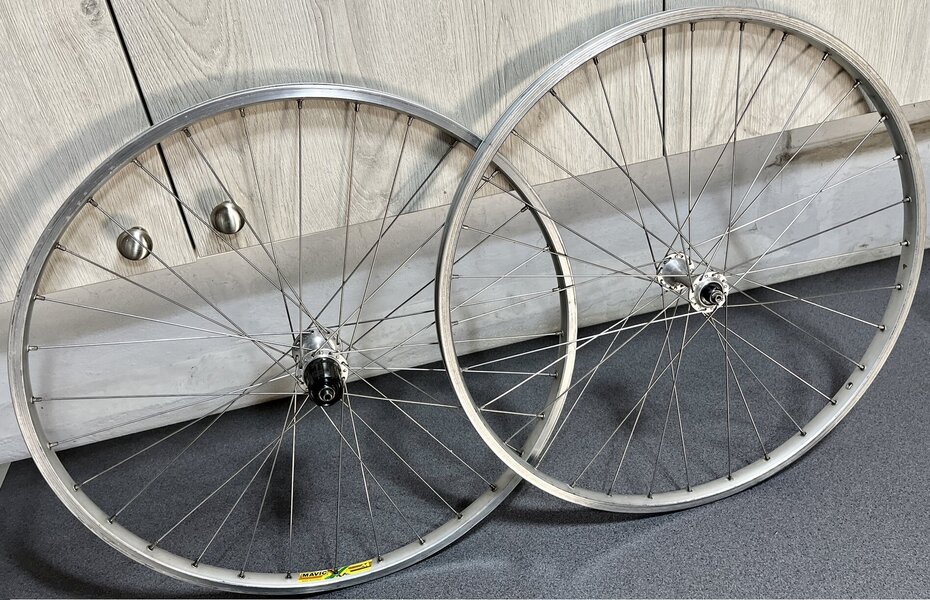
Every morning I do a chunk on my turbotrainer, now this is early, it's a great time to look for stuff. I found a very cheap tatty looking set of M550 wheels with silver 32H M231 mavics. I think the wheels were £35ish including postage from here. Now this is heading for fakey M900, and shimano share castings forgings and pressings all over the place. These were perfect as I needed a core set to work with and 'adjust'!
401.jpg
M550 hubs used the same hub spool as M650, M735, M900, and I think Ultegra and dura-ace. The main spool is polished, stickered or screen printed and anodised slightly differently and loaded with different bits but the cores are the same. The rear RM50 series is different it has no lip or support washer.

M550 has a little sticker and no screen printing, on these the rear sticker was gone even better. When they turned up the front wheel was true but crusty and the hub was horrendous. Full of grease but the raceways had had water get in and they were corrosion pitted. The cones were toasted too. The rear as well as being 7 speed was just as bad and the rim was wavy. Now the fun started!

I stripped the hubs down so I had rims, spokes and a bare hub in the centre. I carefully lifted out the dust covers and cleaned up as much of everything as I could. The raceways were beyond saving.

Years ago I bought a dremel, the best little tool ever. With a flexy extender wire end and all the fittings. There is a little grinding cylinder thing and this was my friend here.
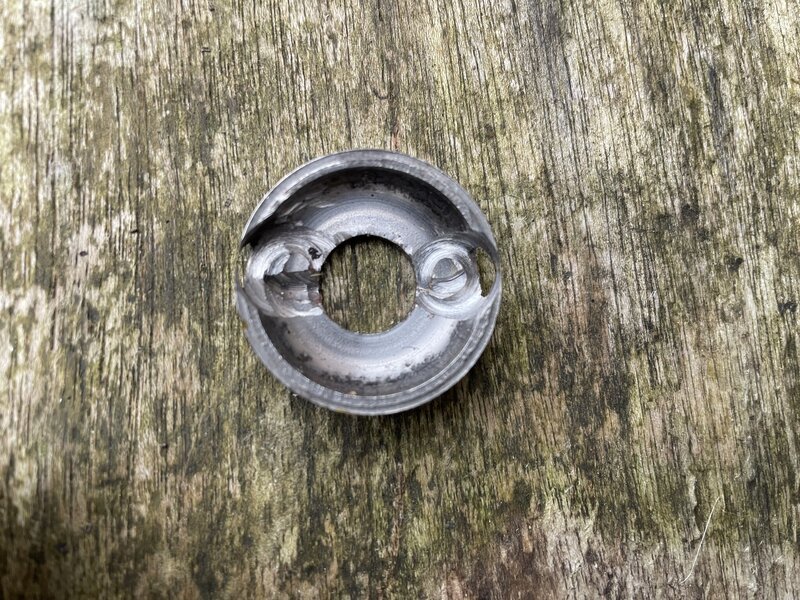
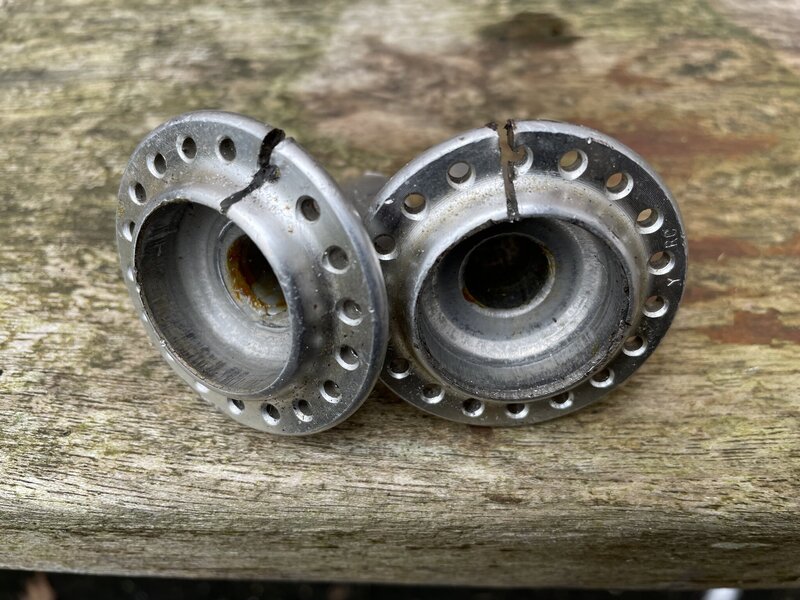
On these hubs there is a little tiny chamfer where you can hook a tool under the race cup and push it out, but the race cup is a heavy (heavy) press fit into the hub. With the dremel at about 28,000rpm and the flexy, and sun and lots of breaks for tea and to stand up after hunching over I carefully ground out two slots at 180degrees apart on each race. I was very careful not to loose squareness and once through a chewed up old screwdriver was hooked in from behind to lift the remains of the cups out. I repeated the process and all 3 yielded.
Here's one of the extracted raceways you can see the corrosion and and the carved out cuts. all 3 were as bad:
402.JPG
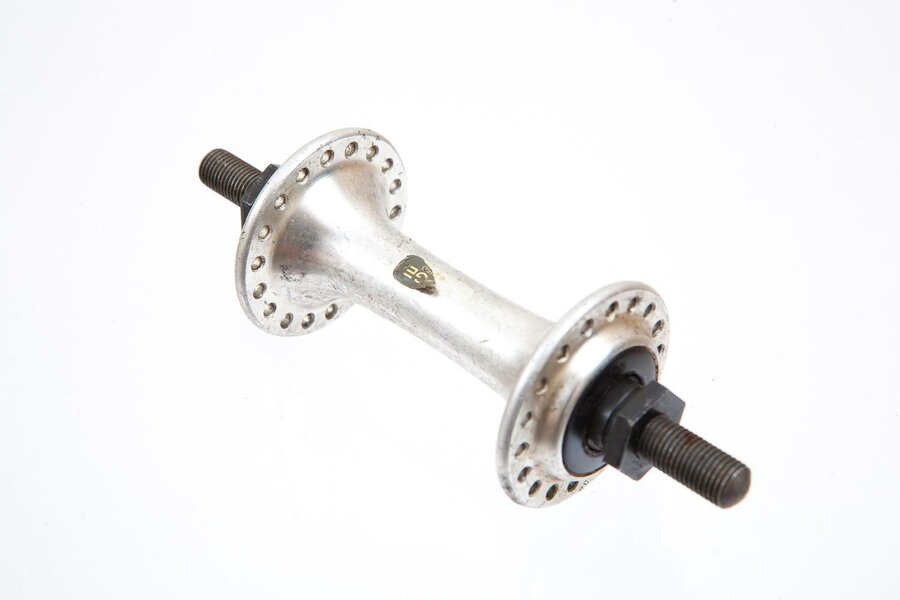
Next part of the plan... I needed some parts. Now all the raceways on these old style shimano hubs are a pressed and polished thick plate raceway. Very very cheap (less than a tenner) I had a brand new shimano old stock front hub here:
404.jpg
This was stripped to yield new dust covers, cones and unused balls. I now needed to retrive the pressed in raceways. A little vice and a hacksaw was my freind here (more tea) and again carefully slotting the aluminium until you are very close to the race. A flat head screwdriver as a wedge and a heavy blow from my lump hammer did the rest as it cracked the hubshell and I could just pop out the raceways. Here's the brand new hub after giving up its useful bits.:
403.JPG
The rear hub was fun too. I had a good parallax stx 8 speed hub and this yielded the raceway and the free hub body. After some careful comparisons of components I found a cone and sets of spacers that would give the right hub position and axle width. The steel bits were cleaned, zinc primered, painted and lacquered. After pressing in the races and reassembling the hubs I then aligned the rear as best as I could and adjusted the dish to make up for the hub position change.

I was very lucky to find a rideable pair of tanwall psychos like I used to have on my bike in the 90s for very cheap too. They are a bit perished, but the look so good!

After this I couldn't resist throwing it together to cut the cables to suit. Here it is looking like it needs to be finished....:
405.JPG
406.JPG
I'd found an set of 'too modern for me' Ritchey skewers that went nicely with the seat qr, and applied my xtr sticker on the mech (I'd done the cranks before). I also really like ritchey vector seats. They have good padding, look ok and aren't flite prices.. You can also see the wide spaced marin sticker on the rear brake stay (which I made that on my cheapo sticker cutter :))
 
Part #5.

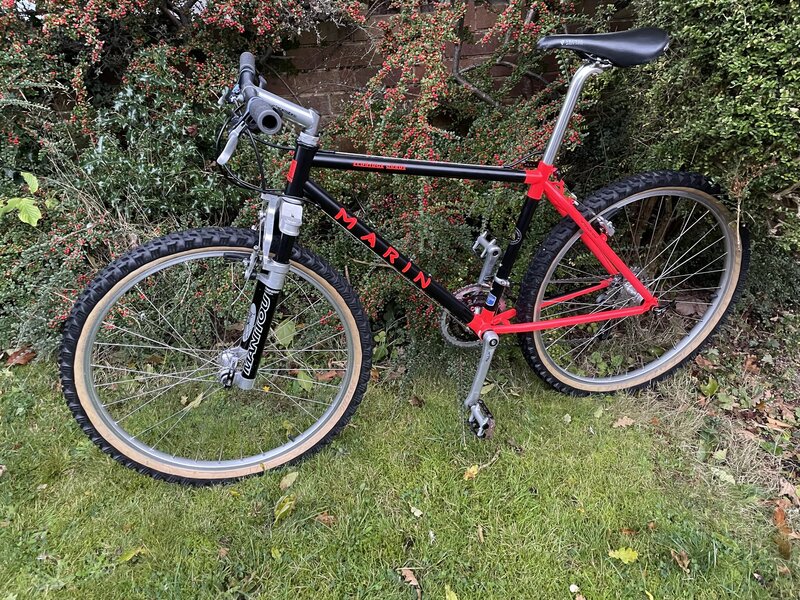
So it's finished now and I've been commuting it for about 3 weeks. It's nice to ride, the tyres are buzzy and the knobbles are squlchy in the corners on the tarmac. I'd like some skinwall michelin city tyres on it, that would set it off nicely.
The brakes were a bit of a headache as the manitou forks don't clear M650/M651s, so it ended up with a set of M651s on the rear and some 1993 cantis on the front. No idea what the front ones are, they had hardware and were a matching pair. Altus or Exage or something...

I found a pair of m650 pedals in a box and they went on too.

I added some 'XTR' look brake blocks from ebay and a pair of lizard skin grips that cost £3. They were not nice, but a toothbrush and toothpaste mixed with fairy clears most ills.

Here it is on the morning of it's maiden commute:
IMG_1212.JPG

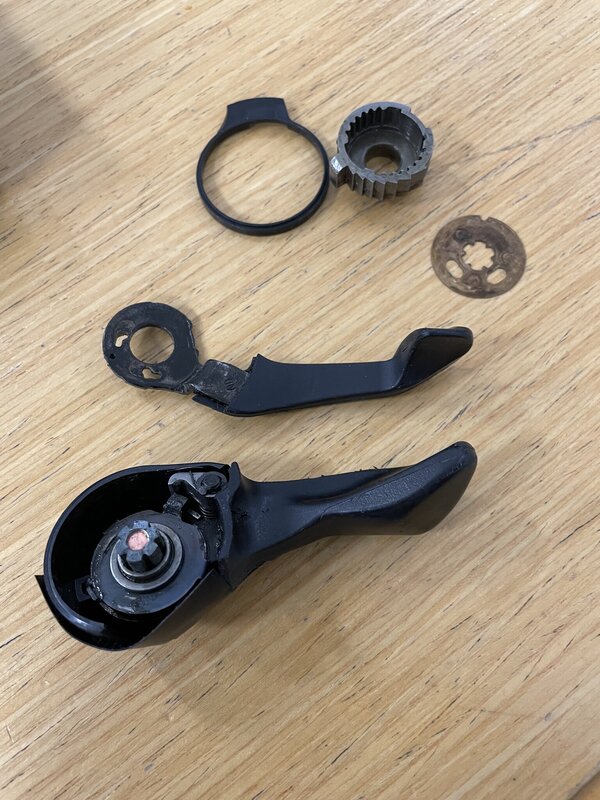
Literally 10yards off the drive the right shifter exploded, the eagle eyed among you will notice in one of the earlier shots there is black tape covering the bottom shifter shell. This is where a big piece was missing. The commute was against the clock so i picked up as much as I could find in the road (crucially the 8speed ratchet and gear cable holder) stuffed it in my back pocket and my boys and I headed off. My boys cycle commute and they were surprised we just carried on, but hey ho.

Later on I looked at the parts I had and the core of the shifter had sheared:
IMG_1217.JPG
So that was a bit pants...

After securing another M095 core unit I stripped it and collected the bits I had. and from the two built a good and functioneal 8speed shifter. I fount the ratchet return spring on the way home. Crucial as the tail point outwards on the 8speed and down on the 7 speeds. The rest had long gone.

Here is the bike with it's new shifter ready for day two:
IMG_1222.JPG

I think it looks quite well now. I've since painted the shifter pod bottom cover, and my lad got annoyed with it having no bar plugs. It rides very sweet for how little it's cost. It certainly looks bright.

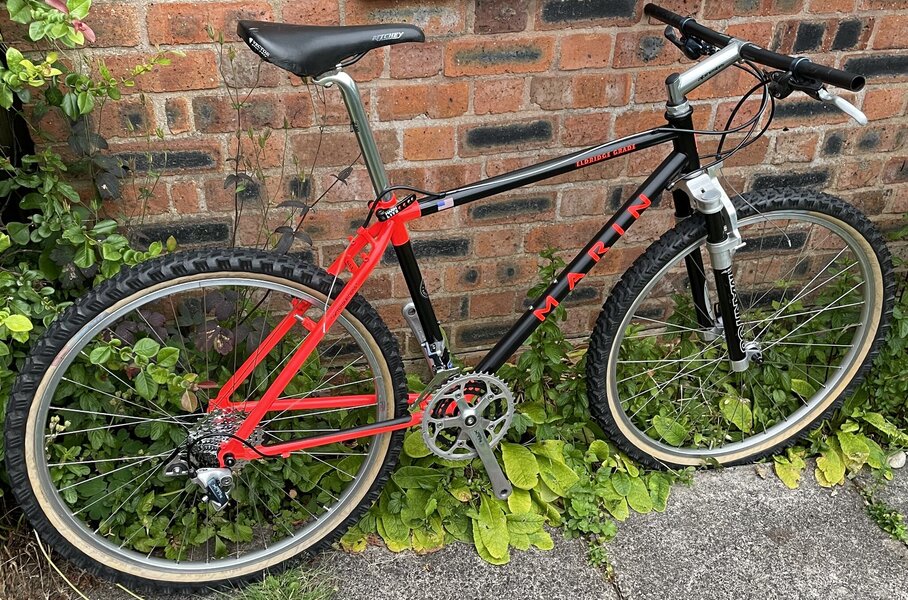
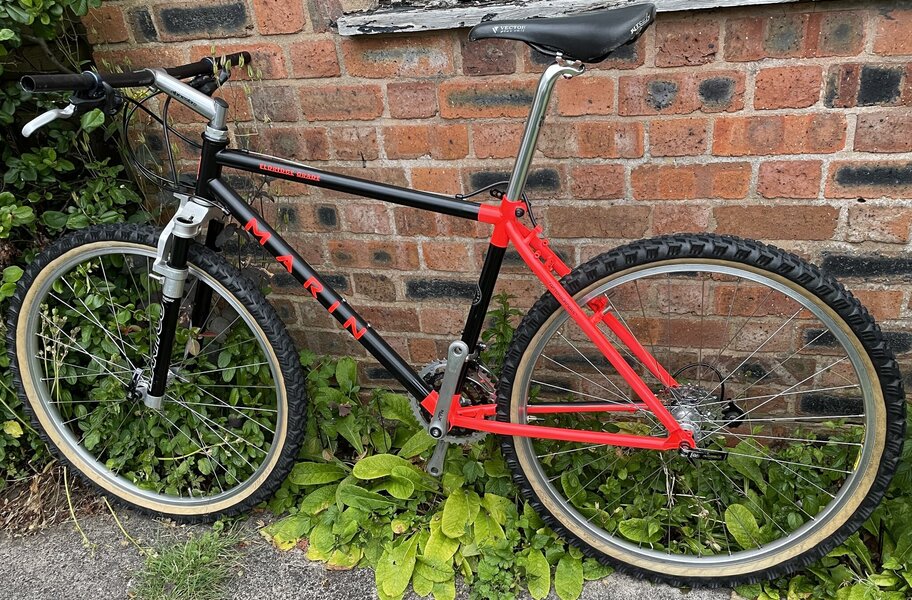
The original inspiration for the build was this:
1992 Eldridge.jpg

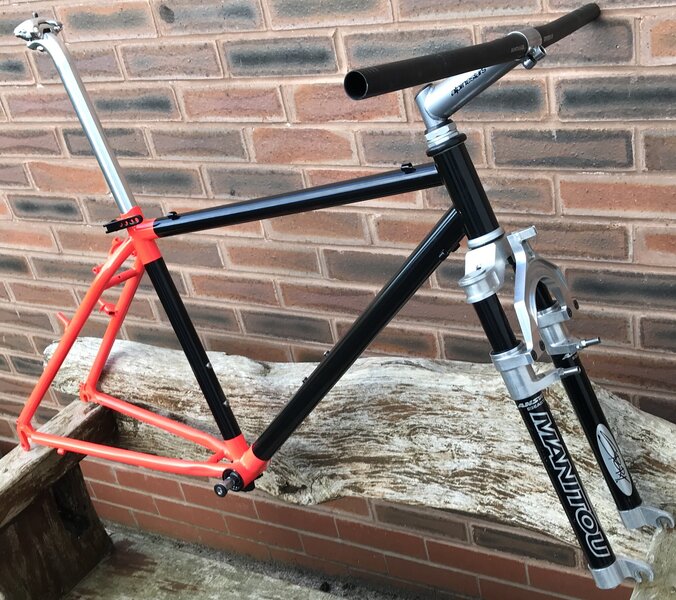
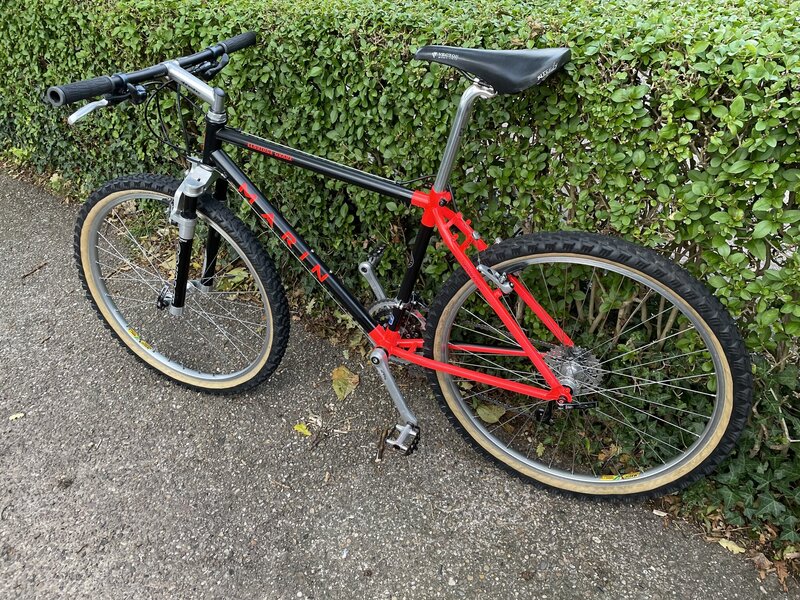
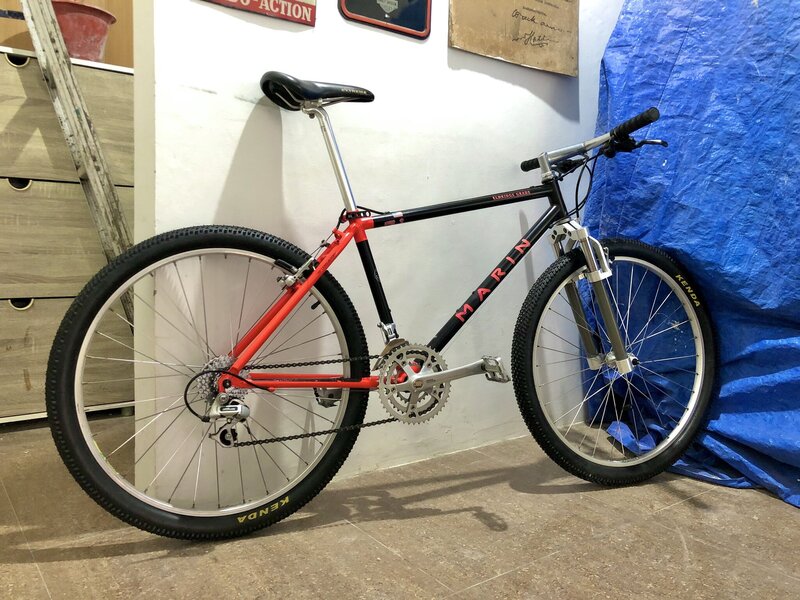
Found one afternoon browsing waiting for kids to finish their homework, the result isn't too far away and I hope looks as good. IMG_1660 - Copy.JPG IMG_1659 - Copy.JPG
 

Latest posts

Back
Top