1993 Lava Dome Build from MTB to tourer

Bootstrap Bob

Dirt Disciple
I am quite a lucky person to still own my very first mountain bike, little did I know when I bought it back in 1993 that it would eventually become a retro bike. I don’t know why I kept it and never traded it in but I have had others and usually sell them on. Perhaps it was the history and places it has taken me or perhaps it was just that I liked to ride it, or perhaps all of these.

After a discussion with my wife about doing a long cycle ride, her on an old Claud Butler tourer and me on my Kona a plan started to develop.

The Kona had sat unused in our carport for 8 years after finally admitting that it could not keep up with the more modern mountain bikes but I just couldn’t bring myself to sell it. I had travelled thousands of miles on that bike, in 2001 it took me from Land’s End to John O’groats and then in 2003 it took me across the country from Morecombe bay to Whitby on the Roses coast to coast route. It was time for a refresh.

A few months ago I posted that I intended to give my Lava Dome another lease of life and turn it into a tourer, this is the story of that rework……………..

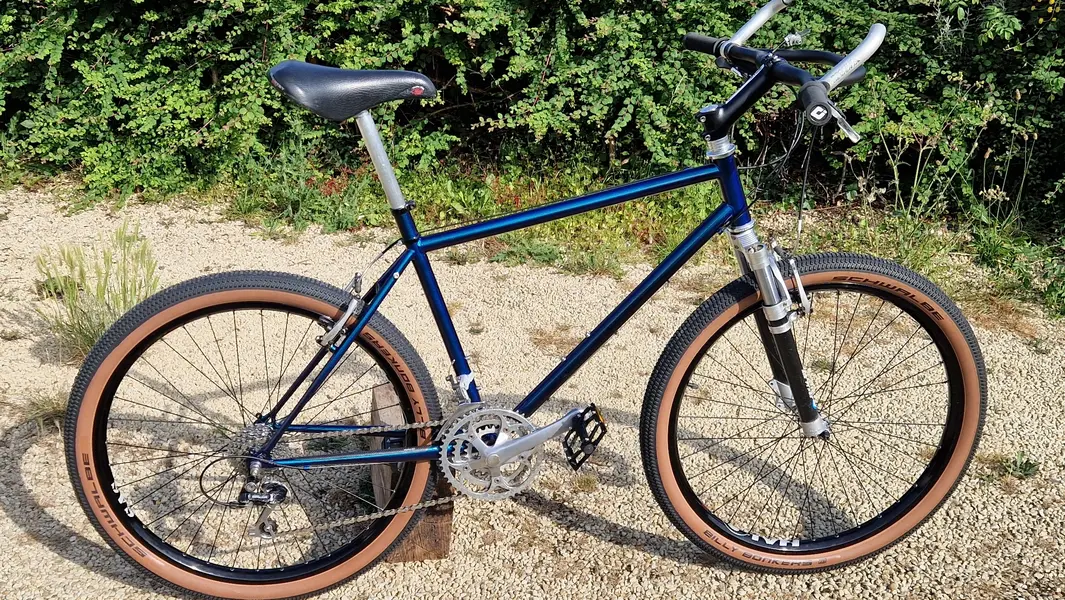
Since 1993 the Kona hasn’t changed that much. I converted it to a more road biased bike with road tyres, mudguards and a rack for the long rides. I added Pace AirForce forks in 2002 and Deore XT Parallel link V-brakes and brifters but that’s about it.

My aim for this rework was to re-use whatever I could and upgrade the bits that were going to make a difference to my cycling pleasure and comfort. Oh and the frame needed an overhaul so why not go to town on that and give it a new paint job?

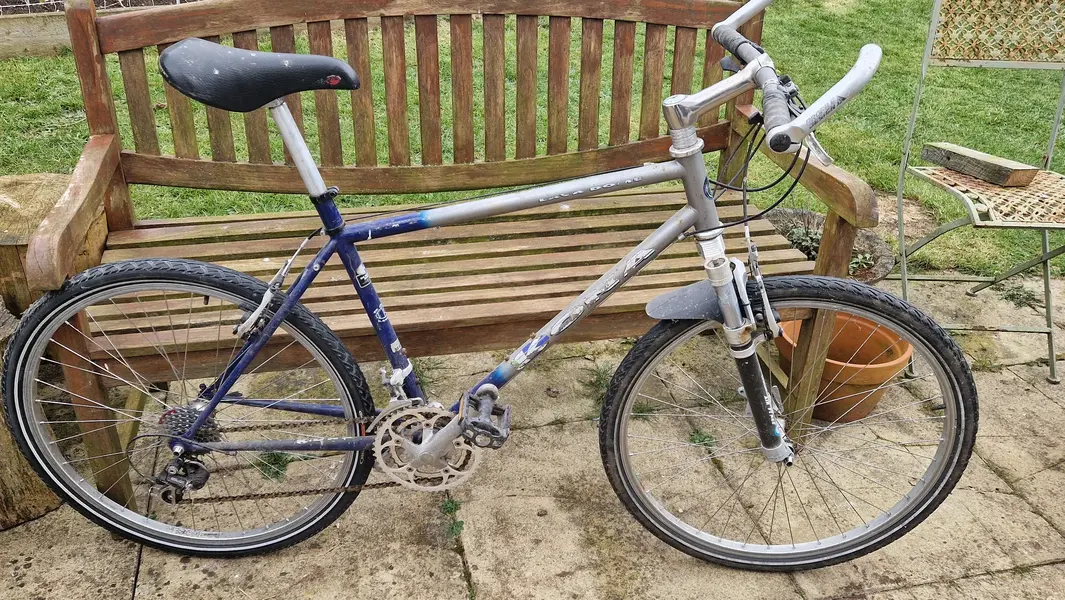
So this is what the bike looked like at the start.
20250316_151016.webp


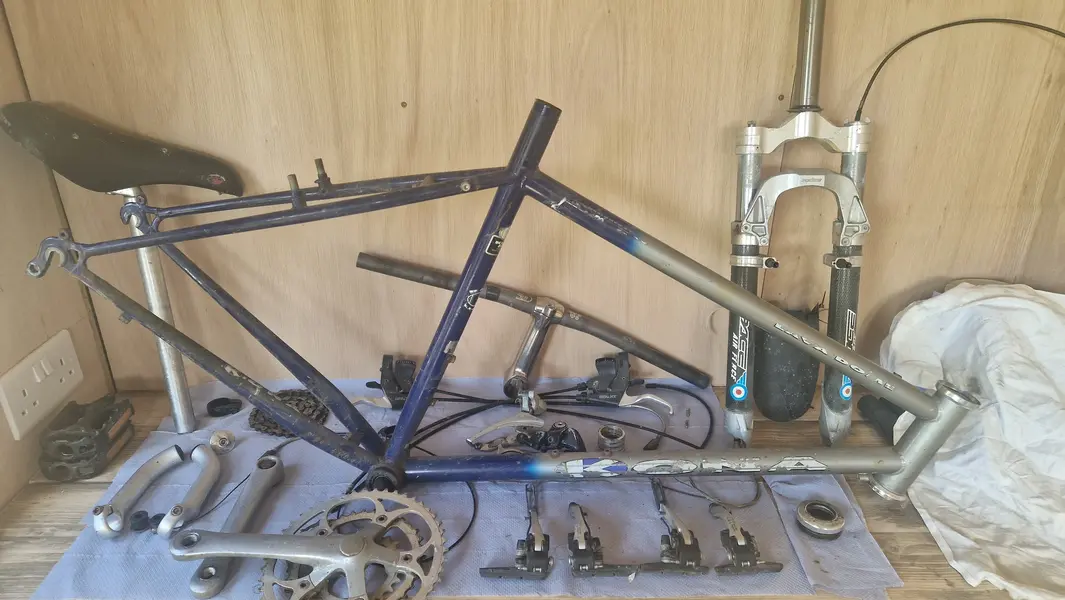
First task was to strip the bike down completely.
20250409_155643.webp


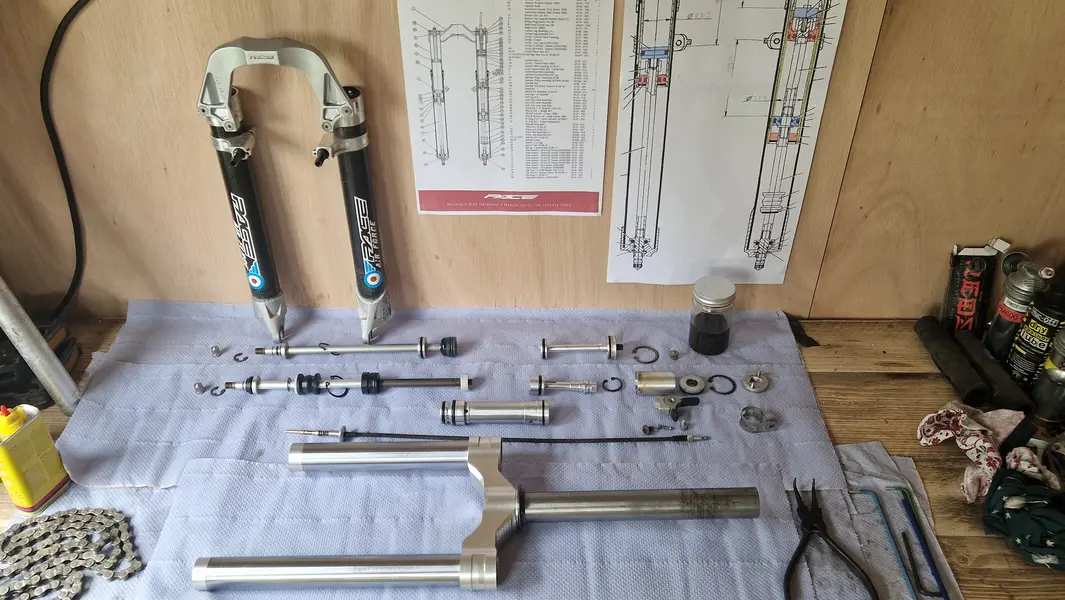
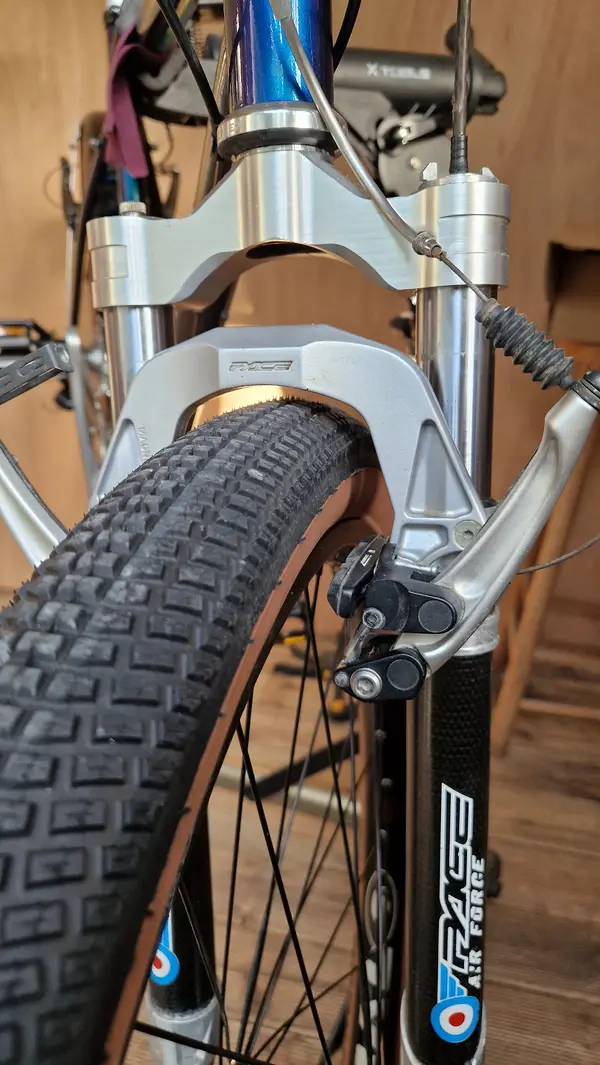
The next job I wanted to tackle were the Pace forks, They had never had a rebuild and even though they still worked it felt time to refresh them. I downloaded all the necessary files so I could get an understanding of their operation and assembly then started the dis-assembly process. They are quite a complex set of forks to control stiffness with three air pressure chambers that control sag, rate and progression. The damping on the other hand is very crude and is controlled by a single plastic flexing shim in the piston and a variable orifice hole connecting the working inner piston chamber and a concentric oil return flow chamber. The orifice hole size is controlled by a rotating tapered slider that is moved via the lever on top of the stanchions. Compression and rebound damping are not independently controllable but there is a remote lockout that drops a plunger into the oil flow above the piston chamber thereby preventing oil flow and locking the damper.

20250419_111654.webp


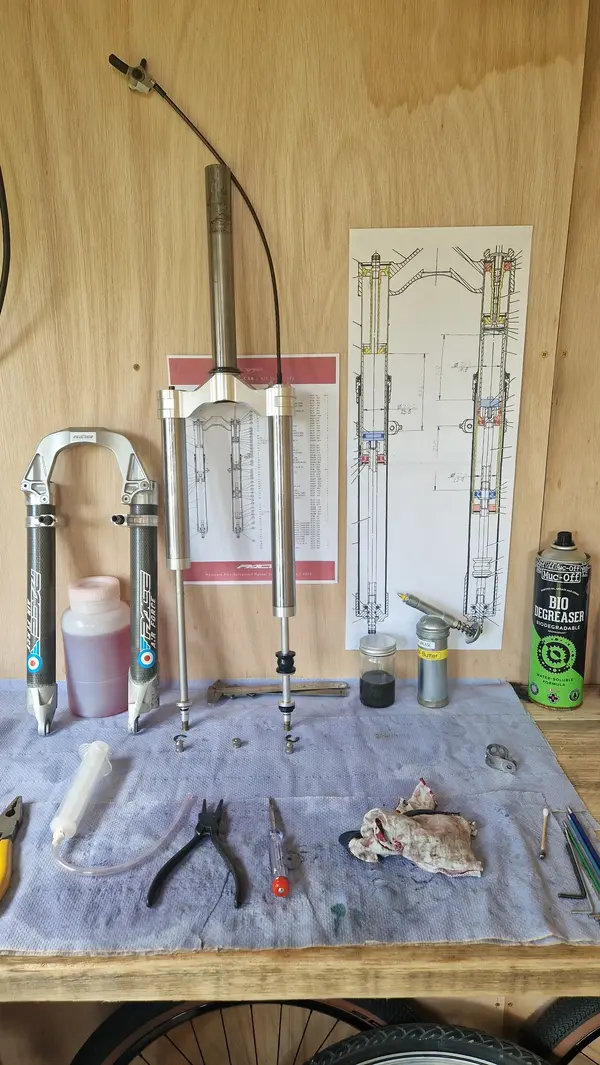
With all the parts cleaned and degreased I could check the seals and o-rings and rebuild with some nice fresh oil.
20250419_155957.webp

With the forks rebuilt it was time to move onto the frame.

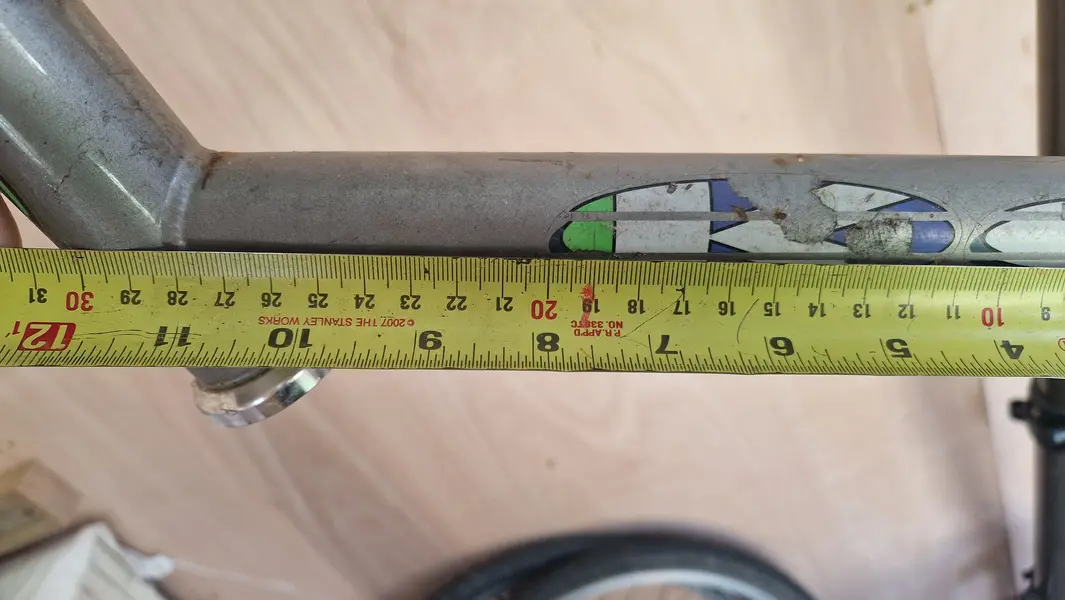
First I wanted to measure the decals for size and position.
20250410_101118.webp


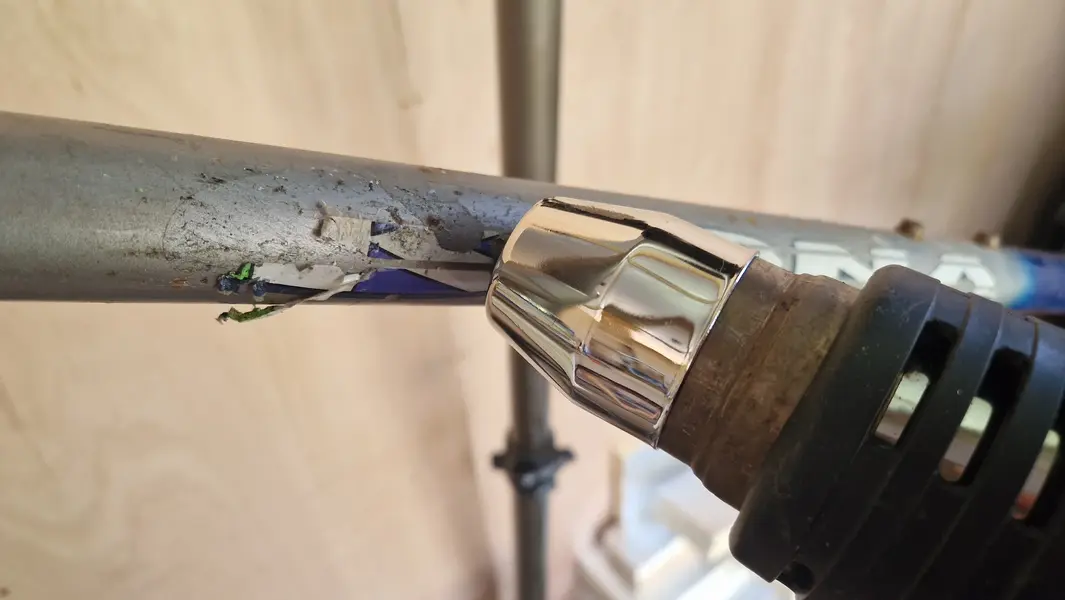
And then I needed to remove them using a hot air gun.
20250410_111357.webp


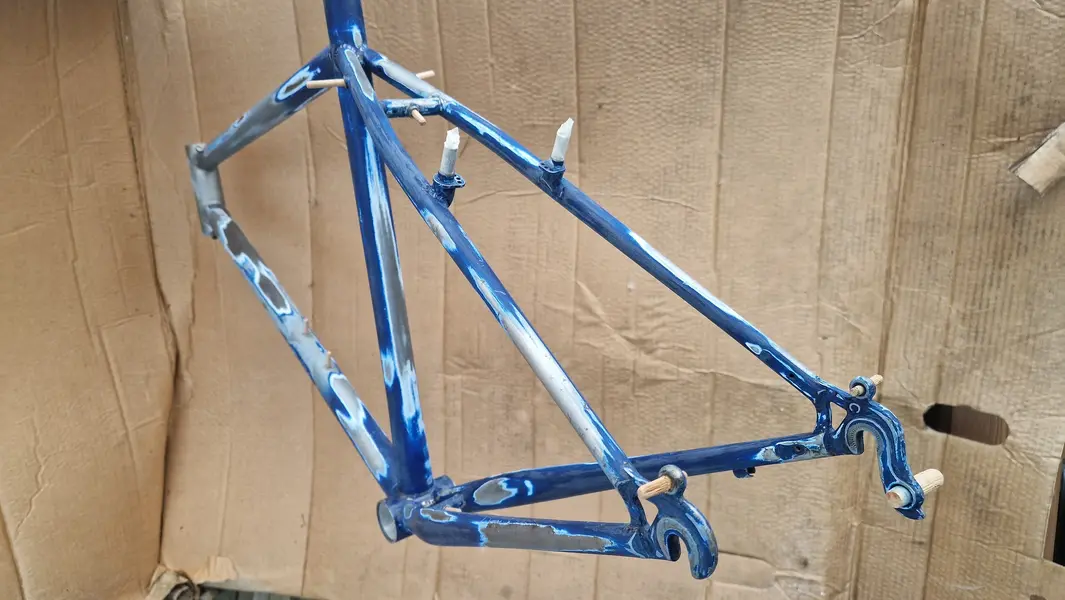
There were no seriously rusty areas but an awful lot of surface rust where the paint had chipped or scratched.

Here is the frame after sanding out the bad areas and preparing it for the first filler coat. I used wooden dowels to plug threaded holes and masking tape on the brake towers.
20250606_173807.webp


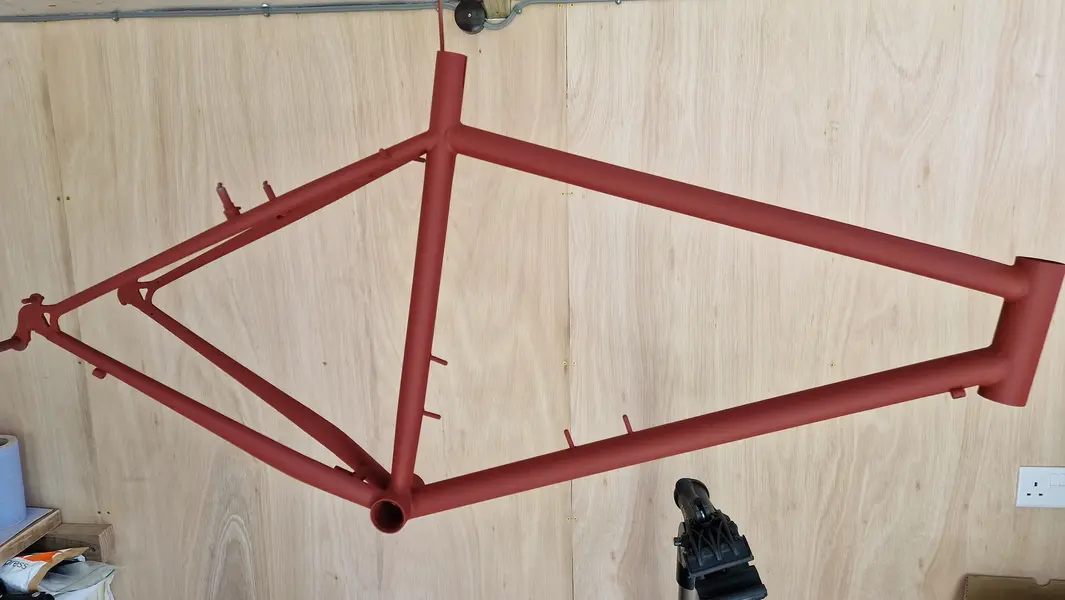
Next came a good clean with degreasing fluid and then the first high fill primer coat.
20250606_175300.webp


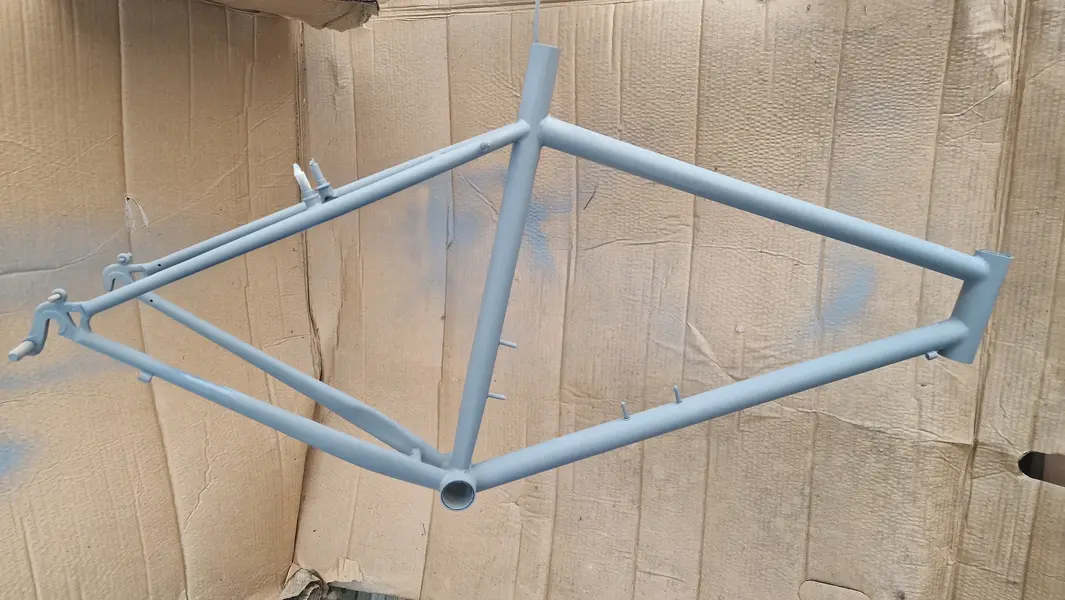
After drying it got a light sanding to smooth out any imperfections, another degrease and then the normal primer coat.
20250608_150552.webp


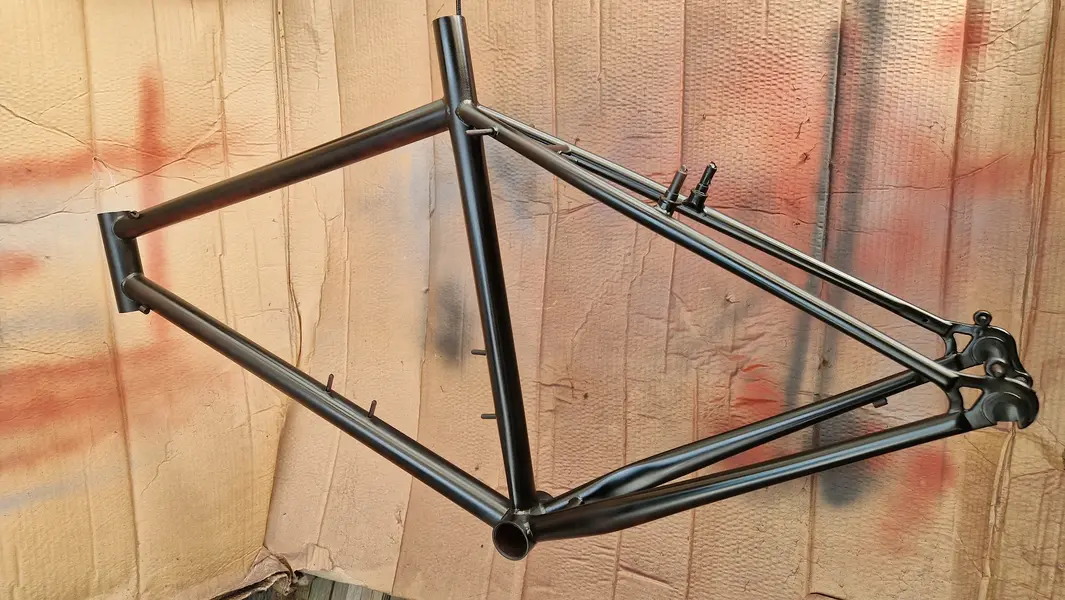
After leaving this to dry it was time for another light sand and degrease and then the base black coat.
20250616_161540.webp


But what was this base black coat for? For that you will have to wait for the next update.
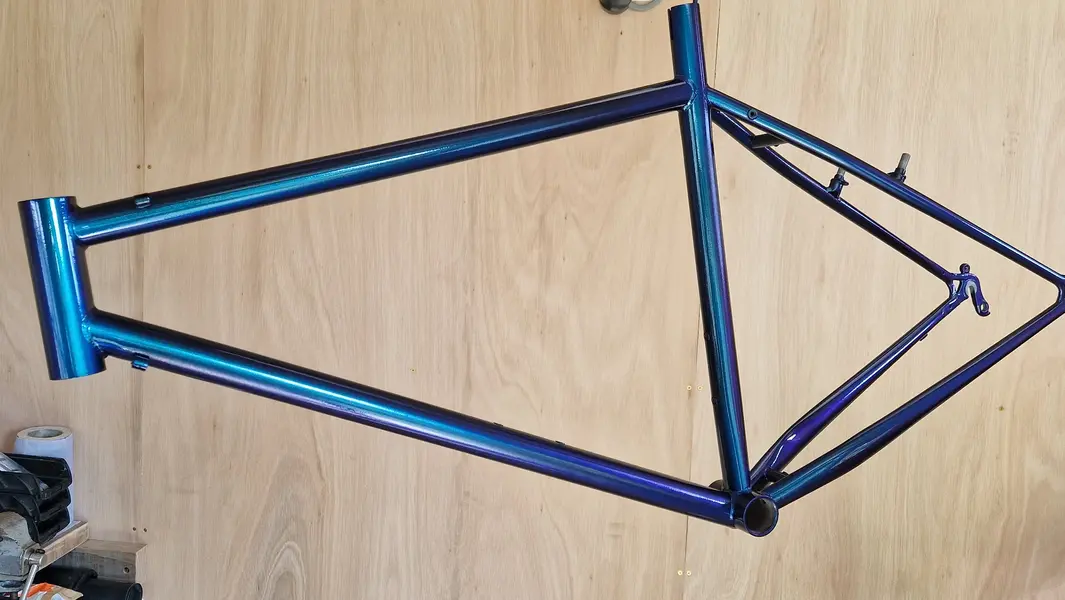
 
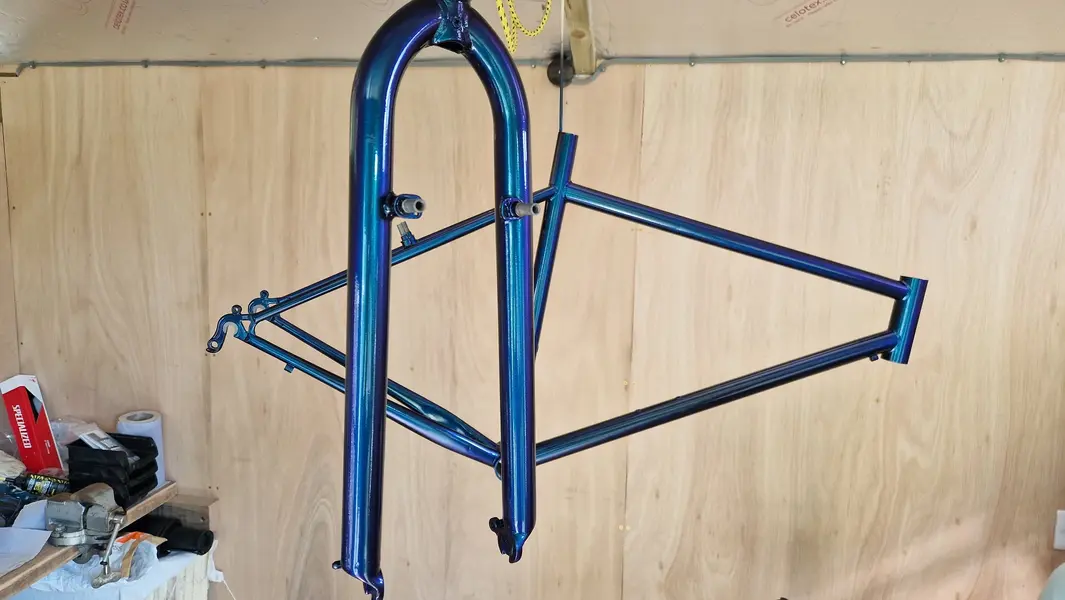
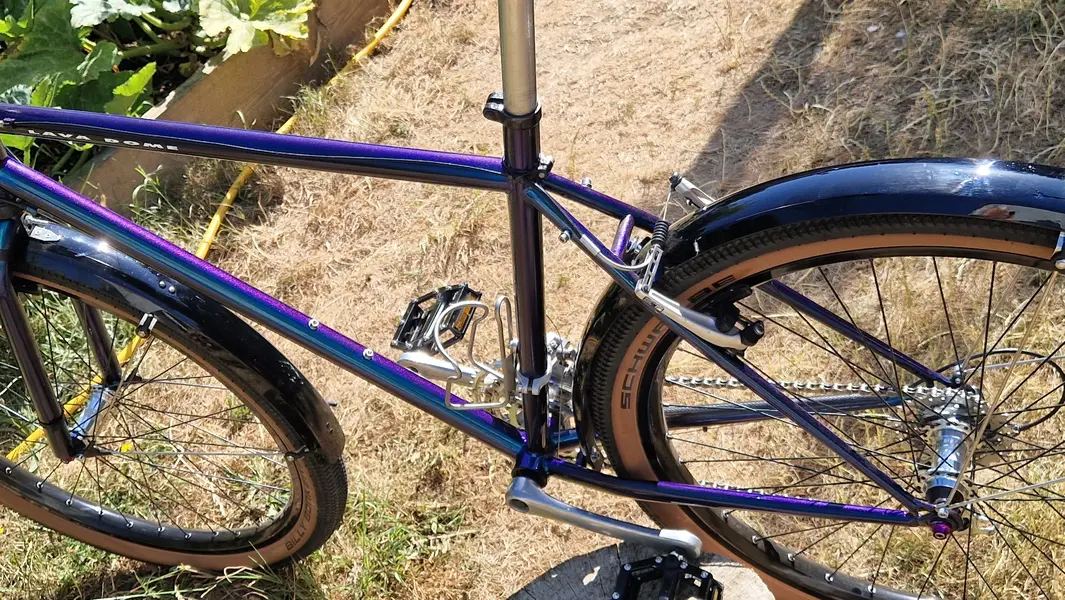
At the beginning of this build I said that I was ‘going to town’ on the paint job so it was not going to remain black although that is the chosen option for many. The base black coat is required for what was to come next and that was Chromacoat Peacock paint. A colour changing metallic paint that varies in the light from blue to green to purple.
20250617_163749.webp


With surplus paint I decided to give the Project Two forks the same treatment which is just as well as you will discover further on in this build.
20250617_164144.webp

The final stage which has to be undertaken an hour after the Chromacoat was the two part clear laquer and then leave it plenty of time to harden. The instructions say 24 hours but I left it a few days before starting the build.

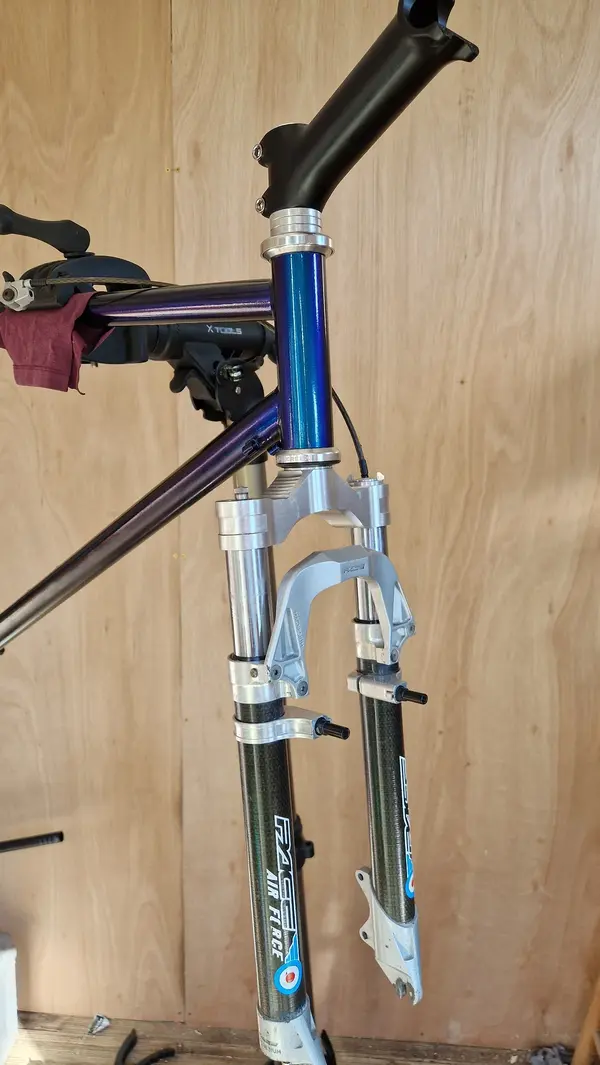
In went the Cane Creek headset after a good clean and re-grease, then the Pace forks and a new stem. As this was to be more of a touring bike I decided to lift the bars but to maintain the reach so out came the 5° x 130 stem and it was replaced with a Jitsie 25° x 135 Forged Stem.
20250618_180730.webp


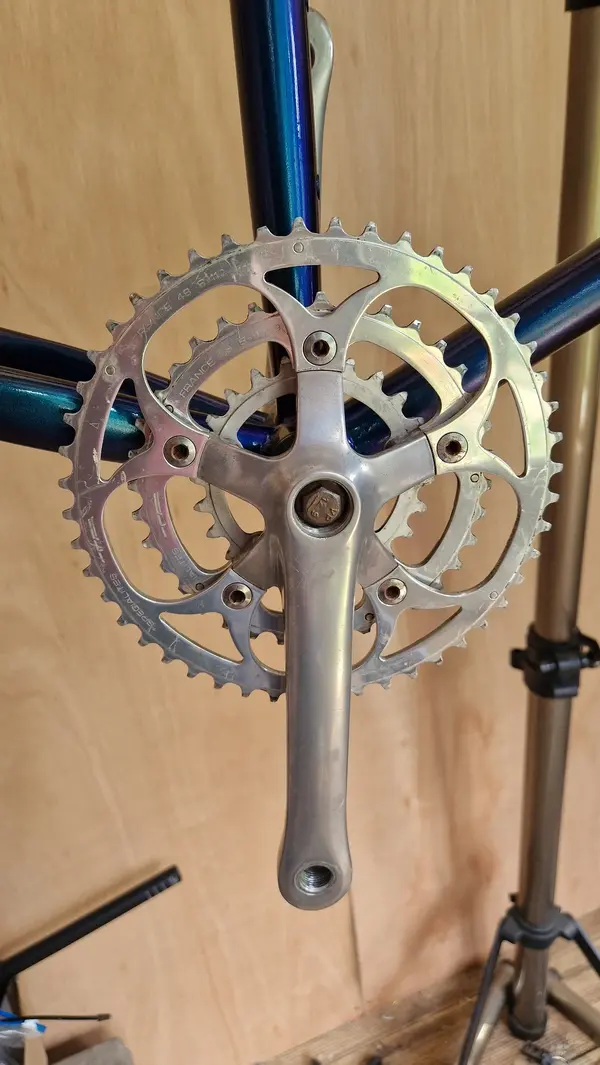
Moving to the bottom bracket I kept the square drive unit but removed, cleaned and re-greased the bearings before re-assembling with the original crank and ring gears (24-36-48)
20250620_161050.webp


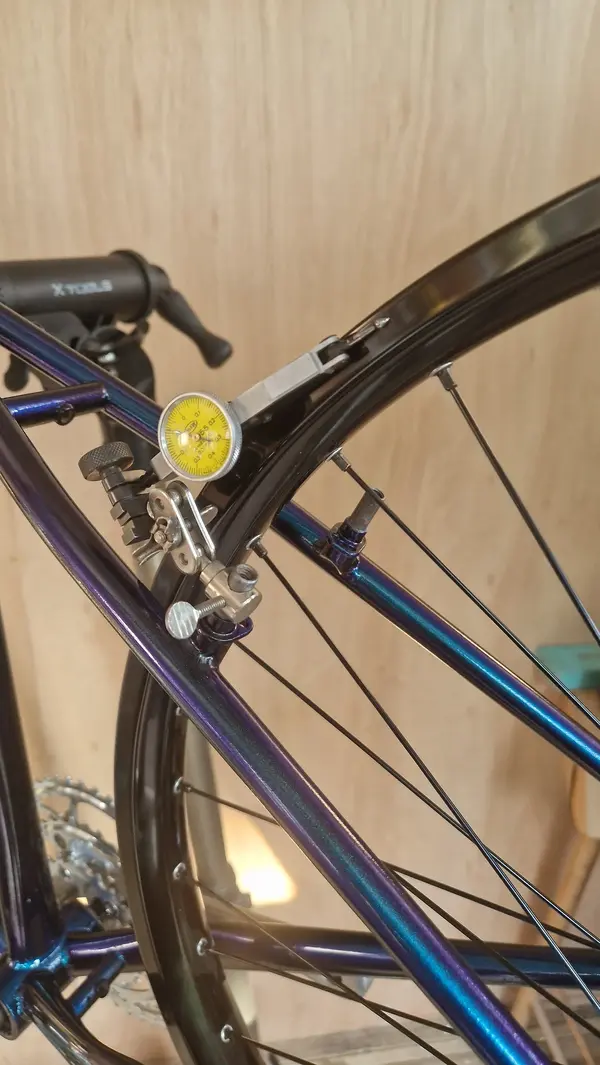
On to the wheels and I decided to re-use the Shimano Paralax Silver label hubs as I found them bomb proof and maintenance free but I went up to 35mm Halo SAS rims and black Sapin spokes. The extra width should give me a better ride when compared to the 22mm rims found on retro bikes. I don’t own a wheel building jig but I find using the frame or forks works just as well if you have a means to measure accurately.
20250620_191643.webp

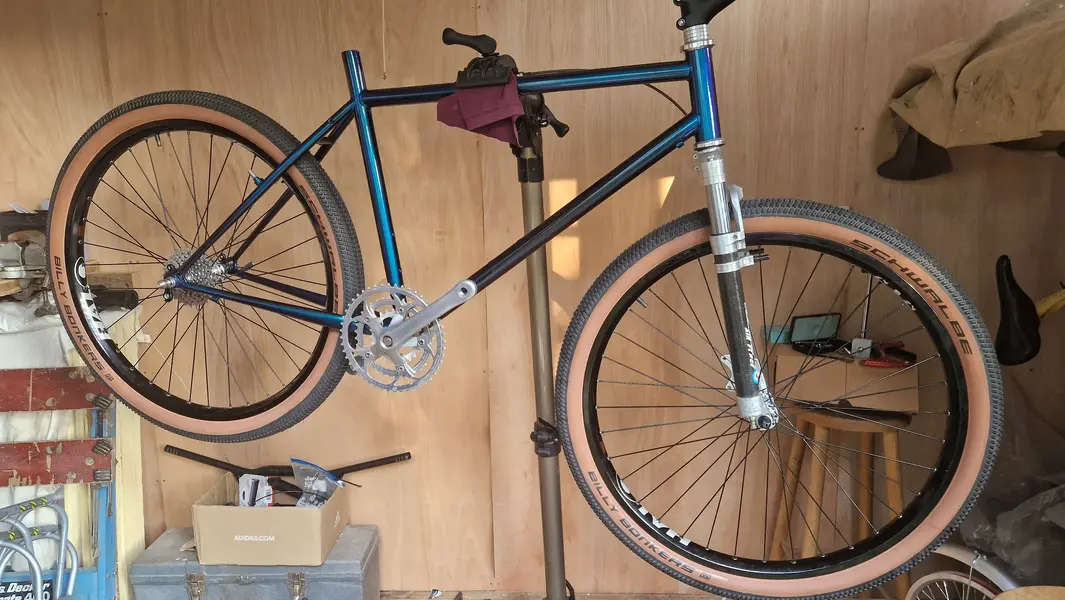
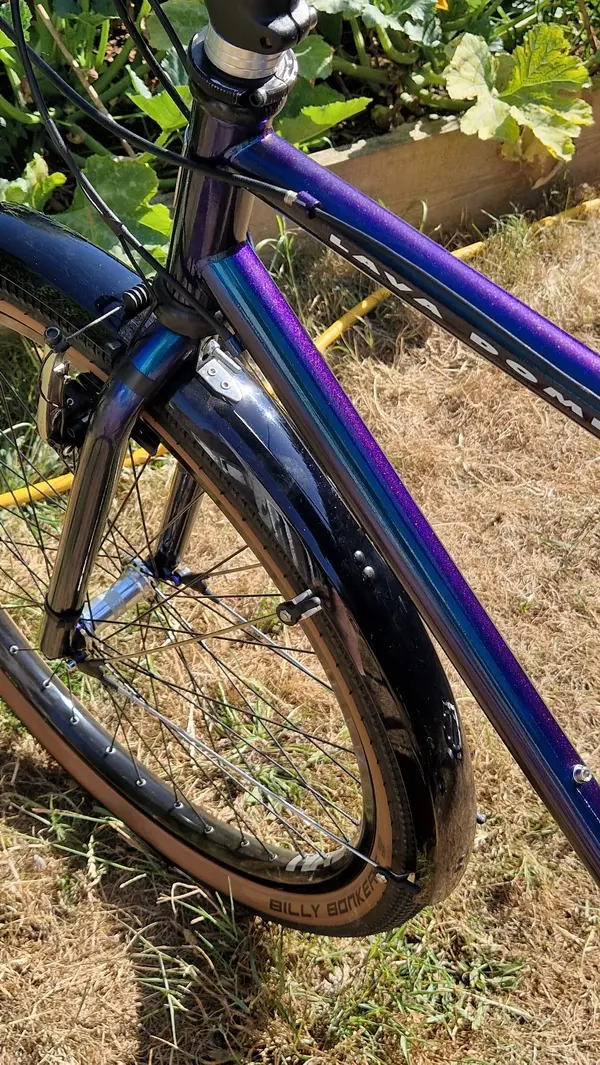
Onto the Halo rims I fitted Schwalbe Billy Bonkers tyres to give me a large comfortable tyre with low rolling resistance. Oh and tan side walls because it goes rather well with the new paintwork.
20250620_200234.webp


In the next update I will move onto brakes and drive train and the first of two unfortunate discoveries that required a bit of a re-think.
 
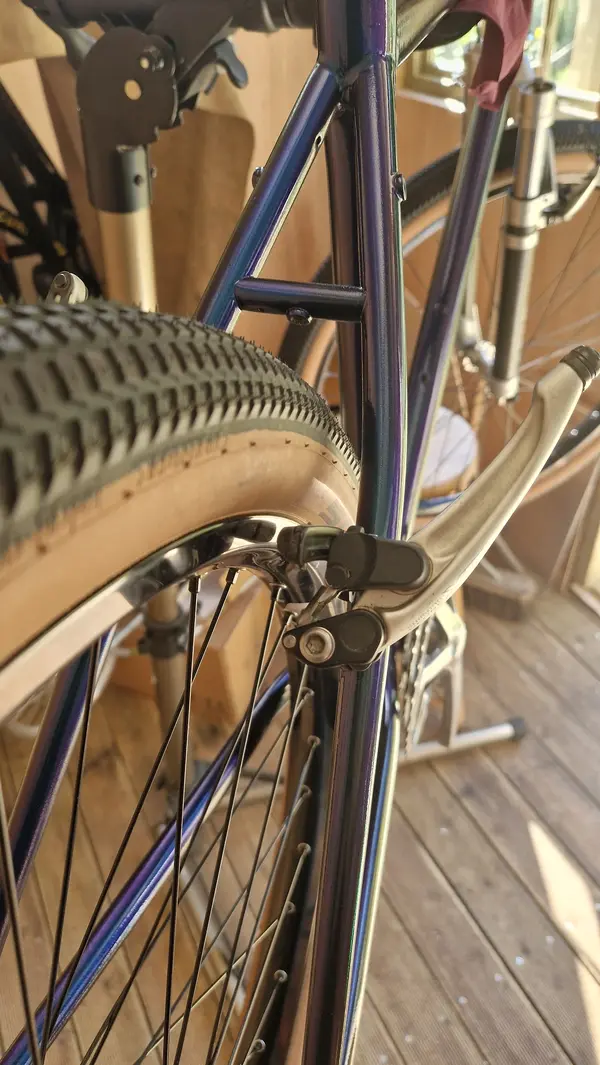
Moving onto brakes. With no mounting lugs for disc brakes I was really forced down the route of V-brakes again for this build. I suppose I could have had someone weld on the lugs but that was likely to be quite expensive. I was trying to keep the costs down and since I had a very good set of Deore XT parallel motion V-brakes I decided this was to be the direction I pursued. This was where I made my first unfortunate discovery. I had kind of expected this to be an issue but carried on choosing to fix it when I knew more. My decision to move from 22mm to 35mm rim widths had the unfortunate side effect of pushing the brake blocks out by 6.5mm on each side which meant the lever arms would have been at a large outward pointing angle which was inefficient and looked rather silly.
20250624_164713.webp


To overcome this I had to remove the conical cup and washer that sat immediately behind the block leaving me no room to adjust the toe angle. On the front this was not an issue as I could just rotate the pivot clamps around the stanchions of the Pace forks but on the rear this could not be done. I decided to leave them initially with just a single washer but it seams that the mounting pivots are not always parallel to each other or indeed the central plane of the wheel. The first ride of the bike post build confirmed my suspicions and there was a lot of noise so I did a bit of head scratching and came up with a solution I am quite pleased with.

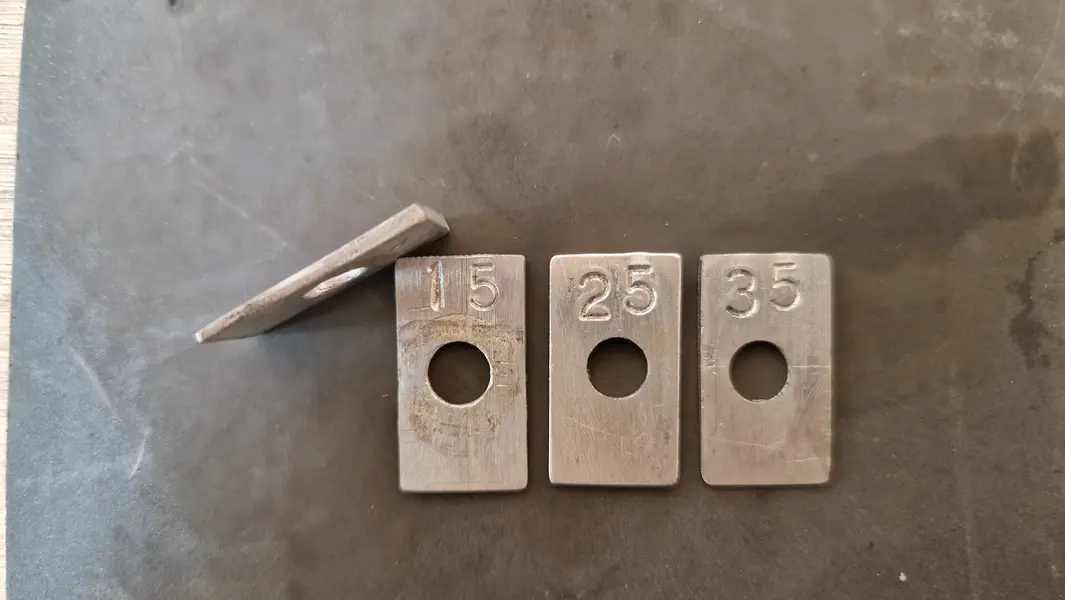
I created some aluminium packing wedges of varying angles that sat behind the blocks and allowed me to fine tune the angle.
20250730_165134.webp


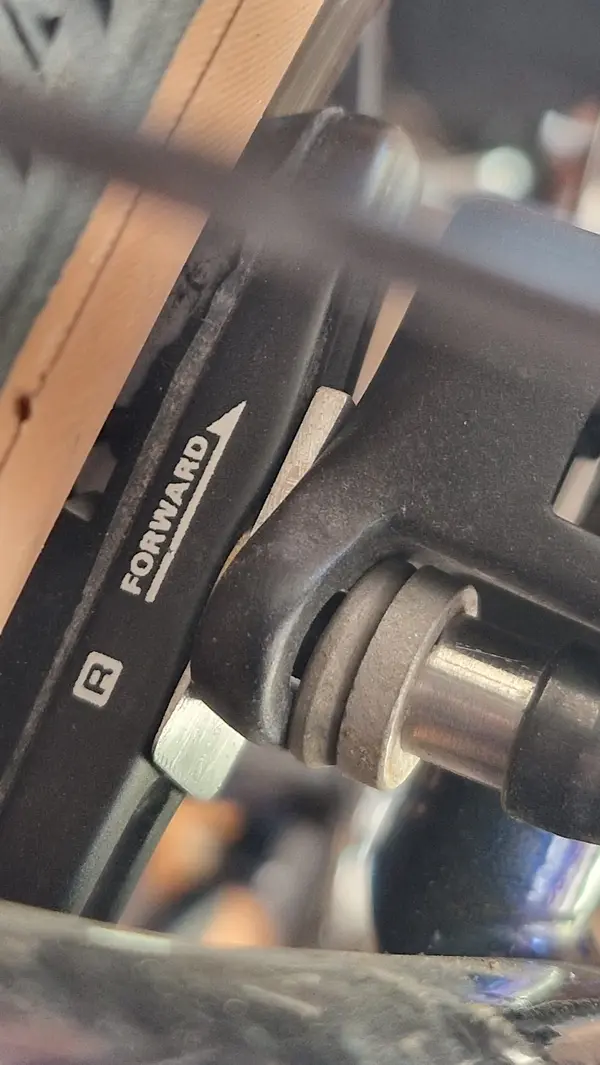
Here you can see the wedges positioned behind the blocks with the conical cup taking up the angle on the outside of the brake lever.
20250730_165208.webp


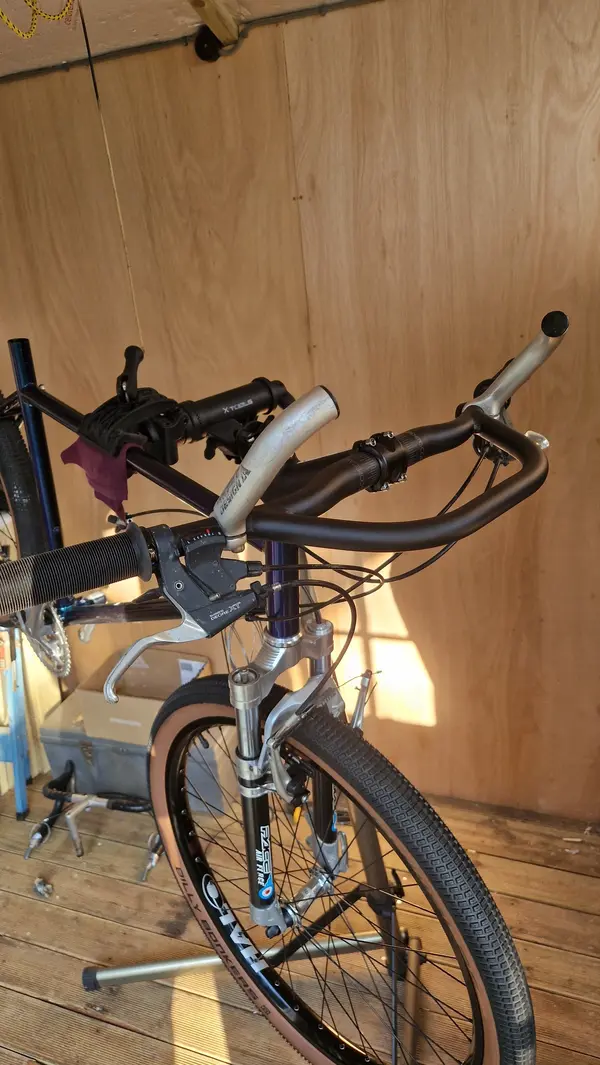
Moving up to the cockpit I decided that since this was to be a tourer I needed some more appropriate bars. I didn’t want drops or gravel bars and certainly not straight bars but something that was going to be comfortable. A lot of touring set ups use Jones H-bars but the large 45° sweep was just going to be too much for me. Alpkit did quite a lot of options so I went to try a few out in the store. After much deliberation I settled on Alpkit Scope bars with a 14° sweep which was the most comfortable for me. Onto these I fitted my existing Profile Design bar ends to give me options for hand positions and a set of Odi grips which I really like on my trials bike.
20250624_190535.webp


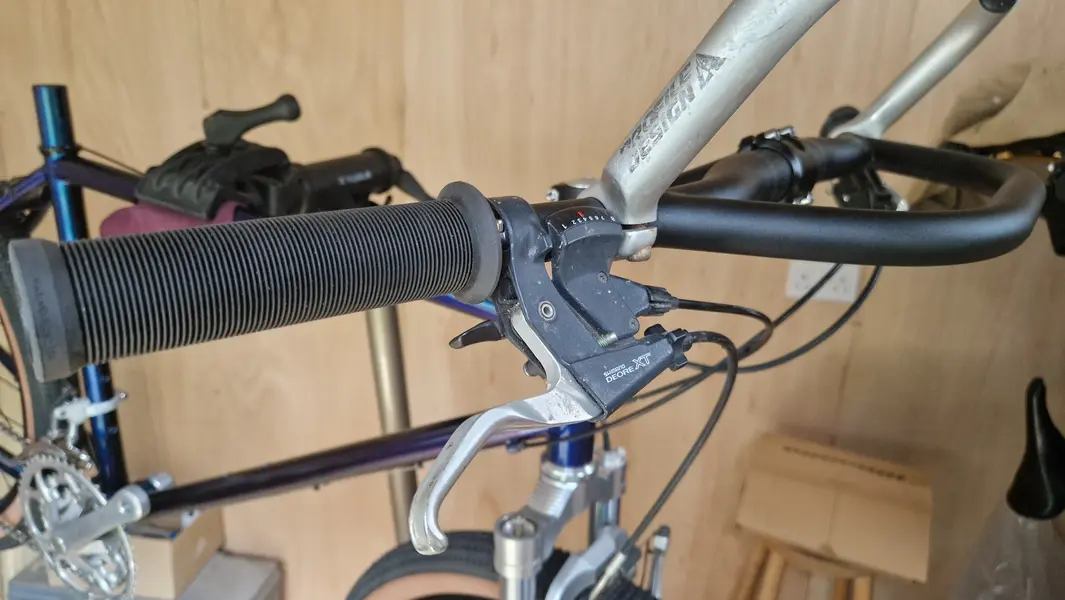
Brakes and gear changing were provided by the super reliable Shimano Deore XT ST-M738 brifters.
20250625_184230.webp


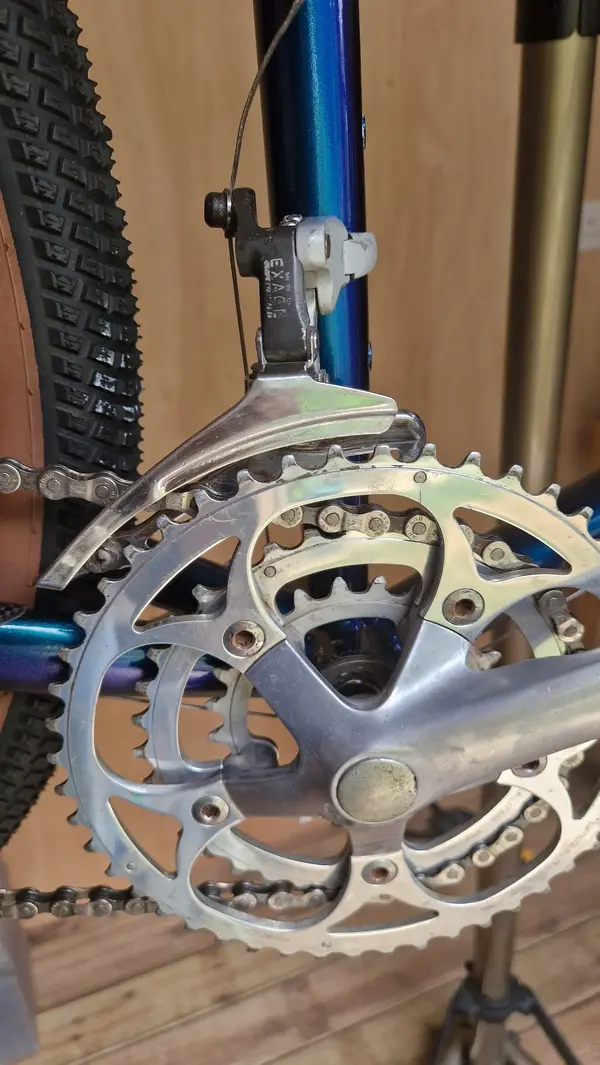
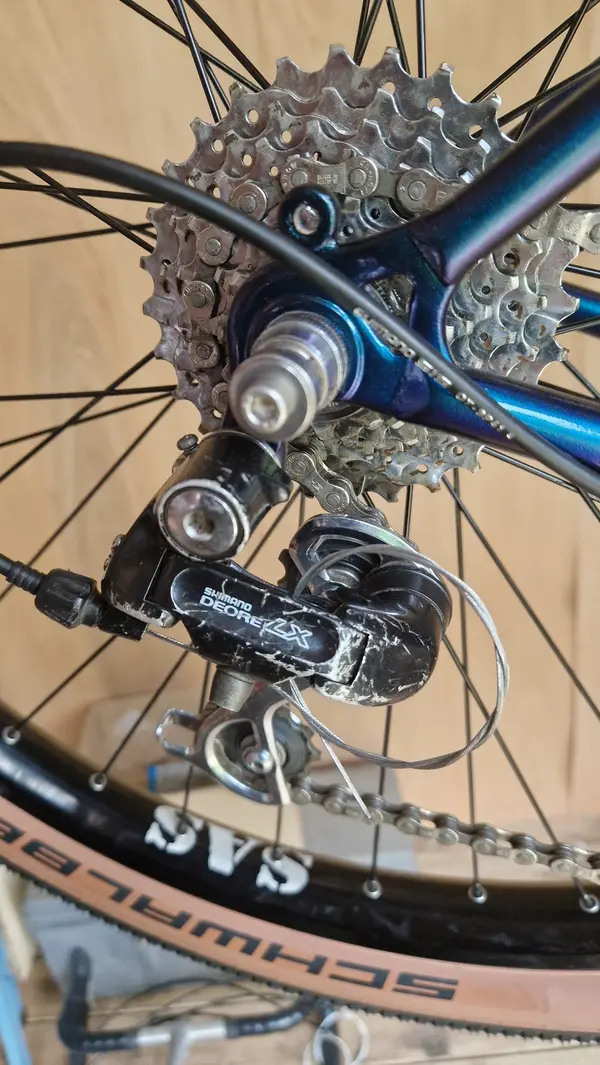
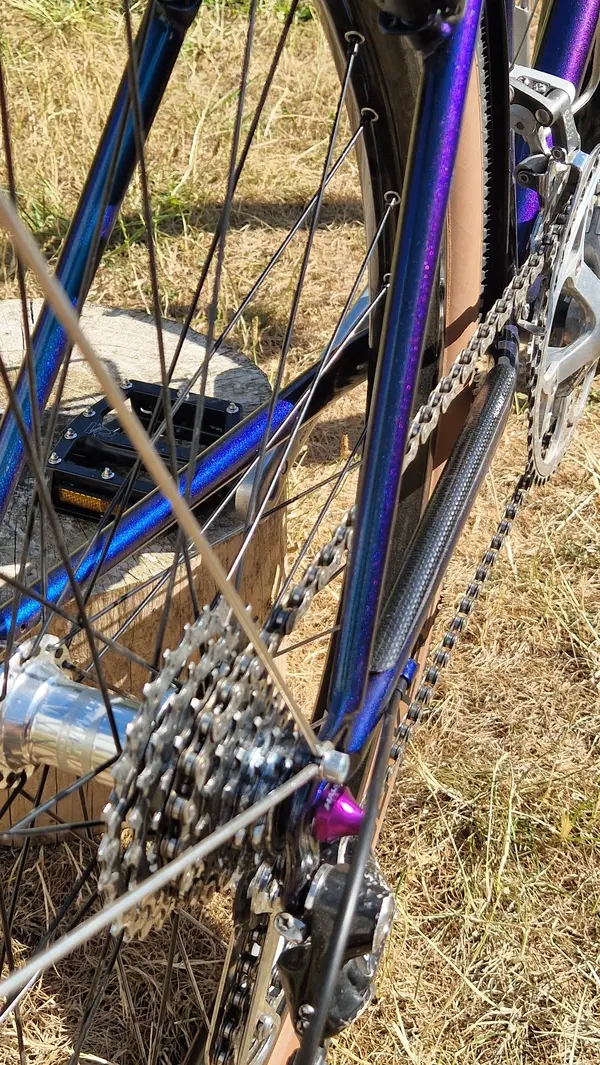
Derailleurs were going to be the original parts after a good clean up so on the front it was an Exage 3spd and on the rear the Deore LX
20250625_183824.webp 20250625_183818.webp


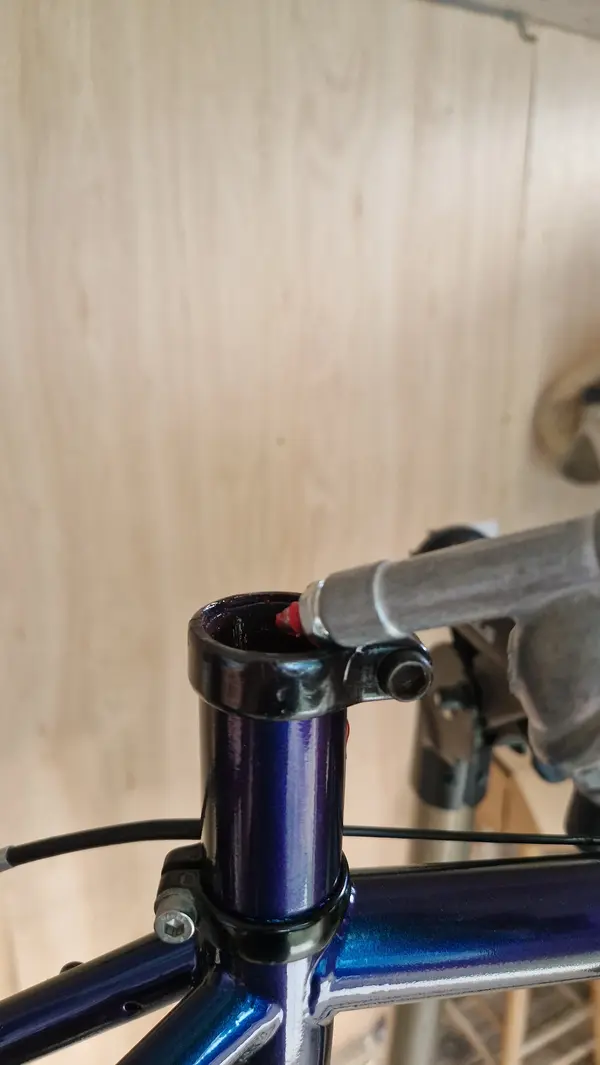
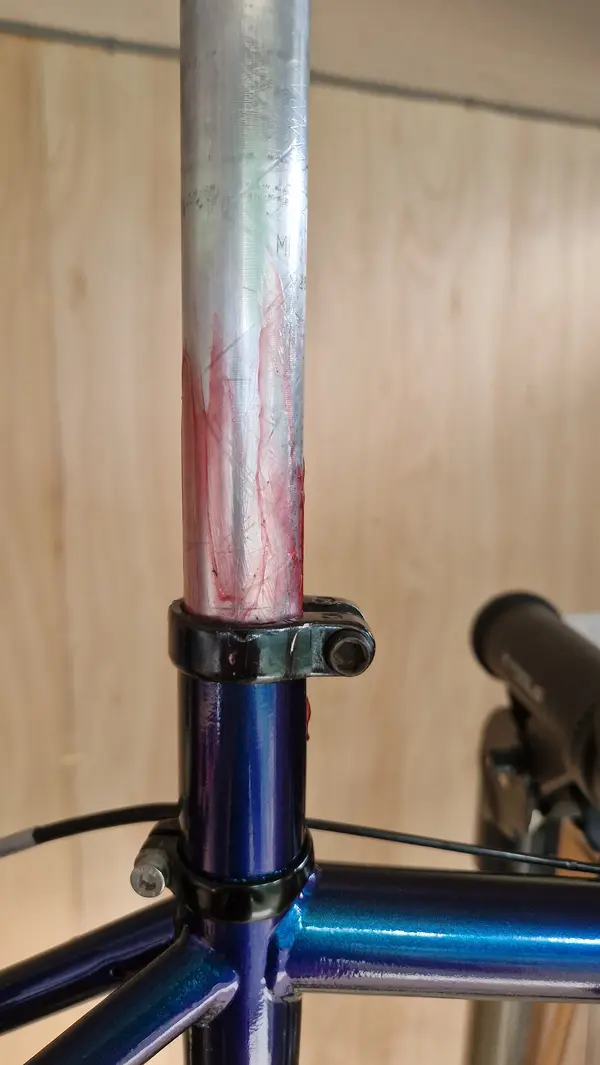
The final bit to fit for now is the seat post and saddle. Any Kona fanatics will probably know that seat post diameter was a bit hit and miss in the early 90s and several sizes were used. For my bike it was a 26mm diameter, not much chance of me swapping that out for a suspension seat post so back on went the original after a good greasing to prevent it seizing up.
20250625_192300.webp 20250625_192428.webp


My initial saddle choice was the same saddle that had taken me to all corners of the UK and that was a late 90s Selle San Marco Gel saddle which I found very comfortable at the time but that was over 20 years ago.


So the bulk of the build is complete.
20250626_172617.webp


In the next update I will move onto the final transition into the Kona’s touring setup, I will talk about the second unfortunate discovery and my solution to it and there will be some bonus material that makes this into a proper long distance touring machine.
 
So this is the final part I promise.

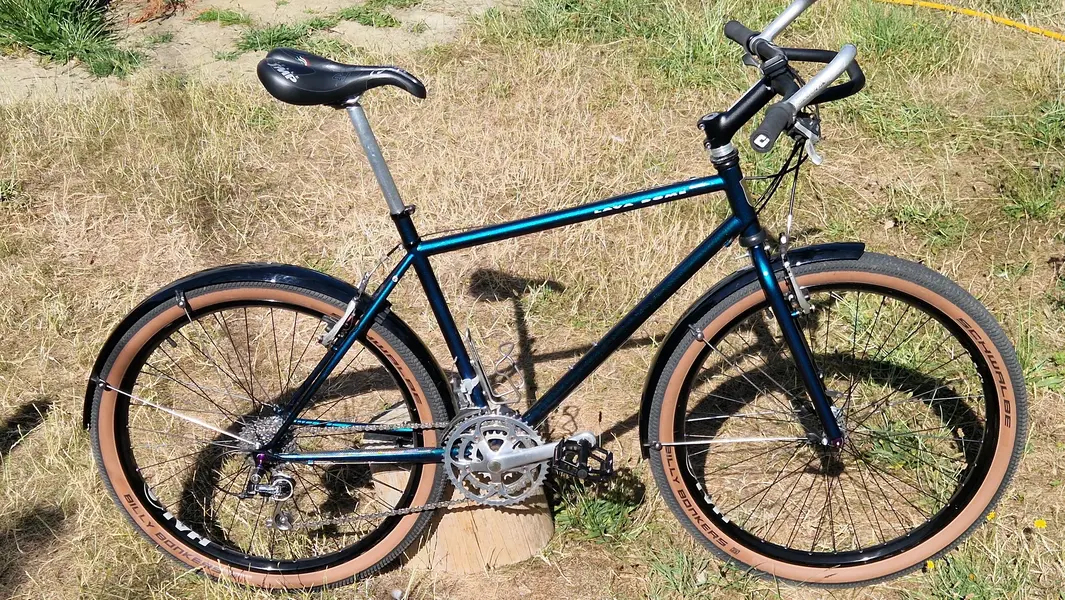
The transition to tourer starts with weather protection, yes I mean mudguards. Everybody hates them until they have to ride any sort of distance in pouring rain and they suddenly become tolerable. I wanted something neat that covered the tyres and was as stealth like as possible so I went for black, 60mm SKS Bluemels Mudguards.

I think they fit in quite well and are not so obvious. The bike looks green in this photo but that’s just the colour changing paint doing its thing.
20250712_093943.webp


You will also notice that there has been a change in the saddle. After doing an initial longish ride of the Kona I realised that what was a reasonably comfortable saddle 20 years ago still is but puts too much pressure in certain areas. After much YouTube research and browsing Ebay I came across a Selle SMP - TRK Gel saddle for a reasonable price and that is what I now have fitted. It feels harder than my old gel saddle but it really does take the pressure off and I can ride with this saddle for days with or without padded shorts.

“Hang on a minute,” I hear you cry, “what happened to the Pace forks?” Well this was the second unplanned discovery which I think will make more sense when you see this next photo.
20250626_191827.webp


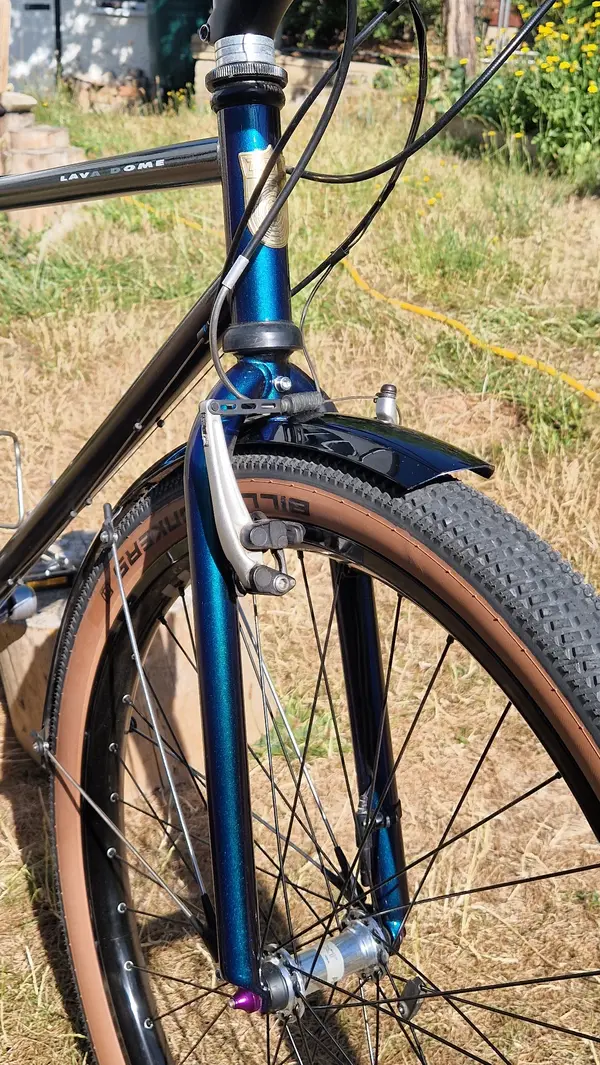
The combination of old retro forks and modern large volume tyres leaves no room for mudguards. I could have split them at the fork bridge but that would have just looked odd. Fortunately I had the foresight to spray up the Project Two forks at the same time as the frame so out came the Pace forks, replaced by the original rigid ones with plenty of clearance for mudguards. The Cane Creek headset was replaced with the original Kona Joe Murray Impact head set after a good clean and re-grease.

I think I actually prefer the look of the bike with these forks.
20250712_093454.webp


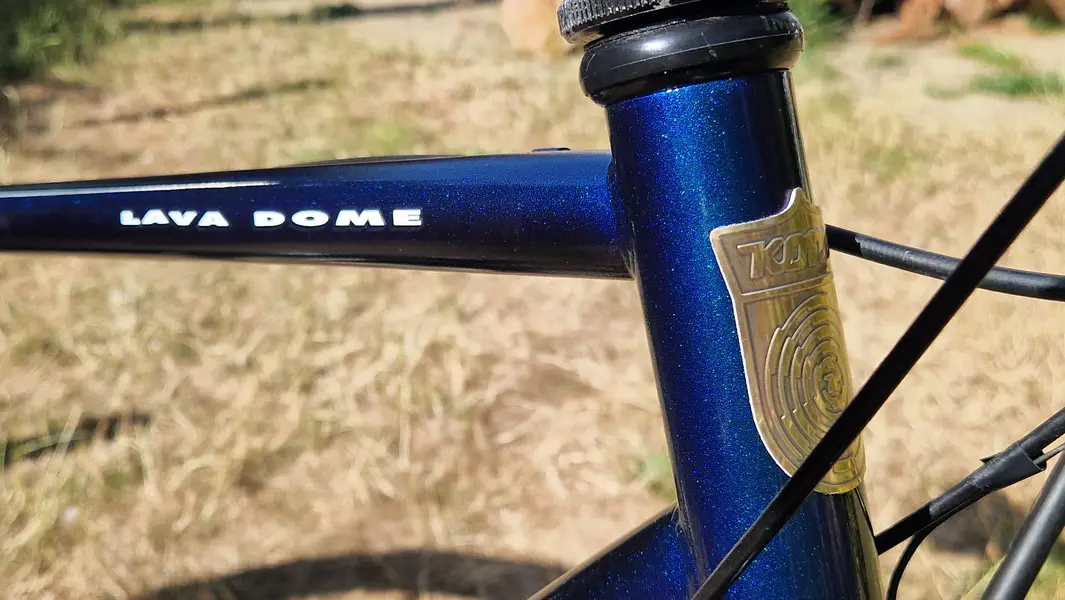
The final touches included a new head badge and some Lava Dome decals from H Lloyd. Thanks to Steve for working with me to get the right proportions for the lettering. I still have the main Kona down tube decal and fork decals to do but have been reluctant to add them just yet. I like the clean look with the simple Lava Dome lettering on the top tube.
20250712_094105.webp


A few more pictures of the finished bike.
20250712_094158.webp


20250712_094218.webp 20250712_093731.webp


So on to the bonus material.
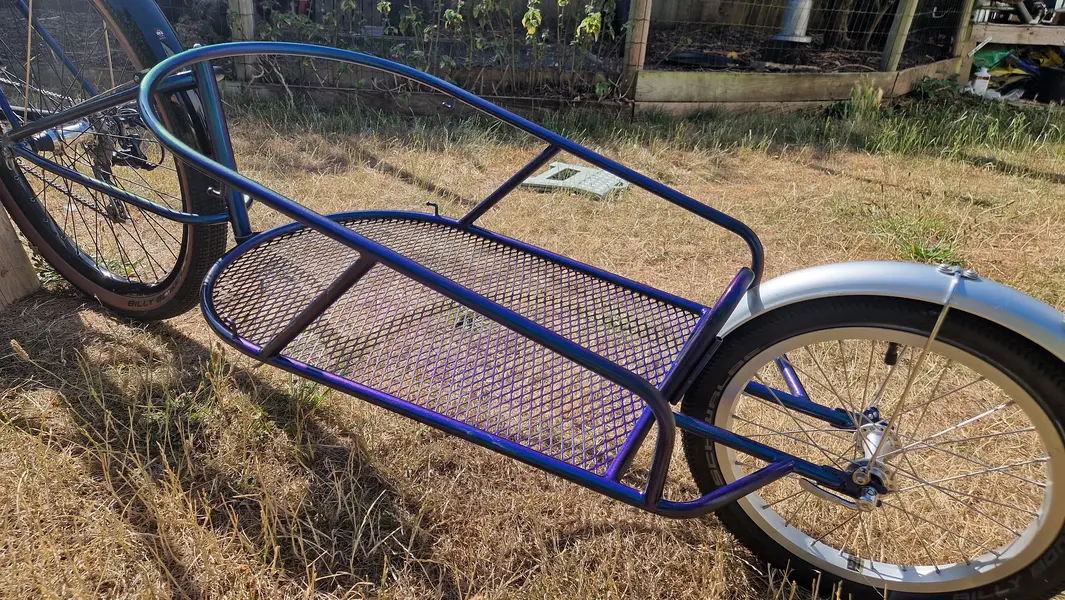
I may have mentioned that this is going to be a long distance tourer and that means unsupported trips on which I will need to carry plenty of gear. I am not a big fan of touring paniers, why would I want to cover up my bike so you can’t see it? so, whilst browsing I came across a reasonably priced Bob Yak trailer which I couldn’t say no to. I thought that was it, and we were sorted but my wife said the trailer needed painting to match the bike as it just looked tatty!

Back to the shed to remove stickers and a very badly done paint job with I think Hammerite before another marathon spray session.

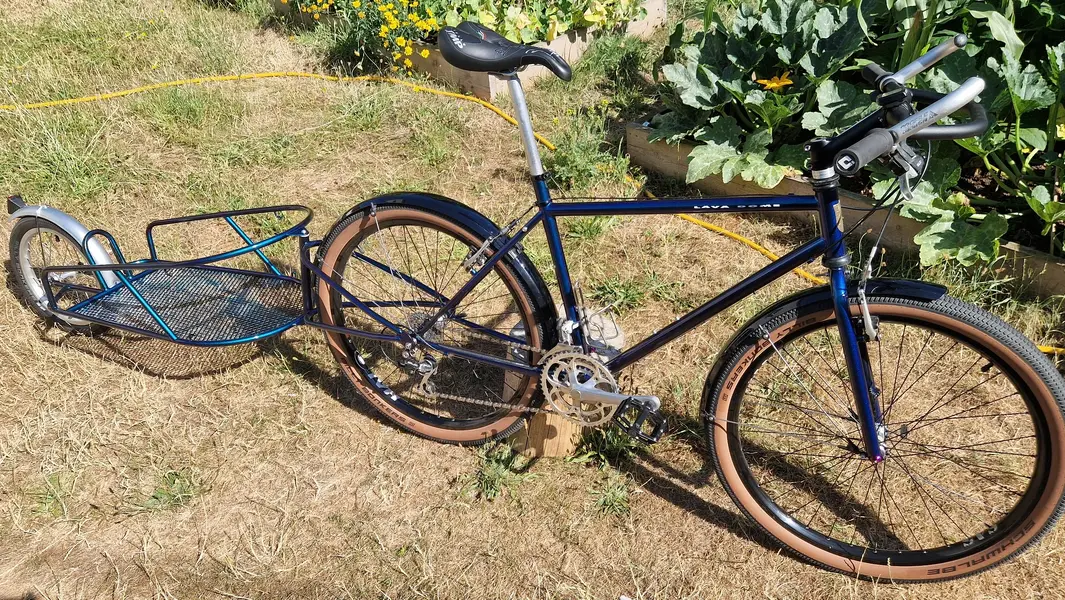
The result I think was worth the effort and compliments the bike nicely, what do you think?
20250712_094821.webp

20250712_095205.webp


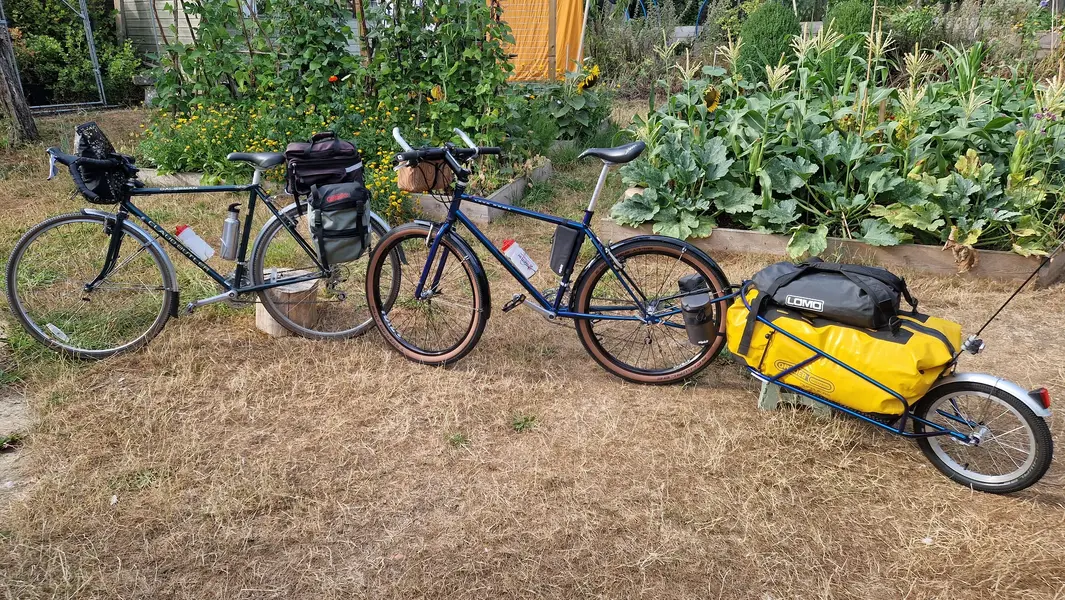
One Claud Butler Dalesman Tourer and one Kona Lava Dome complete with matching Bob Yak trailer ready for another Coast to Coast ride.
20250718_180351.webp

As of posting this build I can confirm the Coast to Coast ride is now complete and everything worked as expected. The Kona was as smooth and silky to ride as I remember and the additional volume tyres were a good choice. Whilst moving we averaged around 11mph which I thought was quite reasonable for loaded bikes and a trailer weighing just under 30kg.
We had no major issues but gear changes required constant adjustment on both bikes at the end of the day, I guess that's what happens when you re-use 30 year old derailleurs. I am now thinking about a couple of Rohloff 14 speed hubs for the future but I may have to look out for used ones.

If you made it this far, well done and thanks for reading. I know this is not an authentic restoration back to original spec but a good chunk of the bike is original and I have just customised it in a few areas to suit its new purpose.
 
That paint finish is incredible and compliments the bike so well,, well done sir!
2 things that my OCD would make me do :rolleyes:🤪,, spray the trailer mudguard gloss black and find a tan wall tyre to match the Kona.

Other than that all I can add is that I wish you many more safe and enjoyable miles on a well executed and rather stunning renovation
Thanks Scott.
I know what you mean about the mudguard and it was discussed but I ran out of time. The trailer tyre is the same Billy Bonkers tyre that is fitted to the bike but unfortunately the 16" option is not available with tan side walls. I tried really I did.
 
Thanks Scott.
I know what you mean about the mudguard and it was discussed but I ran out of time. The trailer tyre is the same Billy Bonkers tyre that is fitted to the bike but unfortunately the 16" option is not available with tan side walls. I tried really I did.
Ach pay no attention to this halfwit, he talks through a hole in his head that isnt liked to his tiny brain, just ride the tread off the tyres and enjoy every mile
 
I love this, i'm thinking of doing some touring in the future and i'm a Kona guy so you've given me food for thought. Be very interested to see how a Rohloff conversion goes. Congrats it looks amazing and i think the fork issue was probably for the better in the end especially with the bigger tyres.
 
Back
Top