1989 Fat Chance Wicked build thread

If you start obsessing about weight, drop the shimano brakes/ levers and go w/ dia compe SS 5/986 or 7. Also, keep an eye out for a 26.4 syncros seatpost. As for fit, don´t drop the bars too low; this bike is all about handling on steep terrain and it´s a lot of fun at it.
 
Hi Yaldie,

Apparently the SpecialtyRretroProducts BB comes with instructions of removing the existing BB from fats. I have asked here in another thread of how to do this and while I got very extensive and detailed descriptions I think it would be easier for me to see how SRP explains the process especially if they include pictures of the process. Would you be able to share some pictures of the instructions here in This thread? Thanks!
If you google fat chance press in bottom bracket maintenance or removal, you will find some descriptions on how to deal w/ it. A mallet and some brute force is required so if you are doing it on your own get as much info as you can before start. At the end is no big deal. Buy a new set of bearings making sure your axle is compatible. I hear phil wood bearings have a slightly different diameter and they sell axles too but then you will be spending more than necessary.
 
Hi Yaldie,

Apparently the SpecialtyRretroProducts BB comes with instructions of removing the existing BB from fats. I have asked here in another thread of how to do this and while I got very extensive and detailed descriptions I think it would be easier for me to see how SRP explains the process especially if they include pictures of the process. Would you be able to share some pictures of the instructions here in This thread? Thanks!
Hi mate, it did but I don’t think I kept them. They were pretty basic though. If the bearings are dead then I would remove the spindle and tap them out with a hammer and punch. When reinserting the only pearls of wisdom from the instructions was to use loctite on the bearings (I can’t remember which type). I used a steel brush on a drill to clean out the shell and a bearing press to insert the bearings.
 
Hi Yaldie,

Apparently the SpecialtyRretroProducts BB comes with instructions of removing the existing BB from fats. I have asked here in another thread of how to do this and while I got very extensive and detailed descriptions I think it would be easier for me to see how SRP explains the process especially if they include pictures of the process. Would you be able to share some pictures of the instructions here in This thread? Thanks!
Instructions are pictured in this thread

 
Hi Yaldie,

Apparently the SpecialtyRretroProducts BB comes with instructions of removing the existing BB from fats. I have asked here in another thread of how to do this and while I got very extensive and detailed descriptions I think it would be easier for me to see how SRP explains the process especially if they include pictures of the process. Would you be able to share some pictures of the instructions here in This thread? Thanks!
Around 36 minutes into the following video shows you how to do it

 
Returning to this build thread after a few months of not doing anything remotely connected with retro bikes partly due to unemployment since March and partly due to kids getting in the way of fun with retro bikes. You would have thought the spare time in my day Monday to Friday would have spurred me on but it’s been a full time job to find a job and I lost all motivation to do anything fun for a while.

I did however do some tinkering today

Update on the paint red rash, I bought G-Paint touch up paints per a video I saw on YouTube,
. I followed the process and just couldn’t get a good match on my test spots that I did. I don’t usually touch up the paint on my bikes but I might revisit this in the future.

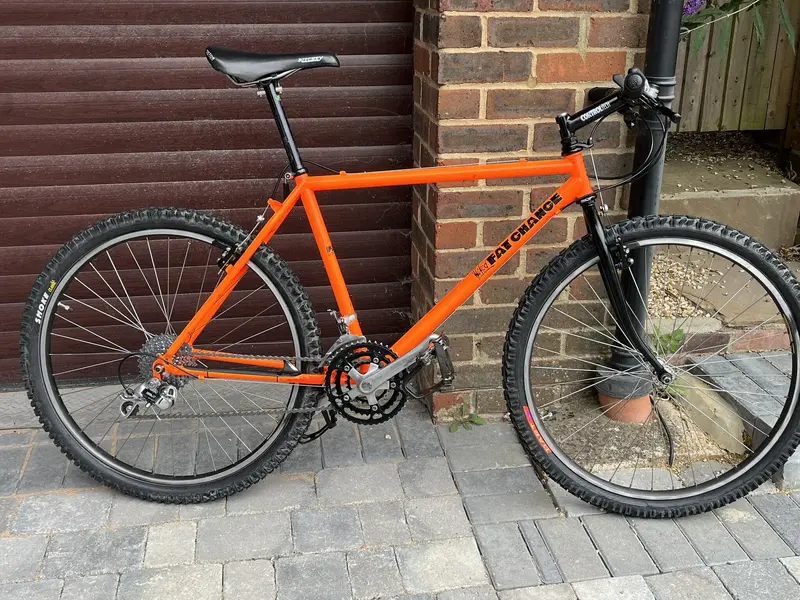
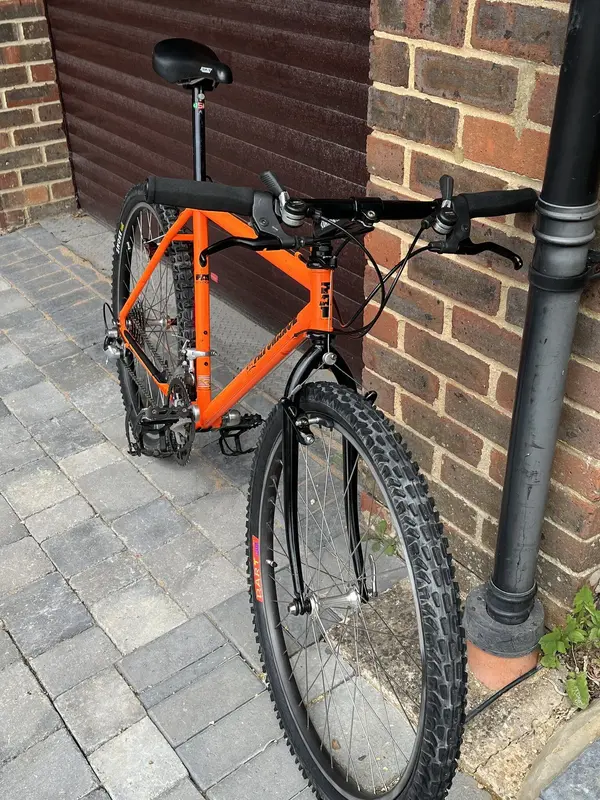
So for now I have put a basic build together.

I have gone for:
Black smoke and dart tyres (new)
Ritchey saddle
Black use seatpost. I struggled to find an alternative to this in a 26.4 sizing, but I am a USE seatpost fan so it’s fitting for me to be on this bike.
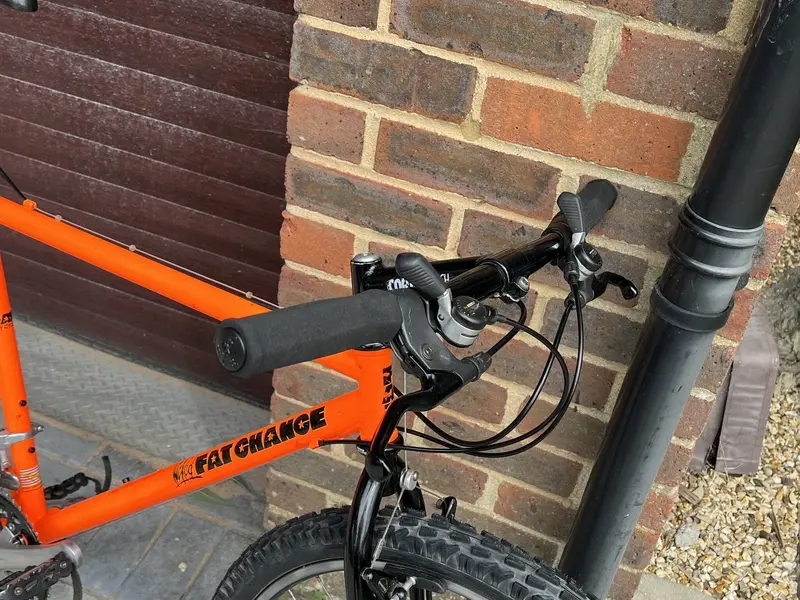
Control tech stem and generic bars. The nos tbone stem will go back into its box.
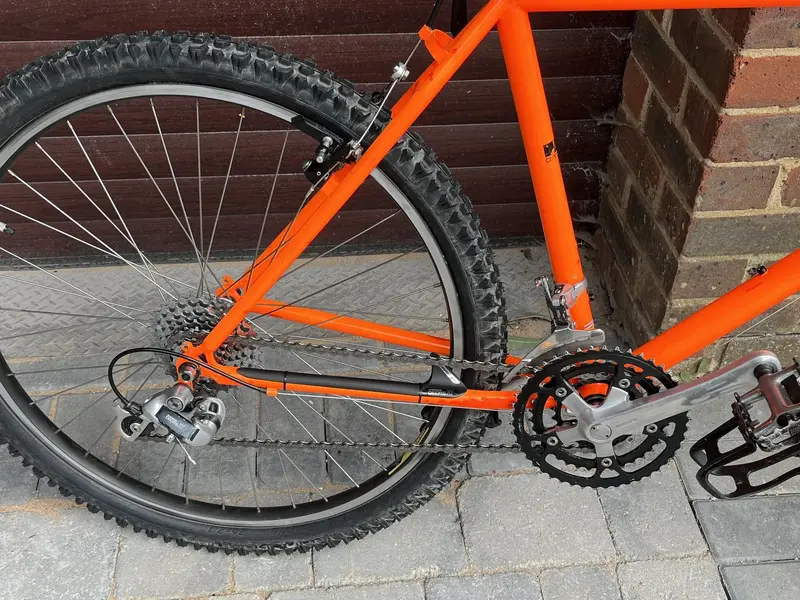
Xt: chainset, headset, cantis, thumbies, rear and front mech. I describe these as fair condition, I might change out the front mech for a better one when I can get round to it.
Dx hubbed wheels, as I am in ‘spend no money until I am employed mode’, I have bridged the gaps on this with parts I have laying around.
Nos sharkfin which I picked up for £20 on brick lane bikes, they still have stocks of these although mine came without the tape strip, so it’s attached with a couple of zip ties.

Annoyingly there is a snapped water cage bolt in the frame. When I say there is a snapped water cage bolt I mean I snapped the water cage bolt into the frame being over zealous. Luckily it’s very soft alloy, so I will drill it out carefully tonight and be more careful in the future.

Some pictures for the masses.
 

Attachments

  • IMG_2030.jpeg
    IMG_2030.jpeg
    790.8 KB · Views: 72
  • IMG_2034.jpeg
    IMG_2034.jpeg
    781.6 KB · Views: 68
  • IMG_2033.jpeg
    IMG_2033.jpeg
    640.2 KB · Views: 42
  • IMG_2032.jpeg
    IMG_2032.jpeg
    715.9 KB · Views: 41
  • IMG_2031.jpeg
    IMG_2031.jpeg
    745.2 KB · Views: 69

Latest posts

Back
Top