Rescuing a Pace RC200 F4 Frame

porschenut911":3ozfgayj said:
As a TIG welder and long time pace owner I've never been that impressed by the welding on some of the frames. Out of the ones I've owned (100, F3, F6 and 2x 300's) the F3 had the best welding.
That's good to know, now a bit less worried about my f3 that will one day get built up.
 
Re: Re:

danson67":4gw8xb1s said:
OK...I thought I'd take on this repair for Papillon...

Thankfully, it doesn't appear to have had the seat tube cut out for no reason...That would have been sacrilege.
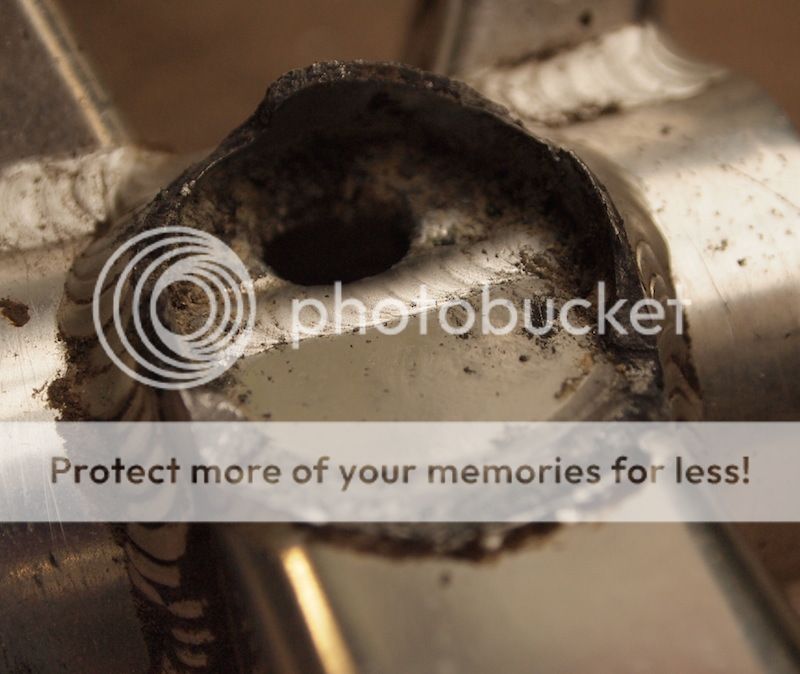
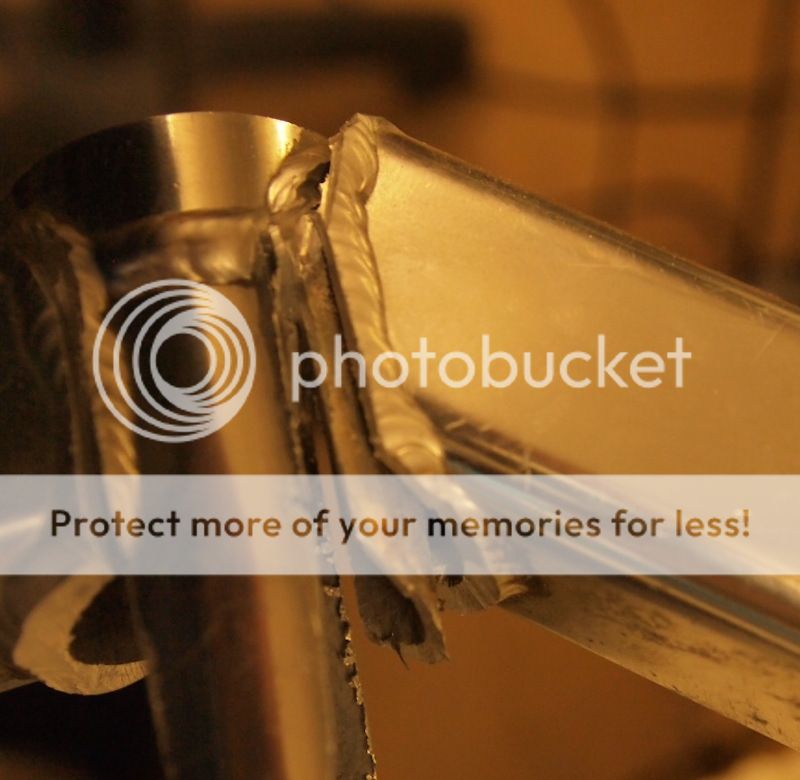
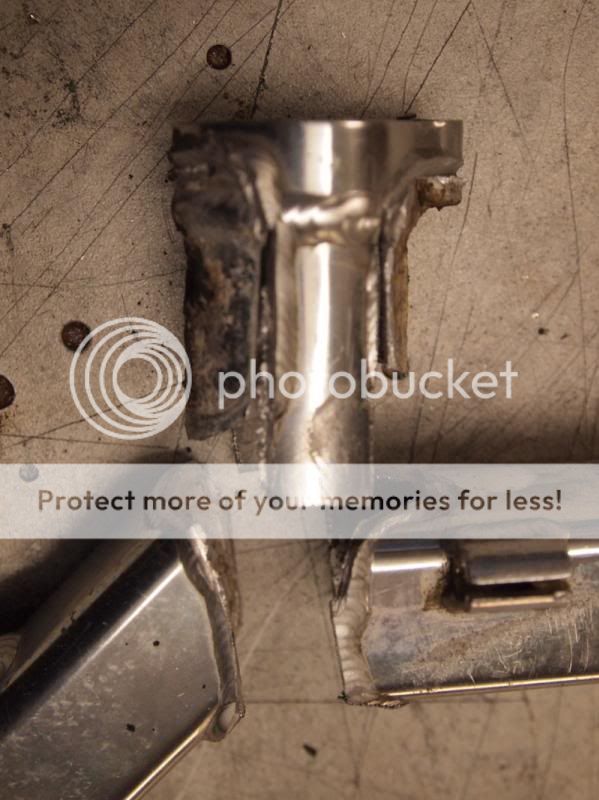
The original seat tube had cracked around the BB weld:

P4022345_zps7a498484.jpg


And later been cut off at the seat tube junction:

P4022348_zpsbd3c6911.jpg


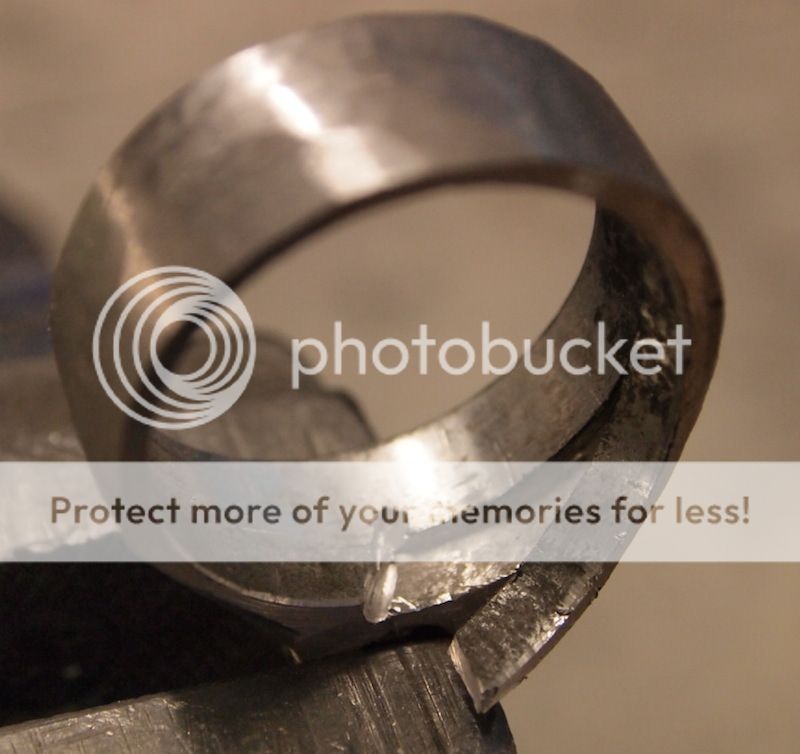
Hardly surprising it broke... as the original tube seems to have been a 32mm plain gauge tube with only a 1.3mm wall.
General practice on an aluminium frame would be to run a double-butted tube, 2.2mm-ish at the BB end, 1.3mm-ish in the central section, back out to a short section of 1.6mm at the top, to give a sensible 28.6mm seatpost fit.

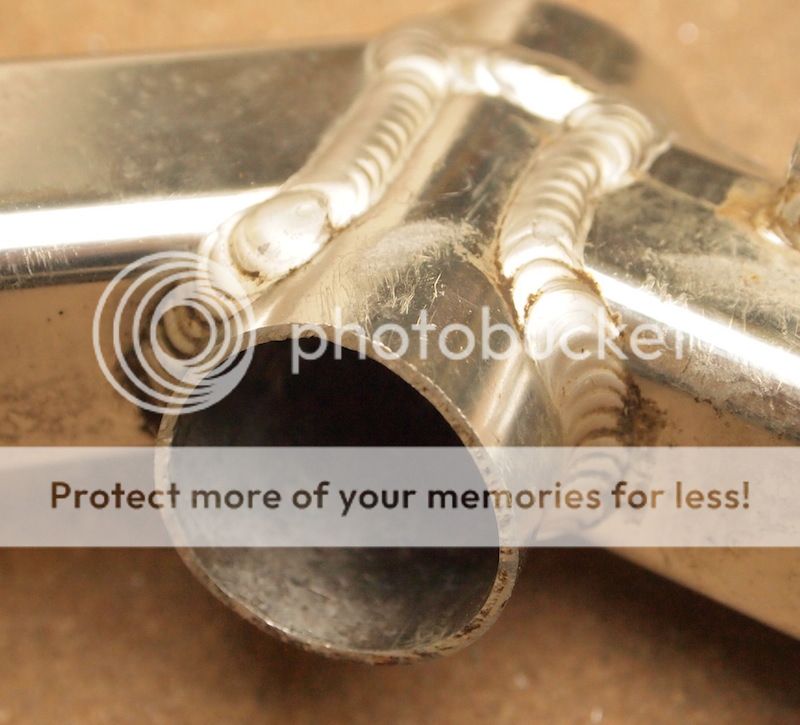
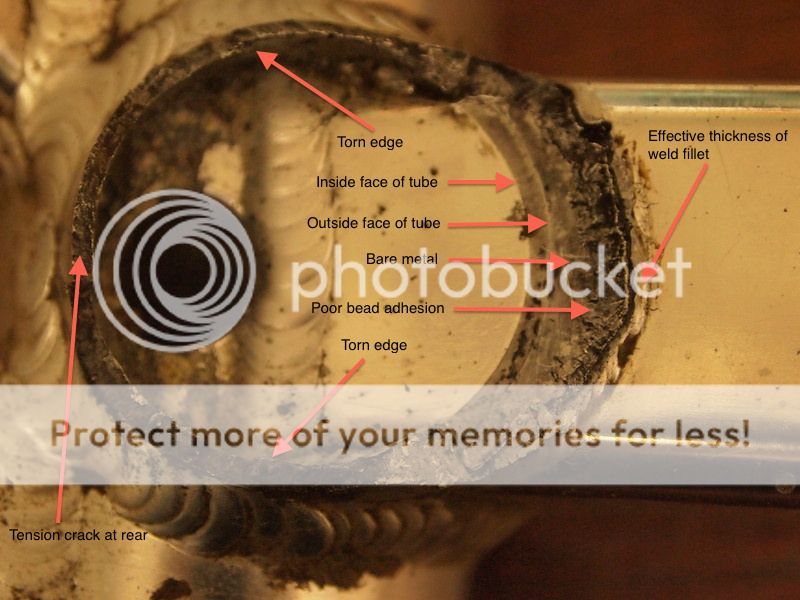
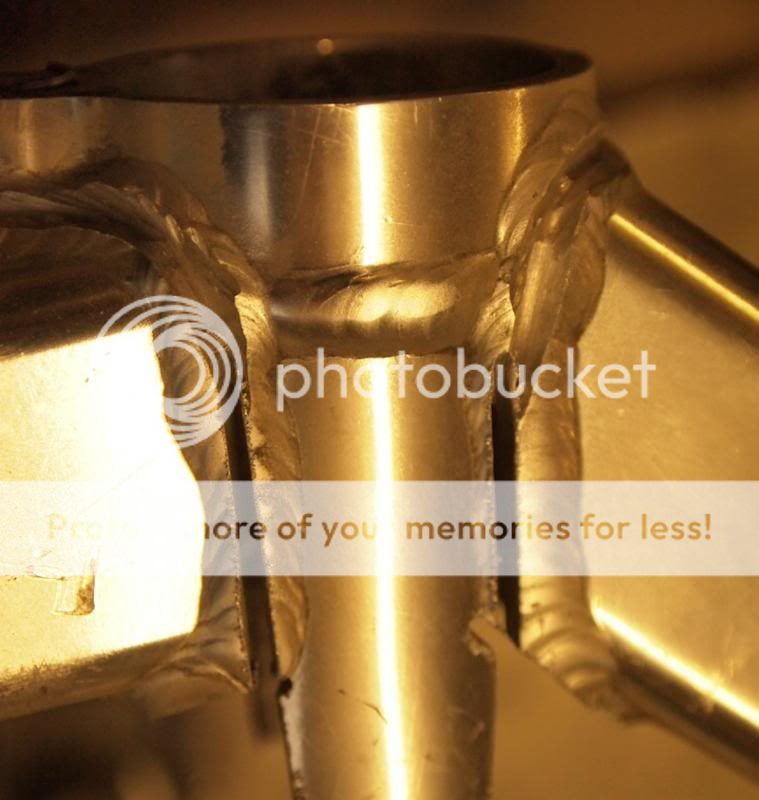
On closer inspection there's some very shallow weld penetration at the front, with a section where the weld pool has touched, but not adhered to, the downtube surface. Also, the eagle-eyed of you will have noticed that the seat tube has been welded on second, after the downtube; the reverse of normal practice with lugless brazed or TIG welded frames.:

P4022352_zps60a67a91.jpg


I'll be keeping a closer eye on my RC300 after seeing this...

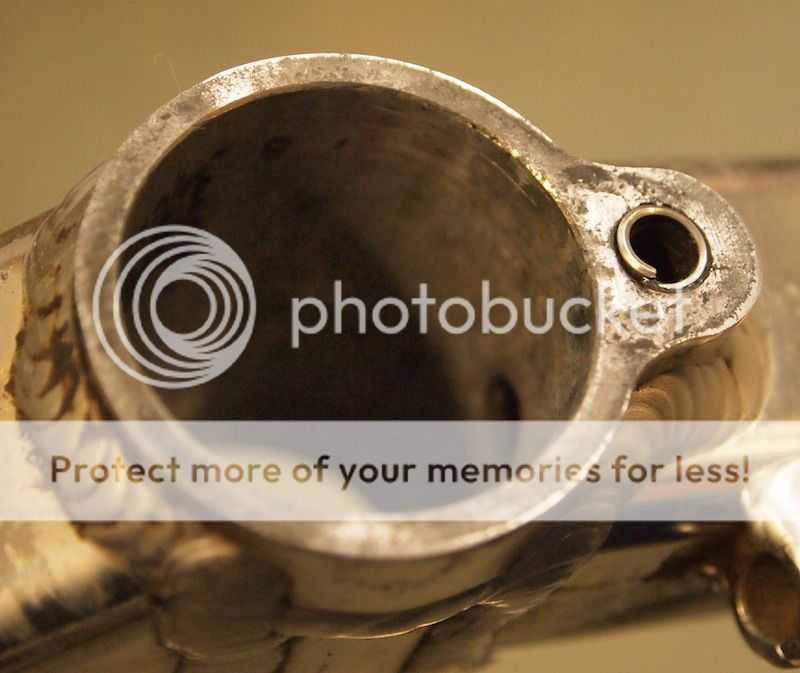
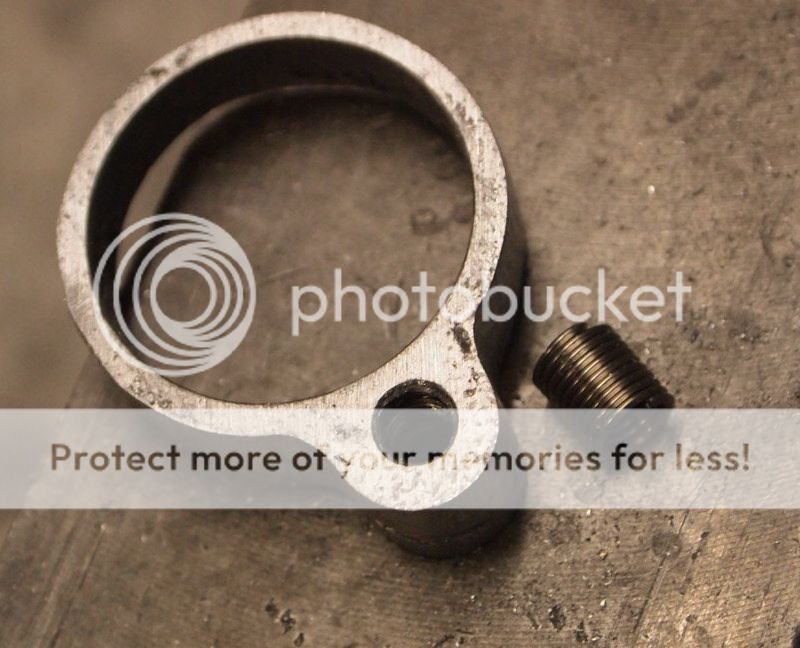
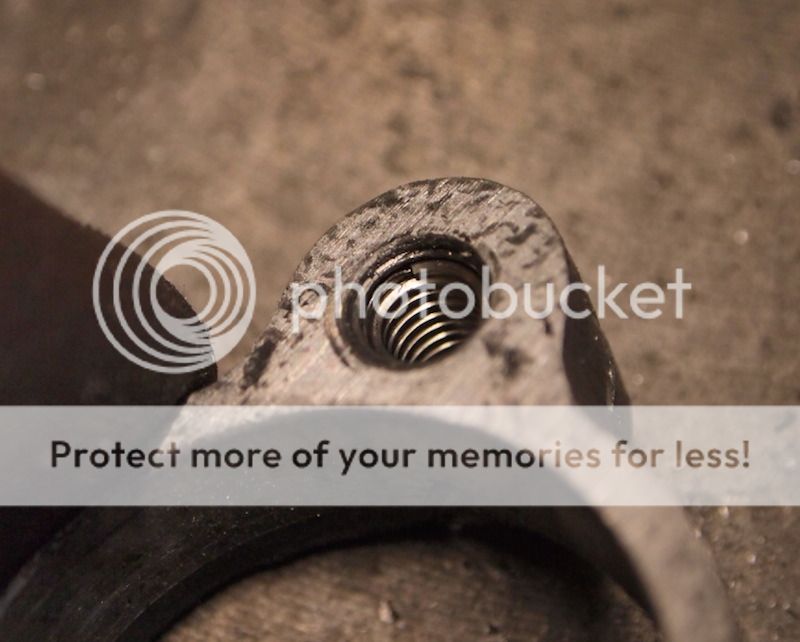
The plan is to clean up the BB shell, removing the anodizing where it will be welded, cut out the stub at the seat end, separate the top ring, replace the pulled helicoil thread and un-anodise:

P4022349_zps289c9316.jpg


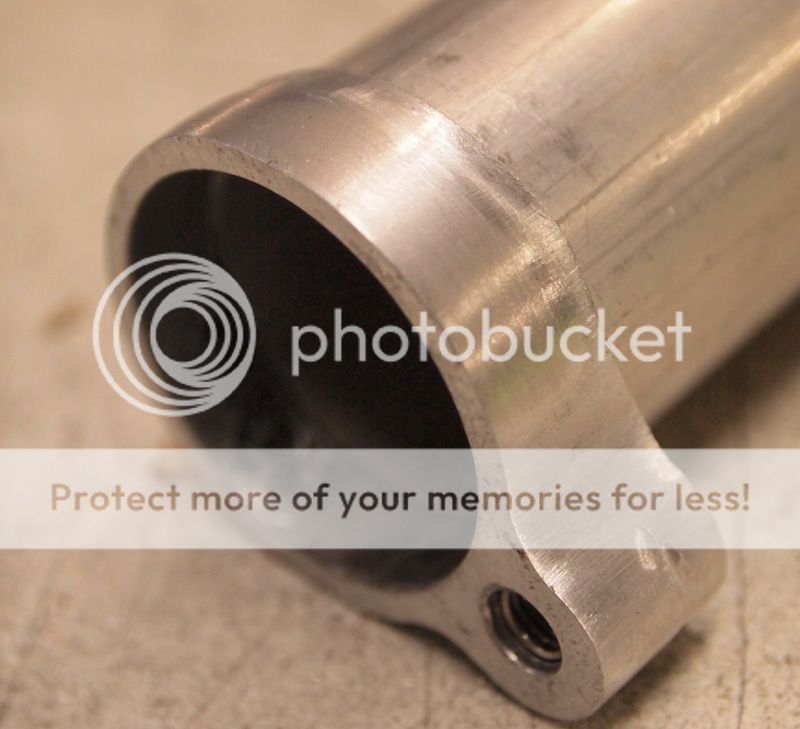
Clean off the old weldment from the frame tube ends. Then re-weld the top ring onto a new seat tube, with an appropriate 1.3mm wall thickness to be able to keep the original (weird) 29.4mm seat clamp. The upper end of the set tube is well enough supported that I think this should be OK, without the additional strength of a 1.6mm thick butt. We'll see...

Papillon wants me to take off all the cabling and brake fittings to make it more sleek for his fixie project. Offended POP (Pace Originality Police) enforcement messages to him, please :D

All the best,
Think it will look cool as a fixie :)
Papillon
 
Re: Re:

Papillon":2592wyzq said:
danson67":2592wyzq said:
Papillon wants me to take off all the cabling and brake fittings to make it more sleek for his fixie project. Offended POP (Pace Originality Police) enforcement messages to him, please :D

All the best,
Think it will look cool as a fixie :)
Papillon


Papillon you do know what all fixie uber cool riders are don't you? OXYGEN and THEFT comes to mind so please keep it whole if not for you but for the next owner after you
 
Re:

Or at least change the thread title to something like "rubbing salt into the wound" or "adding insult to injury" :LOL:
 
OK...progress report. Picture heavy:

It's got to get a whole lot worse before it can get better...

1: Cut off tube remains at BB shell. Don't fancy using caustic soda etc, so file and wire brush off anodising around area.
Not great finish, but there are too many nooks and crannies to reliably neutralise the CS in time. Fine for an industrial process, but not here.
Check removal by colour and feel change, backed up with multimeter..anodising is an insulator, so no continuity ;)
Might still need a light blast to remove the anodising completely. Maybe do a small test to assess the slag in the weld pool...

P4072364_zpsadc3c175.jpg


2: Up to the top...Cut into weld roots on the top with small cutting disc on Dremel. Careful, want to keep this bit.
And then cut the tubing I don't want with something a lot bigger...angle grinder + cutting disc:

P4072368_zps7606cddc.jpg


3: Wiggle, Prise & Lever (that fine company of Solicitors... :) ) out the stump, taking care to slowly ease apart any remaining weld material. Don't want to kink the tube ends.
This should leave most of the original tube mitring intact:

P4072370_zps94cf60b4.jpg


Ooh, switch the white balance on the camera...that's better :D

P4072371_zpsd0faea2e.jpg


4: Now to get that top clamping section out cleanly. Part off the scabby old tube remains from the clamp at the weld line on lathe.
Small cut on inside of the tube at the thickest section and peel out remaining ring of seat tube:

P4072372_zps29b177a0.jpg


5: Pull out remains of damaged 5mm Helicoil and replace with new:

P4072373_zps190a9729.jpg


One turn deeper than the original. Fully supported, so it shouldn't pull out so easily in future:

P4072374_zps38f0f405.jpg


6: Quick sand and polish..not too bad. The lower edge will be included in the weld when the seat tube is fitted.

P4072375_zps57be538e.jpg


Just have to wait for the replacement tube to turn up now...

All the best,
 

Latest posts

Back
Top