Downland Cycles advanced bike mechanic course, update 12/7/15

Re:

right, i thought i'd do a bit of a continuation of the stuff i'd learnt by proving that this stuff can be done at home with mostly normal tools.

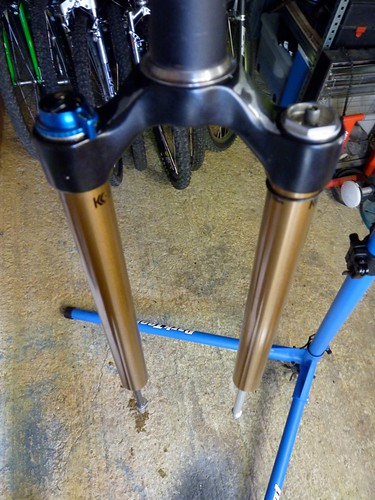
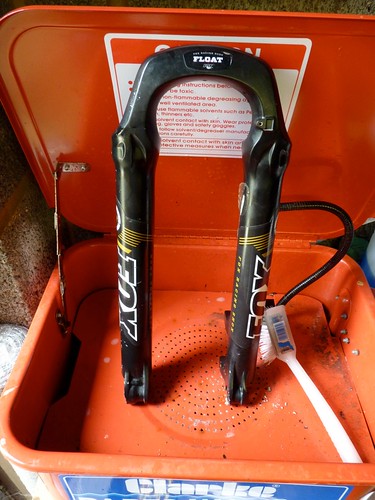
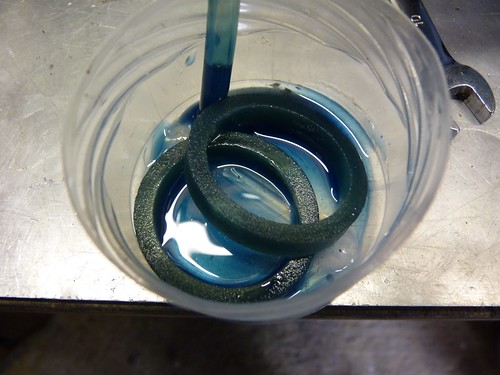
first thing was my friend Ben's fox forks, a lower service. these are pretty much the same as rockshox for a lower service, one small difference is the fact that the rebound adjuster has a grub screw on it, so don't forget to remove this before trying to pull the adjuster off.


P1130421 by Dr. Branom, on Flickr


P1130418 by Dr. Branom, on Flickr


P1130419 by Dr. Branom, on Flickr


P1130420 by Dr. Branom, on Flickr
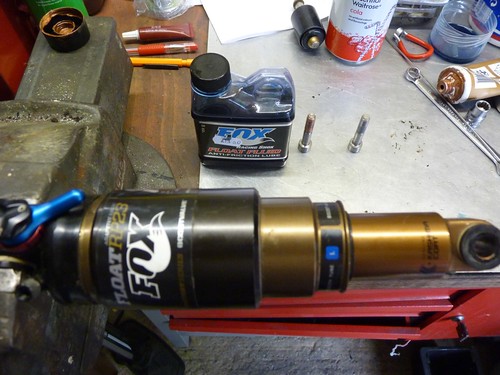
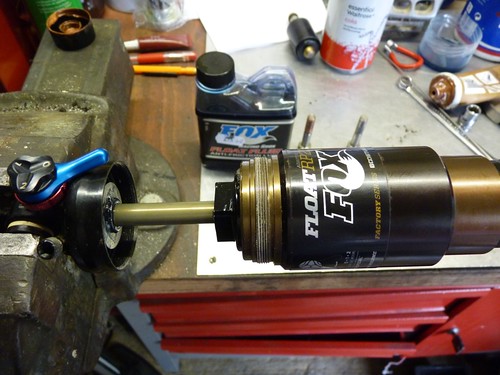
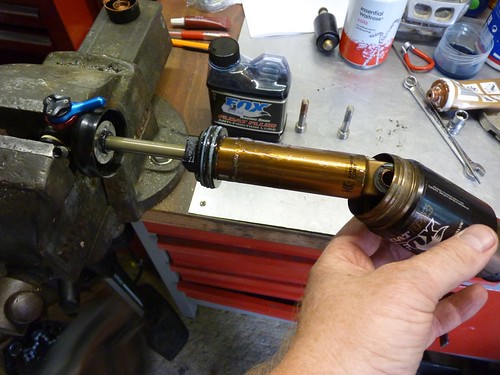
then his shock:-


P1130422 by Dr. Branom, on Flickr


P1130423 by Dr. Branom, on Flickr


P1130424 by Dr. Branom, on Flickr


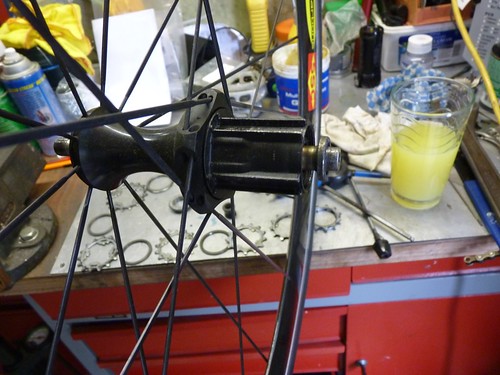
after this came my Mavic Cosmic rear wheel, again simple to service and something i have never done :facepalm: until now:-

P1130425 by Dr. Branom, on Flickr


P1130426 by Dr. Branom, on Flickr

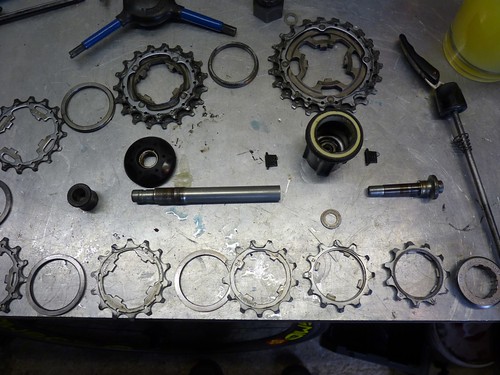
the parts in the middle of this pic are the parts from inside the hub, 2 pawls and springs, the axle in 2 parts and the freehub body and one washer and that's it!

P1130427 by Dr. Branom, on Flickr
 
Re: Re:

jonnyboy666":2nht26gn said:
it sounds silly but we stripped and rebuilt some shimano tiagra hubs, "simple!" you may say! and i would have agreed but then i learnt why we were doing this. setting up the cones on a normal ball bearing hub is not quite what i thought, i have always adjusted the hub so that there was no play in the hub, then put it in the bike and thought, yep! that's done! turns out all these years i had been slightly wrong (read the manuals if you don't believe me!) basically the way to do it is to leave a tiny bit of play in the hub and i do mean tiny, when this is done the wheel is replaced in the bike, when you do up the quick release skewer the play is then gone because the QR compresses everything slightly taking the play out of the wheel bearings! not doing this can be as bad as leaving play in the bearings as both can cause wear in the hub bearing tracks.

Well now that is a revelation. I'm from a road background and for years this was the absolute norm with Campag cup-and-cone hubs.

Generally I tighten them up with no play, then back off about a quarter to a third of a turn.
By far the "worse" axle to compress was a crappy cheapo Miche hub - made from some mild
alloy steel putty material.

Now, I have some NOS Shimano LX M560 / M565 hubs and from the factory the cones are
far too tight; hell they even feel gritty without ever being used! I will sort them out, and also
replace the steel axles with Cro-Mo while I'm at it to make them more like XT hubs. Nice to
know Shimano seemed to have learnt something on the way about their own products. :roll:

I wished I could say the same about the pedals because unfortunatly I always find
them sloppy with too much play from the factory - only the XTR seem to be about right.

Really great write up, and I'm impressed that they let you loose on some fairly high-end
modern kit to pull to pieces (and potentially hit with a hammer and throw at the wall in frustration).

Would have been interesting to see a report on canti set-up ;)
 
Re: Downland Cycles advanced bike mechanic course

Also, if you can service those Mavic Cosmics, then you can do Crossmax too - virtually no difference. Crossrides are a little different needing a cone spanner, although they still have sealed bearings.
 
Re:

actually alot of the higher end stuff we worked on was broken/crash damaged stuff, i'll explain, Downland Cycles was a shop in Canterbury itself but as i understand it the land the shop was on was sold so they had to move, they were already doing the training courses at the shop so they decided to concentrate on that more than being a shop, this is why the training centre is in the middle of nowhere, literally the middle of nowhere! i view this as a good thing (for the trainees) because it means that the instructors are not disturbed by customers which means the trainees are not disturbed either. they do still accept customers for repairs though but on a smaller scale.

the stuff we work on is mostly bought brand new, rockshox and hope etc, these are stripped and rebuilt a huge amount of times, once they are out of date/worn they get binned though as they can't sell them after all that constant stripping. the top end wheels however, most were used, from when they were a shop, they are old wheels from workshop jobs where the customers were happy to leave them because they were dead. if they bought a load of brand new wheels like cosmics and fulcrums etc it would cost them a fortune! also being used it meant we could see the effect that wear marks have on the various hub designs.

we were also shown what we would be expected to replace as part of a hub service, for example, a mavic ksyrium wheel, you'd replace the hub pawls and springs, and the rubber seal, bearings only if needed. also the zircal aluminium spokes, mavic only sell them as a pack per side of a wheel, this is because if a customer brakes a spoke the tension increases on all the others, which overloads them, some people/shops only replace the one spoke and give the rest to the customer, then the customer brakes another spoke, so gets one put back in, and again he breaks another spoke and so on, you replace the whole lot as other wise spokes will just keep breaking on them, mavic insist that the way to do it is to replace all the spokes from the side that the spoke broke on.

also alot of their examples to show different designs are from places like the mavic service centre, obviously mavic get alot of stuff sent to them for service but is past the point of serviceable, or is broken so they send the broken parts (hubs etc) to Bryan so he can then show people the different designs and how to strip them, they do this for him as they get alot of spares from them and it's in their interests to have mechanics around the country who are able to service their products as it means they'll naturally sell more of their spares.
 
Re:

Even I could have told you about leaving a bit of play in cone bearings, tightening the QR takes the play out and leaves the bearings perfectly adjusted. I find Calvin Jones 'Big Blue Book of Cycle repairs' invaluable when it comes to getting the right information.
 
Re:

i suppose it's one of those things that you were taught or not, i never was, i was taught to get the hub as smooth as possible with no play, now i know different which is a good thing, and that to me is the point of the course.

:)
 
Re:

You were right, the Rebas were much easier than I expected.
Mind you, I did have to kill a rubber hammer before I could take the lower legs off. Normally a few light taps should be enough to break the stiction, but that wasn't the case on the left-hand side.

The grease in the air chambers was still perfect and the o-rings were covered with nice clean oil, so I didn't even have to do any maintenance to the entire upper left leg. I only added spacers and that was it.
I can't believe that my former LBS turned me down because it would be too expensive in labour to add those spacers. what a <use your imagination>

However the lower legs did require attention. The dust caps and the foam below were completely dry. 10ml of Redrum on the foam (5ml per leg) and some grease on the inside of the dust caps worked miracles.
In fact it's now better than new because it always used to have some initial friction which caused it to remain rigid over small stuff (like gravel). Now it'll respond to the slightest change in weight, so I can't wait until my brakes arrive so I can test it on the road.

After lowering, I now have to run much higher pressure though. When it was set to 100mm travel, I was running 105 psi positive and 110 psi negative. now it only has 60mm travel left and the sag indicates that my starting point for the whole setup procedure is around 160psi. (that's with 25% sag, which is a bit much for road use really). It'll probably be near the 180-190 psi mark by the time I'm done messing around.

-----

Did they teach you by any chance how big/deep scratches on the upper stanchions can be before you need to bin them?
(no worries, not my main Rebas but a 2nd hand set I got for next to nothing)
 
Re:

told you it was easy!! :D

basically the scratches are ok until oil starts coming out of the seal but if it's bushing wear you should get new uppers and new bushes in the lowers, and the bushes are more for a pro job unless you want to buy those tools which are quite expensive.
 
Re:

hmm ... they ARE leaking, but it's on both sides whereas the scratch is only on one stanchion. Bushes seem okay, I checked it for play when I bought it.
They were accidentally stored upside-down when they started to leak and there was quite a bit of oil involved. In fact there was more than half a glass in the thrashbag I stored them in, which is way more than the 5ml that's supposed to be in each leg. So either they were over-filled or the damper is leaking too.

Oh well, I'll open them up, check everything, re-grease and re-oil them according to the correct specifications, rebuild without actually changing a single part and see what happens.
If they still leak after that, I'll take it from there. I don't think SRAM will have 2005 uppers and lowers, and if they do it'll be expensive.
 
Re:

after a service the fork will push a bit of excess out of the seal/foam wiper, after that they'll settle down, the fact that it's coming out of both sides sort of confirms this.
 
Back
Top