Relliott6879
Old School Hero
I love the finish you've achieved on those fork dropouts (and the rest of the bike!). Could you give us a brief rundown of the method? I've just taken delivery of a carbon fork for my road bike which has bare alloy dropouts and, inspired by your amazing work, I'd like to try and achieve something similar.
I'm going to hazard a guess at 'mask off the carbon, rub the dropouts with increasingly finer grades of wet and dry, finish with metal polish' but which grades and which polish do you recommend? Also, how long should I rub with each grade/determine when to move to the next?

I'm going to hazard a guess at 'mask off the carbon, rub the dropouts with increasingly finer grades of wet and dry, finish with metal polish' but which grades and which polish do you recommend? Also, how long should I rub with each grade/determine when to move to the next?

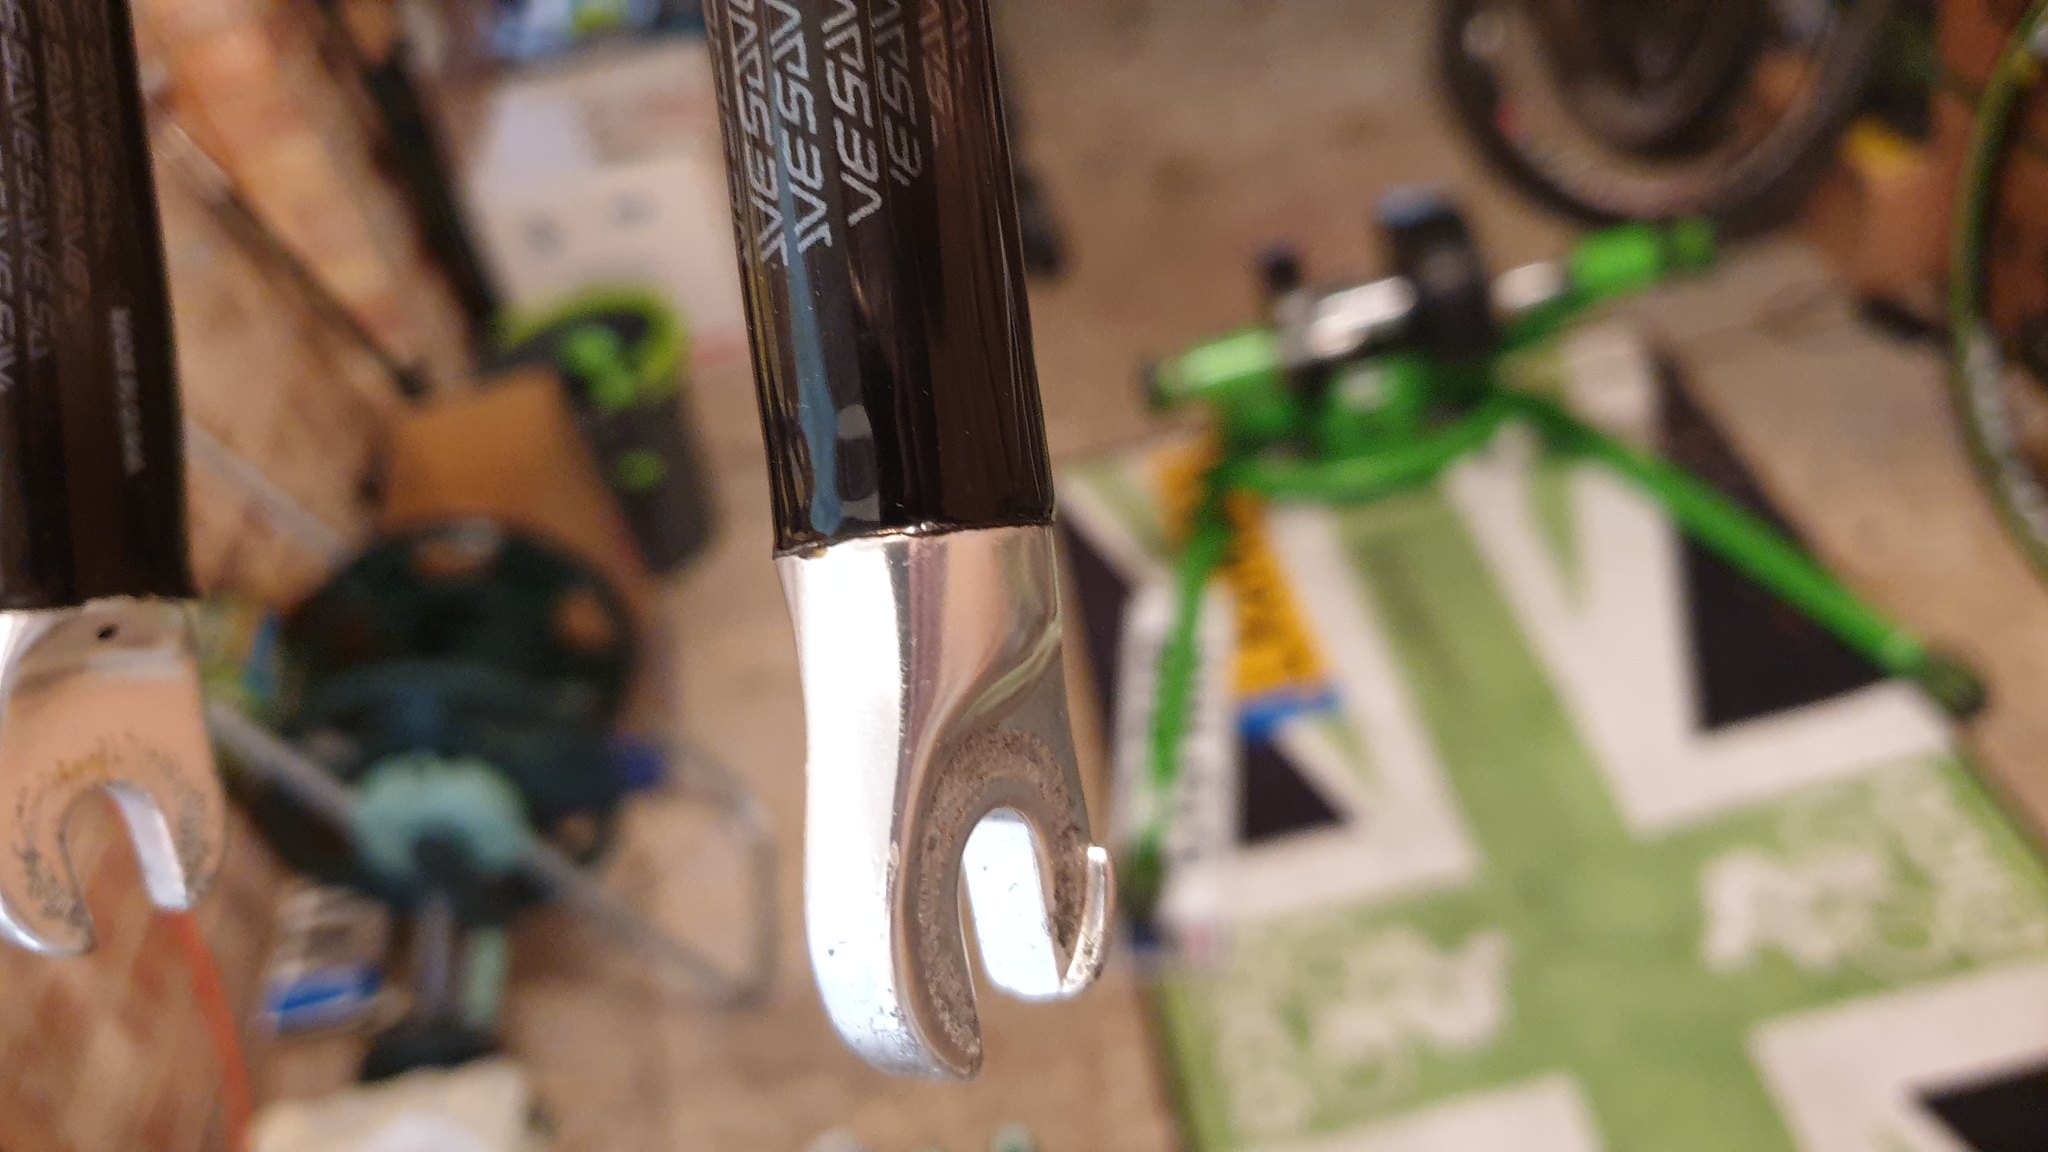
") Yes I'd mask off the carbon to start with and depending on the finish on the drop outs whether they are lacquered etc or not will depend on how you go from there..... Paint stripper to remove the lacquer otherwise you'll need to work through several grades of wet and dry with plenty of water. Deeper marks/imperfections can be tackled with 240-400, then up to 600 and 800 grit but just in those areas not the whole dropout or it will take longer to go through all the grades needed to smooth out any sanding marks/scratches. For areas that are free of marks ie smooth or at least in better condition 800-1000 grit then 1200, 1500 and finish with 2000 grit. Clean off areas before going to the next grade and don't skip a grade, you need to work through them.
Yes I'd mask off the carbon to start with and depending on the finish on the drop outs whether they are lacquered etc or not will depend on how you go from there..... Paint stripper to remove the lacquer otherwise you'll need to work through several grades of wet and dry with plenty of water. Deeper marks/imperfections can be tackled with 240-400, then up to 600 and 800 grit but just in those areas not the whole dropout or it will take longer to go through all the grades needed to smooth out any sanding marks/scratches. For areas that are free of marks ie smooth or at least in better condition 800-1000 grit then 1200, 1500 and finish with 2000 grit. Clean off areas before going to the next grade and don't skip a grade, you need to work through them.


")


