garyoneill
Retro Guru
Hi All
I have just joined the forum so hopefully have posted this in the right area! I have restored quite a few bikes in the past (to various degrees of success) but have finally started work on the list of Mountain Bikes from the 90s that I could not afford at the time. First stop is a Proflex 856; I plan to do this to a high standard and would welcome some advice on a few things.
A bit of background…
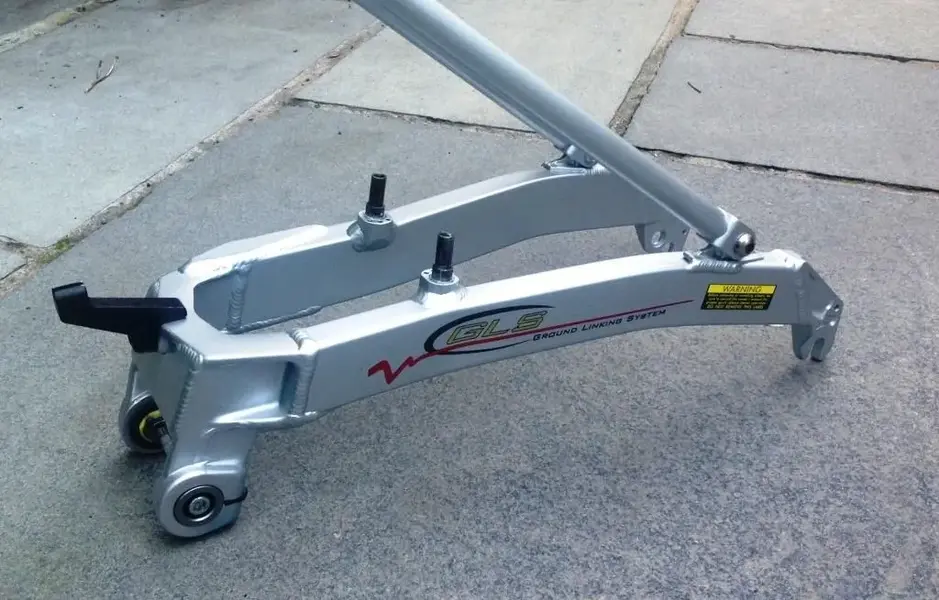
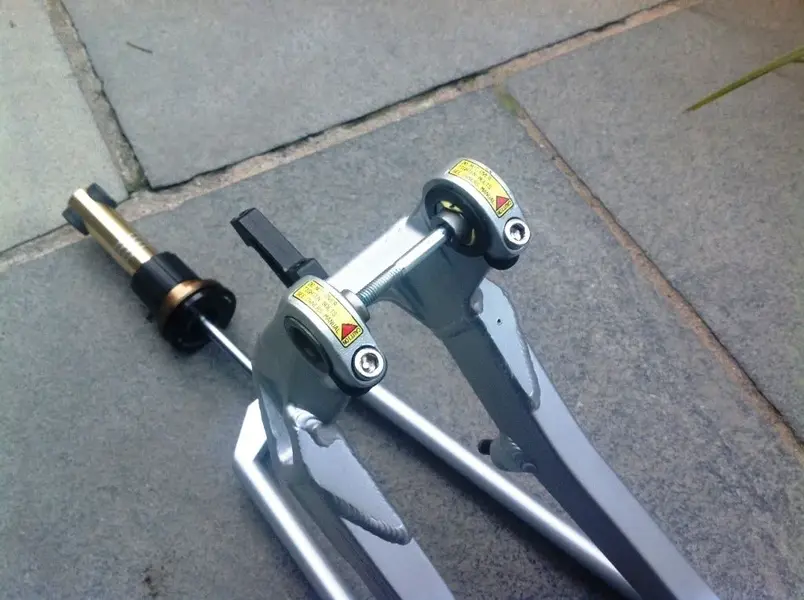
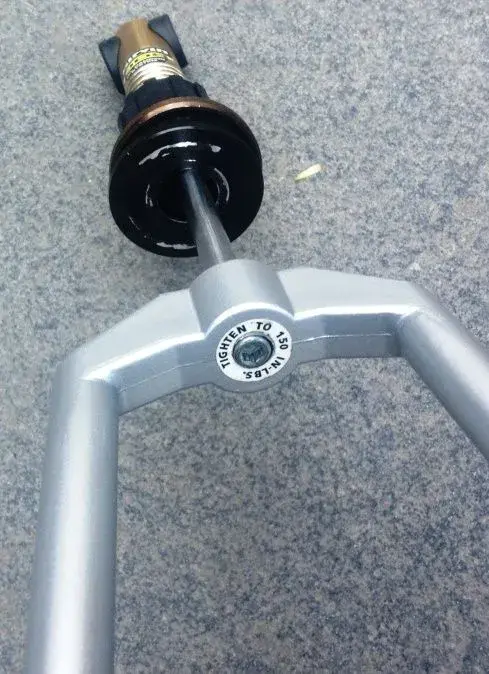
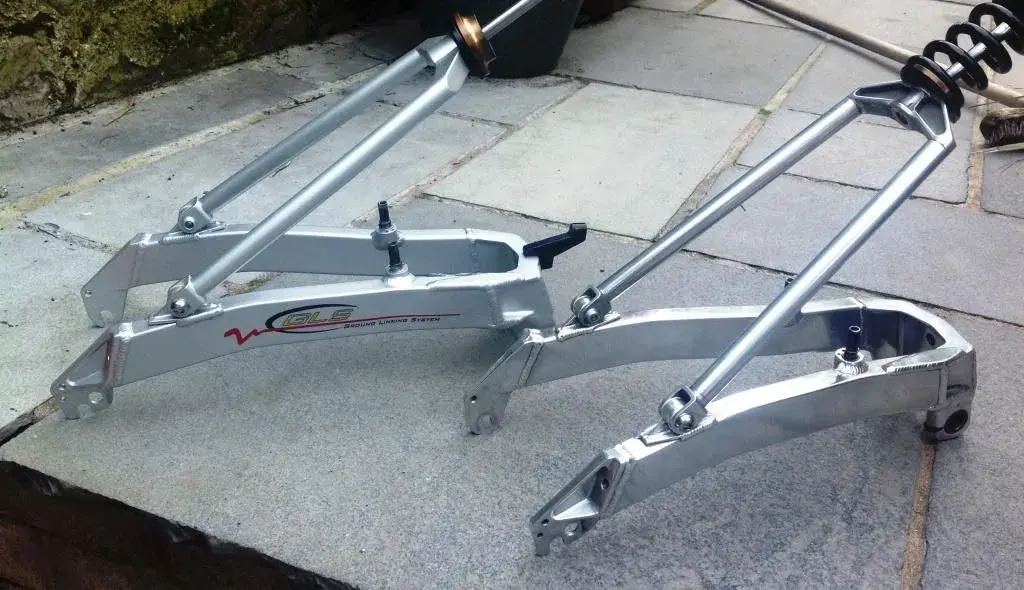
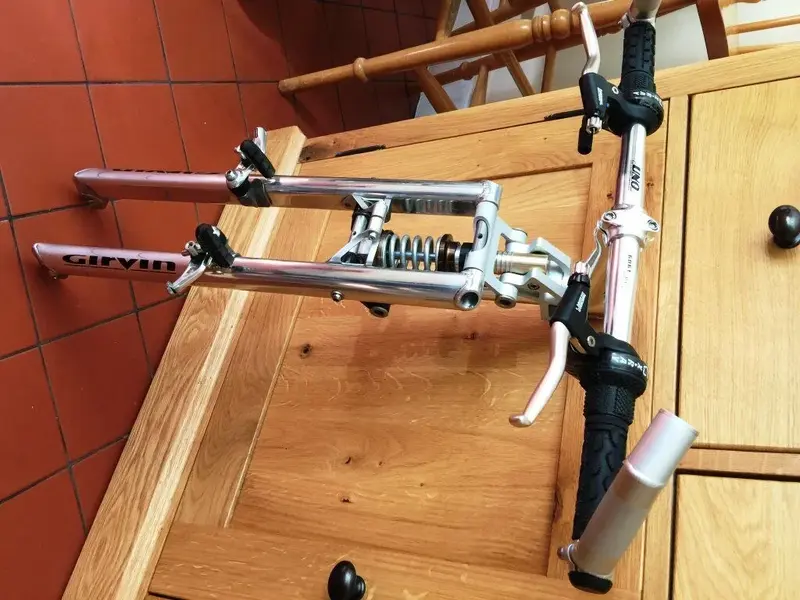
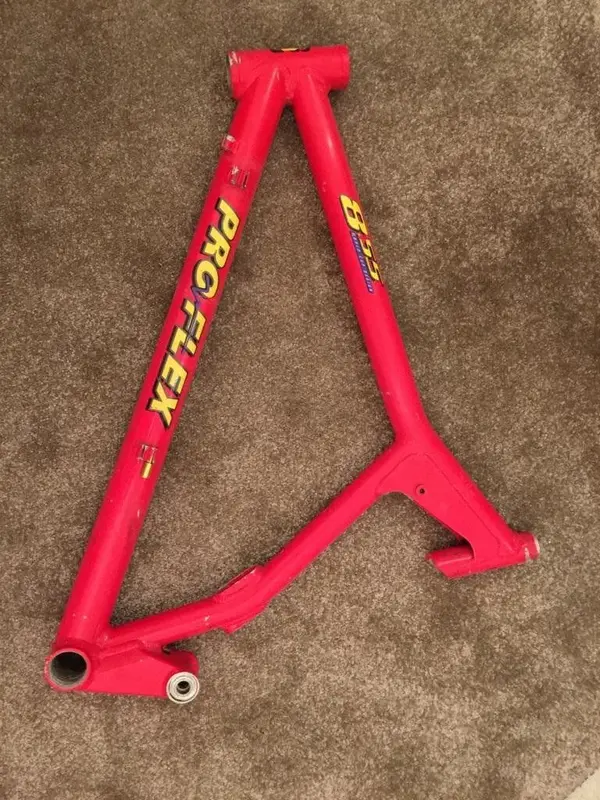
I bought a frame off eBay a couple of months ago which the seller claimed had been powder coated and was therefore ready for completion. In fact, on inspection, the front triangle had been sprayed black but had an orange peel effect and the swing arm was coated in something industrial that coated the threads and canti bosses. After a bit of negotiation it came home with me for £40 along with the ODI shock and knackered elastomers.
I have spent a number of evenings flatting the front triangle with 1500 – 2500 wet and dry and have improved the finish. The new paintwork was black which was good, as I wanted to build a black and silver themed Proflex. I ordered some decals from www.graphicshack.co.uk which look great and are very close to the original ones. I am planning to do the frame in a couple of coasts of lacquer this weekend, partly to ensure the decals do not peel and secondly to give the paintwork a few layers of protection. It is a bit thin in places due to vigorous flatting!
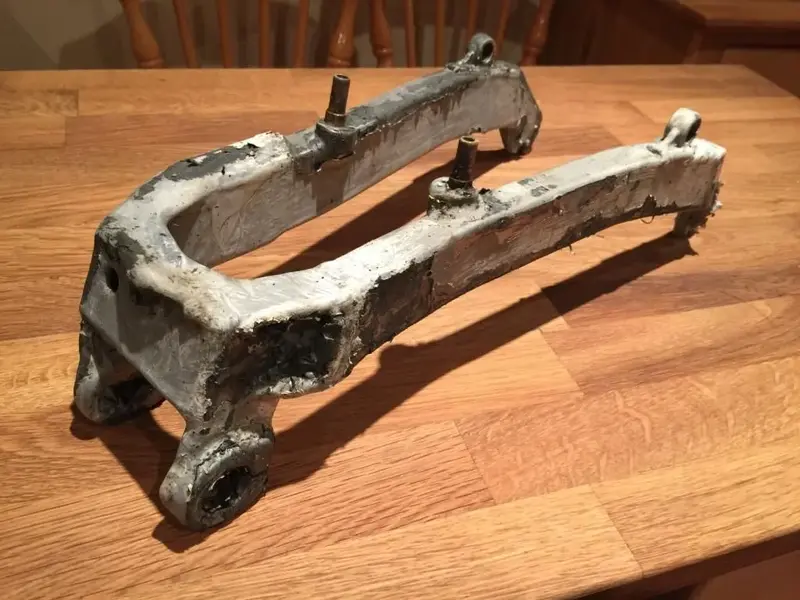
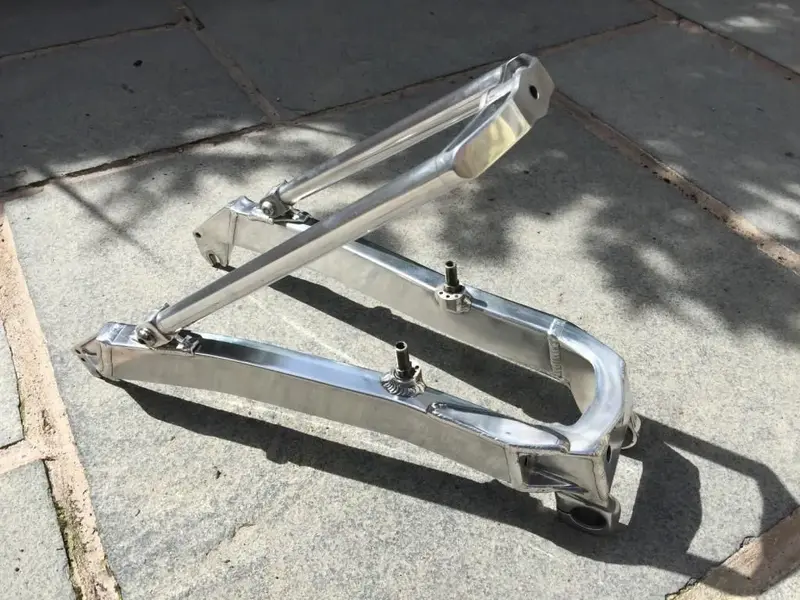
However, the swing arm is a bit of a challenge. I want to strip it back to the aluminium and nitromours does not seem to touch it. Does anyone know of a decent paint stripper that works? Nothing I have tried seems that effective these days?
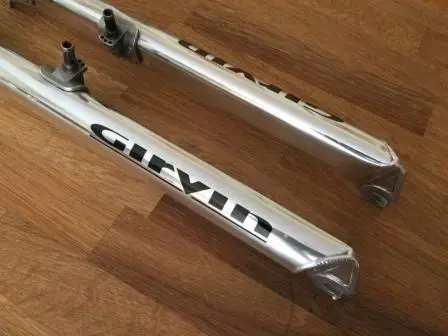
Secondly, does anyone know where you can buy replacement swingarm decals, specifically the “Ground Linkage System” graphic? I suspect I will also need some Girvin Vector 2 decals if anyone knows of a source?
Many Thanks
Gary
I have just joined the forum so hopefully have posted this in the right area! I have restored quite a few bikes in the past (to various degrees of success) but have finally started work on the list of Mountain Bikes from the 90s that I could not afford at the time. First stop is a Proflex 856; I plan to do this to a high standard and would welcome some advice on a few things.
A bit of background…
I bought a frame off eBay a couple of months ago which the seller claimed had been powder coated and was therefore ready for completion. In fact, on inspection, the front triangle had been sprayed black but had an orange peel effect and the swing arm was coated in something industrial that coated the threads and canti bosses. After a bit of negotiation it came home with me for £40 along with the ODI shock and knackered elastomers.
I have spent a number of evenings flatting the front triangle with 1500 – 2500 wet and dry and have improved the finish. The new paintwork was black which was good, as I wanted to build a black and silver themed Proflex. I ordered some decals from www.graphicshack.co.uk which look great and are very close to the original ones. I am planning to do the frame in a couple of coasts of lacquer this weekend, partly to ensure the decals do not peel and secondly to give the paintwork a few layers of protection. It is a bit thin in places due to vigorous flatting!
However, the swing arm is a bit of a challenge. I want to strip it back to the aluminium and nitromours does not seem to touch it. Does anyone know of a decent paint stripper that works? Nothing I have tried seems that effective these days?
Secondly, does anyone know where you can buy replacement swingarm decals, specifically the “Ground Linkage System” graphic? I suspect I will also need some Girvin Vector 2 decals if anyone knows of a source?
Many Thanks
Gary
") .
.