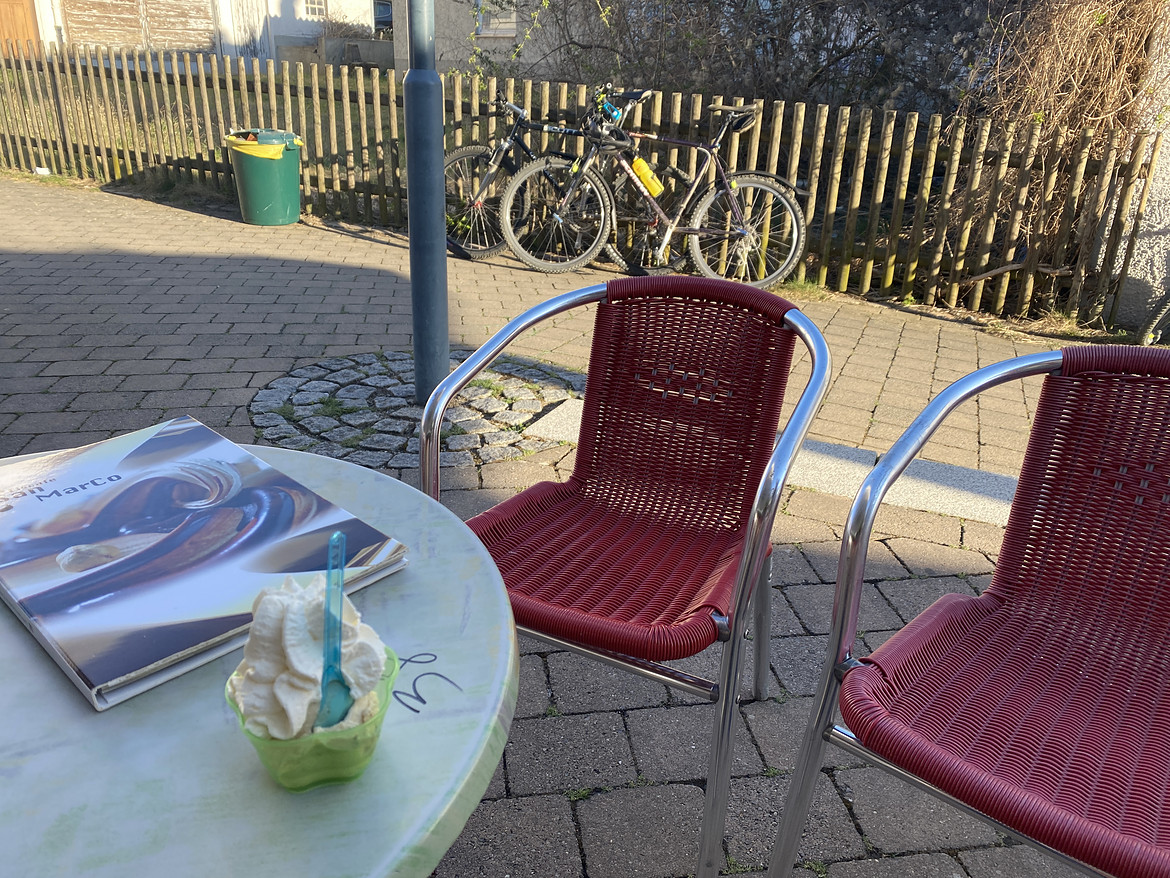
More boing for the buck! Free Scott Unitrack DH - Welding done!

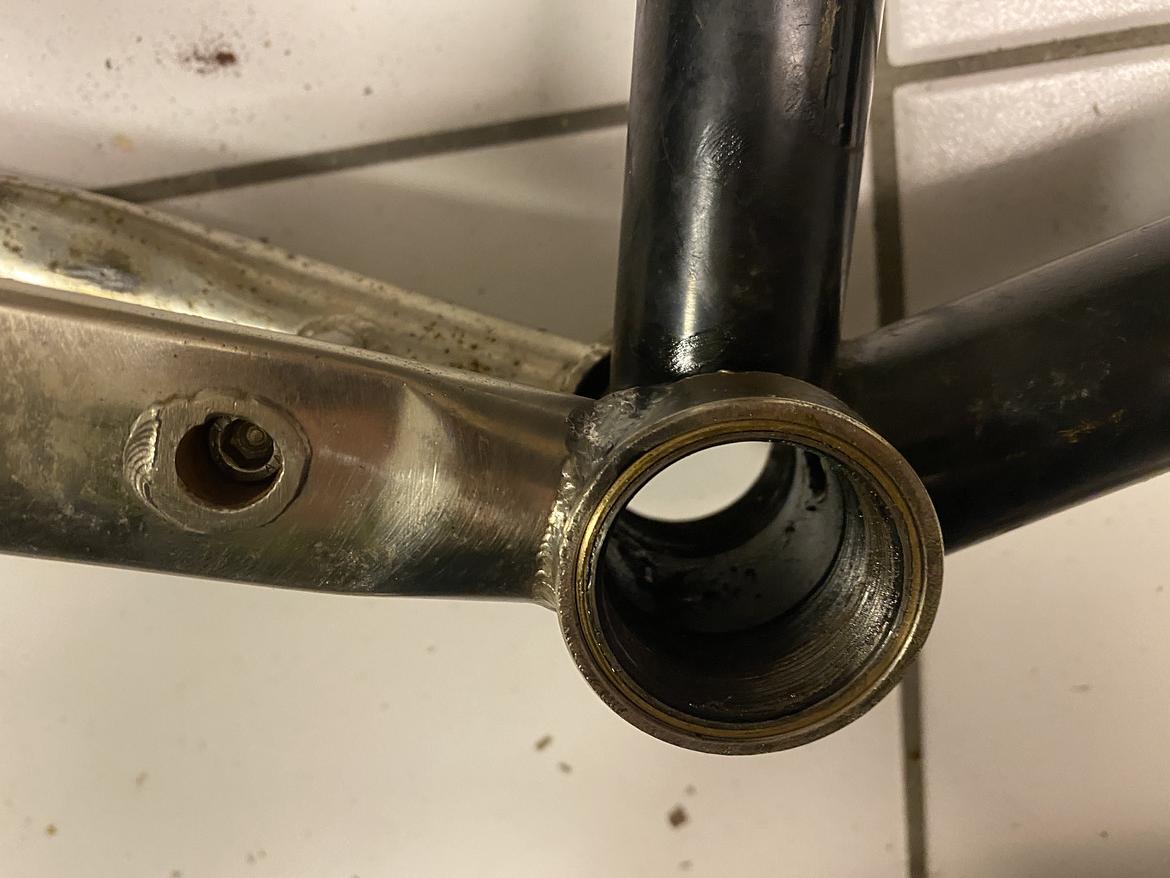
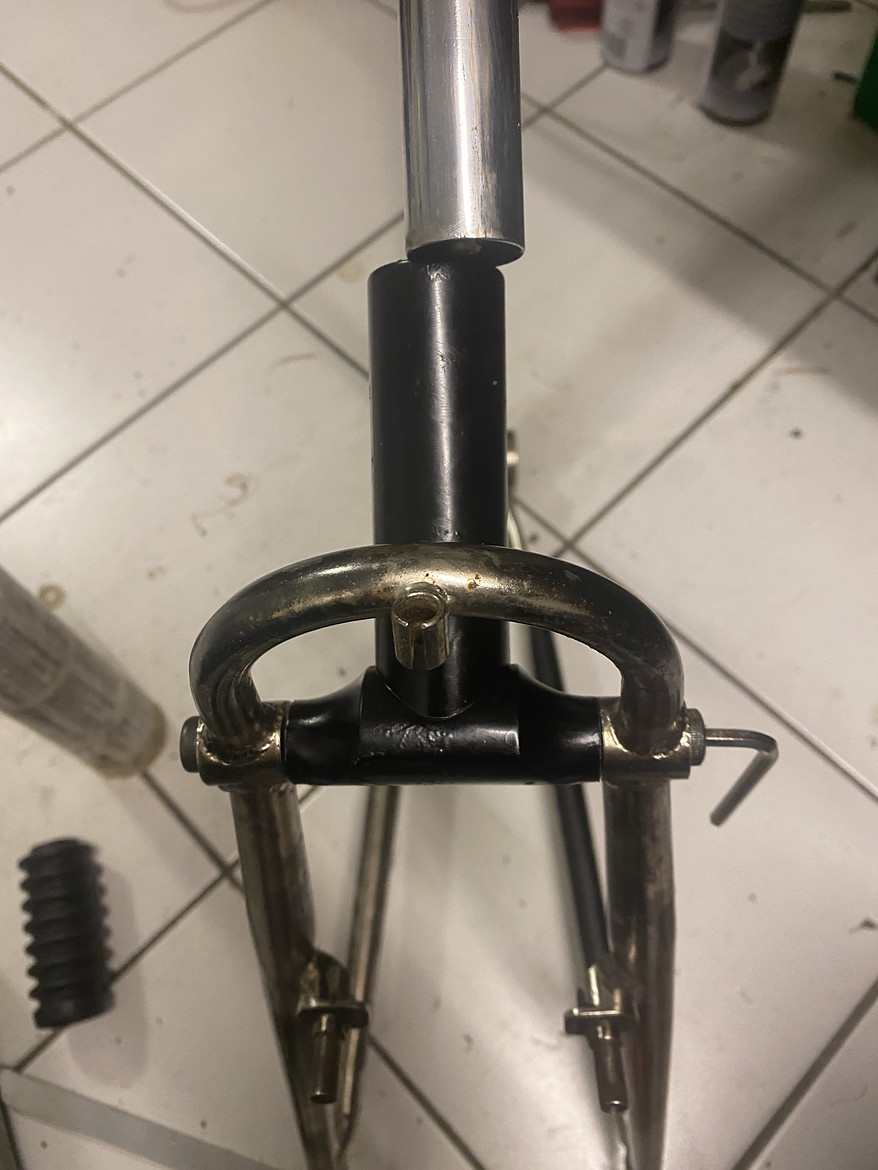
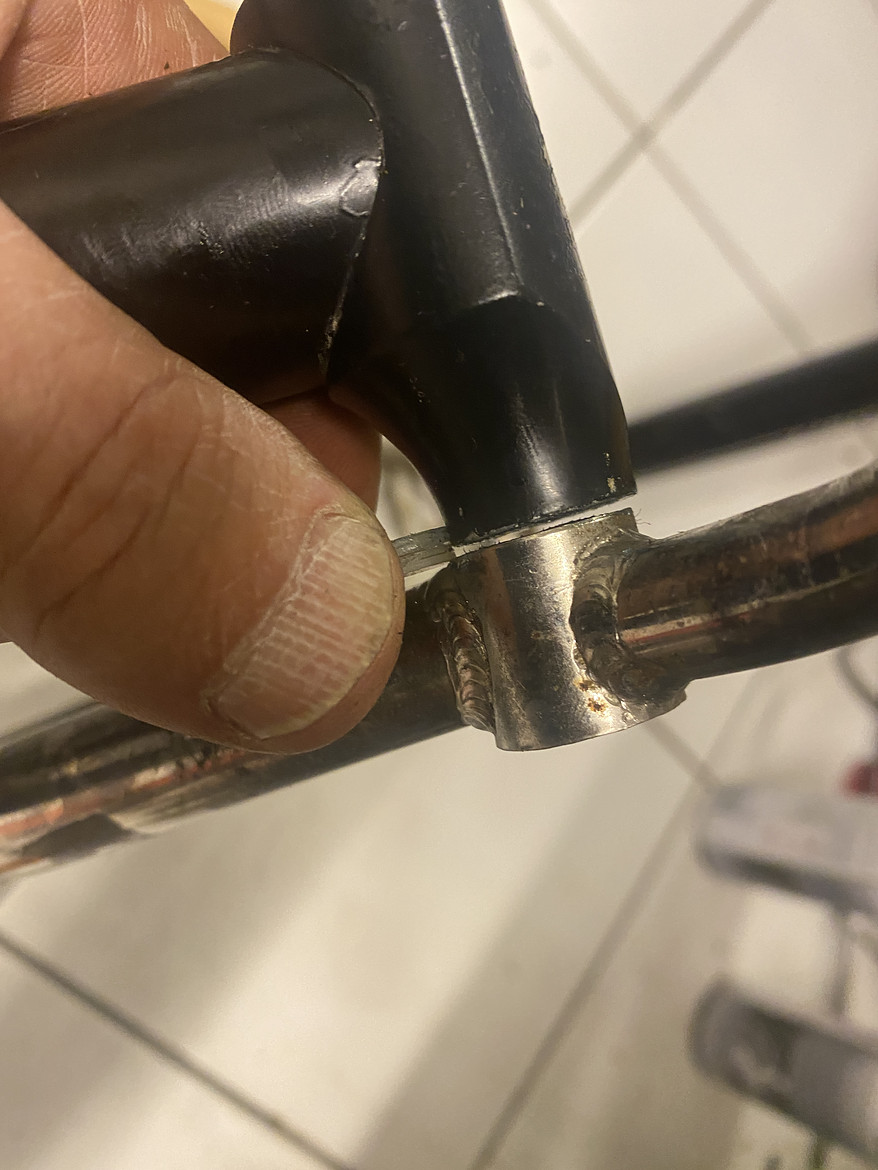
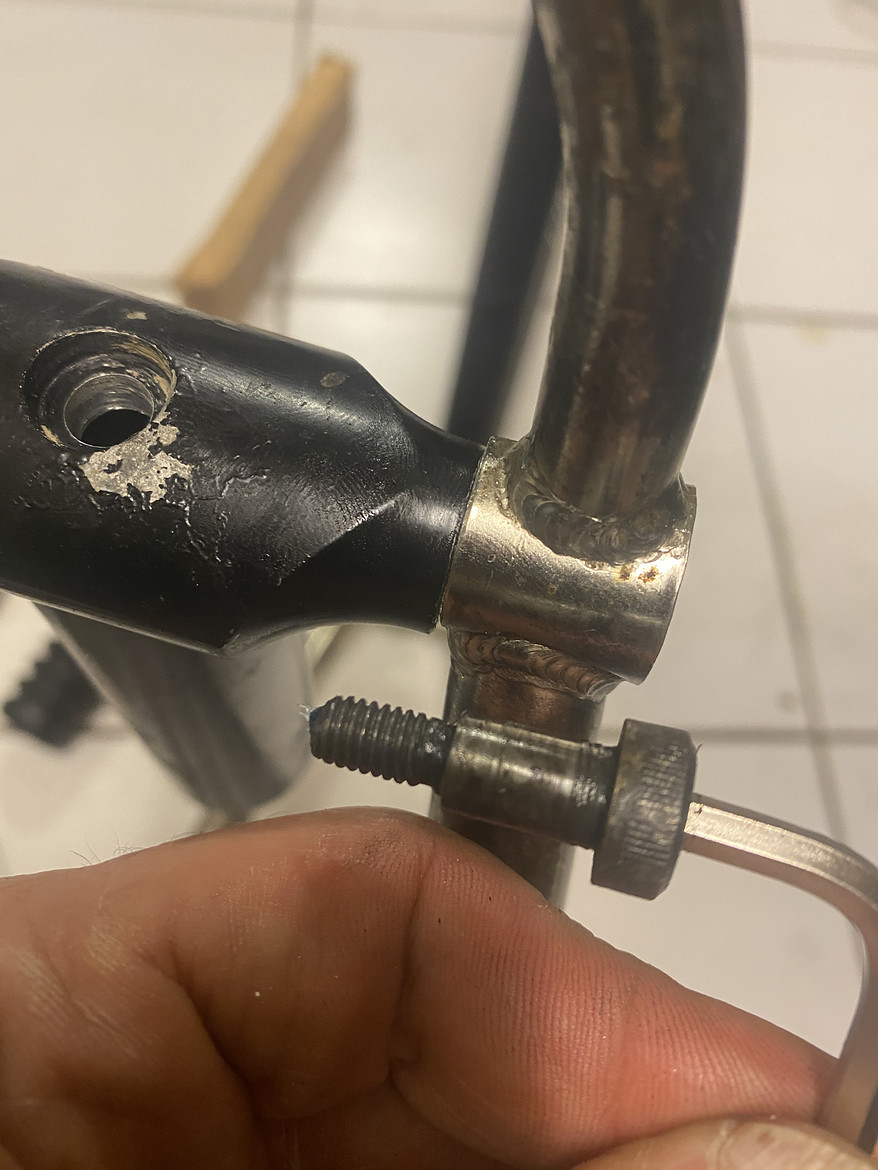
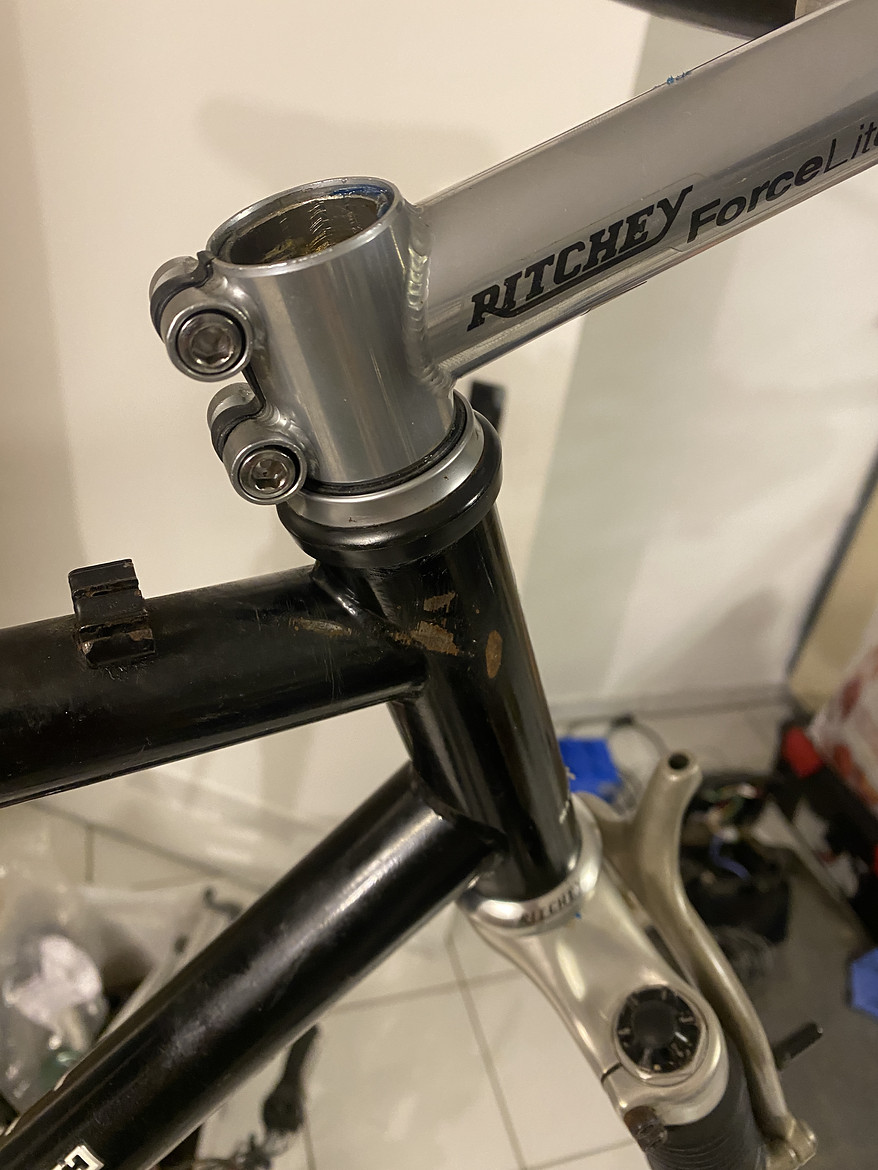
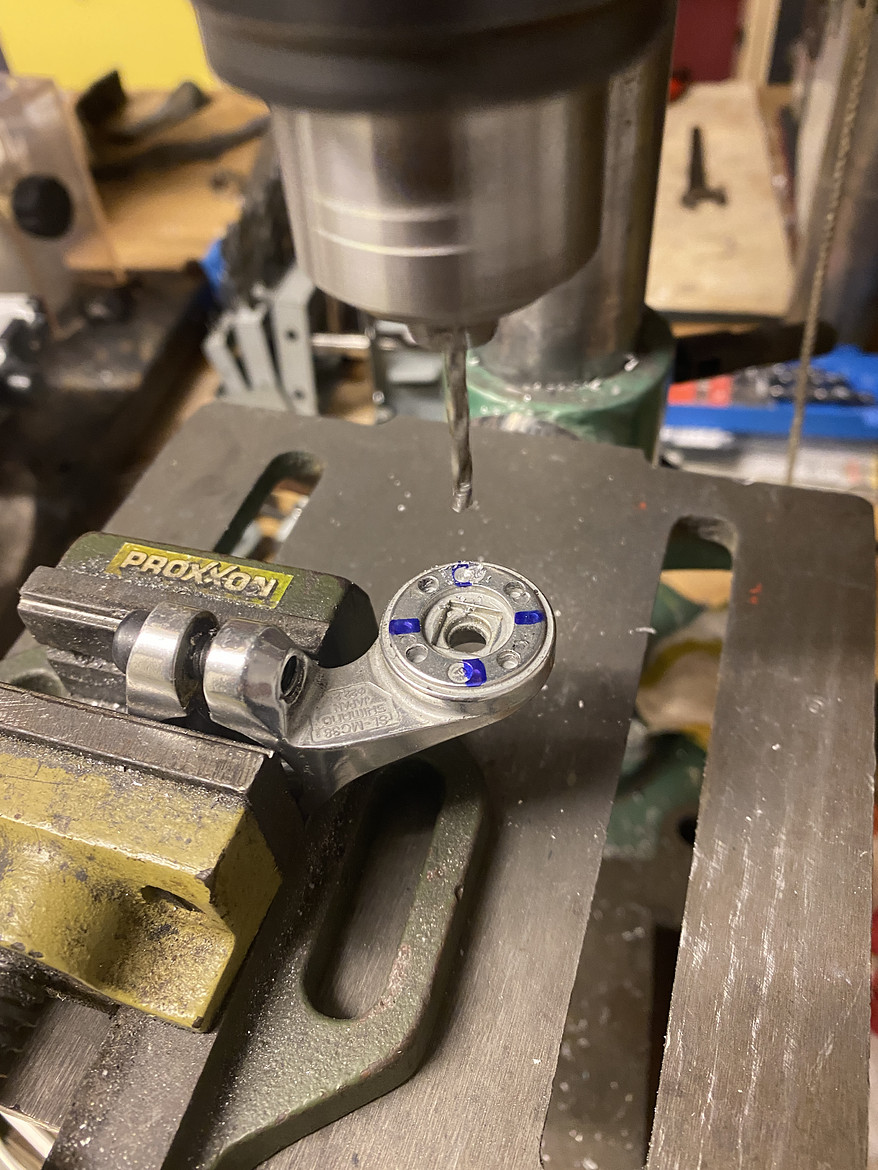
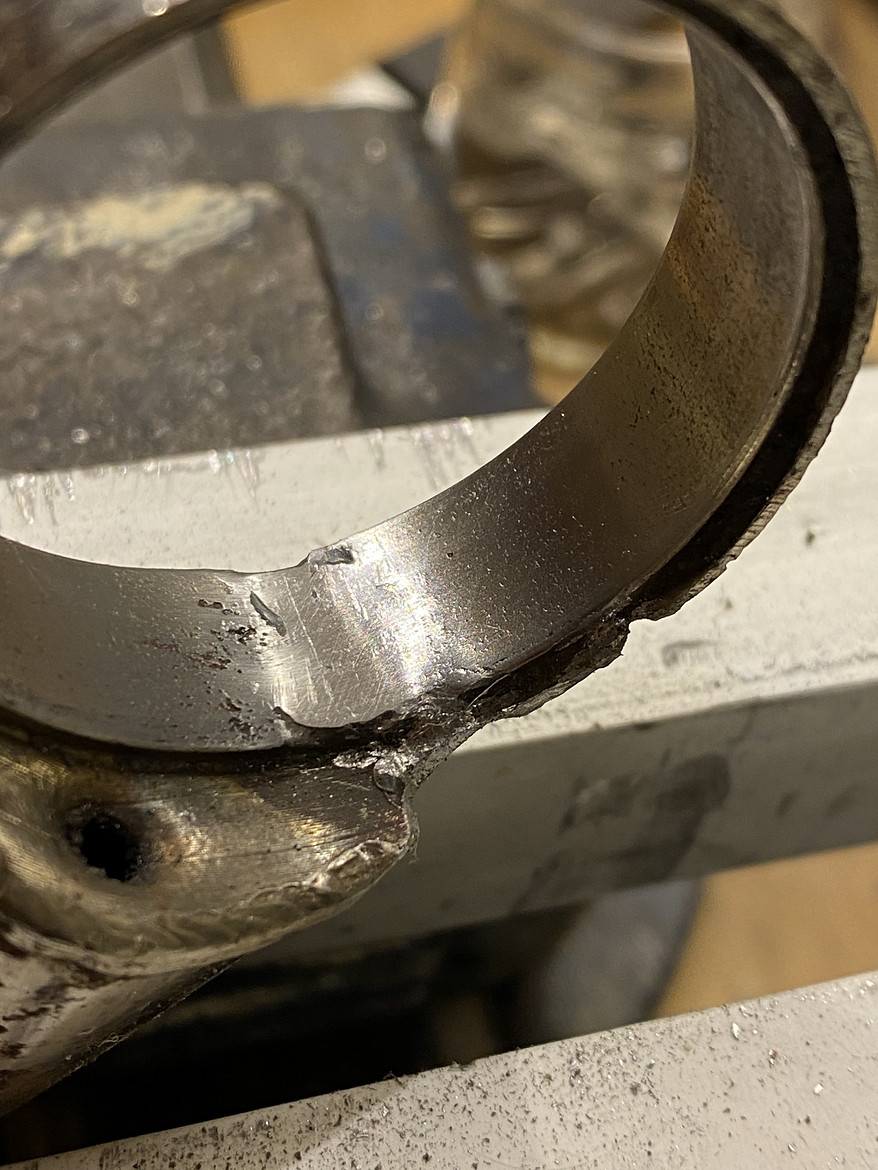
I then filed and ground down the inner weld.


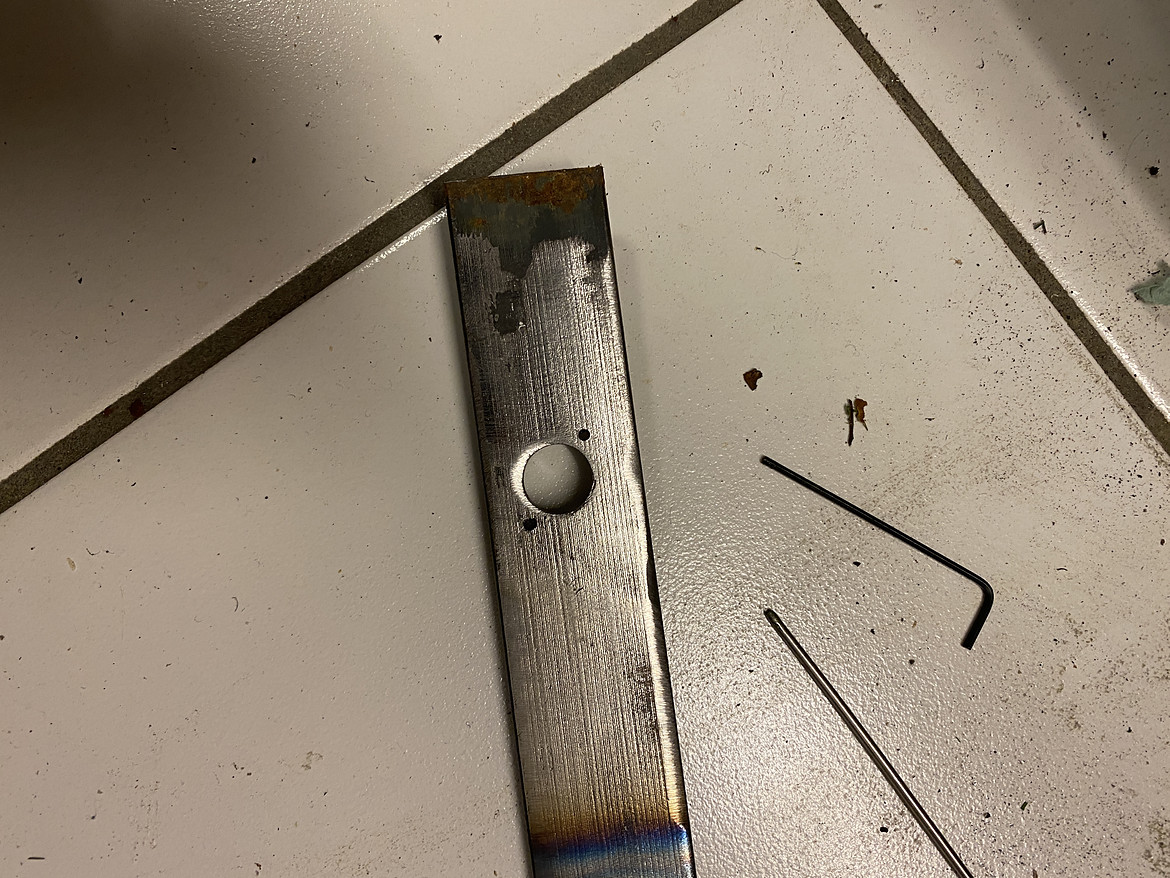
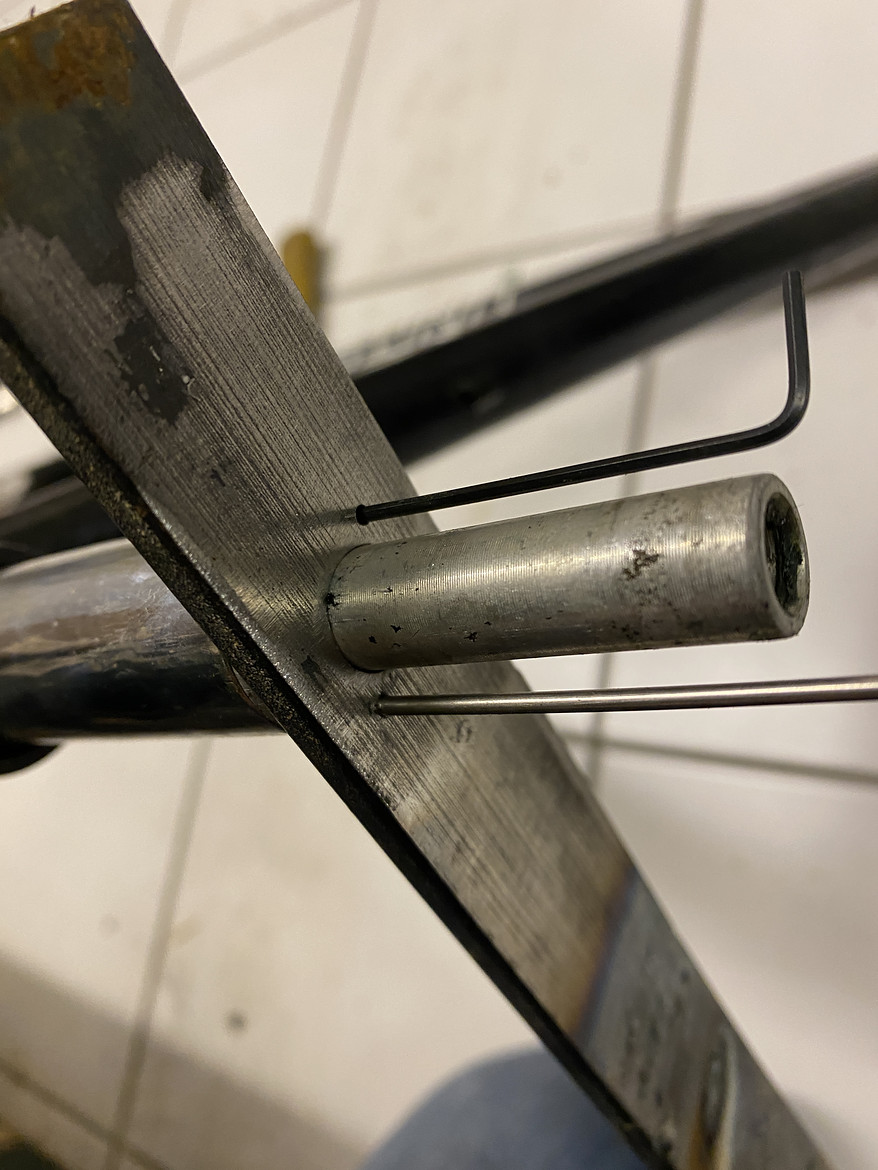
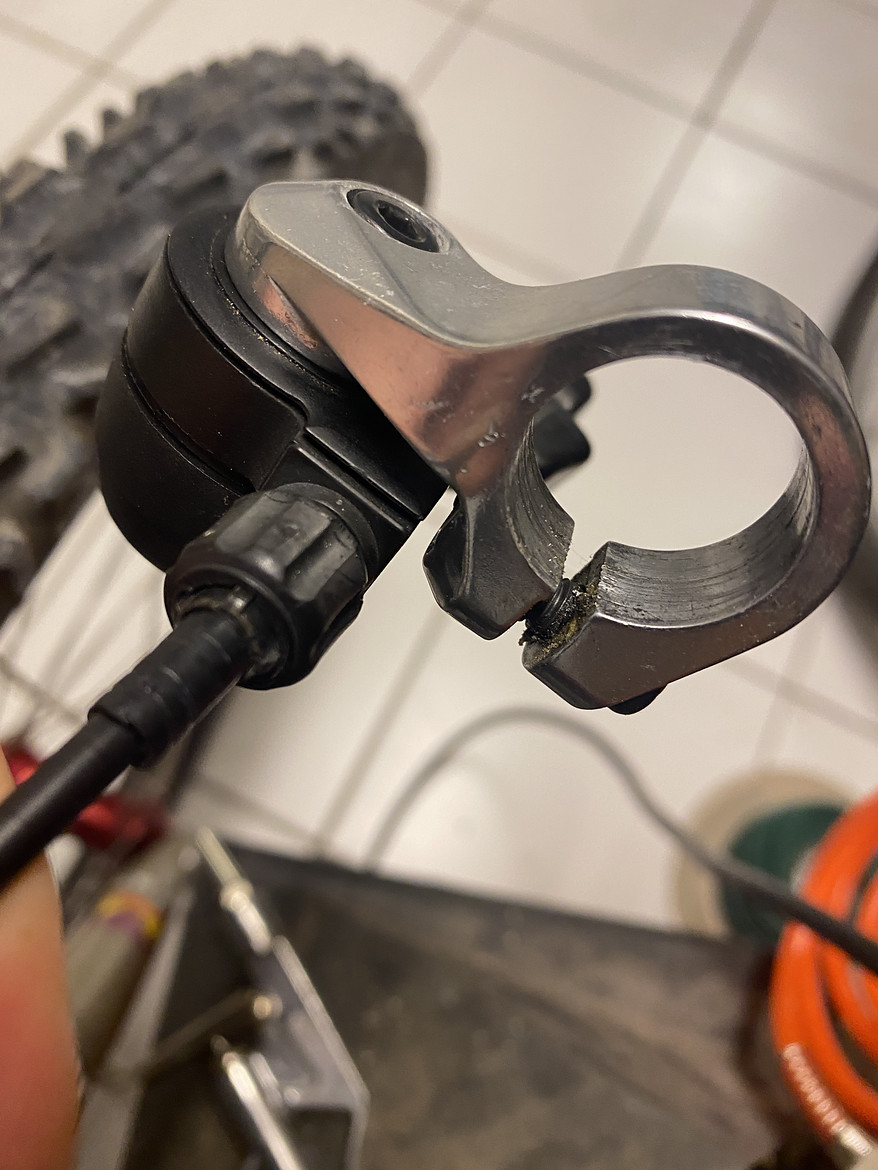
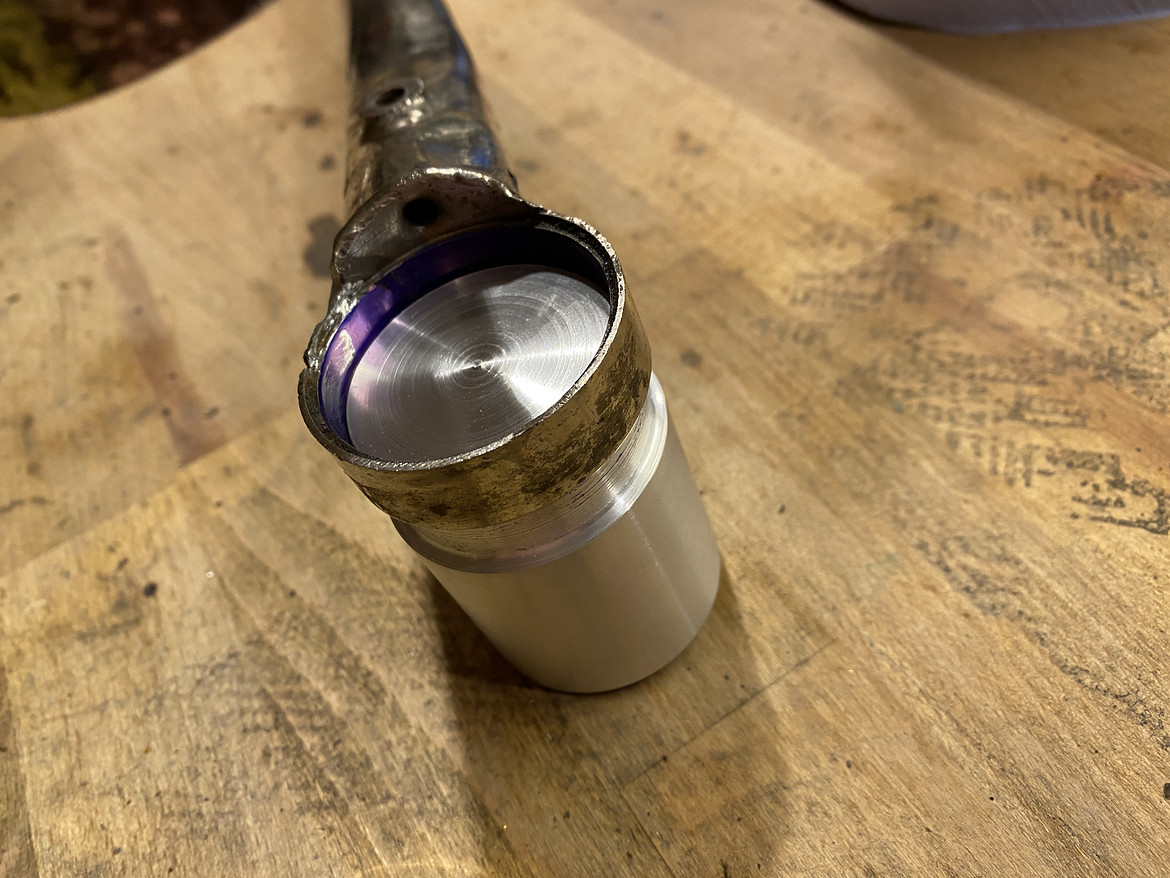
The ring was a little oval shaped after the welding was done. So I made a pin that loosely fit the opposite undamaged side. Then "massaged" the welded side until the pin was fitting in.


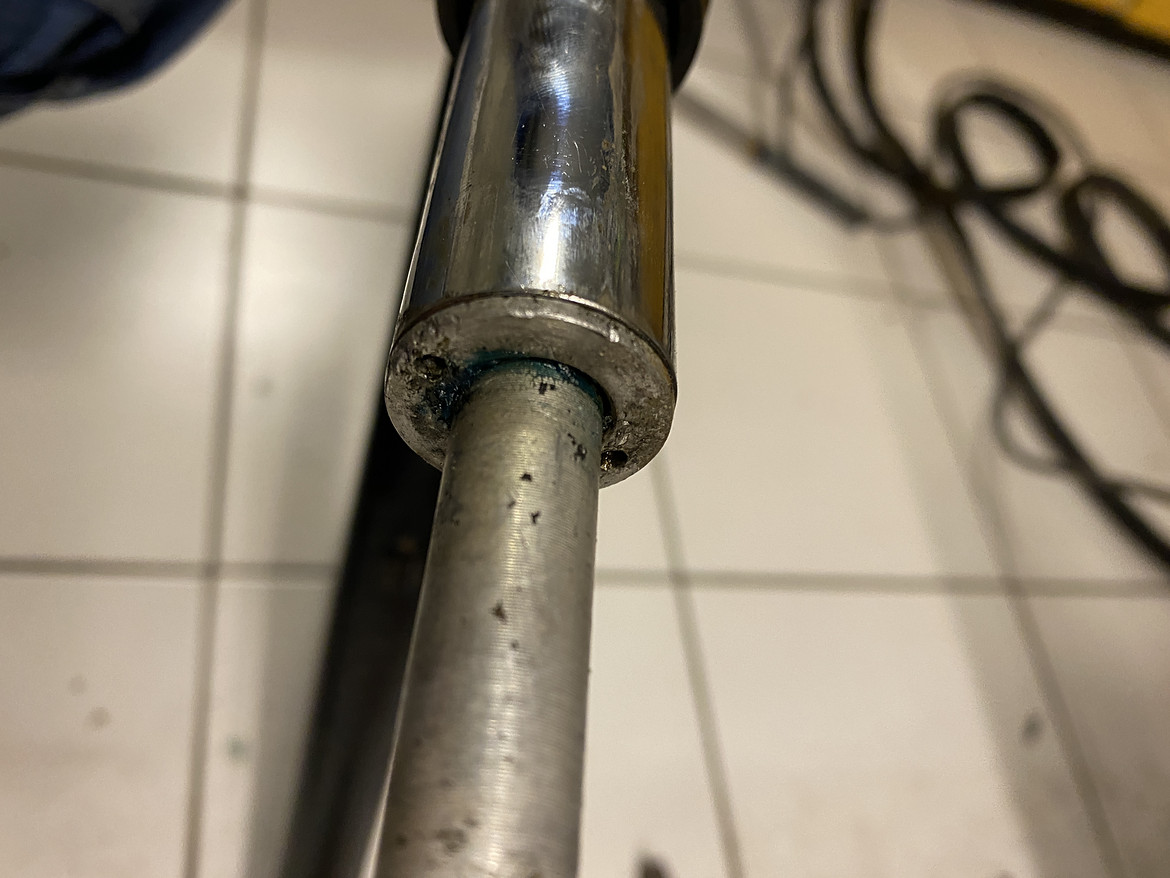
Then I used a marker to blue the inside of the ring. After turning the pin inside the ring, the paint gets rubbed off where the high spots are. That's where I need to grind some more. I'll do that until the ring fits the bronze bushing on the frame.
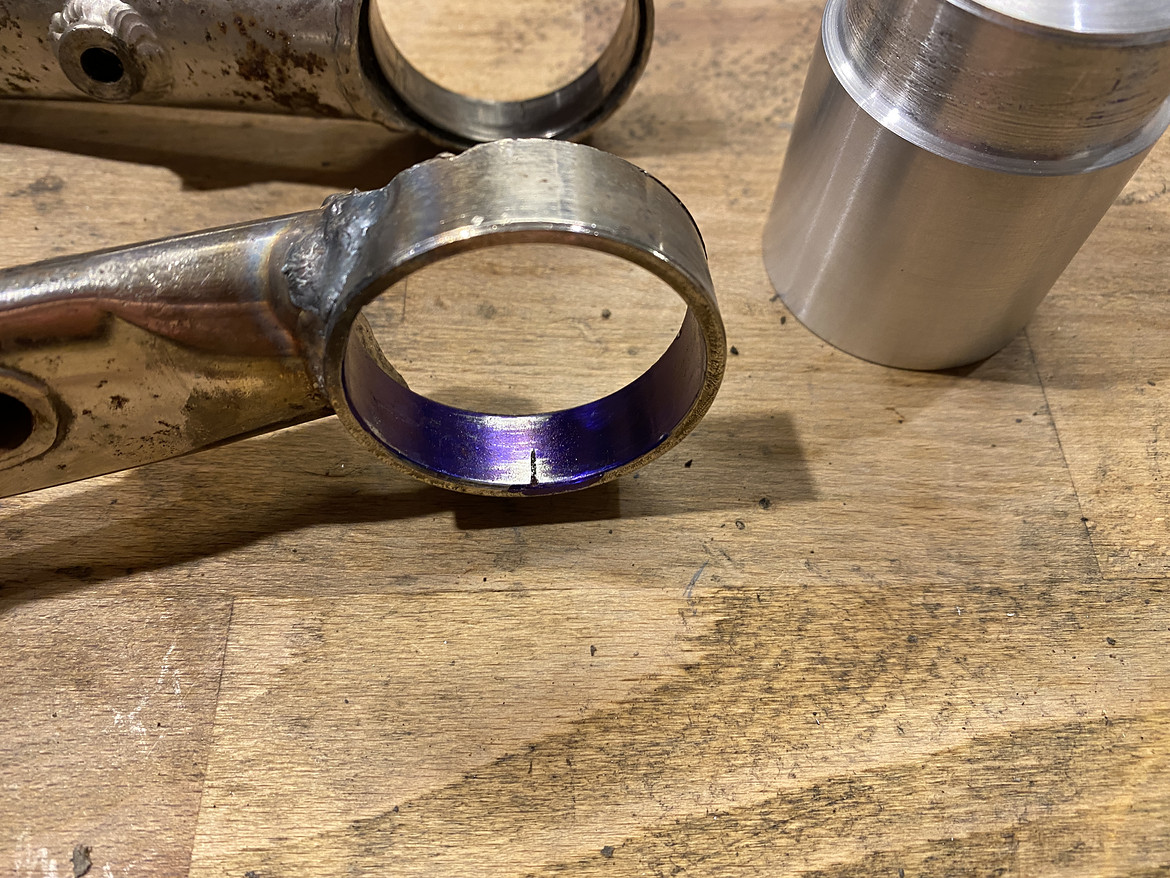
 
Last edited:
Quick li'l update.
After making the that welded ring round again, I put the rear triangle back onto the frame. But it would not turn. It was very very hard to slide the rings - both sides, not only my repaired side - onto the bronze bushings. I thought that can't be right and took it all apart again.
Took a few measurements and found that the bushings were basically a press fit that would not allow for any movement. So I took them off of the frame and gave them a very gentle skim on the lathe.
Put it all back together. Now the rear moves with just the right amount of friction. No slop. And it will slowly be lowering itself from it's own weight if not attached up top.


Now I am revising the shock. Dampener. The boing thingy.
Someone already had a got at it with improper tooling.


I don't have the proper tool as well. But I don't want to use pliers an scratch it all up even more. So I whip up something, I deem more appropriate.


That's it for now.
There is some wired bunny running around in my garden, hiding cloured eggs and and chocolate in the bushes. What the hell? I'll go and check.
 
Putting together the rear is revealing quite a few problems with the design of that frame.
It seems to me, that the build quality was not good enough at the time. Or maybe the frame had some kind of accident in the past. But I don't think it had, as there are no dents or major scratches that would indicate a frame bending incident.
But have a look for yourself:


When the lower part of the dampener is attached to the seatstays it should imho line up with that tube housing the eleastomeres. But it really doesn't.

Also, the eyelets that hold that black lower dampener thingy are not in line, as they should. You can see it in the following pictures.


When I got the frame, there were two teflon washers between the dampener and those eyelets in the seatstays. And I get, why they should be there. But they were wedged in like you wouldn't beleve. If I want to put them back, I already have to bend the frame apart just to put one of them in. For the second, I would have to use my feet. I'm not sure those Teflon washers are original.


And then, there is the problem with those retaining bolts. They have a polished shoulder. It is supposed to be rotating in the bronze busing that is pressed into those two eyelets. But when I put everything together and try to rotate the dampener, those bolts stay stationary in the eyelets. It's the dampener that rotates around the threads of the bolts. That part is really bad.

It seems I have some work ahead, than just putting everything back together...
 
Cobbled it back together, using some random washers I ground to size. So the rear now works reasonably well, I think. On the bench at least.

Used a Rock shox Judy (I think) boot to keep the dirt away.


I especially like the phase where you just hang parts onto the frame to find a look that works.
I did try Manitou's 1 and 2, AMP, Rond WP. But in the end I went for the classic-you-can't-go-wrong Mag21's

I also found some Ritchey parts. Namely the stem, saddle, seatpost and even an aheadset. Non pc, I know. But good enough for the first ride.


A little cleaning had to be done. Note my special installation tool in the background.


For the brakes, I think I'll go for Magura. They'll nee a service though.
 
Made it up the hill. Gerometry is nice, I like it. Riser bar would be a bit better.


The dampener didn't make it though. Something gave way inside. Maybe the Elastomere was pushed into the coil. I'll have a look tomorrow.
Didn't stop me from reaching todays goal:
 
Took apart the dampener once again. To investigate why it had failed yesterday. There had been another elastomere inside that tube. I put my coil on top of it and did not use any separator. Now that elastomer basically wedged itself inside the coil. I wasn't able to get them out. So I put one more elastomer in (with a proper seperator this time) and but everything back together. I did not have enough time to spare as I was basically chasing day light and I really wanted to have another spin. The rear end in this configuration now has about 2 to 3cm of travel.

So I made it up another hill. It's my go to tour. Roundabout 20km, 400hm. Really nasty downhill section. Well, nasty for a classic bike at least. Just right to test my welding.

Here are some impressions:


The downhill section is a hiking trail. Really narrow, lots of pointy rocks and roots. Kind of dangerous. I like it, alright.
Couldn't go full send, as the Hydrostops gave me some troubles. Oe more thing to take care of.


The frame made it home no problem. The weld did hold, I'm shocked. And pleased. A few weeks ago I did not know anything about welding. Now I have ridden a bike (in anger even) that I made a weld repair on! I can't beleve it.

I also really like the characteristics. It drives just like a normal hardtail steel frame. Snappy and nimble. No sideways flex. No funny effects while pedaling as compared to some other rear suspension frames. But it does still smoothe out the bumps. In a very understated way.
I'm thinking about using this bike instead of my trusty Biketech hikari, which as been my most used bike for the last 5 years. That's how much I like the scott.

Next up would be paint, then. Ritchey theme.


I'm scared. :eek:
 
Last edited:
Great work.

I'm going to share this on my suspension fb page.

al.
 
No time to do any painting, but I had some time to scratch something off the list.

I want to use a set of DX triggers I recently refurbished. But I don't have any Magura shifter perches left. What I do have though is a set of SL-MC38 Shifters. Those have nice looking, solid Aluminium perches. The only problem ist, that the indexing holes are in the wrong position.
In the end they should look like this:


It is important to leave a 2mm gap between the shifter housing an the perch, where the clamping bolt is. Because it will protrude a little bit when torqued.


The 4 new holes are quickly done on the drill press.


This is the new cockpit view. I like it. Thumbies would be preferalble, sure. But it's what I have atm.
 

Latest posts

Back
Top