Wasn’t expecting to post about this but turned out better than expected so thought I’d share.
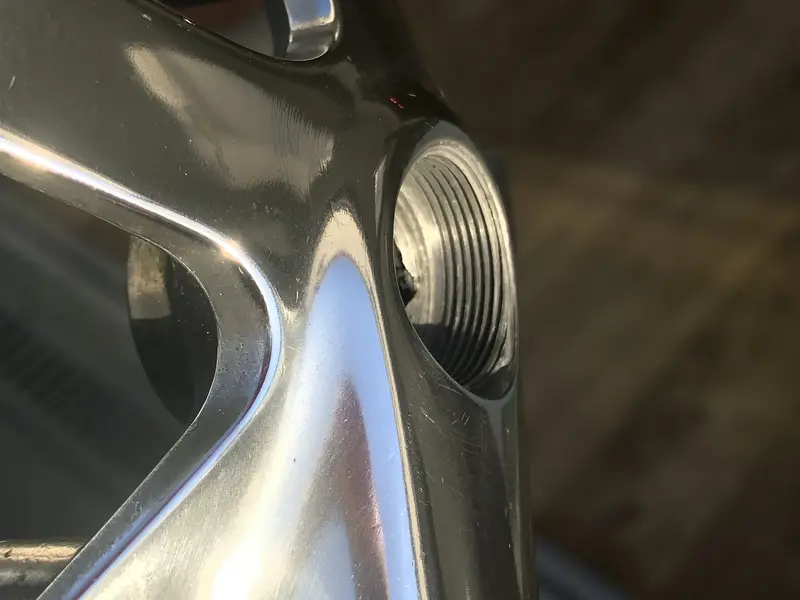
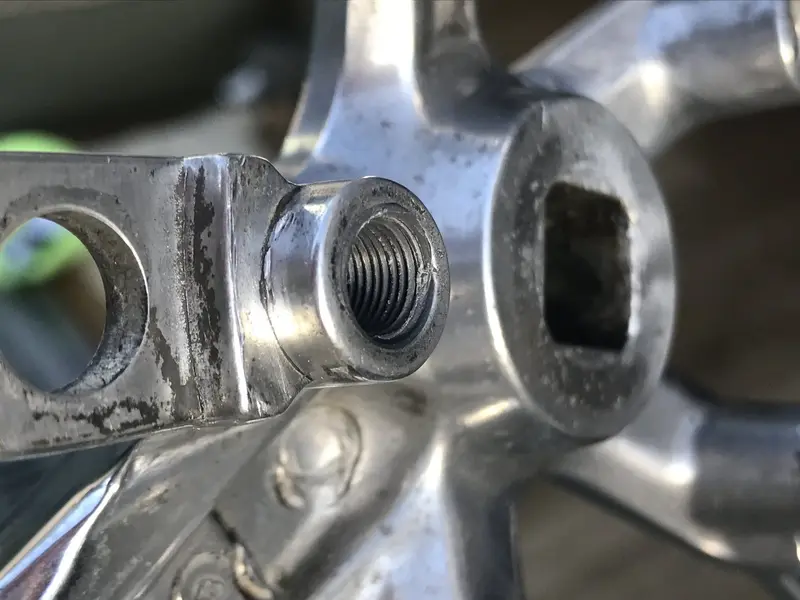
In a nutshell, have a set of Suntour XC Pro cranks that came on the 1991 Zaskar I’ve owned since new. The centre “crank pull” threads finally gave way many years back. Also, one of the granny ring threads had stripped. All in all, bit of a sorry state. Looked online, way too much money to replace and all other crank repairs were about the pedal threads. So decided to see if I could rescue it myself.
Here’s the process…
1) Clean out the threads thoroughly. I used kitchen roll / cotton buds and isopropyl alcohol. The point is to remove all grease.
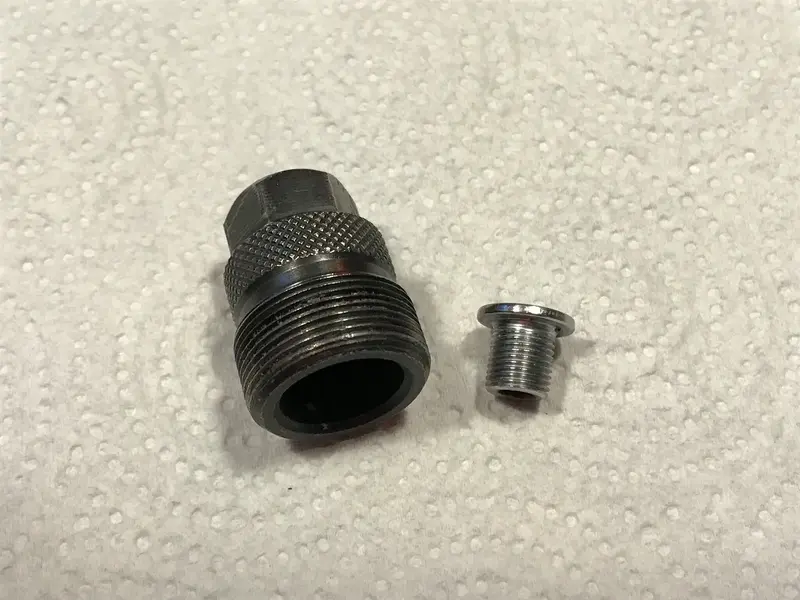
2) For the chain ring threads, do the same cleaning process to a steel chainring bolt. I assumed aluminium would be too weak when it came to extraction (see below).
3) For the puller threads, get a chainring extraction tool and clean the threads. I had a bust one so was ideal.
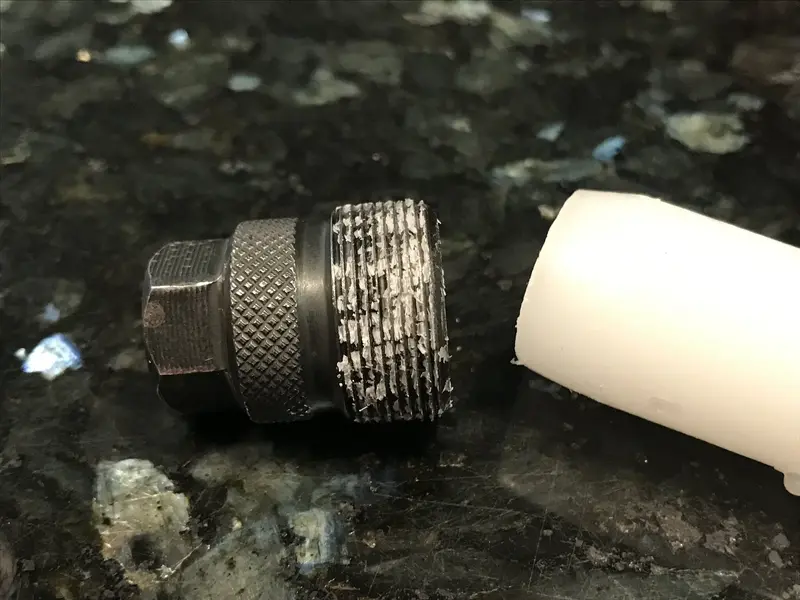
4) Use a candle to scrape against the threads, all the way around, leaving wax scrapings on the chainring / extractor threads.
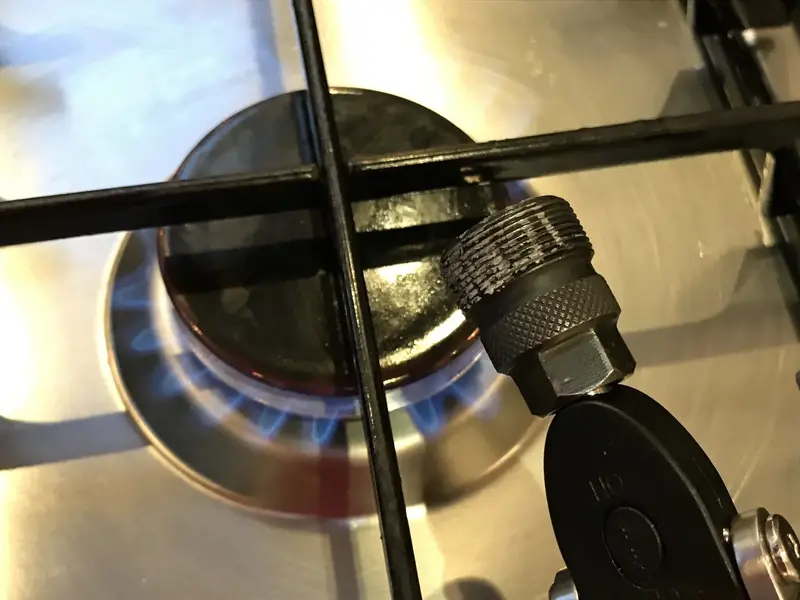
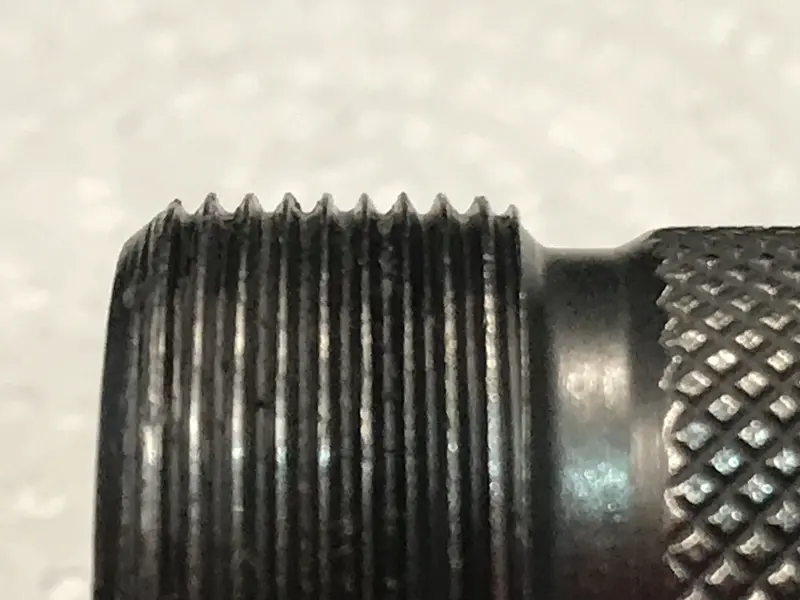
5) Hold them with pliers or whatnot and carefully waft them over a gas job flame or hot hair dryer. Just as the wax starts to melt, remove from heat and rotate them as they cool to ensure the wax solidifies evenly. If the wax is thick and plugging up the threads, give it a wipe with a tissue before it sets. The threads need to be nice and sharp with minimal wax in the valleys. Be sure to leave to wax coating at the bottom of the bolts and under the top flanges.
6) Get some JB Weld metallic epoxy resin, mix it up and apply a very thin layer to the inside (stripped) thread surfaces. This isn’t the main epoxy layer, it’s just to ensure the female thread surface is coated.
7) Add a little more epoxy to the male threads (the chainring bolt and the crank extractor thread). Not too much though, as this will cause it to accumulate as you screw the bolt in and it gets messy.
8 ) Align the bolt as best you can. Luckily, I had a little thread deeper in the holes that I could use as a guide. Insert / screw the bolts in. It’ll be a bit tight due to the epoxy getting in the way but mine seemed to go in fairly easily with a bit of constant pressure.
9) As the bolts get to about 75% of the way in, wipe any excess epoxy that may have backup up the threads as you inserted the bolts. Then screw the remaining thread in.
10) Leave to set for 24 hours or longer. Resist the temptation.
11) Now it’s time to remove the bolts. Wrap the crank arm in cloth to protect it, add wooden blocks to a vice and hold the cranks steady.
12) Undo the crank puller / chain ring bolt. It will put up some resistance at first but then “crack” free. Remove the bolts fully.
13) If all’s gone well, your new threads will be smiling back at you. If you need to, file or sand any excess resin. I was really careful as I applied it so only needed a slight sanding on the puller thread outside edge.
14) Add a bit of copper grease or whatnot to the threads and CAREFULLY reassemble.
I was very careful tightening the chainring bolt. The other 4 are good and strong so I treated this one as support, but not critical. Seems to hold tight but not going to risk over tightening it. Before, it just spun in the hole so it’s much improved.
For the puller threads, I only did a tentative test run (as I don’t need to push my luck) but they worked held abs didn’t seem to have suffered any damage.
Not an “as new” fix but certainly allowed me to use the cranks for a long time to come. We’ve been through a lot together so I’m glad they weren’t consigned to the recycle pile.
Hope that helps if your in the same situation.
In a nutshell, have a set of Suntour XC Pro cranks that came on the 1991 Zaskar I’ve owned since new. The centre “crank pull” threads finally gave way many years back. Also, one of the granny ring threads had stripped. All in all, bit of a sorry state. Looked online, way too much money to replace and all other crank repairs were about the pedal threads. So decided to see if I could rescue it myself.
Here’s the process…
1) Clean out the threads thoroughly. I used kitchen roll / cotton buds and isopropyl alcohol. The point is to remove all grease.
2) For the chain ring threads, do the same cleaning process to a steel chainring bolt. I assumed aluminium would be too weak when it came to extraction (see below).
3) For the puller threads, get a chainring extraction tool and clean the threads. I had a bust one so was ideal.
4) Use a candle to scrape against the threads, all the way around, leaving wax scrapings on the chainring / extractor threads.
5) Hold them with pliers or whatnot and carefully waft them over a gas job flame or hot hair dryer. Just as the wax starts to melt, remove from heat and rotate them as they cool to ensure the wax solidifies evenly. If the wax is thick and plugging up the threads, give it a wipe with a tissue before it sets. The threads need to be nice and sharp with minimal wax in the valleys. Be sure to leave to wax coating at the bottom of the bolts and under the top flanges.
6) Get some JB Weld metallic epoxy resin, mix it up and apply a very thin layer to the inside (stripped) thread surfaces. This isn’t the main epoxy layer, it’s just to ensure the female thread surface is coated.
7) Add a little more epoxy to the male threads (the chainring bolt and the crank extractor thread). Not too much though, as this will cause it to accumulate as you screw the bolt in and it gets messy.
8 ) Align the bolt as best you can. Luckily, I had a little thread deeper in the holes that I could use as a guide. Insert / screw the bolts in. It’ll be a bit tight due to the epoxy getting in the way but mine seemed to go in fairly easily with a bit of constant pressure.
9) As the bolts get to about 75% of the way in, wipe any excess epoxy that may have backup up the threads as you inserted the bolts. Then screw the remaining thread in.
10) Leave to set for 24 hours or longer. Resist the temptation.
11) Now it’s time to remove the bolts. Wrap the crank arm in cloth to protect it, add wooden blocks to a vice and hold the cranks steady.
12) Undo the crank puller / chain ring bolt. It will put up some resistance at first but then “crack” free. Remove the bolts fully.
13) If all’s gone well, your new threads will be smiling back at you. If you need to, file or sand any excess resin. I was really careful as I applied it so only needed a slight sanding on the puller thread outside edge.
14) Add a bit of copper grease or whatnot to the threads and CAREFULLY reassemble.
I was very careful tightening the chainring bolt. The other 4 are good and strong so I treated this one as support, but not critical. Seems to hold tight but not going to risk over tightening it. Before, it just spun in the hole so it’s much improved.
For the puller threads, I only did a tentative test run (as I don’t need to push my luck) but they worked held abs didn’t seem to have suffered any damage.
Not an “as new” fix but certainly allowed me to use the cranks for a long time to come. We’ve been through a lot together so I’m glad they weren’t consigned to the recycle pile.
Hope that helps if your in the same situation.
Attachments
-
 C1DF7D9C-197F-4B29-BB08-5ED5A8C41DDB.webp456.4 KB · Views: 122
 -
 99A699A6-EBEC-442D-9723-039085C692ED.webp211 KB · Views: 108
 -
 4EF9AE50-D043-41D3-9CEF-BD5945BE9E61.webp243.2 KB · Views: 101
 -
 8D85AA59-C880-4692-A59E-3FF06A34B4AD.webp154.5 KB · Views: 104
 -
 483F228A-FDC5-4C01-9535-FDED406B577D.webp112.5 KB · Views: 134
 -
 492E5479-36AF-4C60-9225-56702F0A4402.webp138.3 KB · Views: 138
 -
 270673FA-7F8C-4152-83EB-A163FA08E722.webp165.9 KB · Views: 146

