That seems about right. There is just a few more little details.
I made some more pictures for clarification:
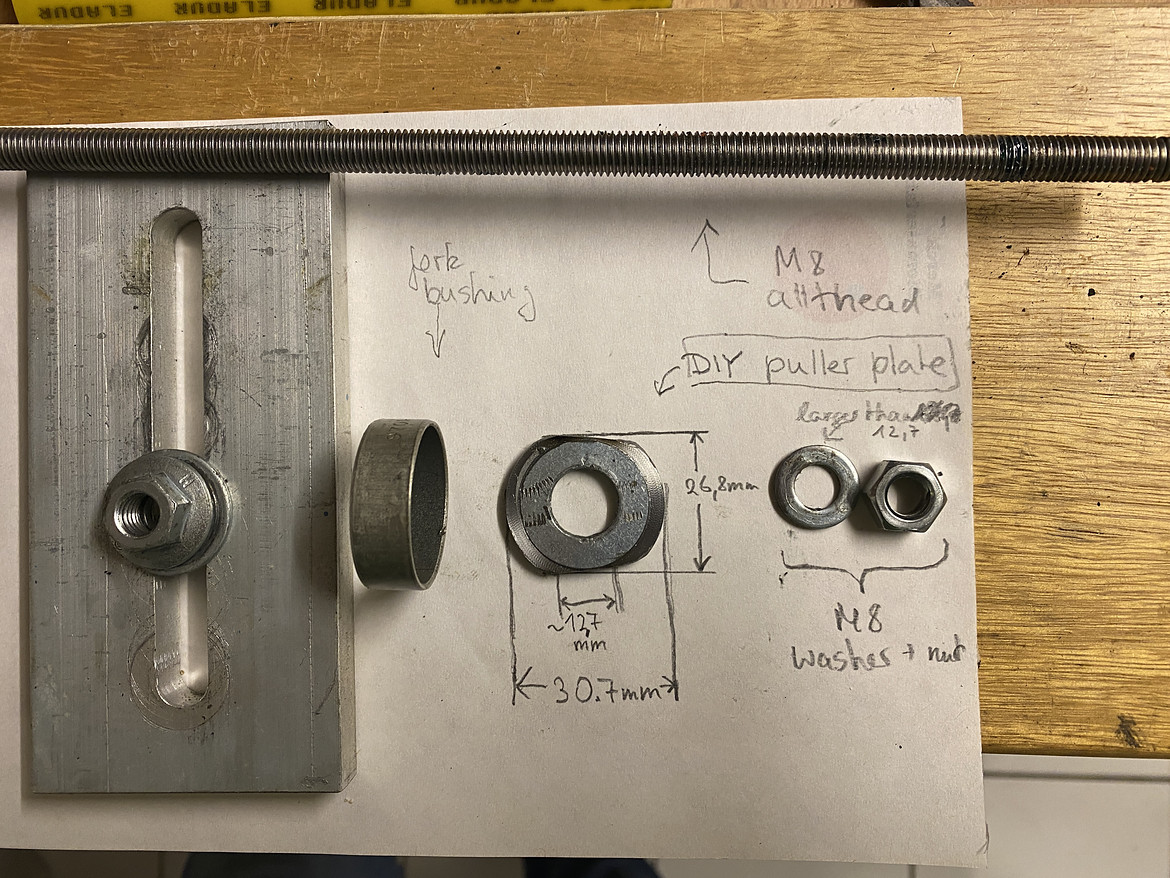
The most critical part is obviously that puller plate -I call it plate for lack of a better word... I made it out of a larger washer using a lathe. The outer diameter of that plate has to be slightly smaller than the bushing that you want to pull. (30.7mm for the Judy. The bushings are 31mm) The inner hole has to be big enough so the plate can be tilted, as @Motomax correctly described. It is shown in the following picture. That dimension is not critical.
Imagine the bushing still being inside the casting.
The puller plate outer edge should be rather sharp and precise, because the bushings don't have much wall thickness.
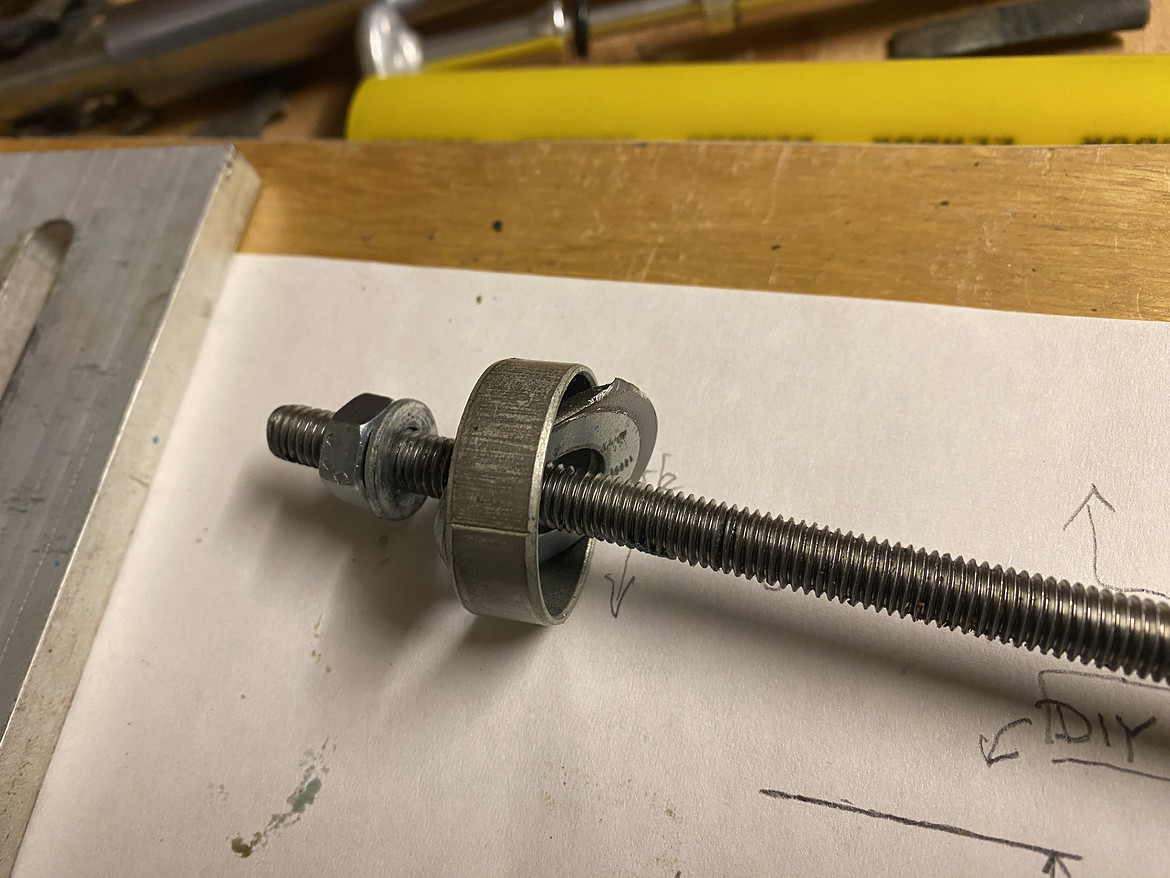
Also note the slightly V-shaped filing. Those edges are not parallel, because I found it easier to tilt the plate through the bushing with it shaped like that. One more important thing about that plate is the underside of the outer edge. It has to be rounded, so the plate can rotate back wothout binding against the casting wall. You might be able to spot it in the next picture. The edge of the plate facing the bushing is sharp. The opposite edge is rounded.
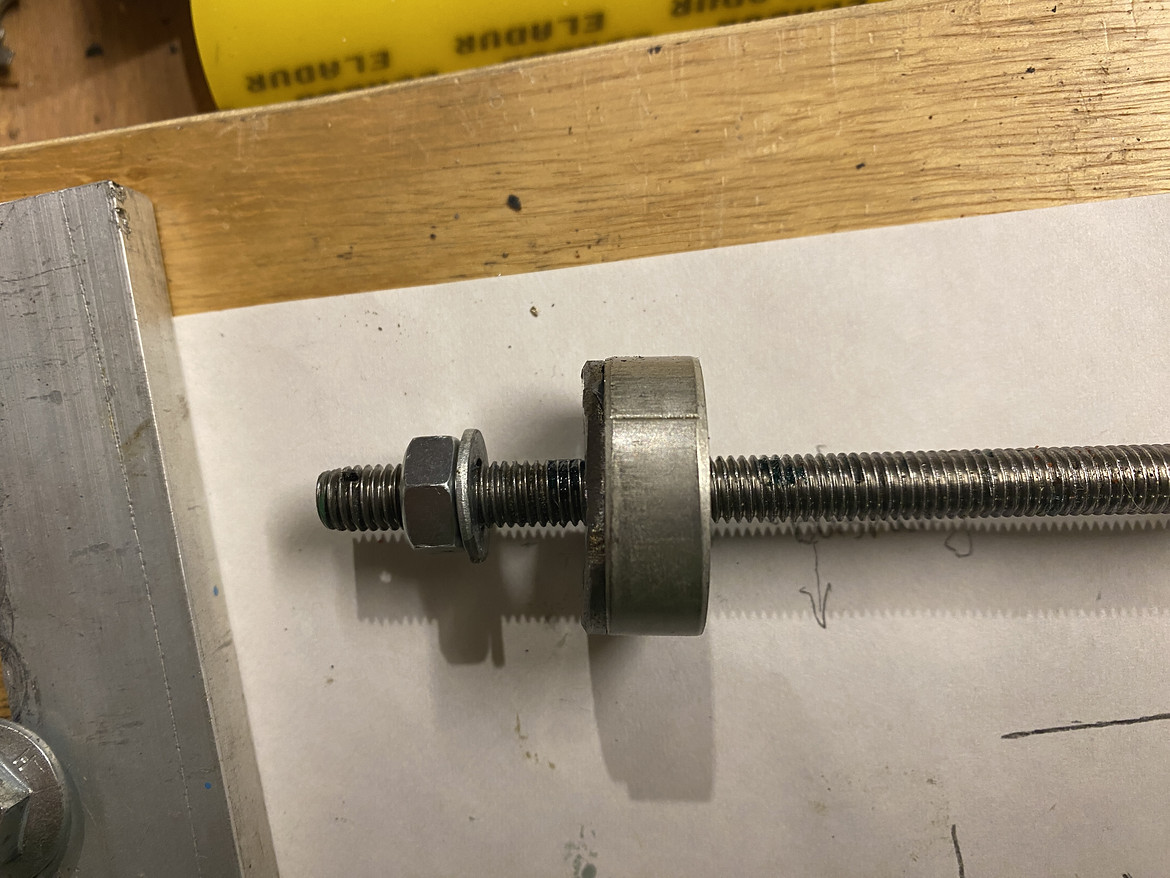
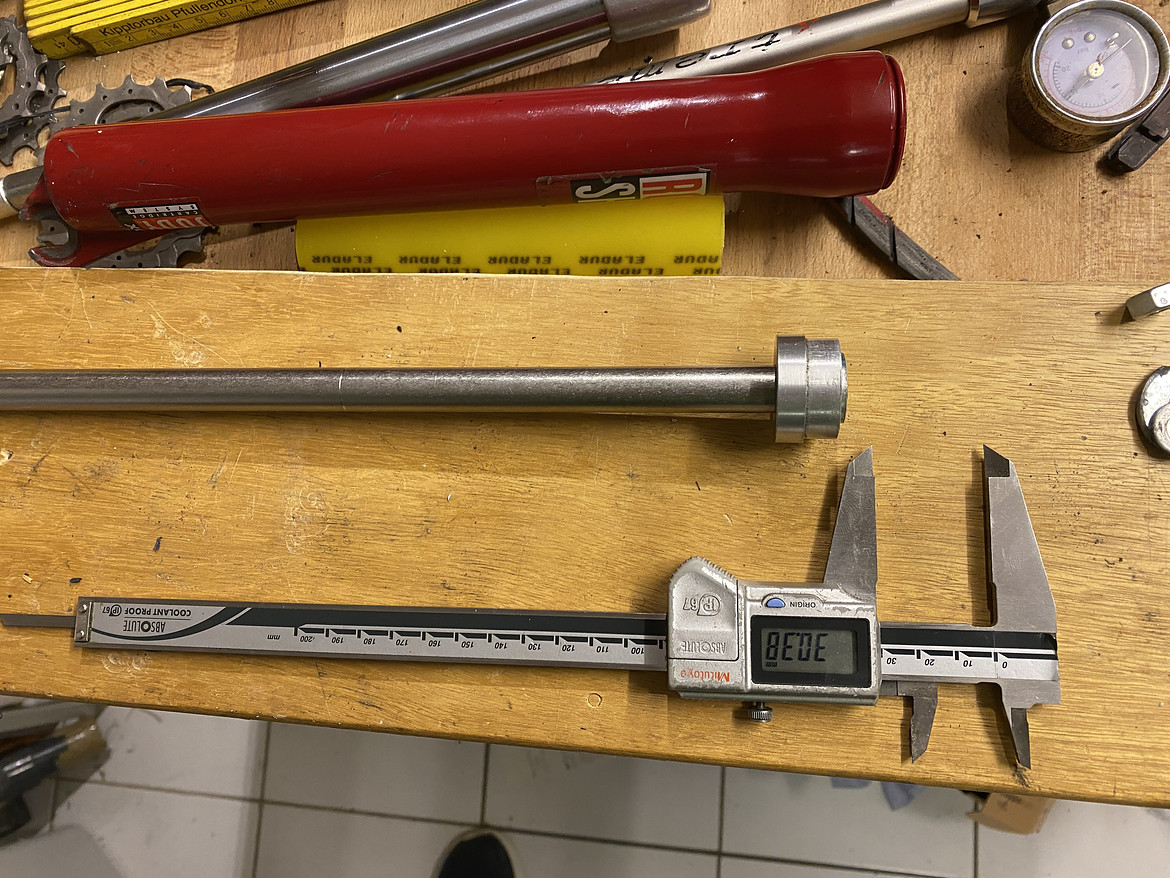
To put new bushings in, you will also need a tool. Mine looks like this:
Its a piece of round aluminium with again 30.7mm outer diameter and a step down to 29.9mm. The step fits the new bushing exactly. The steel rod came out of an old printer I salvaged. The new bushing is hammered in pisition using a wooden or rubber mallet.
Don't forget to "form" the new bushings after pressing them in. Or else they might scratch the legs immediately. That step is omitted by many DIYers. But I think it is rather important. Think about the fact, that the lower bushing can only be formed with the upper bushing not pressed in yet! I forget that every time. And then I have to pull the upper one again...
Today, I'ma go on a little tangent. As I don't seem to have enough enthusiasm to start sanding and polishing...
So here for you, episode 1 of
"Things you better do before putting all back together" - Wipe your bottom clean.
I mean, the bottom bracket.
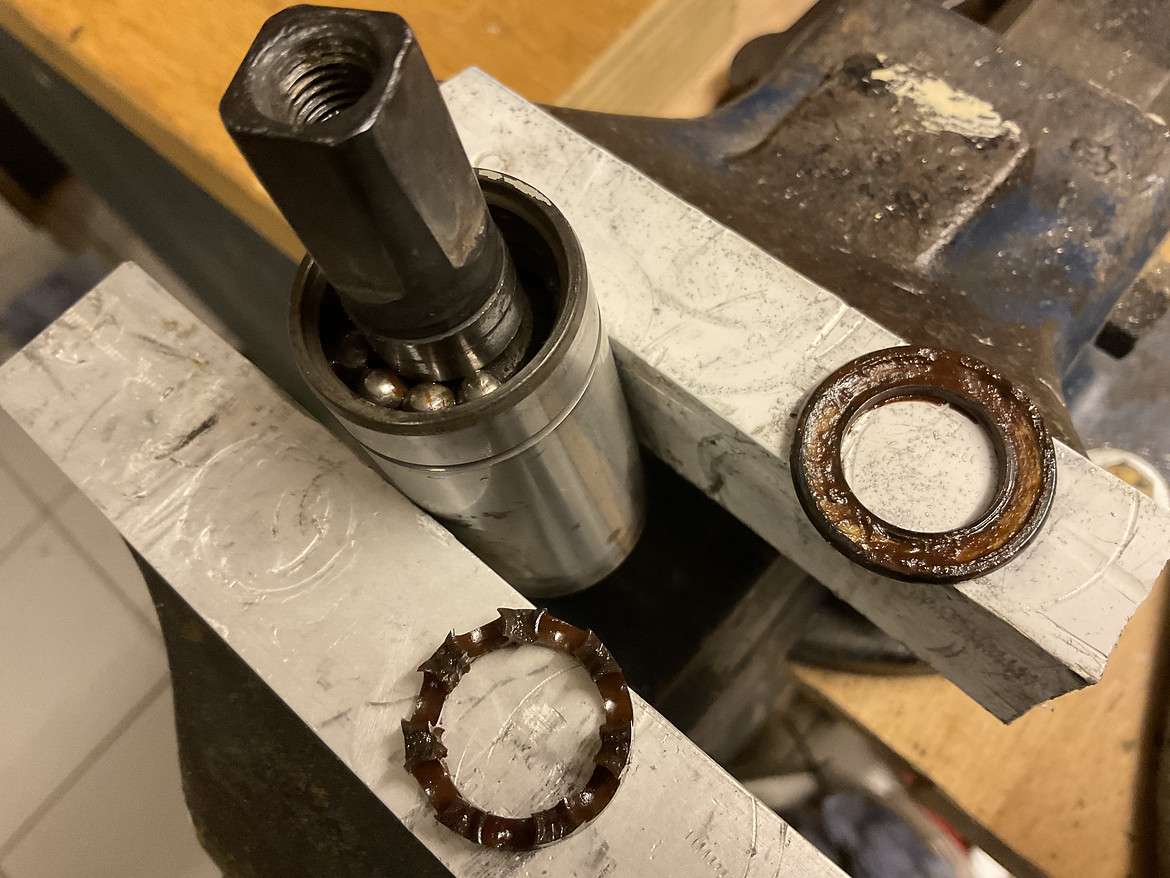
Many guys don't seem to know - I surely didn't for the longest time - that you can actually repack sealed bearings. Even those Shimano bb's. Those are sealed ball bearings, too. One just has to pop off the seal to get to the balls, then flush and repack. No need to toss them, whenever they start feeling dry.
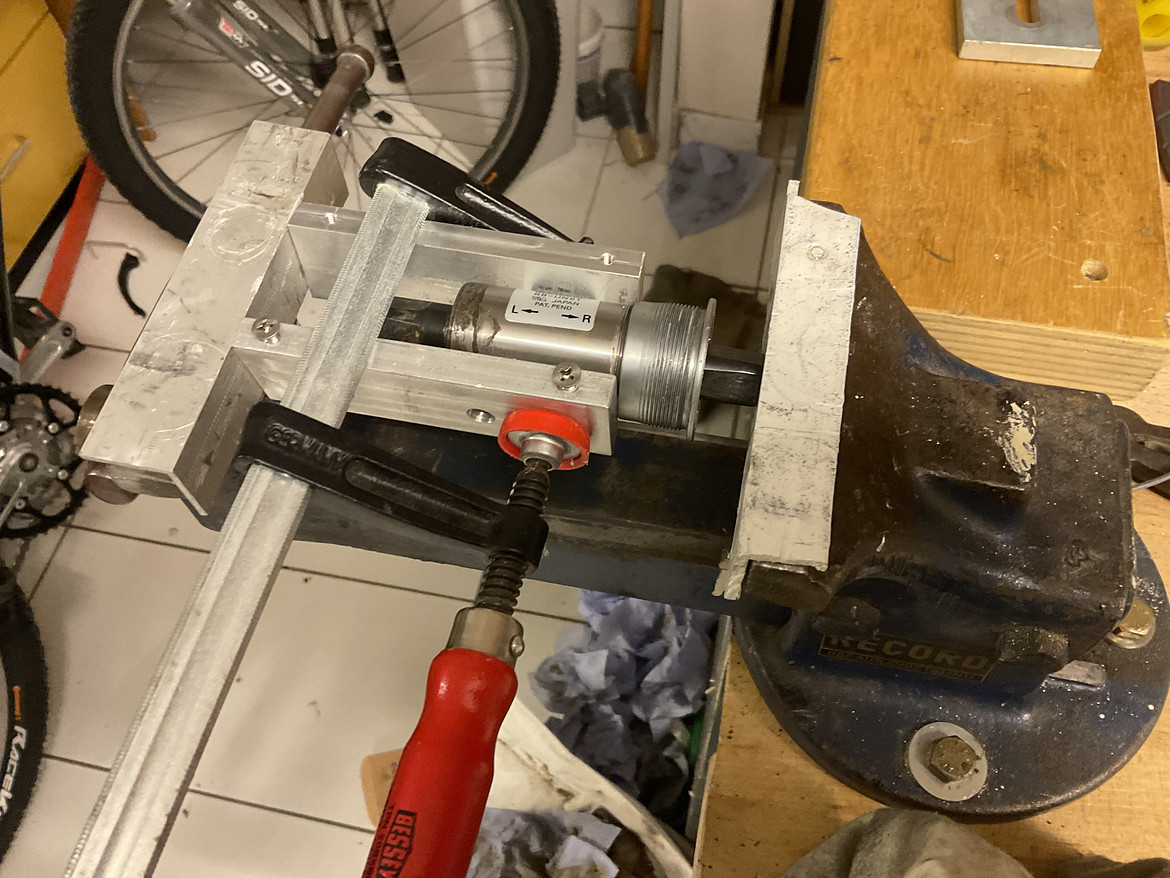
Servicing the left side bearing is usually easy. But on the drivetrain side, you have to pull the cup off first.
Or rather push:
You can see my vise (with "soft jaws"), to pieces of scrap Aluminium plates lightly (!) clamped to the bb-casing, so they are still able to slide.
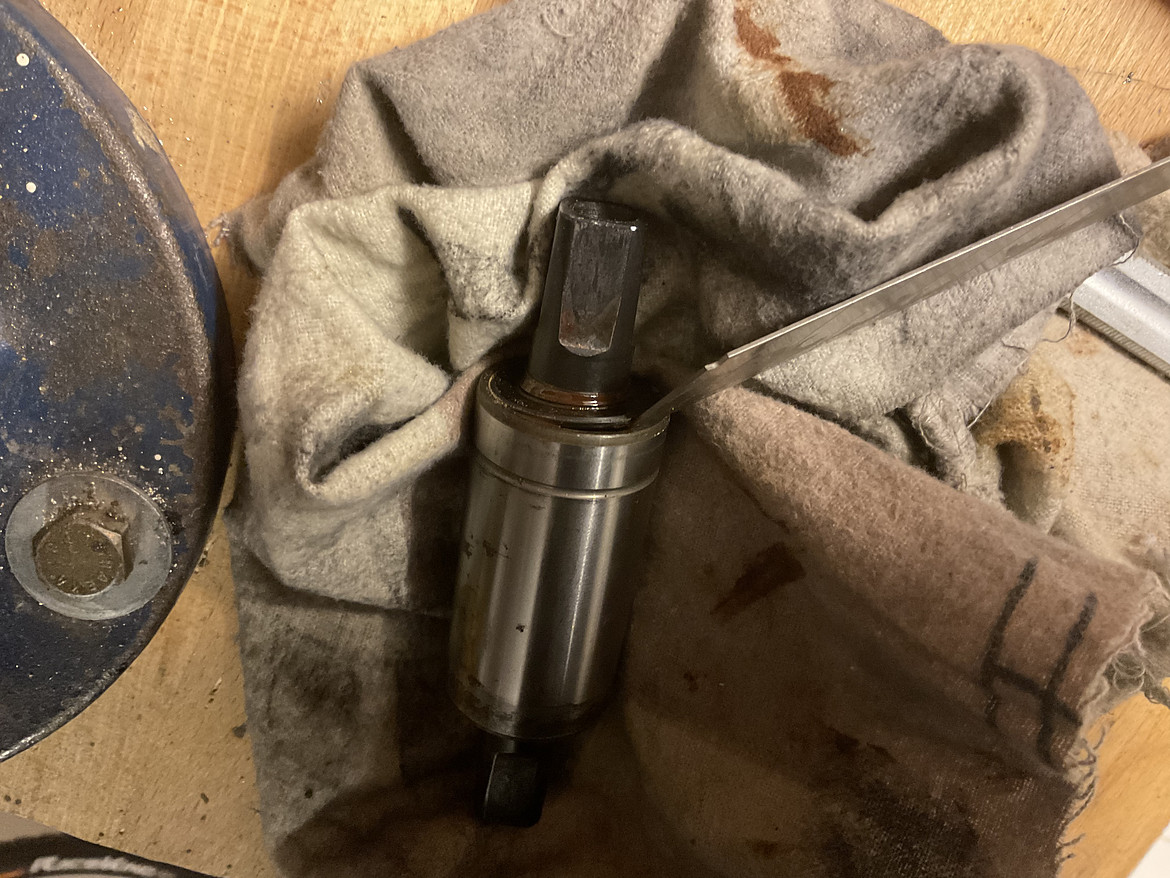
Next is the sealing cap/plate/ring. Using a cutter blade, you have to stab in between the casing and ring, then lever it up. The rings rubber surface will end up lightly scratched but I don't think you can avoid that. If you bend it, no big deal. You can flatten it back later.
With most ball bearings you would at this point be able to see the balls. But in case of this BB-UN51, we are looking at a plastic ball cage. It has to come out too.
The brown shmuck is old grease, rust and brake cleaner that seeped into that bearing while i was cleaning the other side. And it is also the reason for doing all this.
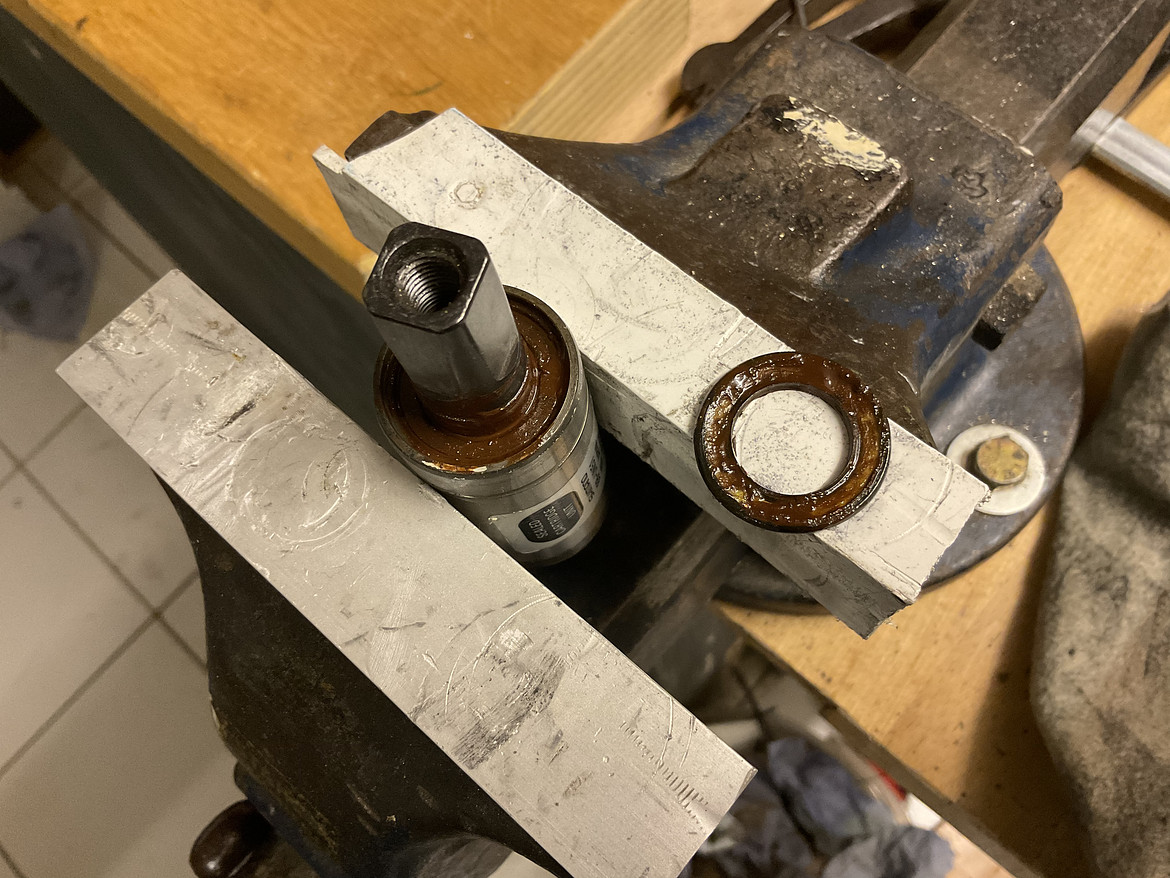
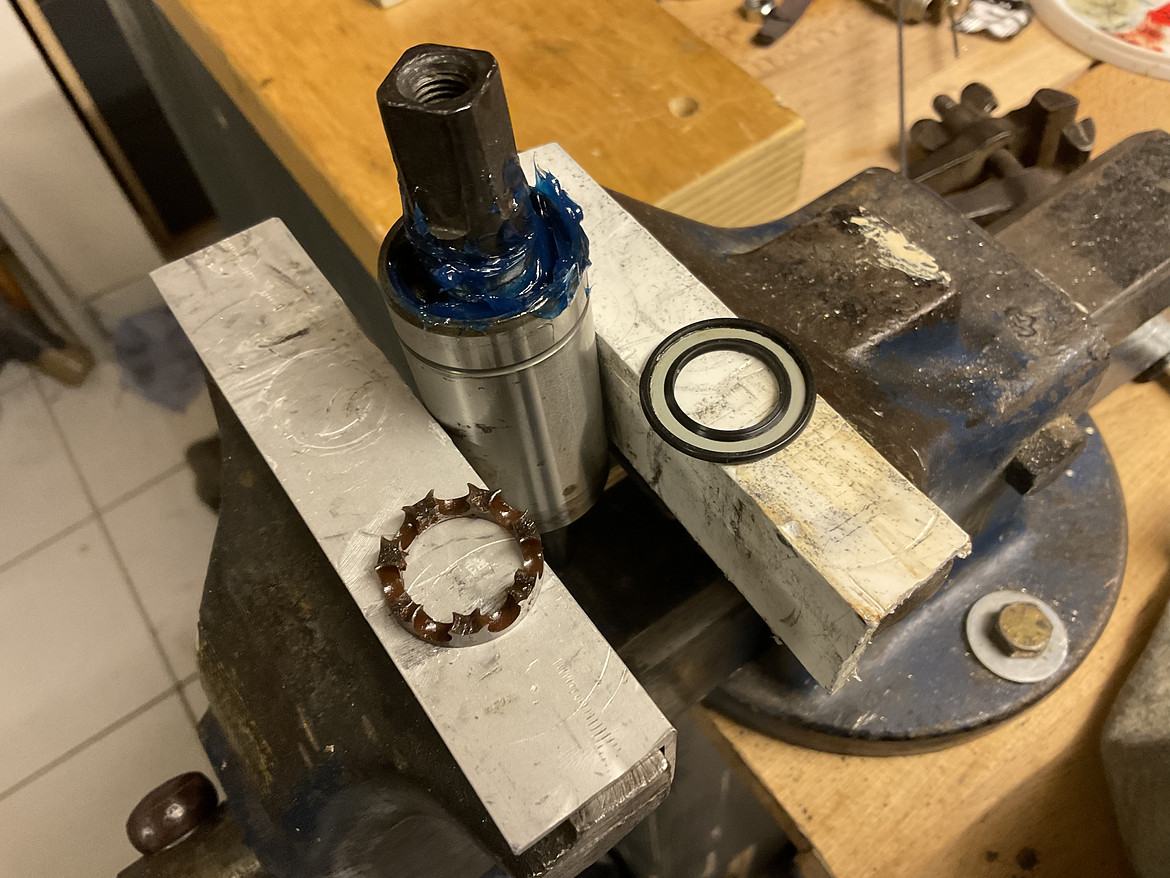
After thoroughly flushing, this is what it looks like.
While the other side had nice shiny balls and a clean surface on the axle, this here side is not ideal looking. The balls chrome is dull, the axle is showing signs of pitting.
It makes me think, this bb will not last for too long any more. 5000km maybe?
So fresh grease goes in and I'll just pretend, I didn't see it.
The sealing ring can simply be pressed back in position. But make sure it is nice and flat. Also have a look at the surface on the axle where the sealing lip is riding on. It better has no dirt or rust or anything. I use emery cloth to spruce it up, if necessary. You'll have to do that before flushing and regreasing, of course.
Then the cup goes back into place. I use the bb-nut for that.
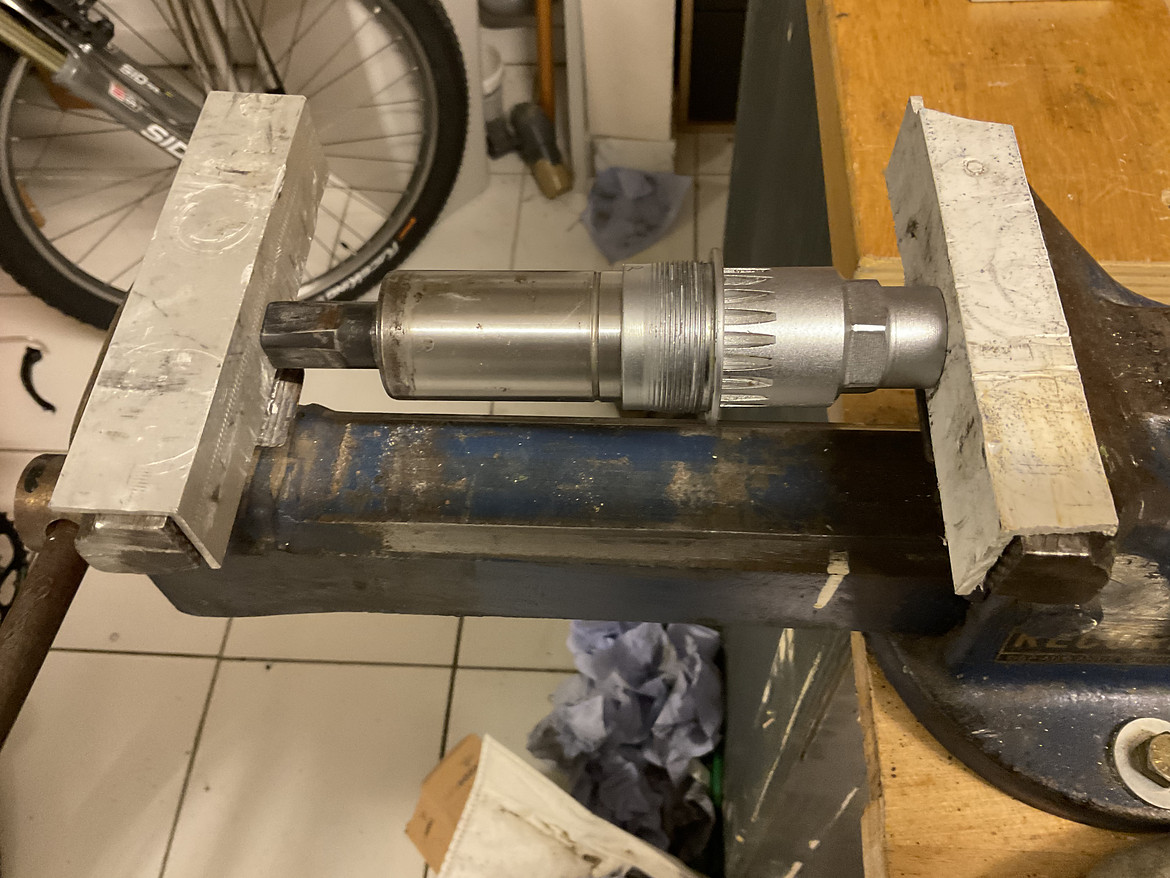
Next is me realizing that the axle length doesn't match the crank I'll be using and it all was for naught...
Or maybe not? Just toss the bb on ebay. Good as new- freshly serviced...
OK. Enough talk about flushing dirty balls. I'll be polishing some tubes next time.
I have too many bikes! Really.
Now there will be one more, I guess. I'm having way too much fun...
As some may have seen, I'm currently building my LTS Thermoplast.
It has a very wired defect at the rear axle mount. It looks like someone has drilled or filed the slot for the axle. And while it's still possible to mount the rear wheel correctly, it's a hassle to adjust the position every time. And it's also "unworthy" for such a nice frame. So I was scouring the usual spots for a donor frame. I have been for the last few years. And now, finally, one came up. It was ratcher cheap so I snatched it.
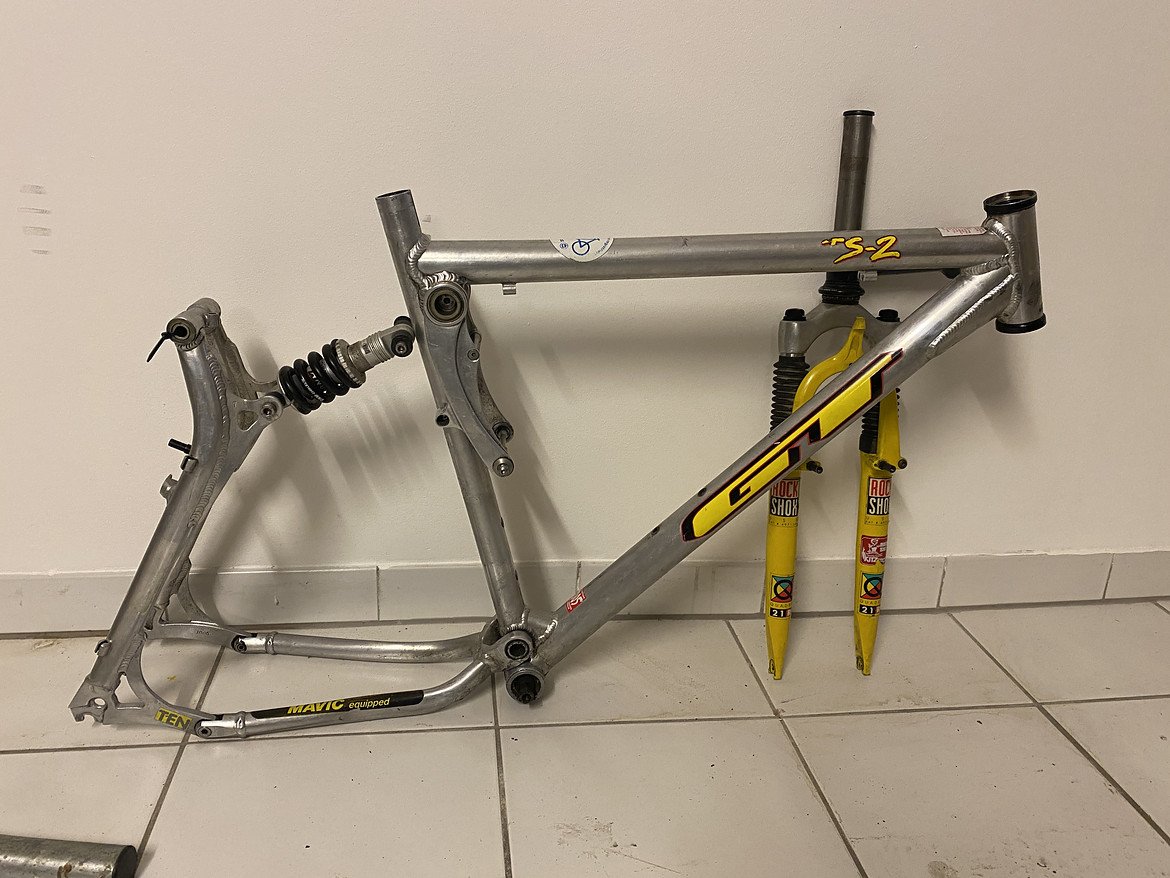
This is how it came. BB and original RS Quadra 21R forks. The bushings, especially the one near the bb are shot. But the metal parts are fine. No cracks, no major dents.
Looking at the sad thing, I made the decision to make it my next project.
It beeing a GT, I'm sure it will be really nice when polished. I'm already looking forward to it.
Nice , I have a ITS-2 also. I need a new rear shock bit it looks a bit different than yours : My spring is silver metalfkake and the eye is very round .Do you know if yours is original or is it a replacement? It is hard to get info about them! Mine looks like the attached photo and like the one in the link; https://www.ebay.com/itm/115437563624
Attachments
p4pb15545373.webp
50.4 KB
· Views: 8
When you click on links to various merchants on this site and make a purchase, this can result in this site earning a commission. Affiliate programs and affiliations include, but are not limited to, the eBay Partner Network.
I have too many bikes! Really.
Now there will be one more, I guess. I'm having way too much fun...
As some may have seen, I'm currently building my LTS Thermoplast.
It has a very wired defect at the rear axle mount. It looks like someone has drilled or filed the slot for the axle. And while it's still possible to mount the rear wheel correctly, it's a hassle to adjust the position every time. And it's also "unworthy" for such a nice frame. So I was scouring the usual spots for a donor frame. I have been for the last few years. And now, finally, one came up. It was ratcher cheap so I snatched it.
This is how it came. BB and original RS Quadra 21R forks. The bushings, especially the one near the bb are shot. But the metal parts are fine. No cracks, no major dents.
Looking at the sad thing, I made the decision to make it my next project.
It beeing a GT, I'm sure it will be really nice when polished. I'm already looking forward to it.
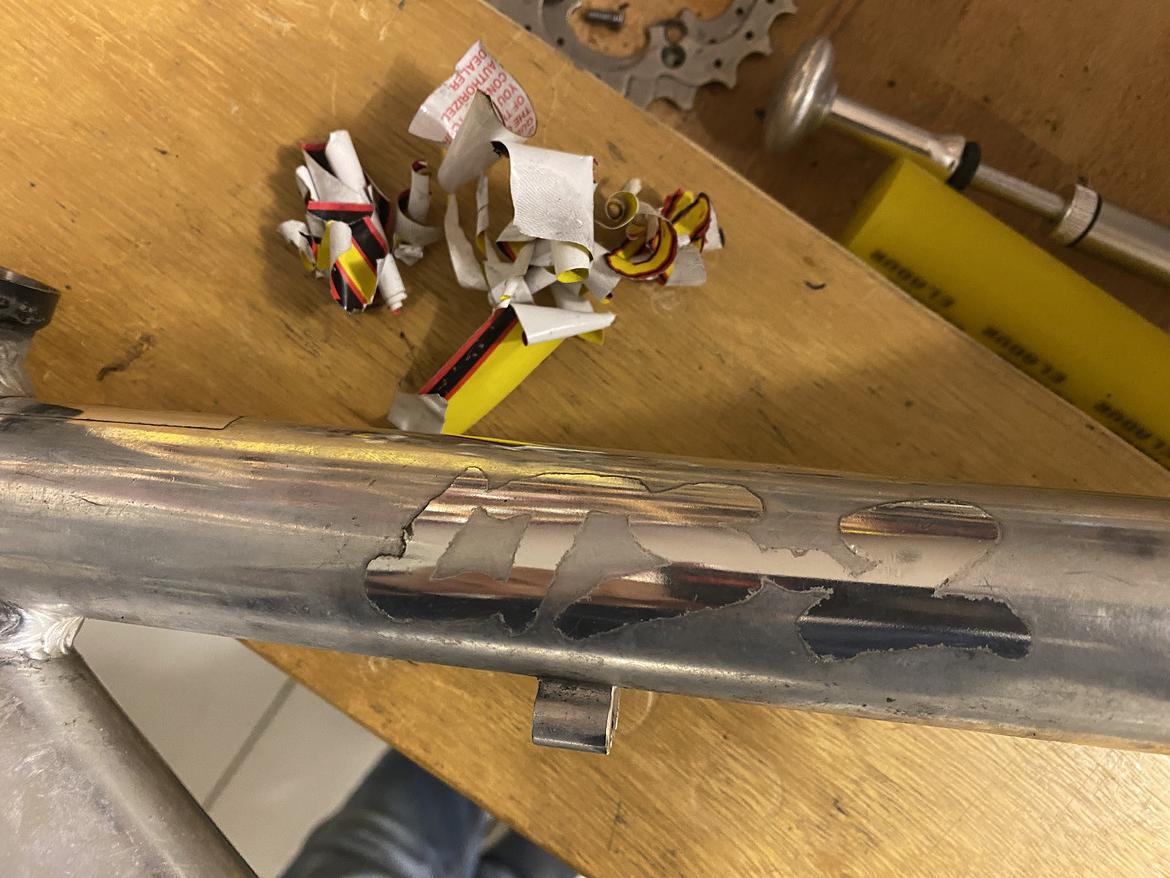
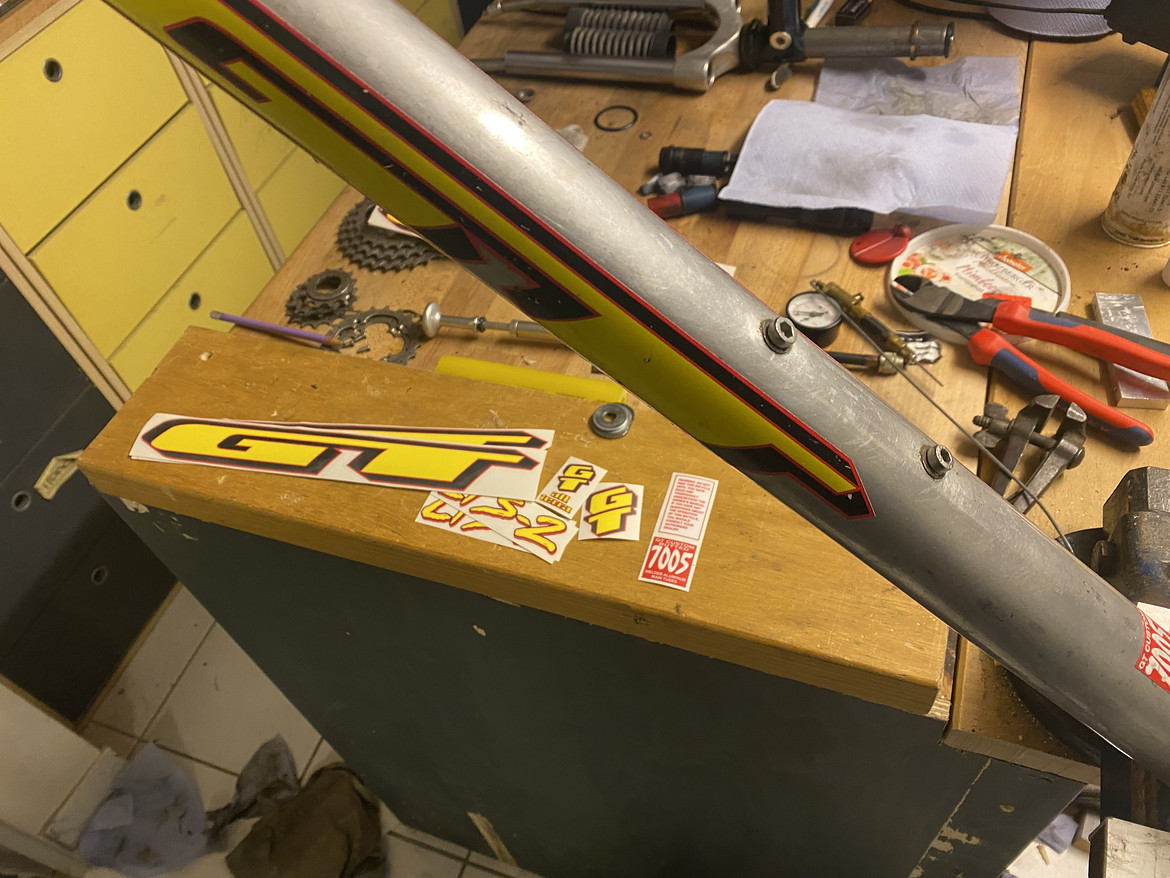
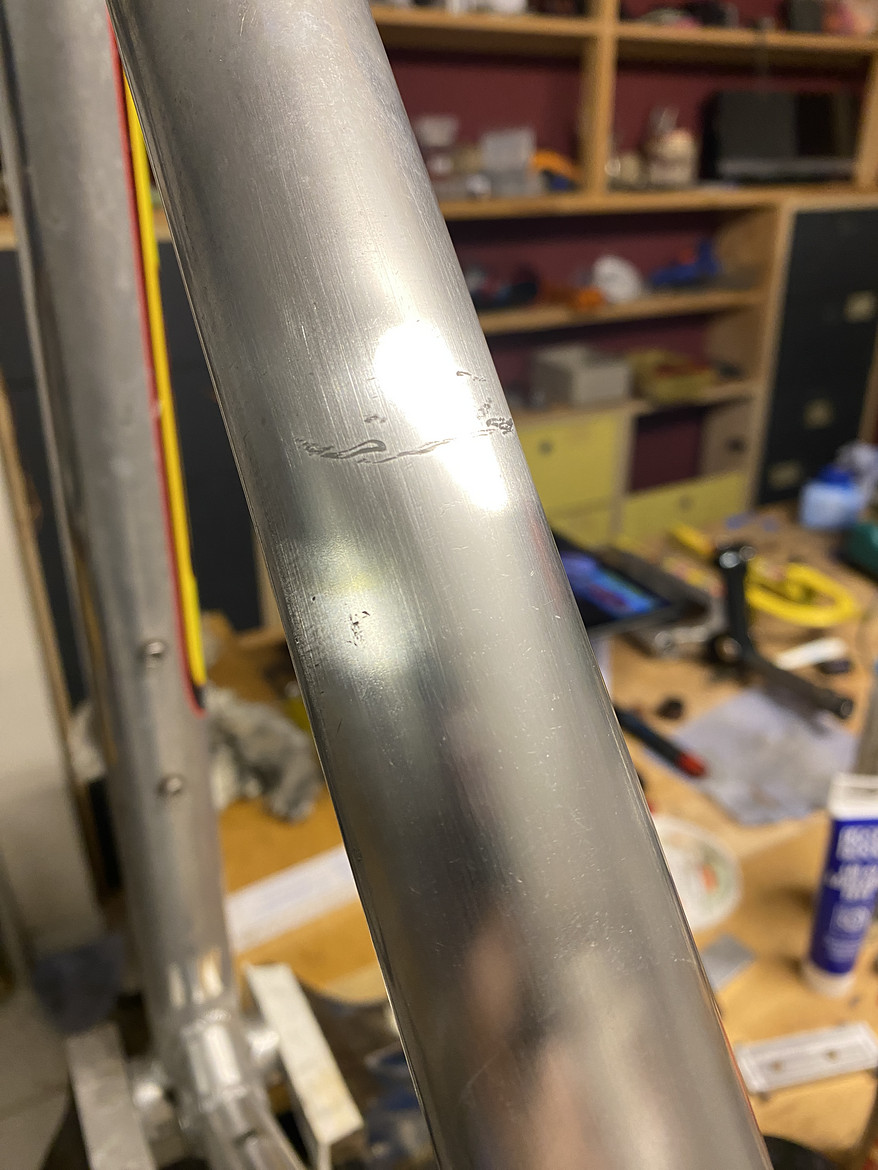
Today it's sanding and polishing. I'm motivated now, but I already know that'll change after one and a half tubes...
So I have a fresh set of decals as a motivational.
There is one deeper scratch on the top tube. What would you guys do? Sand it smooth or leave it?
Pro: Better looks
Contra: Thinner tube. And the frame looses some of it's history.
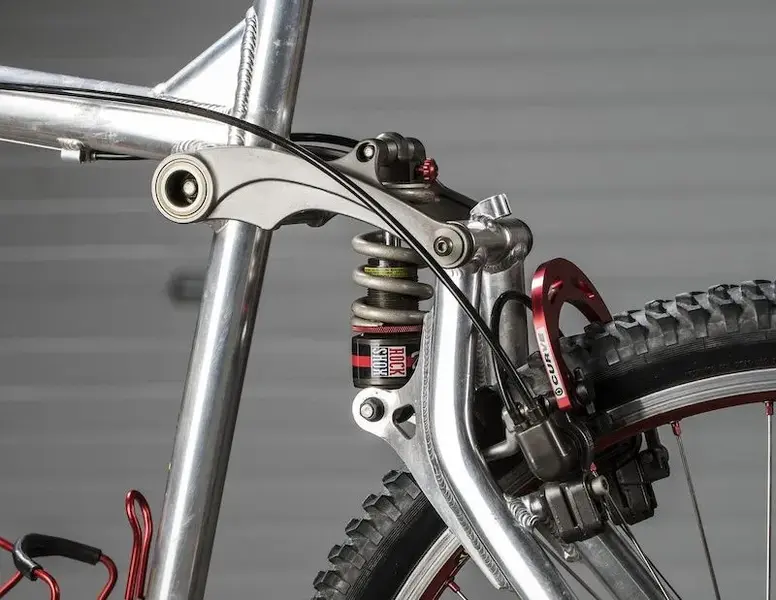
@d333gs About the shocks. The frame came with a DNM firestarter DV-22 in 135mm.
But my LTS Thermoplast, that has the exact same rear end geometry came with a RS Deluxe in 140mm. So there you go.
I'd sand it out personally, that spot on top of the top tube is pretty visible. Not sure I'd worry about reducing the wall thickness and would make a gradual thinning a few inches either side. GTs of this era wouldn't have super thin walled tubes would they?
")


")