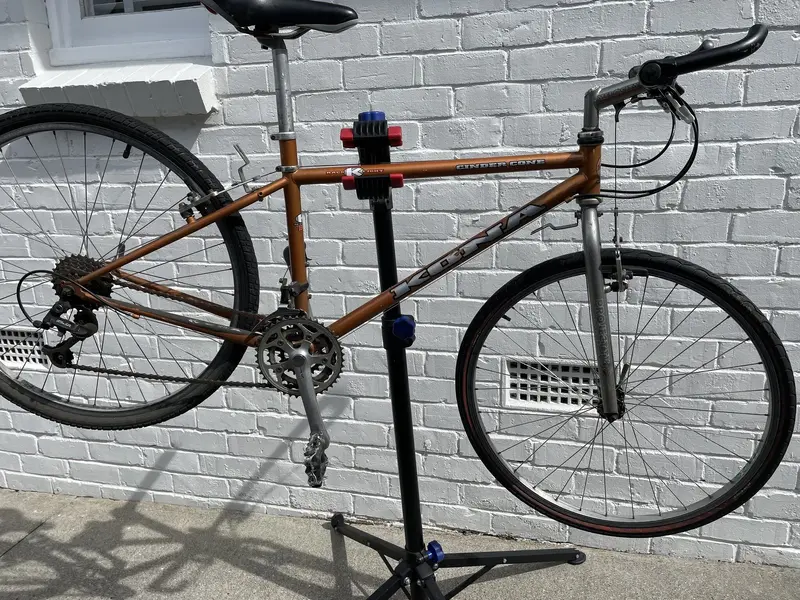
Yesterday was sunny and with the kid off to a friends for a couple of hours I got time to disassemble the Cindy.
Like many of you I get my bikes off the internet, so lots of zooming low rez photos with bad angles to try and see if that’s really a crack in the frame or just grot. And its at this point with the bike on the stand you find out whatcha got.
No grot on this frame to suspect a crack, but still plenty of opportunities for problems. Top three issues which are hard to spot on auction on pics; seized seat post, impossible to remove BB, nonsense going on up front in the headset/steerer area. But before I touch those hot spots, I work up to them on the wheels, brakes and derailleurs.
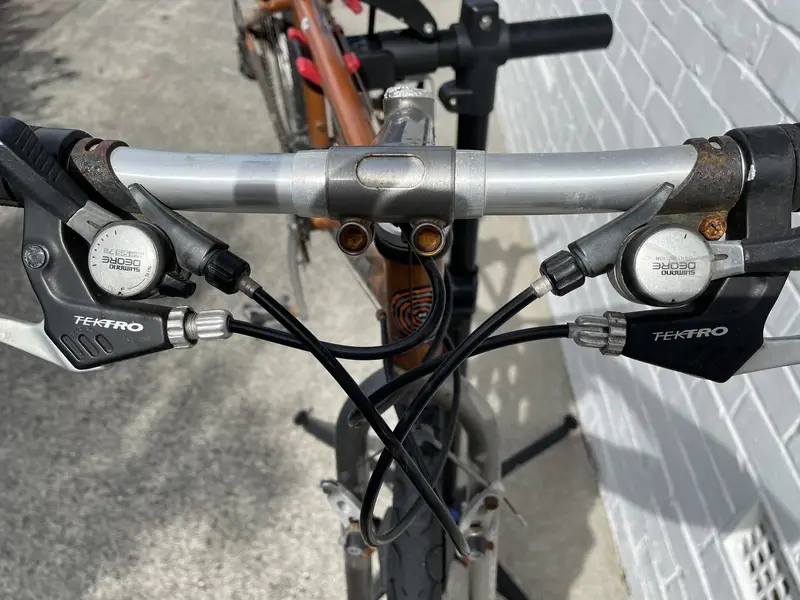
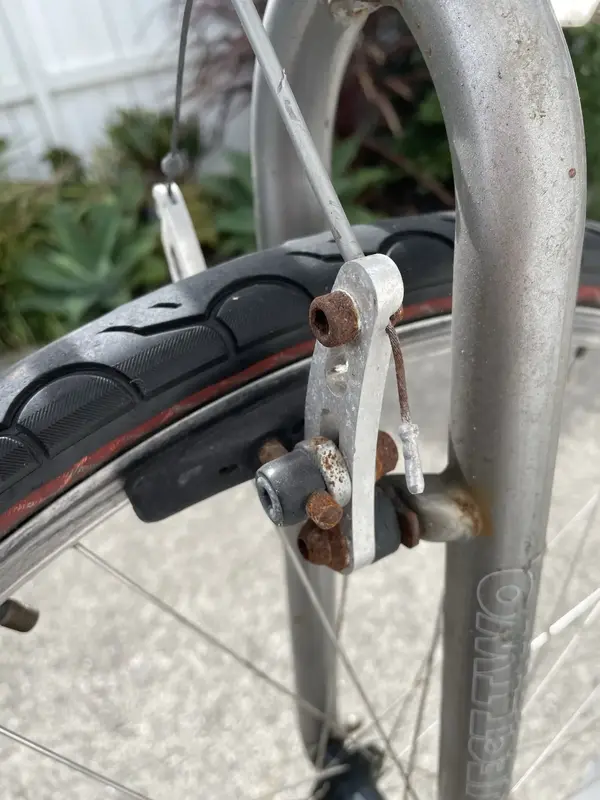
The brakes are interesting, described in the Kona catalogue as ‘custom lightweight stoppers’ they are not like the usual Shimano stuff I’m used to. My mate who knows much more about this stuff than me says they’re like Grafton brakes, just not as good, or as expensive.
Anyway off they come and I try and keep the stack of spring, canti and washers in order. When removing things from a bike there’s information to be preserved. I’ve learned that hard way to keep stacks of things together. Many things are handed or only go in one way and so I tie the bits together as soon as they’re off the frame. I also label lefts and rights and fronts and backs.
The right hand brakes are weird, they leave a bit behind on the brake post. I’ve no idea what they do or how to get them off so I ignore them and move on.
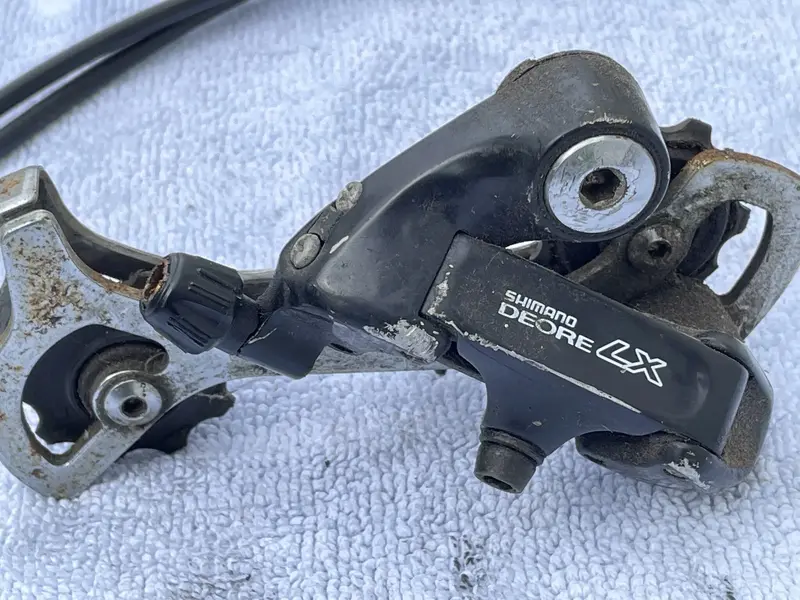
Derailleurs are in nice shape, they come off and into bags. The cables for brakes and gears are off into bags. I rethread the outers onto the cables to preserve that information and into a bag.
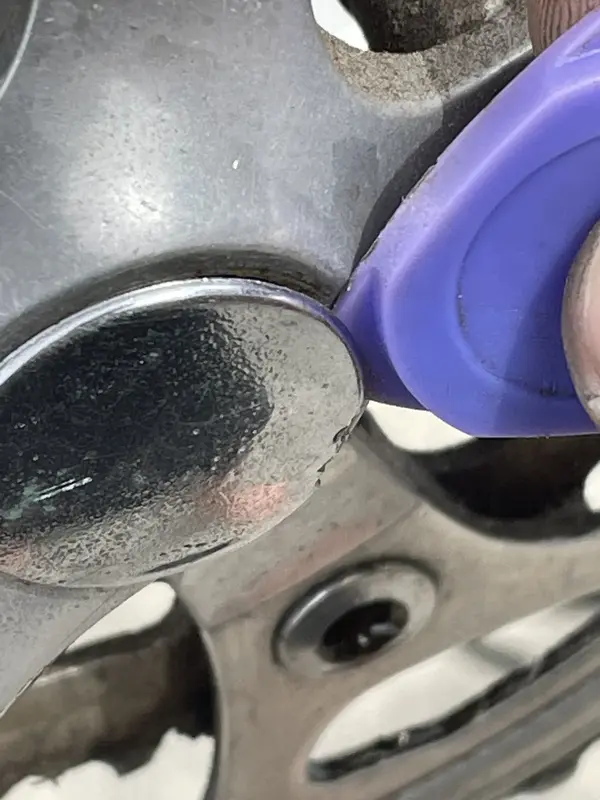
So now I get to think about one of those potential problem areas. I go for the bottom bracket. But before I get to that I need the cranks off and now the dust cap stumps me. Dust caps normally press in or screw in. These look like press in but the lever slot to remove them is tiny and pristine. No jamming a flathead in there. I use a plastic pry tool I got for disassembling Nintendo switch controllers and carefully lever them off.
Lefty loosey, righty tighty, sometimes that’s true and sometimes it’s not. And in the micro universe of pedals, cranks and the bottom bracket some weird quantum rules apply and it’s both true and not true all at the same time.
Anyway I get my left and rights sorted and the most concerning thing about the cranks is that they basically just drop off the BB spindle. There may be trouble there but not until we get to putting the bike back together so let’s ignore that, bag ‘em up and move on.
Bottom bracket next, it’s stiff but I resist reaching for the hammer, upend the frame lean on the tool and out it comes. Good. No surprises here. Next up seat post. I undo the bolt and it slides out easily. Great, two down one to go.
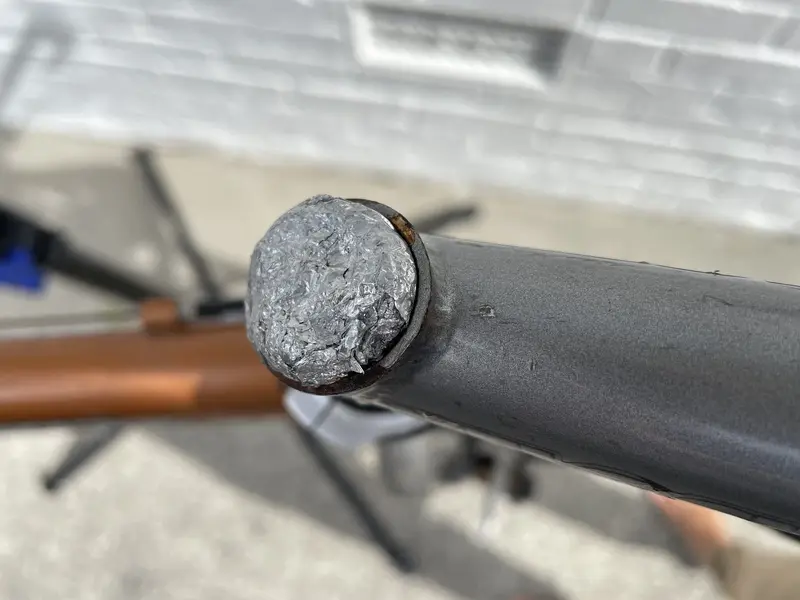
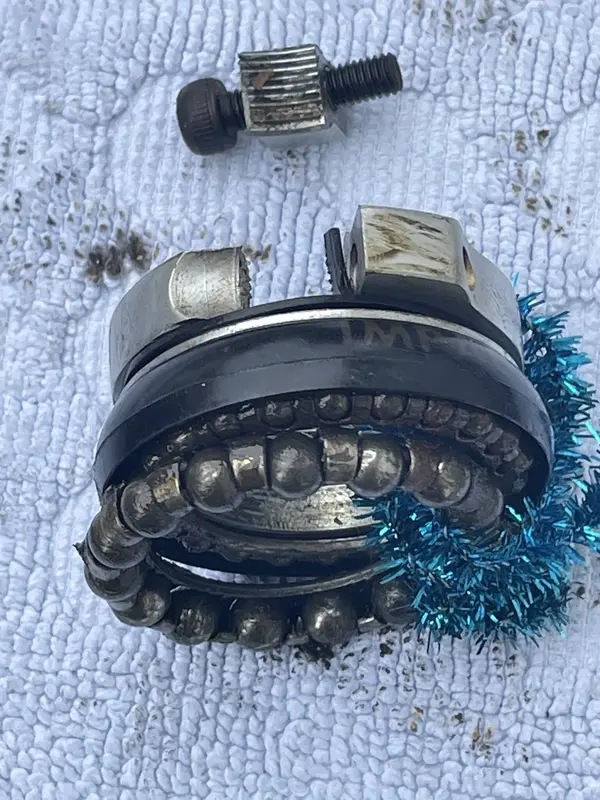
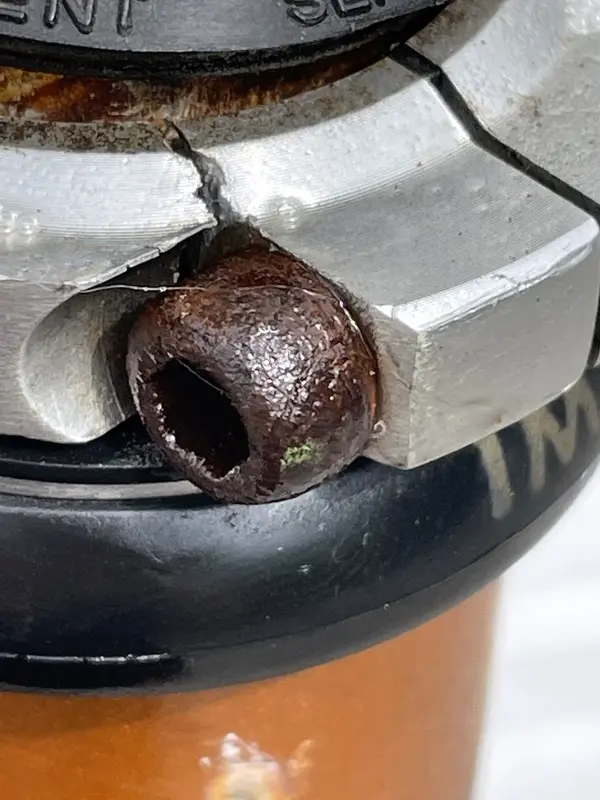
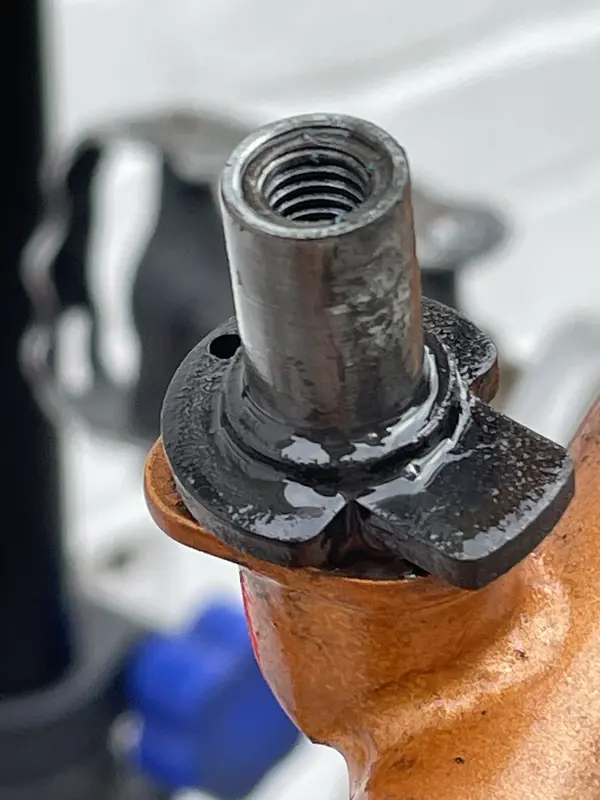
Headset, and the problem is obvious straight away. This bike has an ‘impact’ headset. It’s a normal threaded headset but with just one top nut instead of two. I guess the engineers at Kona were dabbling to find improvements and thought this was it. Anyway this top nut is aluminium and has a slot cut in it. There’s a bolt threaded into it to tighten it up a little into the steerer tube and lock it on. At some point some over zealous wrenching has over tightened the bolt and the nut’s cracked in two. Oh dear. As a buyer of bikes on a budget I don’t mind dirt, that’s free to clean off. But broken things means repairing or replacing. I reckon this is a replace. Anyways off it all comes and into the bag it goes, tied up to keep the order of rings, bearings and other bits.
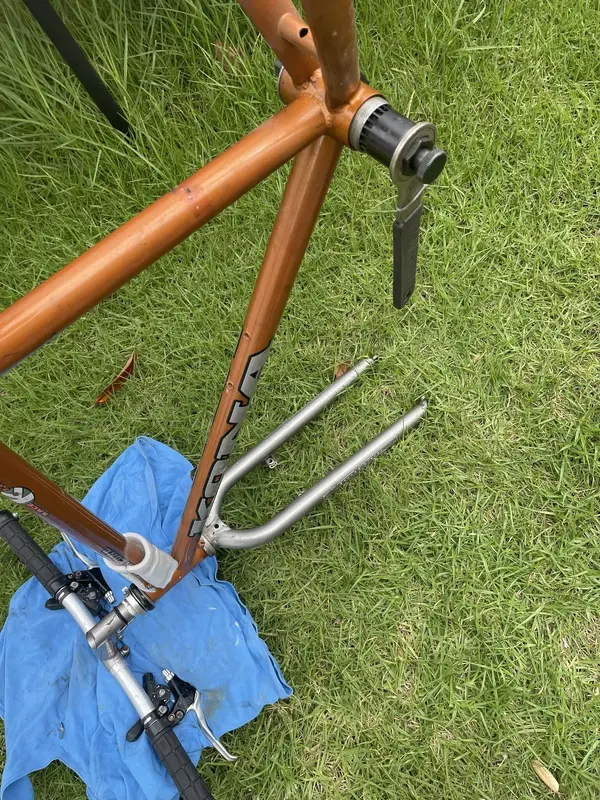
Not too bad then overall. The bars and fork are no trouble. The brake levers have been replaced but are a good match for the originals. The DX thumbies have the original plastic film on the tops. Nice! The grips come off with a bit of methylated spirits dripped between bar and rubber.
The parts are all bagged up and boxed away waiting for the cleaning mood to strike. Plenty of polishing to ahead.
Thanks for reading. Happy riding.


")


