Start at the beginning - Muddy Fox Courier Comp Greeeeeen

Re:

Got a few more wee jobs done the past few days.
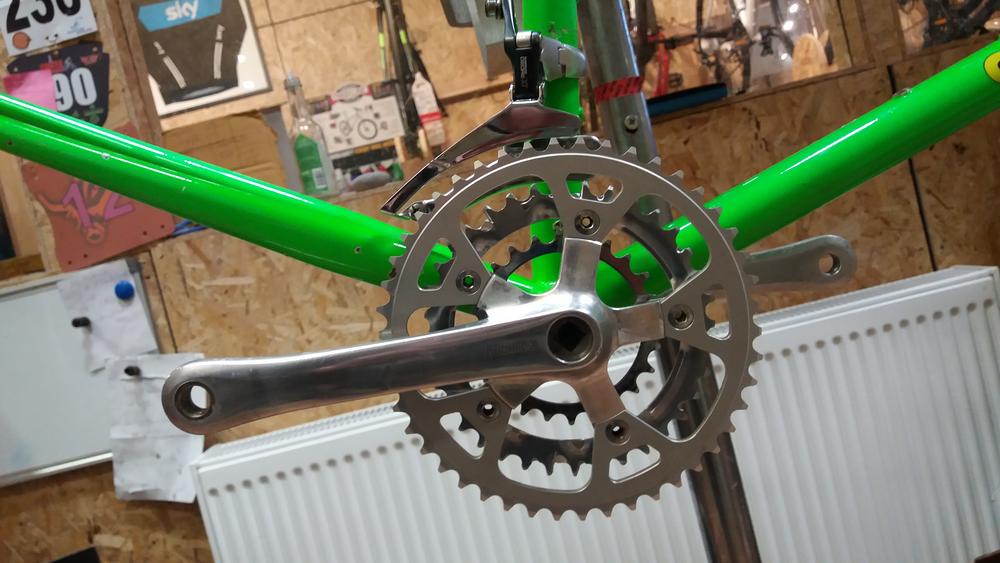
The chainset I have is an XT M730 with some pretty worn rings.

vYty3i9.jpg


dSyY9KE.jpg


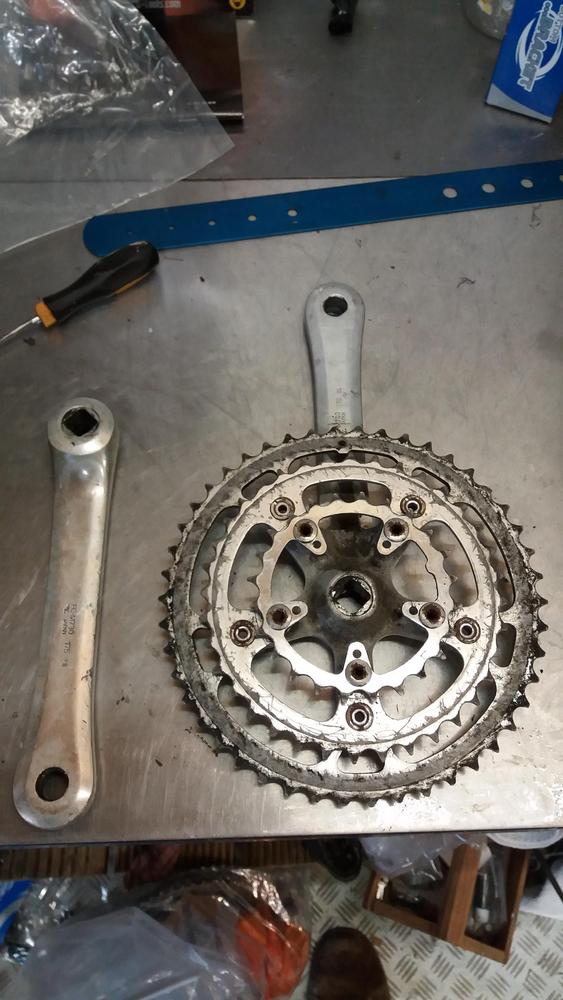
it was looking pretty grubby and unloved so off with the rings and a good polish to see what lurks beneath.

The arms polish up reasonably well, although they are a bit tarnished in places, not sure if the photo shows it very well

CssIZKu.jpg


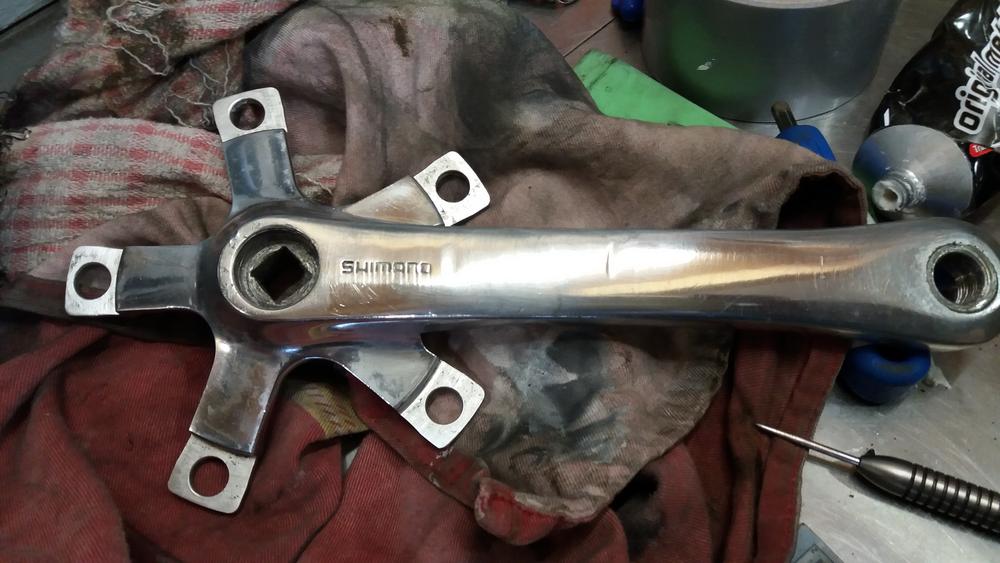
but no matter how much buffing it gets, the finish seems to be away. Has anyone come across a way to bring full lustre back to this sort of finish? Could be that it just had its shiny day, but if anyone has any good suggestions...

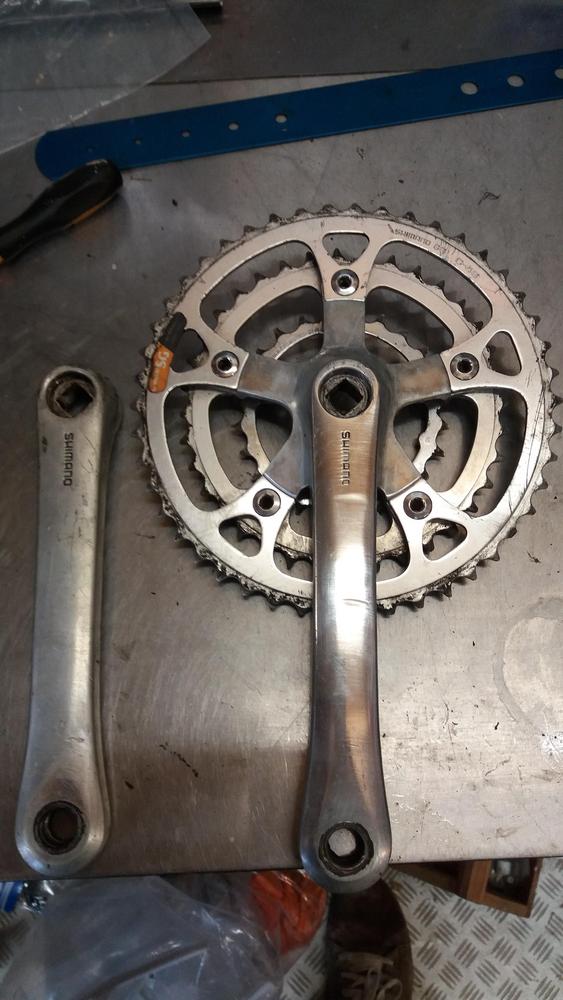
In the meantime I have been cleaning up the rings as best I can. Ive a 46 t outer which is in reasonable shape, so it got a hot scrub in the soapy, and a degrease, and a brush with an oral b

UGh11ah.jpg


Just to prove how much time it is easy to waste really.
Stuck it all back together with a 38t middle and a 24t wee, and was quite pleased with the overall result

xEW8AFs.jpg


7gesPiu.jpg


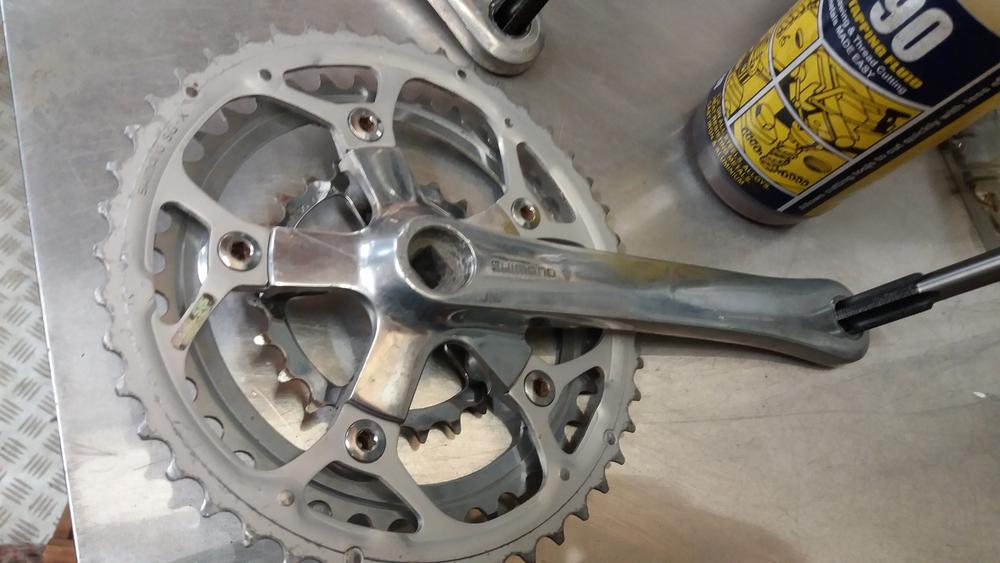
and had just hung it on the bike when my workmate abracadabras an almost mint 36t and a band spank 46t out of his pannier bag. Good things come to those who are just making do, sometimes

I couldn't be bothered taking it all apart again yet, so I moved on to a very pressing issue.

Most of the hangy bits have a definite silver theme, although theres also a Strong XT thread running through the build

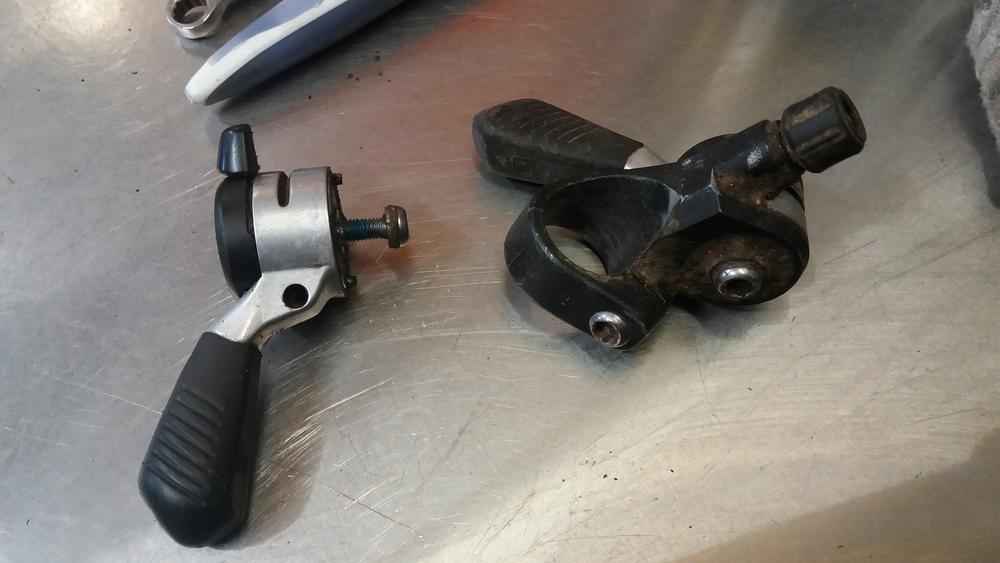
So when it comes to the brake levers, do I go with the scruffy looking XTs with black blades?

LQZTXRv.jpg


or rob these Deore levers of the Marin lurking in the rafters?

xkANLJr.jpg


What to do? Polish the shifters...

BollE9Z.jpg


7pq8Y5Z.jpg


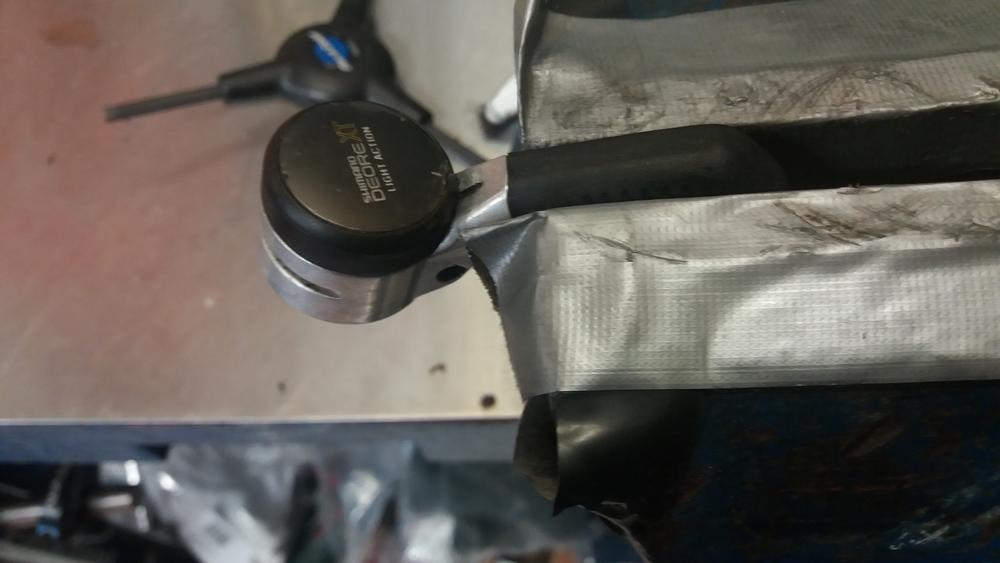
they got a good hot bath too and a tcut rub, the tops looking a bit bubbled, (not from the bath) but the rest of them came up pretty good.
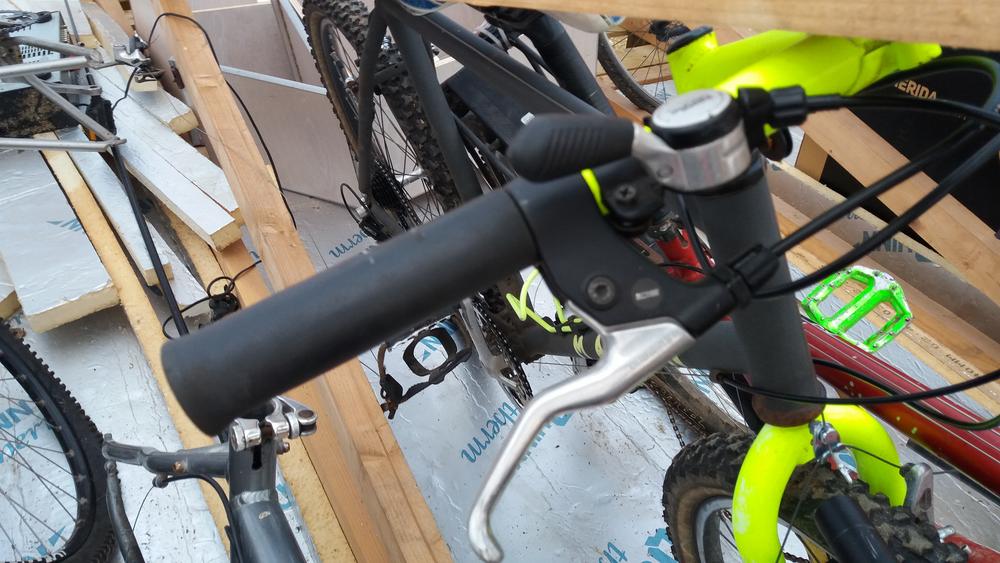
And in position...

nxeT8fL.jpg


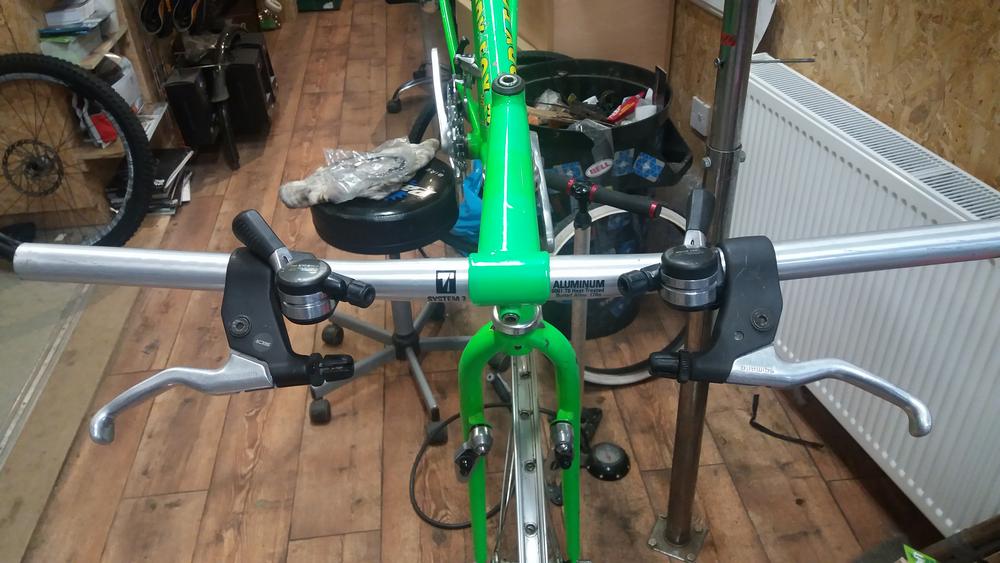
...with the silver levers, I think its the aesthetic over the XT purity that wins out. The bike I rode BITD had silver 4 finger Deores, so is kind of inkeeping. And its getting DX hubs

So its starting to come together, I fished out the front wheel which definitely needs a hub strip down and fresh bearings, but if I cant find a silver M261 to match (32 hole) then I'm going to be a bit stuck. The rims I have at the moment are either one M400 and a 261, or two BX23 Specialzed hard anodised, but they just look kind of odd with all the silver

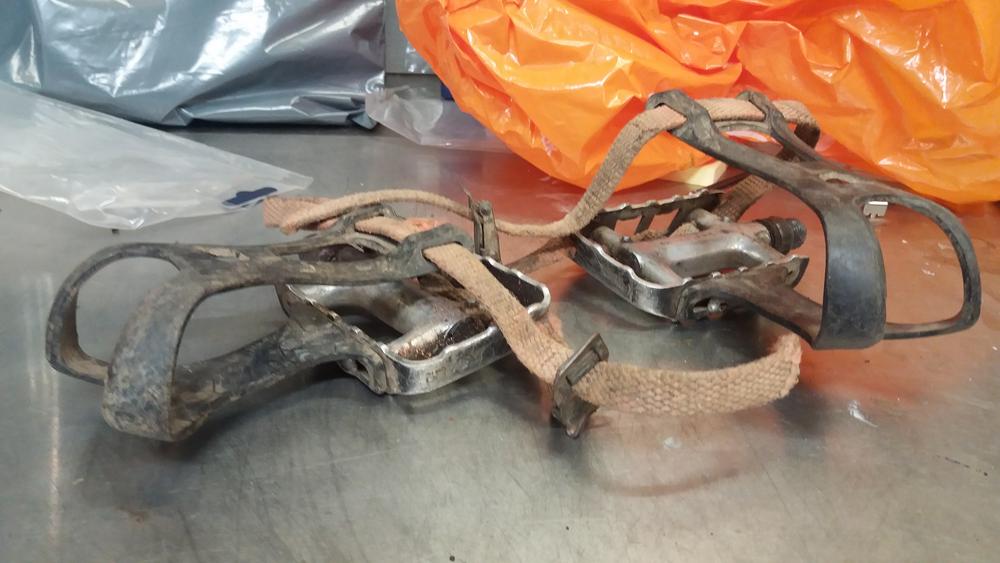
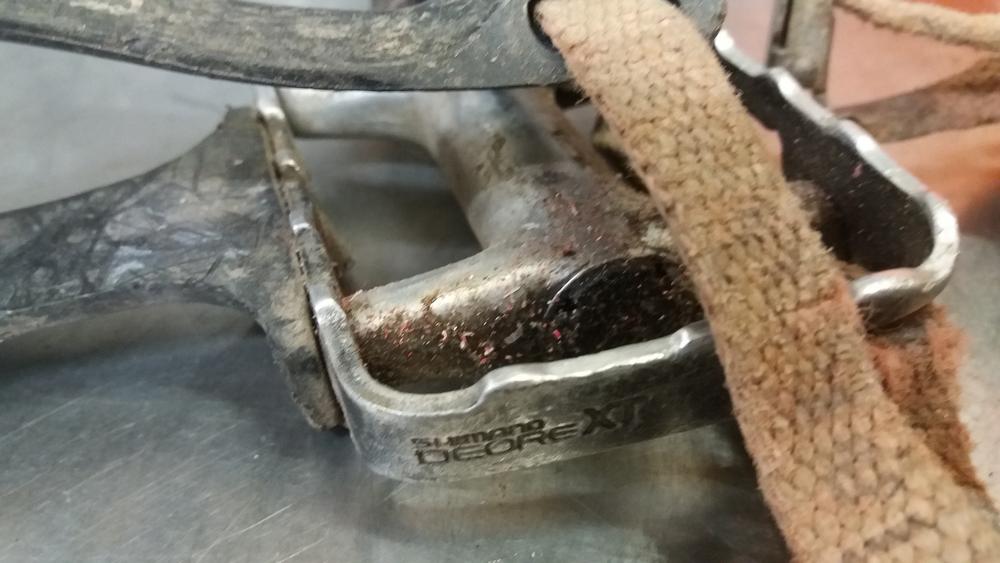
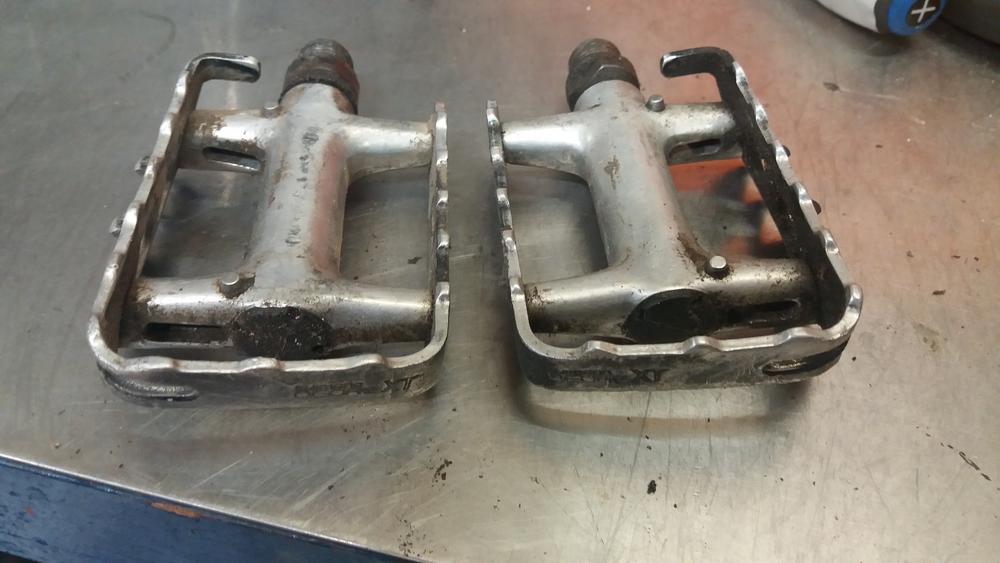
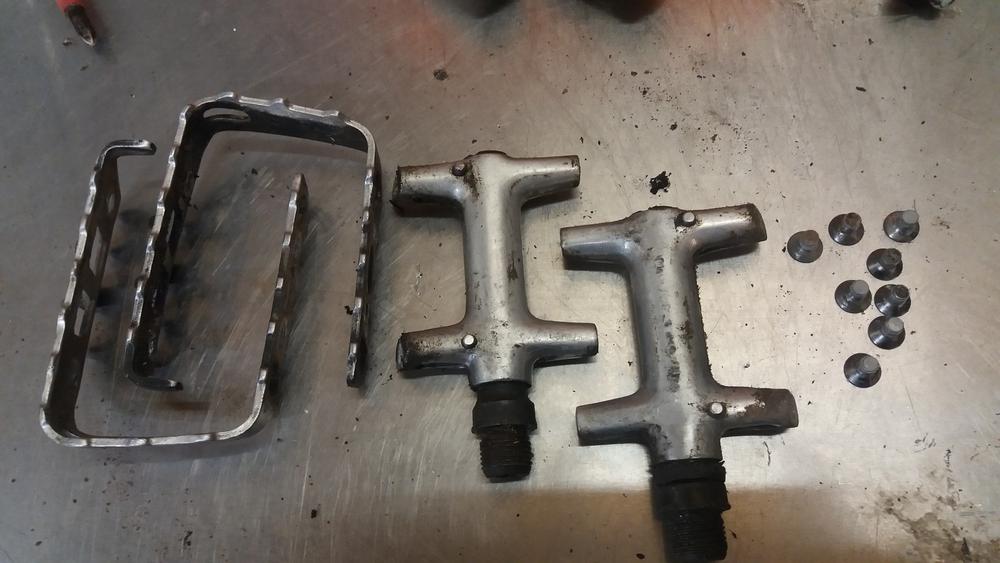
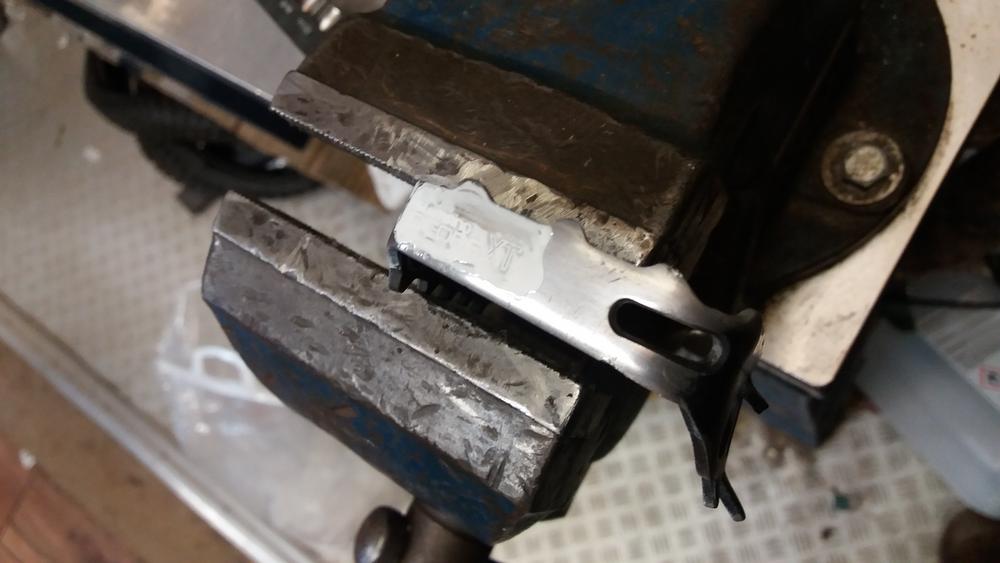
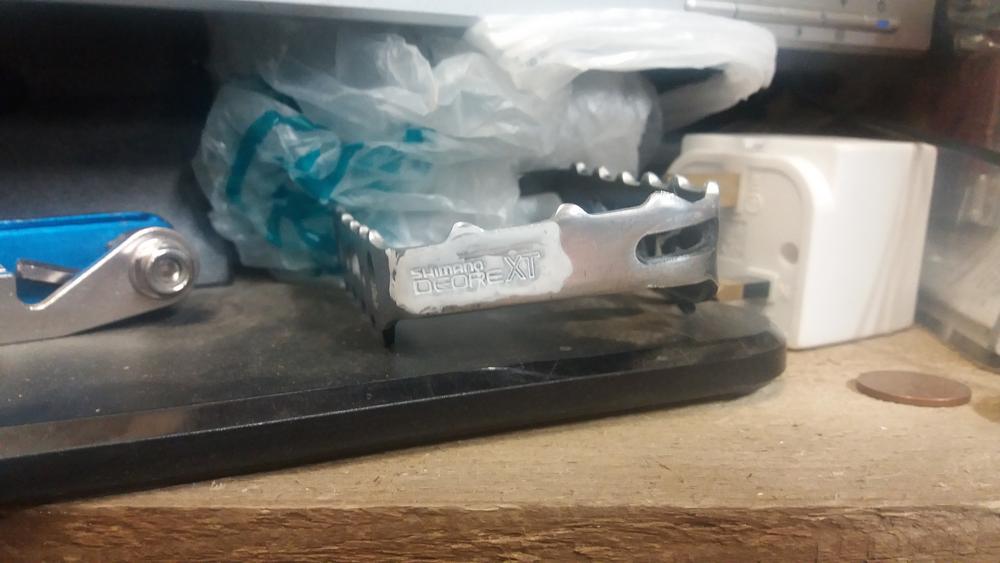
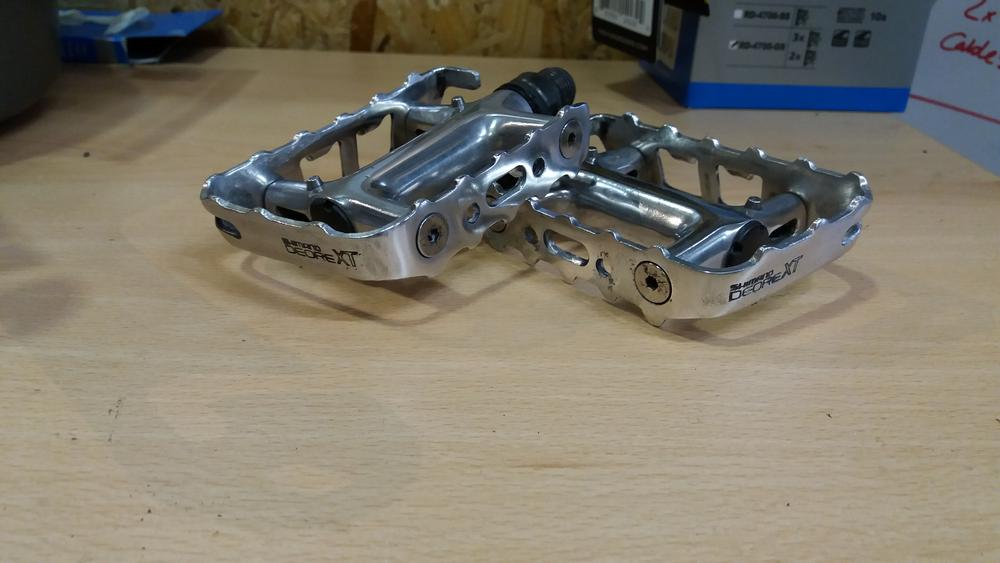
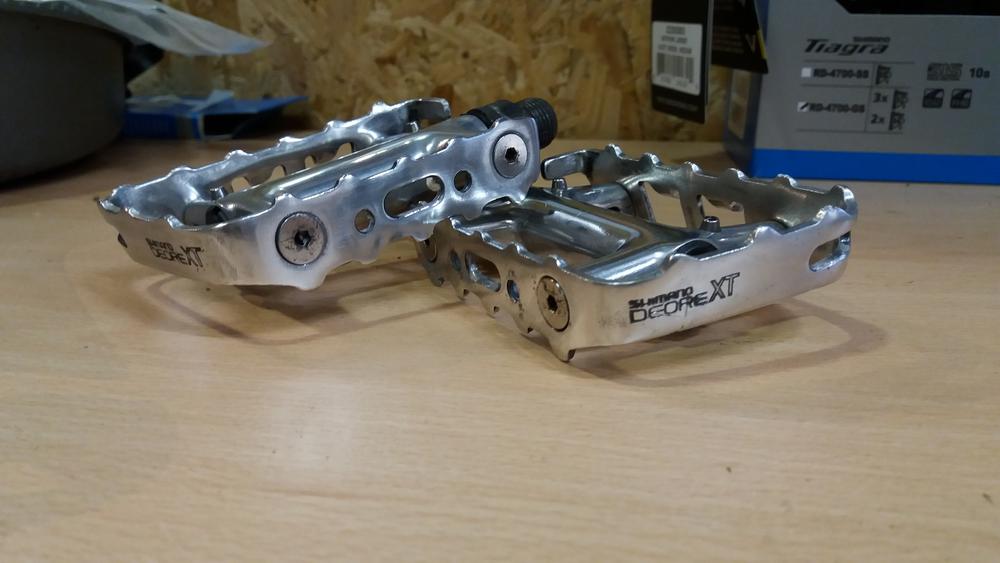
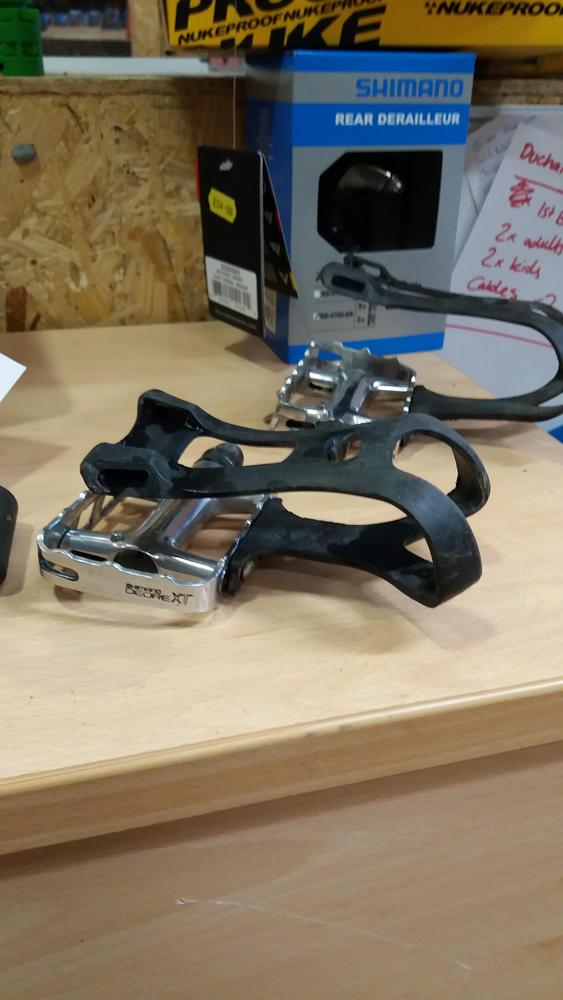
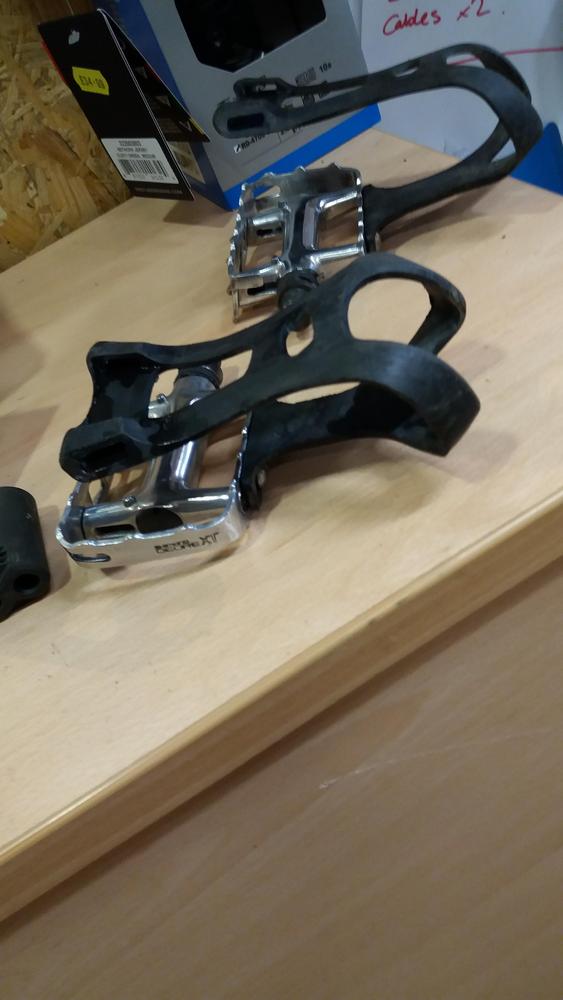
I will do the pedals first, buy some time... :D
 
Excellent thread mate! Went through the exact same process with my Brodie with addition of paintjob minus the workshop which helps alot, I think.

I would personally chose those XT levers. I think you can fix the black color on them or polish them which would really look good.
Also, that front Wheel on your last Picture looks not centered. Is it angle of photo or the Wheel need re-dishing?
 
Nice job so far.
I would take the thumbies further apart just one step further. Some more cleaning and oiling on the inside would not hurt, would it?
You can take off that plastic top cap without "loosing mechanical integrety". Just take out that lower Allen bolt that holds the lever to the base/clamp that you already had out for polishing. Underneath the Allen bolt, there is a small Phillips screw. Undo it and the cap slides right off. Then you can give the insides a good rinse of brake cleaner fluid and add some fresh oil.
(And if you are in the mood of takeing them even further apart then: Be aware that the main nut (underneath the cap) has a left handed thread!)
 
Dare":20mbsmuk said:
I would personally chose those XT levers. I think you can fix the black color on them or polish them which would really look good.
Also, that front Wheel on your last Picture looks not centered. Is it angle of photo or the Wheel need re-dishing?

You're right about the wheel, I just threw it in to see if it was true, it wasn't sitting right. Hopefully the forks are aligned!

As for the levers, I am quite tempted to get the XT blades back to silver, has anyone done it successfully? The black definitely isn't a good look so its either a few hours of buffing, or I live with the Deores. I'll see how much patience I have but see above re the rim, I might have plenty time :D

Thias":20mbsmuk said:
I would take the thumbies further apart just one step further. Some more cleaning and oiling on the inside would not hurt, would it?

Agreed, I've never tried that so absolutely I will!


Today I could be arsed changing the rings, and very glad I did, they just look so much better with a 46,36 jump. Well pleased with how they've come up

BNi6Zul.jpg


Needing a pair of shiny 2 pin dustcaps though, eyes peeled

Onto the pedals today, I'm quite excited about these cause they are in a right state

WRGYDVI.jpg


9iQ1aJ1.jpg


Minus clips and straps...

gZPtDxO.jpg


and exploded parts diagram...

aWEqXrL.jpg


First off is to give them a good scrub, under the dust seal the bearing grease is like new, thems proper seals right there.

ywYbfTg.jpg


Once that's done, I'm going to attempt to revive the cages. I reckon once they're clean I can pick out the Deore XT with a fine brush in white and then maybe roll over with black on a sponge roller?
Its worth a shot, has anyone had any joy doing anything to pedals like these?

Now I've heard there's a man with a few lofts full of auld rims, might be time for a phone call....
 
Back to ultra shiny

You need to remove all the scratches by making more scratches, only smaller and all orientated the same direction.
The smaller the scratches, the shinier it becomes.

I start on 600 grit wet & dry. Then on to 1000, then 1200 , then 2000. Spend time on each grit and use plenty of water. Go over it a couple of times at least on each.
After i use autosol(car metal polish) and 0000+ very fine steelwool. Only quality makes of steelwool are worth using. Stuff i use to cut back lacquers, french polish and such
http://www.ebay.co.uk/itm/TROLLULL-STEE ... oc2_731DPw

Rustins make a lacquer for polished metal.
http://www.ebay.co.uk/itm/Rustins-Clear ... xy7nNTQ-3P

There should be a number of threads on this. Polishing things seems to be popular in here..
 
When you click on links to various merchants on this site and make a purchase, this can result in this site earning a commission. Affiliate programs and affiliations include, but are not limited to, the eBay Partner Network.
Re:

Agree with all off the above, however I add a small amount of liquid soap to the wet carbide paper in order to create a paste which I find increases the performance of the paper.

Looking god so far :D
 
dyna-ti":2eule0nf said:
Back to ultra shiny

You need to remove all the scratches by making more scratches, only smaller and all orientated the same direction.
The smaller the scratches, the shinier it becomes.

I start on 600 grit wet & dry. Then on to 1000, then 1200 , then 2000. Spend time on each grit and use plenty of water. Go over it a couple of times at least on each.
After i use autosol(car metal polish) and 0000+ very fine steelwool. Only quality makes of steelwool are worth using. Stuff i use to cut back lacquers, french polish and such
http://www.ebay.co.uk/itm/TROLLULL-STEE ... oc2_731DPw

Rustins make a lacquer for polished metal.
http://www.ebay.co.uk/itm/Rustins-Clear ... xy7nNTQ-3P

There should be a number of threads on this. Polishing things seems to be popular in here..

Do you Think this lacquer for polished metal would work on Alu?

I would suggest removing anodisation (from the levers) with caustic soda and than just go nuts with sanding paper. Takes some time - 1-2h but it is totally Worth it.
 
When you click on links to various merchants on this site and make a purchase, this can result in this site earning a commission. Affiliate programs and affiliations include, but are not limited to, the eBay Partner Network.
Re:

A couple of pedal updates.

Amateur hour on pedal 1, I wanted to have a strip down and see what the bearing situation was, so I made to undo the locking nut under the dust seal.
In my Autosol addled state, I wrongly assumed this would be a left hand thread, God knows why, which tightened everything up real sweet.
Sanity restored I removed it but couldnt get a socket down onto the cone nut, which is a 10mm nut inside the thread for the dust seal.

So off to the tool fabrication yard, and produced this

vwmJE7G.jpg


theres really not much metal left on that, but it worked.

Anyway on releasing the nut, along came the bearings too, about 25 or the tiny little feckers. All over the bench. ahhh

Gave the spindle a bit of a spring clean seeing as I was there

uEsckO7.jpg


and very fiddlyly resinstalled the bearings with some fresh grease. They were running really smooth beforehand, and I cant say the experience made me wild with glee. Im not certain I'll go that far with pedal 2. Anyway its snug and it spins. happy days

I moved on to the cages before I could do any further damage. There was quite a bit of scarring around the lettering so I have been rubbing them back as best as I can without going too deep, so the lettering is still indented.

Once it as fairly smooth I added some white paint into the grooves. The theory is I might be able to rub the excess back, then roll over the top with a very dry roller of matt metal paint. No idea if this will work, but I cant think of another way to get the white into the lettering

Further update tomorrow...

wet paint

Qb4d0UA.jpg


dry

uSRidfJ.jpg
 
Re:

oh. and back in the room, bit of a timewarp there, busy few weeks

The above method of rolling black paint onto the cages was a total non starter, it just filled the white lettering straight away, and bubbled on the surface.
so much for my great idea. Option 2 was my less preferred one, but actually quite in keeping with the silver theme.
I sanded back all the black anodising, which is a little fiddly and time consuming. like maybe around three weeks of lunchtimes consuming.
really awkward corners on there.

Im quite pleased with how they've ended up though, and probably the best result i could have hoped for

uAbUkvH.jpg


9zRckn4.jpg


still a few wee scuffs here and there but an improvement

and with the toeclips fitted

VmfSphV.jpg


UsSadhE.jpg


now where did i put those green straps?

Good news on the wheel front, I have come across a set of M231s on DX hubs, all in silver, which will get a good polish up over the next few days, and then we are properly back on track
 
Back
Top