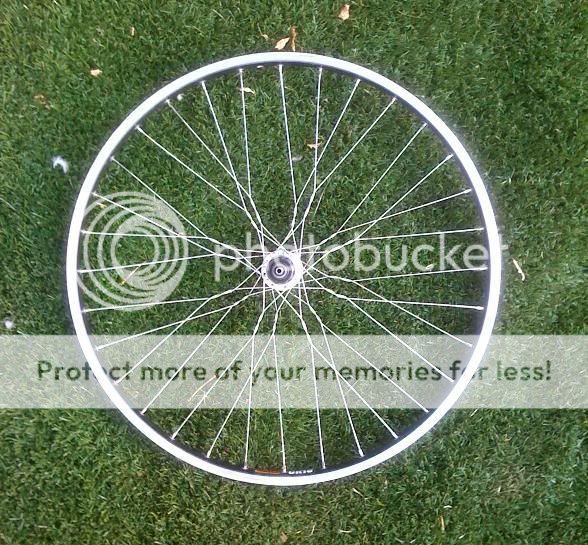
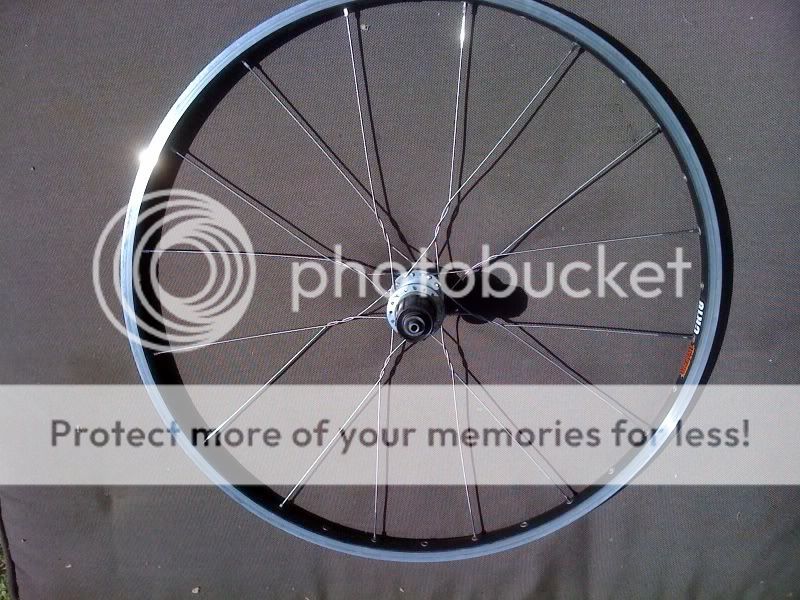
As the result of this thread ( http://www.retrobike.co.uk/forum/viewtopic.php?t=93831 ) I thought i'd slap a 'Snowflake' wheel together and document the process for anyone who's interested. This describes how to build a 32 spoke wheel. Here it is:
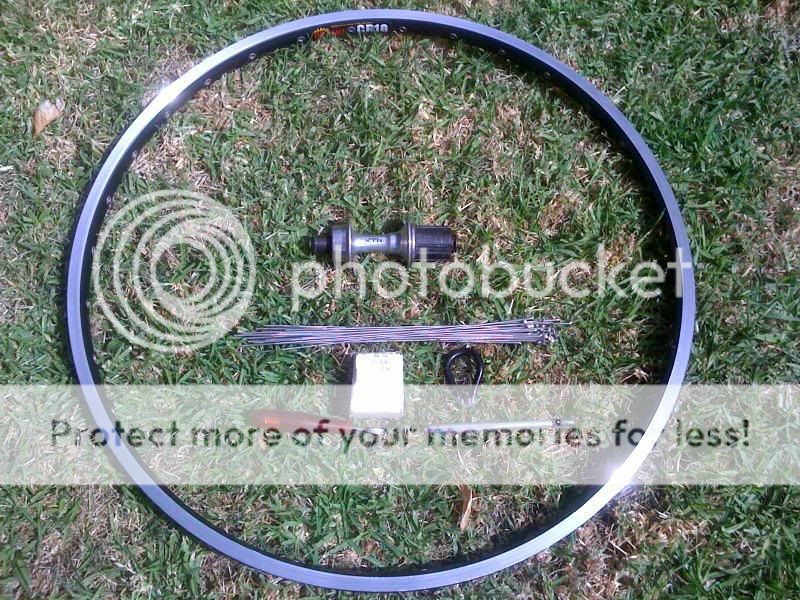
The parts list:
Before you start the build you'll need to ascertain what length spokes you'll need. There's no 'formula' as such other than finding out what length spokes you'd need to build a 3-cross wheel with your chosen rim/hub/spoke nipple combination and then adding 4-5mm (spoke calculators are easily found via Google. I think there's one on Sheldon Brown's website from memory too).
Step 1: Getting started.
Step 2: Getting the build under-way.
Step 3: Completing the first side of the build.
Step 4: Starting the second side of the build.
Step 5: Finishing the lacing job.

Step 6: truing the wheel.
I'll preface this step by saying that you MUST be a reasonably accomplished wheel builder to undertake the last step of this build. If you're not, don't bother because these suckers are tricky to true. Each spoke you tighten affects another (obviously) which complicates matters, to a degree.
Sorry the instruction was a bit verbose but I couldn't find a way to get all the info across any other way! Have fun!!!
The parts list:
Before you start the build you'll need to ascertain what length spokes you'll need. There's no 'formula' as such other than finding out what length spokes you'd need to build a 3-cross wheel with your chosen rim/hub/spoke nipple combination and then adding 4-5mm (spoke calculators are easily found via Google. I think there's one on Sheldon Brown's website from memory too).
Step 1: Getting started.
- * (If you're building a rear wheel) I like to start with the non-drive side. Take your longer spokes (generally 2mm longer on the non-drive side of the rear wheel).
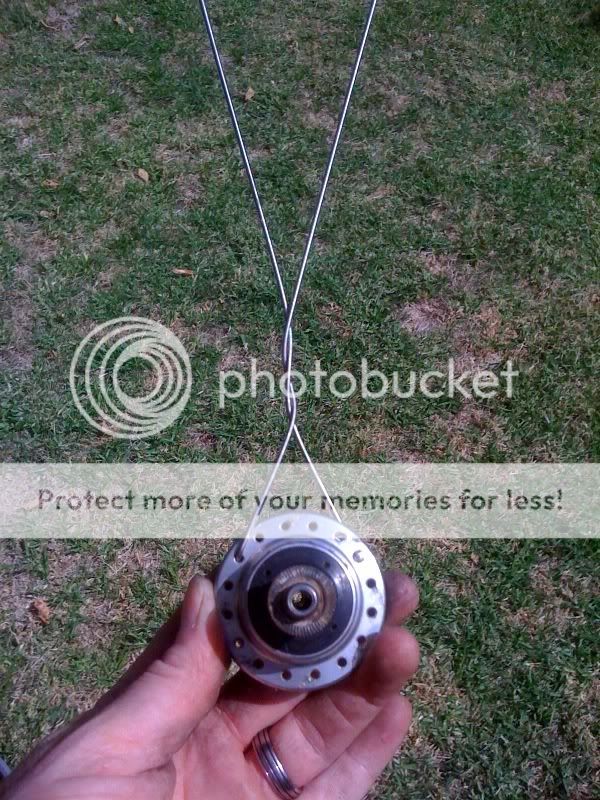
* Face the hub with the freewheel away from you and place one spoke through a spoke hole so that the head of the spoke is on the inside of the hub flange.
* Count 5 holes around in a clockwise direction (i.e leave 4 holes spare in between) and place a spoke the opposite way with the head on the outside of the hub flange.
* Here's the most critical part of the whole build! Twist the 2 spokes 360 degrees in a counter-clockwise direction so that the spoke with the head facing 'in' is on the outside of the twist (this way there's not too much load on the elbow of each spoke).
* Make sure you have a nice, tight triangle at the base of the twist and that you wind the 2 spokes together nice & tight (this way you achieve a reasonably straight eyelet entry angle with your spokes). Aim to make an equilateral triangle with the 2 spoke heads & the bottom of the 'twist'
Step 2: Getting the build under-way.
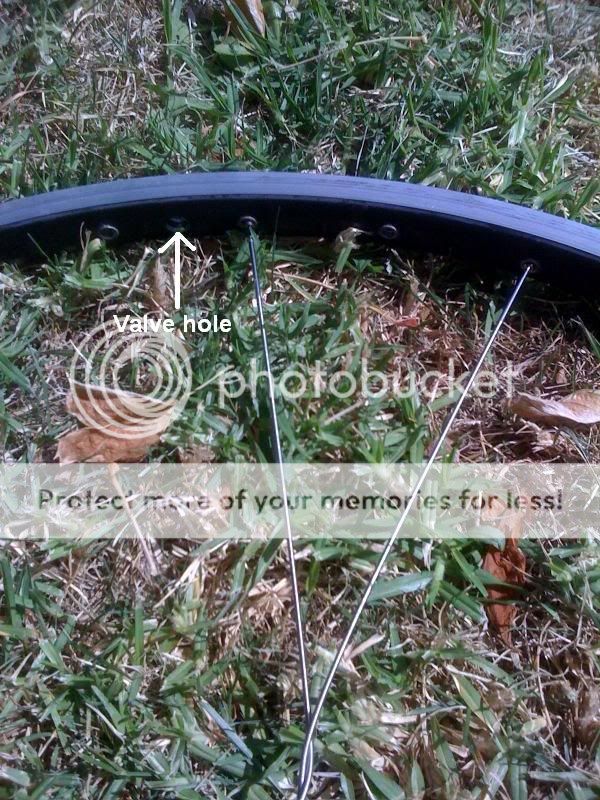
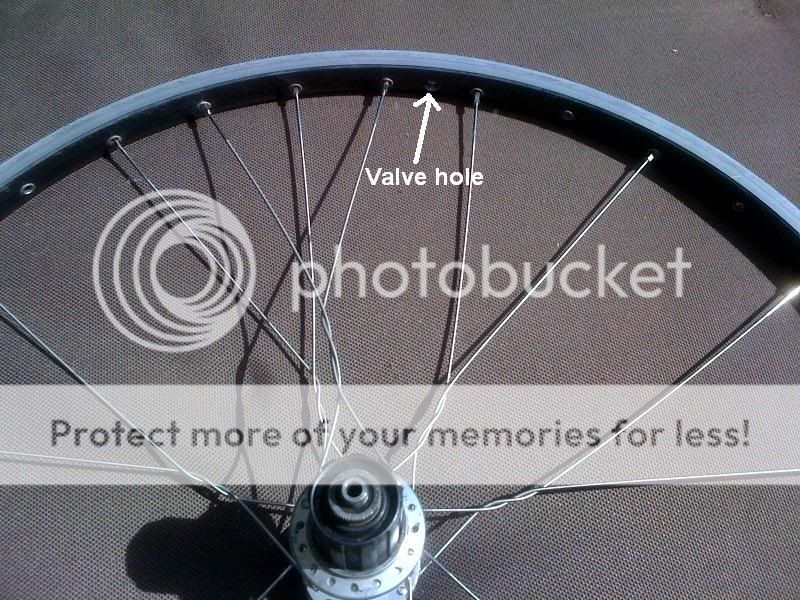
- * Hold the hub with the freehub facing towards you and place the 'left' spoke in the eyelet to the right of the valve hole (If your rim eyelets are directional, this will almost always get the build going the right way) then twist the nipple on to the spoke a few turns
* Take the right spoke and place it in the second eyelet to the right (i.e. leave 1 hole spare in between the spokes)
Step 3: Completing the first side of the build.
- * Repeat steps 1 & 2 seven more times (i.e. until you have completed one side of the wheel).
Step 4: Starting the second side of the build.
- * With the wheel in front of you and the freehub facing up, trace the origin of the spoke 2 holes to the left of the valve hole in the rim and place a spoke, head out, 1/2 a step advanced (clockwise) in the opposite flange
* Count 5 holes counter-clockwise (i.e leave 4 holes free) and place another spoke, head in, into the same flange.
* Twist the spokes 360 degrees (bt this time, clockwise) and insert the right spoke into the eyelet hole directly to the left of the valve hole. Attach a nipple
* Place the left spoke in the first free eyelet hole to the left & attach a nipple
Step 5: Finishing the lacing job.
- * Repeat the above 7 more times until all spokes are in place and attached loosely with nipples
Step 6: truing the wheel.
I'll preface this step by saying that you MUST be a reasonably accomplished wheel builder to undertake the last step of this build. If you're not, don't bother because these suckers are tricky to true. Each spoke you tighten affects another (obviously) which complicates matters, to a degree.
- * If your twists have been consistant, you can get the wheel true off to a good start by simply winding all the drive-side nipples to the end of the visible thread on each spoke and leaving 2mm of thread showing on all the non-rive side spokes.
* The truing process goes very much like any other except for 2 things:
* 1) You must factor in the extra tension placed on the 'buddy' of each spoke you tighten
* 2) The wheel will take more series' of '1/4 turn' laps because you have to take out the slack in the twists
Sorry the instruction was a bit verbose but I couldn't find a way to get all the info across any other way! Have fun!!!