New member with Aluminium Elite

Re:

I haven't updated this as I haven't done anything. Summers a busy time with holidays and various days out, and work seemingly stacking up the whole time I'm off. Finally today though I have got some paint stripper on the frame, in readiness for its polish. Now we all know nitromors is not what it used to be, so rather than waste my money on that I bought a bottle of the cheaper screwfix alternative. This was no good either but not to worry - I also last week purchased a bottle of dichloromethane - the modern paint strippers missing ingredient. I mixed these together at approx 3 parts stripper and 1 part dichlo. Within minutes the laquer was peeling. To this I rubbed it away with grey scotchbrite (grey is the least abrasive grade, and abrasion is the last thing you want on a polishing job). I'll wash it down shortly with some soapy water after removing most of the gel. I also ordered the stickers from Gil - excellent quality and service.
 

Attachments

  • image1.JPG
    image1.JPG
    70.9 KB · Views: 579
  • image2.JPG
    image2.JPG
    67.2 KB · Views: 579
  • image3.JPG
    image3.JPG
    46 KB · Views: 579
  • image4.JPG
    image4.JPG
    53.5 KB · Views: 579
Re:

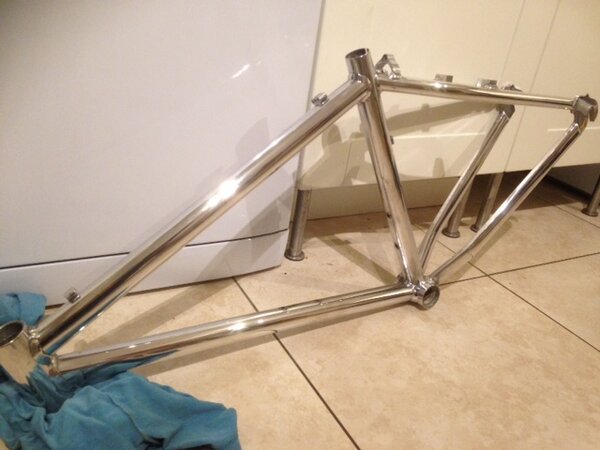
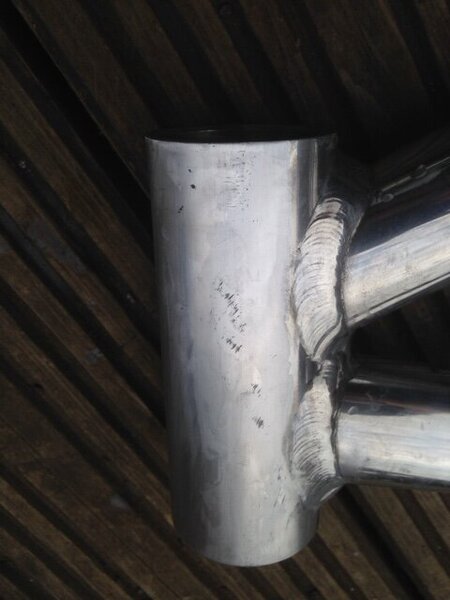
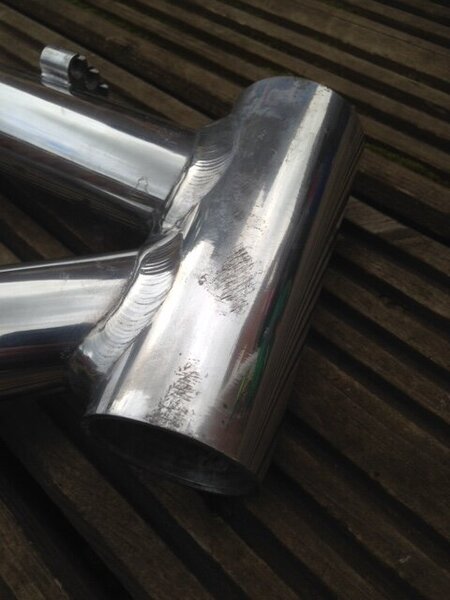
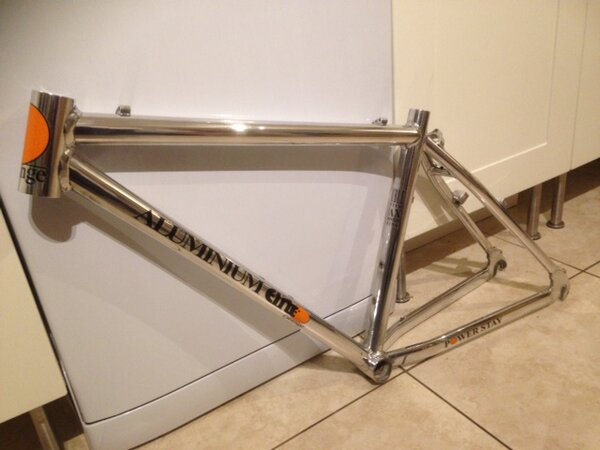
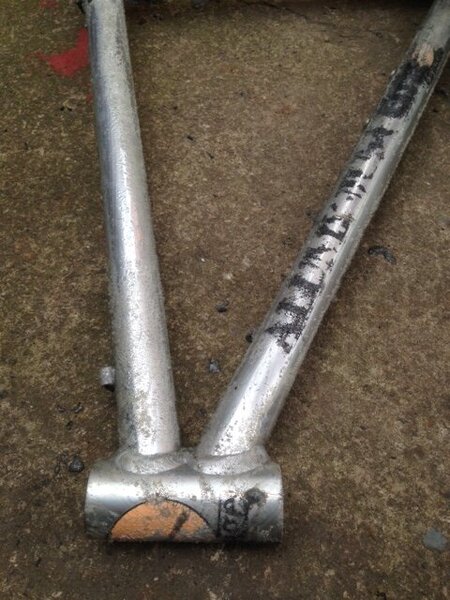
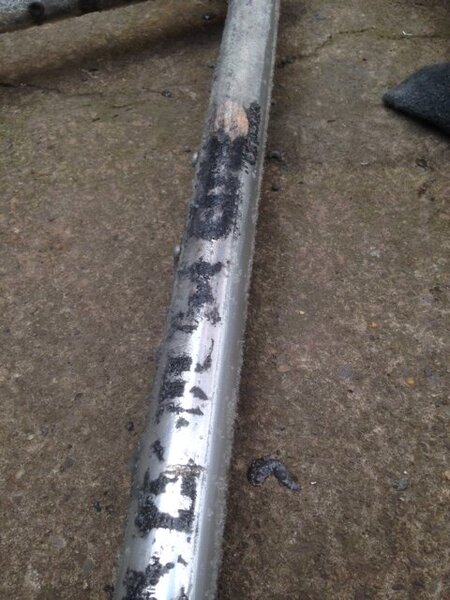
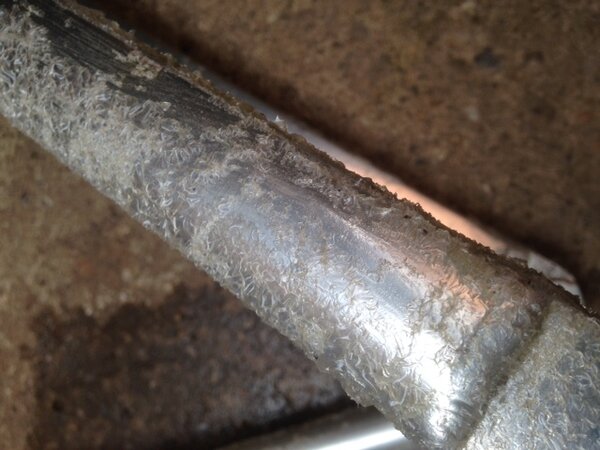
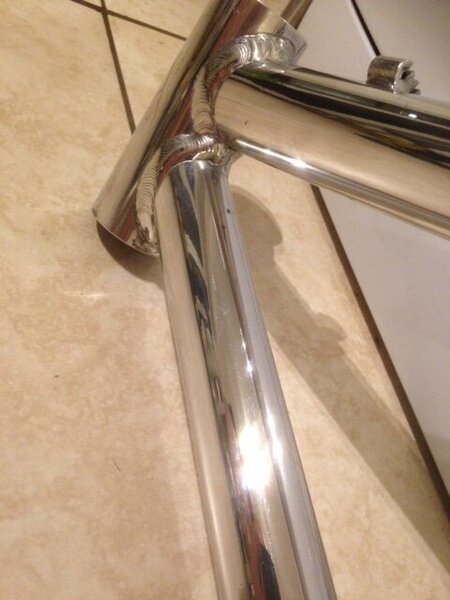
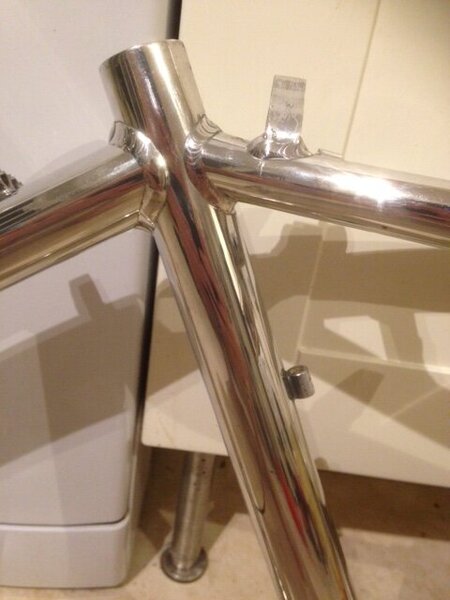
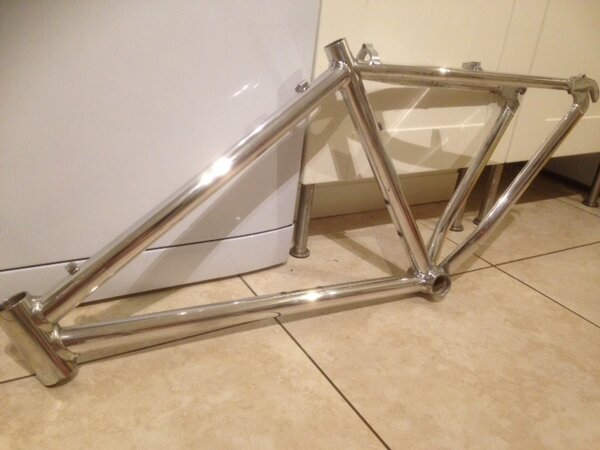
Cleaned the frame off and today I've had five or six stints at it with the polish. Total time around 2 hours. It's really worth noting that abrasion is what polishing is all about. Smoothing off a surface to as perfect as possible. Any scratch you put in you will only have to take out again later. It's well worth leaving the stripper to do it's job and Minimising any abreasive help. Some bits of my frame needed the help though, hence the grey scotch. There are some areas that are going to need dressing with wet and dry but I'll come to that another day. For today it's just an initial quickie polish to see what we've got, get on a level playing field so to speak. For this first pass, I've just used any old t-shirt rag I had lying around, but it MUST be clean and dry, and ideally changed often. The same few square inches of cloth can cope with say, the downtube. So change it for the top tube, lower stays etc. You only need a tiny amount of the paste/polish and I've used autosol because it's very good, I've used it for years, it's easy to get so you get consistent results. When going at it on the frame it's important to know how it works and, like the paint strippper, let it do the work itself. The polish as you work it on is actually removing a fine amount of material, oxidation etc and leaving behind a flat surface. You only need to gently rub - if you go at it like a (imagine anything you like that uses rapid movement of your hands / arms for long periods) then you're soon going to end up getting fed up. I just did it while I was bored or between other jobs. You do get very dirty though. The removal of this material is why you need to change rag frequently - otherwise you are rubbing away at your frame with a fine Aluminium paste. I've almost finished this first pass with just a few areas around the brake bosses left. Looking fairly good and I reckon at this level it's about 80% of whatever shine can possibly be achieved. There are still fine scratches and a lot of imperfections to iron out. Something else worth mentioning is how different parts react. It's all Aluminium but the tubes making up the rear stays are easier to get a shine, so I guess are a softer Alloy than the main tubes. Harder still are the dropouts and they are proving difficult to get a good shine. When this is complete I'll get to dressing the scuffs before moving in to the final polish which is essentially just the same again but with top quality cloths.
 

Attachments

  • image3.JPG
    image3.JPG
    44.6 KB · Views: 561
  • image2.JPG
    image2.JPG
    39.2 KB · Views: 561
  • image1.JPG
    image1.JPG
    35.1 KB · Views: 561
Gleaming... looks great. Kinda sorry i sold my elite frames on now.. i envisage its going to be box fresh when its finished. Anyway look forward to the end result. :)
 
Re:

Here's the frame after some final fettling. S you can see, the headtube had quite a sore on one side. I removed a lot of this with wet and dry. First 600grit then 1200, then 1500. ALWAYS Change the water between grit size otherwise you're likely to pick up a bit and scratch deeper than you want. If I could have been bothered I might have dug deeper into the garage for some 400 to get started as this was deep, but on the other hand - I didn't want to remove too much material. Anybody having never done anything like this before might want to take note:- use one lot of wet and dry in one direction, then the next grade use at 90 degrees so that you get an idea of when the previous deeper scratches have been removed. From 1500 wet and dry it is easy to polish back by hand. After addressing a few areas of the frame with this method I went over the whole thing again with autosol on a t-shirt style cloth followed by another going over with the fine cloth. Here are the results.
 

Attachments

  • image1.JPG
    image1.JPG
    37.5 KB · Views: 521
  • image2.JPG
    image2.JPG
    32 KB · Views: 521
  • image3.JPG
    image3.JPG
    38.6 KB · Views: 520
  • image4.JPG
    image4.JPG
    47.3 KB · Views: 520
  • image2.JPG
    image2.JPG
    38.7 KB · Views: 520
  • image1.JPG
    image1.JPG
    41.9 KB · Views: 520
Re: stickers!

I should have waited to do this but was just too excited. As clean as the frame was I thought better degrease it prior to applying the stickers. Remember the paint stripper missing ingredient? Well it's also a fantastic degreaser. Some of that on a kitchen towel or three and I was truly amazed how black the towel ended up. So with a clean frame it's then ideal to wash your hands and then avoid touching the frame. I had taken measurements of the location of the old stickers prior to removal but decided on the application of the new ones to put the main stickers 10mm further down the tube. I'm liking the result and, once again, many thanks to Gil for the stickers - they're worth every penny.
 

Attachments

  • image1.JPG
    image1.JPG
    33.9 KB · Views: 519
Re:

Love the shine, and looking forward to seeing the built-up bike!

Thanks for taking the time to write down the different steps to take to remove the lacquer and polish the frame, and for including some very useful tips (e.g. the different directions for the wet and dry). I have to go through this process on my K2 frame, and hope it will turn out as nice as yours.
Did you do anything special to treat the hard-to-reach parts, or only finger power ;-)
 
Re:

Are you going to protect the frame anymore than standard Alu oxidisation?

I have an Aluminium Elite frame hungup in the garage if you need more practice ;-)
 
Back
Top