- Feedback
- View
You are using an out of date browser. It may not display this or other websites correctly.
You should upgrade or use an alternative browser.
You should upgrade or use an alternative browser.
I’ve given a home to a knackered old Dog on its last legs-
- Thread starter Retro Spud
- Start date
- Feedback
- View
It’s very nice in a conformist sort of way. The finished article should stop traffic.
- Feedback
- View
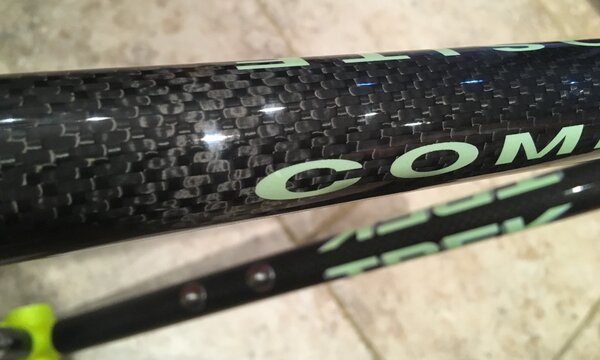
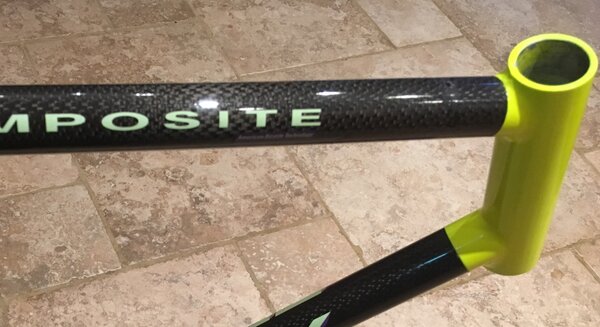
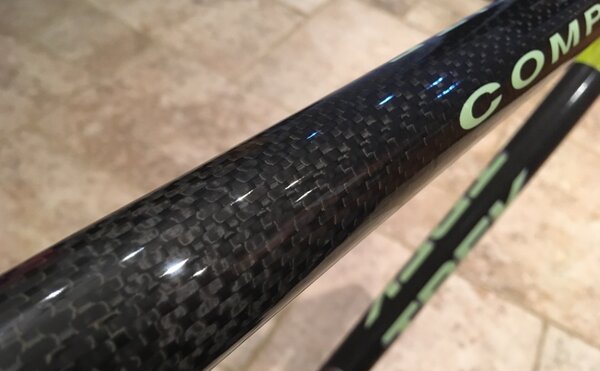
Trek 8900 8700 1991 carbon composite
After a month of looking at the frame hanging up curing like a side of pork I got it down and gave the clear coat a polish to get rid of the inevitable orange peel and overspray. For a rattle can the 2k lacquer did the job nicely
Just need to apply a few more decals along with the head tube badge then the parts from my eclectic parts bin.
The results with the Water slides left me underwhelmed in so much as the Hue and Saturation of the Neon Yellow isn’t as vibrant as I wanted but being applied to a black and the medium they are printed on being naturally clear I guess it was a tad on the dumb side as choices go
In short they look a little faded or bleached out by the sun but for a bike from 1991 it’s okay - I’d have been proper pissed if I’d spent big iron on a top draw paint job from Argos and they were stuck under the clear, However I reckon Gary at Argos would have put me right on my choice before they (Argos) accepted the work
I guess it’s all part of the learning curve and those in the know will :facepalm: at this point
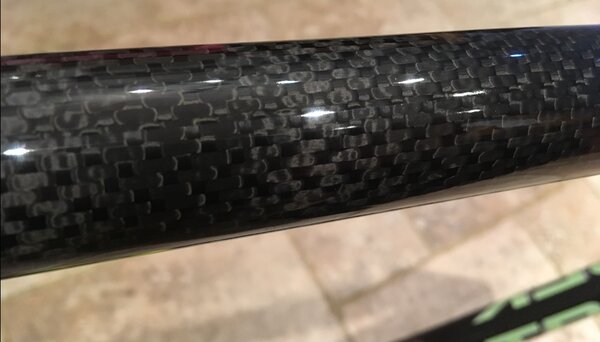
Just check out the weave in this fibre ....
After a month of looking at the frame hanging up curing like a side of pork I got it down and gave the clear coat a polish to get rid of the inevitable orange peel and overspray. For a rattle can the 2k lacquer did the job nicely
Just need to apply a few more decals along with the head tube badge then the parts from my eclectic parts bin.
The results with the Water slides left me underwhelmed in so much as the Hue and Saturation of the Neon Yellow isn’t as vibrant as I wanted but being applied to a black and the medium they are printed on being naturally clear I guess it was a tad on the dumb side as choices go
In short they look a little faded or bleached out by the sun but for a bike from 1991 it’s okay - I’d have been proper pissed if I’d spent big iron on a top draw paint job from Argos and they were stuck under the clear, However I reckon Gary at Argos would have put me right on my choice before they (Argos) accepted the work
I guess it’s all part of the learning curve and those in the know will :facepalm: at this point
Just check out the weave in this fibre ....
Attachments
- Feedback
- View
yakboy":2j4jmd12 said:Wow, I do like a bit of carbon weave (As you know). Really excellent job Spud, especially considering the frames original condition.
Its surprising what a good bath and a decent haircut can do for an old dog - it was always there, just hiding under all that blown clear coat, just need to borrow a few bits from the Lobster and I can dress it up with XT
- Feedback
- View
Trek 8900 composite 8700 8500 C26
Yeah not long now until the Malverns and also that unmentionable 24hr event with 95 pages of bollocks
longun":33szxzvc said:Oh my days... . ......can't wait to see this next month
Yeah not long now until the Malverns and also that unmentionable 24hr event with 95 pages of bollocks
- Feedback
- View
Re:
Progress of late has been slow, due to commitments else where....
However it looks like I'd better get busy as I received this update today care of the legendary Dan Chambers who reworked my old steerer to make it super long to fit this gate of a frame,
My original Manitou I 1.25 inch steerer was Karma 'ed away long ago for a project on the otherside of the Atlantic and I came super close to junking the rest - however if you keep anything long enough you eventually find a home for it....
with limited options I pinched the steerer off a set of unused M3's and sent it off to Dan with the simple instructions make it long and solid
This popped into my In box today
danson67":1w4dx23o said:Hi Nick ,
Progress pics for you:
Here's the problem..1-1/8" threaded Manitou crown way too short at 150mm, needs to be 210-ish.
Plan of action, cut steerer down, insert internal sleeve, fit threaded extension.
Cut needs to be low enough so that the stem quill won't foul the internal sleeve:
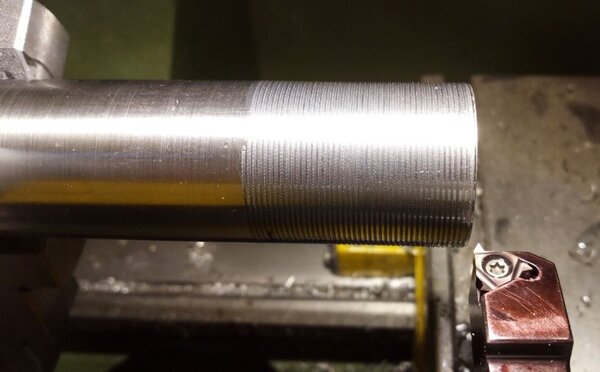
I didn't have a spare threaded 1-1/8" steerer, so needed to cut a thread into a threadless tube...over to the lathe.
A bit of tool chatter early on, but all smoothed out easily enough by the final pass.
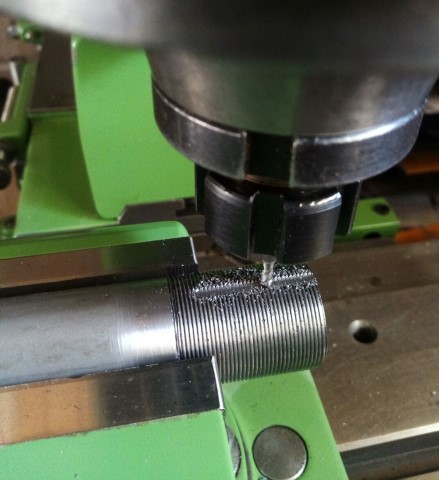
Over to the mill to cut a slot for the lock washer tab:
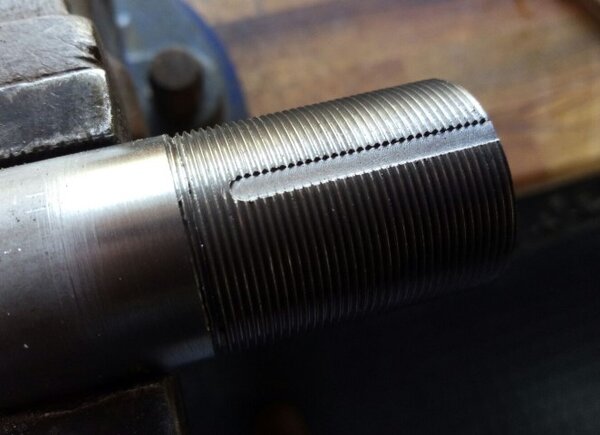
File thread edges to clean off burrs and ready to go:
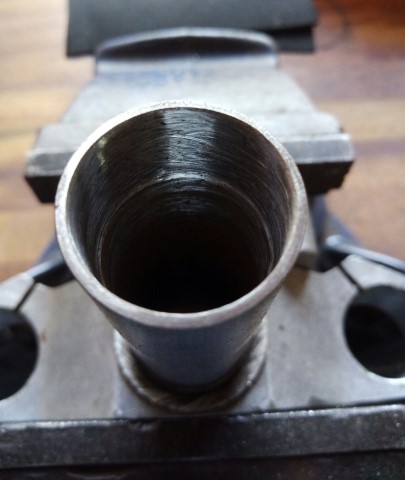
Because the cut was quite a long way down the steerer, I had to ream out a small section of the internal butt in order to get enough overlap for the 1" internal sleeve. Also helped to clean out some of the crap from the inside of the steerer:
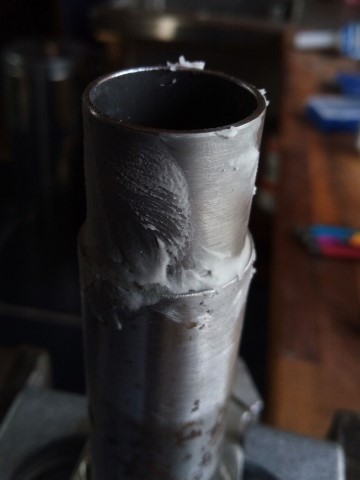
Flux and locate 1" internal sleeve ready for brazing:
More to follow:
All the best,