SackofHammers
Dirt Disciple
Note: Mods if you think the Bontrager data should split from the bike build I'd be happy to do that. Now that this is typed up it's rather long!
It was suggested by Mike Muz that I make a build thread for my 1992 Bontrager Race that I am working on rebuilding and eventually repainting. I wouldn't have though of doing this until he suggested it and I thought it might be kind of cool to keep a web log of the bike as I plan on keep it long term and have wanted one since the mid 1990's when I was MTB Racing and working as a bicycle courier. I also want to return the favor to the vintage bike community and share the knowledge in one location that I have gathered all over the web.
I was casually looking for a Bontrager frame when I stumbled on an ad here on Retrobike for a used 1992 Race Frame being sold by cyberbackpacker. After PMing the seller who luckily is located in the states we got it all worked out what size the frame was and after many pics I pulled the trigger sent him the paypal and shipping monies and a week or later the frame arrived without taking any damage from its cross country trip. I couldn't have asked for a better transaction and I can't recommend cyberbackpacker enough. The frame was extremely well packed in a frame box with the rear triangle braced with a length of steel all-thread and nutted up with axle nuts. Thanks again man!
After I decided to get the frame, I realized I that I would need to get some proprietary parts that simply aren't available at your local bike shop and I'm hoping the info I share here will help someone else in rebuilding one these great frame sets. None of the info that I'm posting in this thread are things I figured out on my own, they are little factoids that I found in what feels like a million google searches and trolling old threads posted by helpful people shared in years gone by. It just seems as though much of the info is getting a bit stale in the posts I was finding with broken picture links, or based on info that the writer assumed the reader already knew. Having been out of bikes for some time, I don't recall half of what I thought I used to know and what I do recall it turns out is usually wrong. I'll try to keep it simple for guys like me who just want to build it up solid and not cock it up and/or waste a bunch of time hunting down parts that won't fit on the bike anyway.
I'll share some specs that I needed to chase down. Note that these specs do not necessarily apply to the post Trek buyout "Privateer" frames.
General pre-Trek Bontrager information:
Frame Sizing Information:

General info needed when gathering parts:
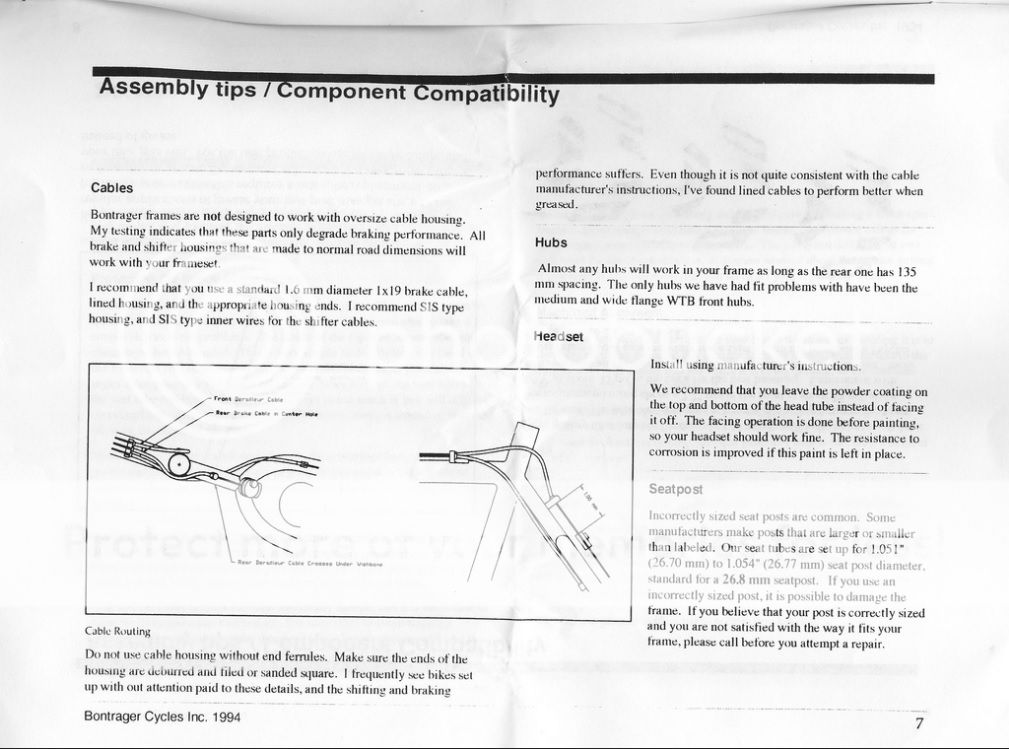
Head tube size: 1"
Seat post size: 26.8
Front derailleur (mech) size: 28.6 (1 1/8") Bottom Pull if you use the Bontrager pulley
Bontrager "Uniqueisms":
The rear brake bosses and posts are proprietary but a nearly any regular brake post that is readily available can be cut down and be used without issue.
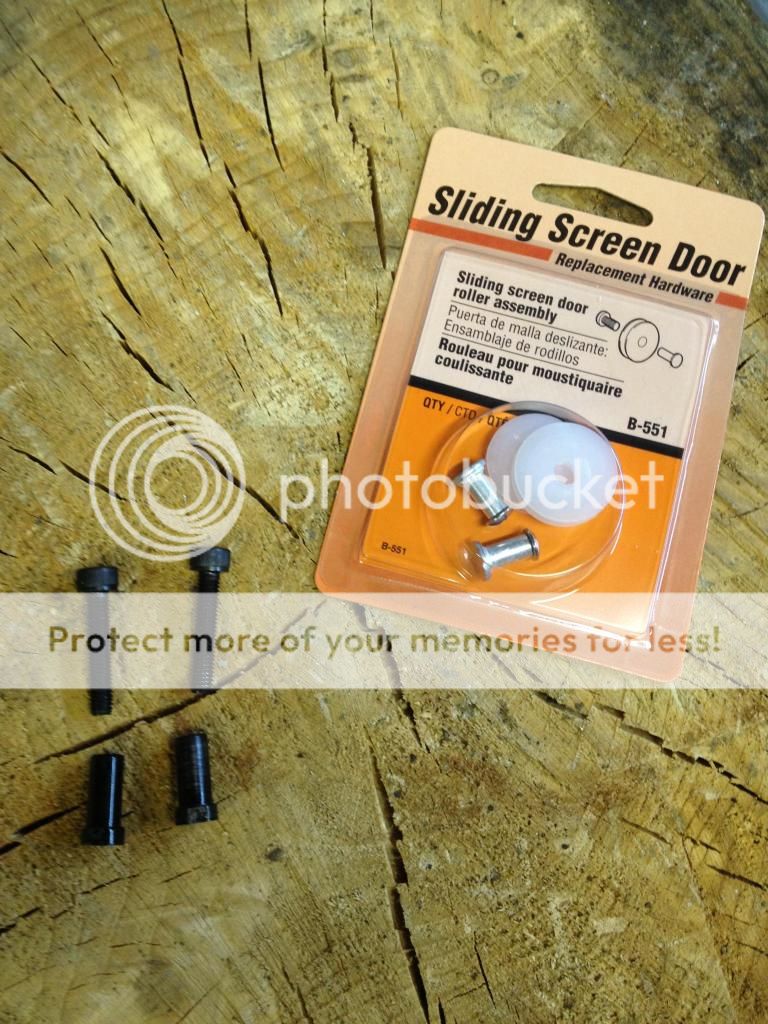
Bontrager's have a unique pulley on the seat tube of the frame that allows the bike to use a bottom pull derailleur when the cable routing is coming from the top. To replace the pulley, simply track down a Replacement Sliding Screen door wheel at Lowe's, Home Depot or other DIY store - Google search turned one up at Walmart. The part number is B-551 is readily available on the cheap and includes two pulley's. Not bad!
The anti-chainsuck device can be fabbed rather easily with a dremel or angle cutter tool and a little patience. I plan to post a template image to use to make your own. I was able to source one from a nice forums member here and want to pay it forward on how to make your own if you can't track one down.
The frame cable stops are designed for small/road diameter cabling. FYI: The SRAM POP brake lines fit perfectly.
Decals:
The decals are believe it or not still available from the original printer used for the Santa Cruz built bikes, or from Gil from Retro Decals. I'm going with Retro Decals at this time as I actually want the original square "old school" OR decals set that SSSink did not print and does not have a template for. Not to mention that Gil seems like super cool dude, is an enthusiast and active on these forums.
As a side note, SSSink it wary of selling these stickers to people trying to sell counterfeit Bontragers which I appreciate. They seem like great guys.
Decal contact info:
SSSinc: http://www.SSSink.com/
Retro Decals https://www.facebook.com/retrodecals
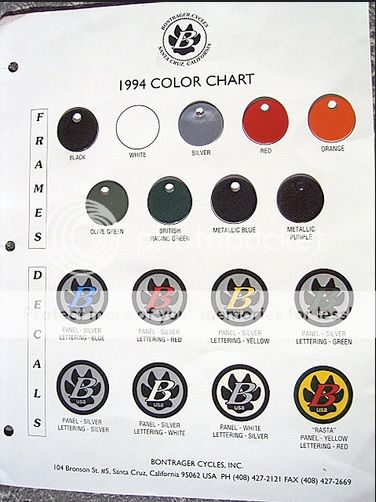
Decal and color samples used from the 1994 catalog. We actually had this at the shop I worked at back in the day, and the paint chips were actually powder coated metal disks and decals were actual decal samples. It was pretty amazing in person.
Brake Posts:
Bontrager's use a design I haven't seen on other bikes but I'm only slightly old, not OLD old.") Maybe others here have seen something similar but I never have. Most bikes have a brake boss brazed or welded to the frame and then a brake post threads into the boss with large M10x1 sized threads. The brakes then ride on the post and a short M6 bolt threads into the larger post, retaining the brake onto the brake post.
Maybe others here have seen something similar but I never have. Most bikes have a brake boss brazed or welded to the frame and then a brake post threads into the boss with large M10x1 sized threads. The brakes then ride on the post and a short M6 bolt threads into the larger post, retaining the brake onto the brake post.
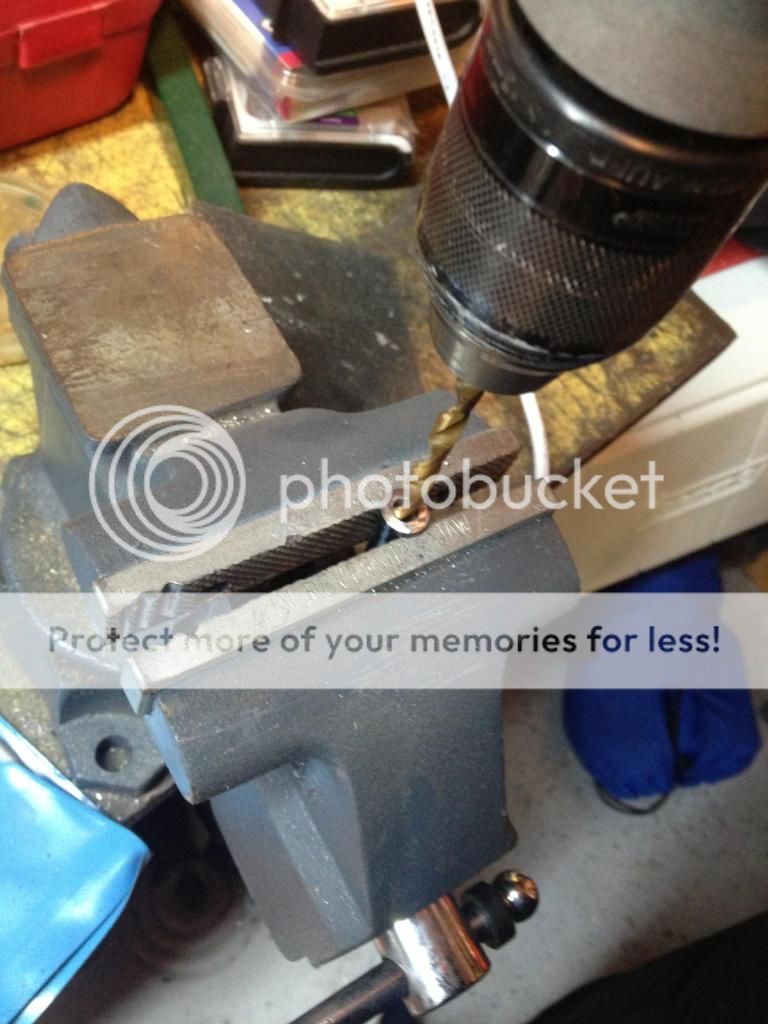
A Bontrager is different. It's boss is threaded for an M6x1 bolt and does not have a replaceable post semi-permanently threaded into it. On a Bonty the bolt acts like the post and requires a collar to sleeve over it to carry the brake with out any slop. It's a clean design but proprietary. To make your own "brake collar" for a Bontrager buy some Replacement Cantilever Stud's. I got mine from JensonUSA.com and they are affordable. Place the new replacement post into a bench vice and cut off the threads with a hacksaw or dremel so that the length of threads is completely removed and the post is flat. Then drill out the center of the post with a quality 15/64 or approximate that will allow an M6 bolt to slide through cleanly. I tried using a couple brand "Titanium" drills bits with cutting oil and they wouldn't bore out the post, I needed to go buy a bit individually that was designed to drill metals before I could drill the stud out. Your mileage my vary.
To make your own Bontrager brake posts:
Tools needed:
Dremel with fiber cutting wheel or quality hacksaw blade
bench vise
bench grinder or dremel sanding/grinding wheel
quality 15/64 drill bit
Materials:
Replacement Brake post or stud
M6 40-50mm bolts. 30mm is too short and it's ok to be too long you can cut down if needed. I'm trying to get stainless in this length but online they are pricey from what I've been able to find.
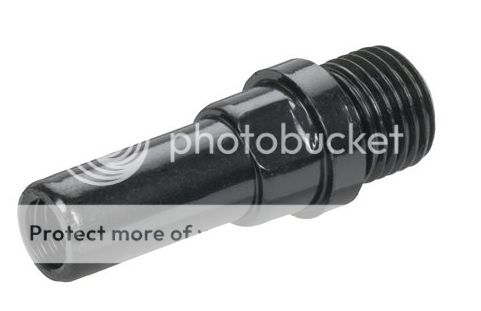
Post before:
Cutting and Drilling:

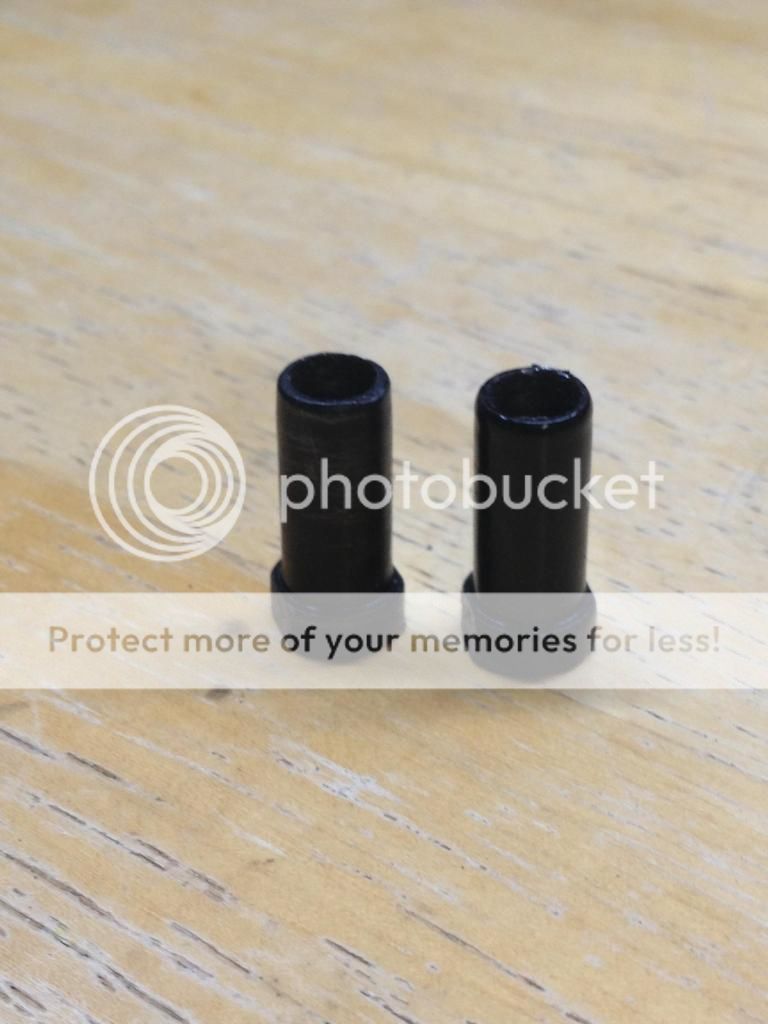
After:
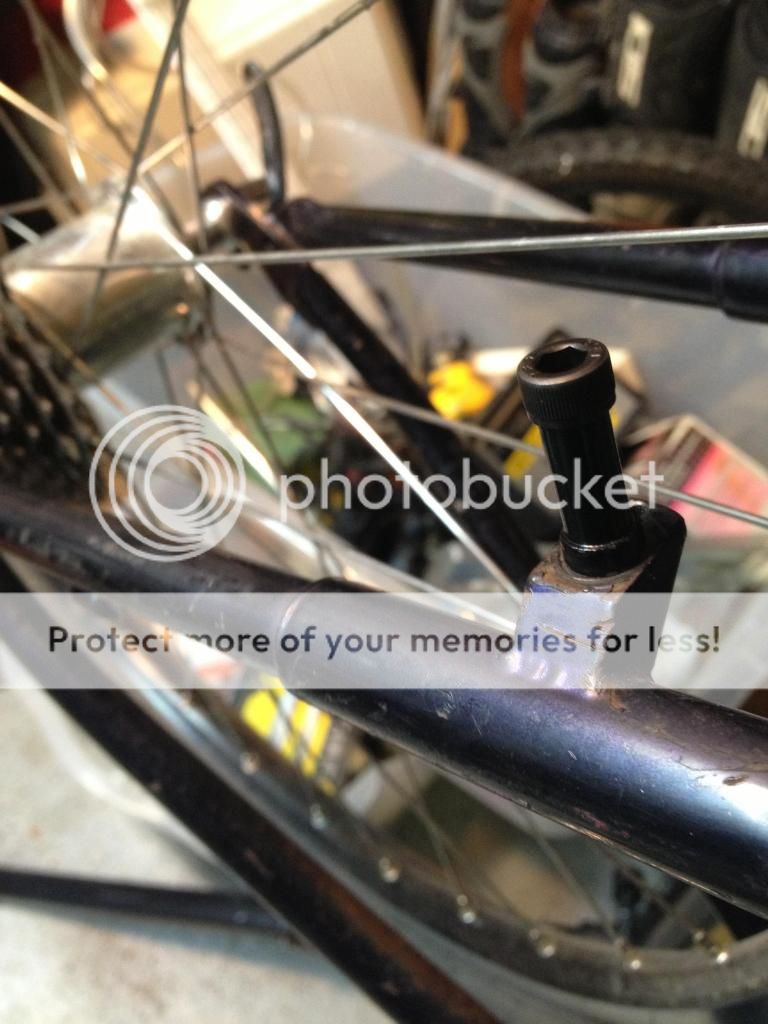
Installed w/o brakes:
Bontrager Front Mech/Derailleur Pulley:
Parts needed:
B-551 pulley kit
I believe this is an M4 bolt but my frame still had the small bolt and collar and I didn't have a way to verify.
Example of the pulley for sale online:
http://www.rakuten.com/prod/crl-1-nylon ... OI2LvD_BwE
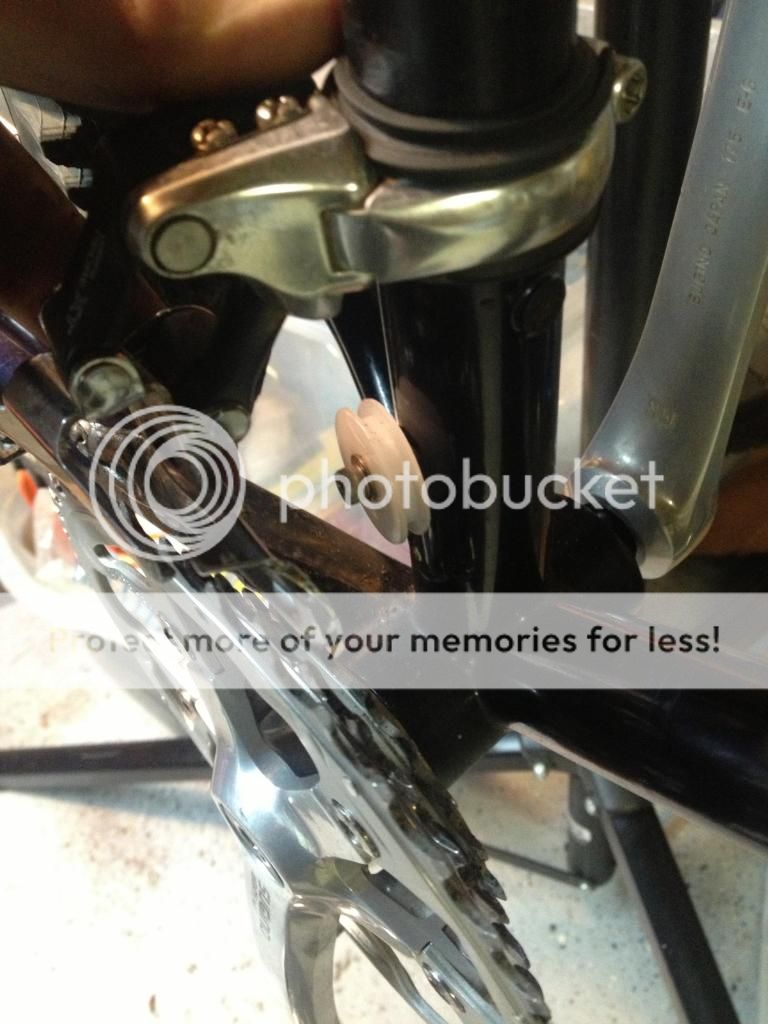
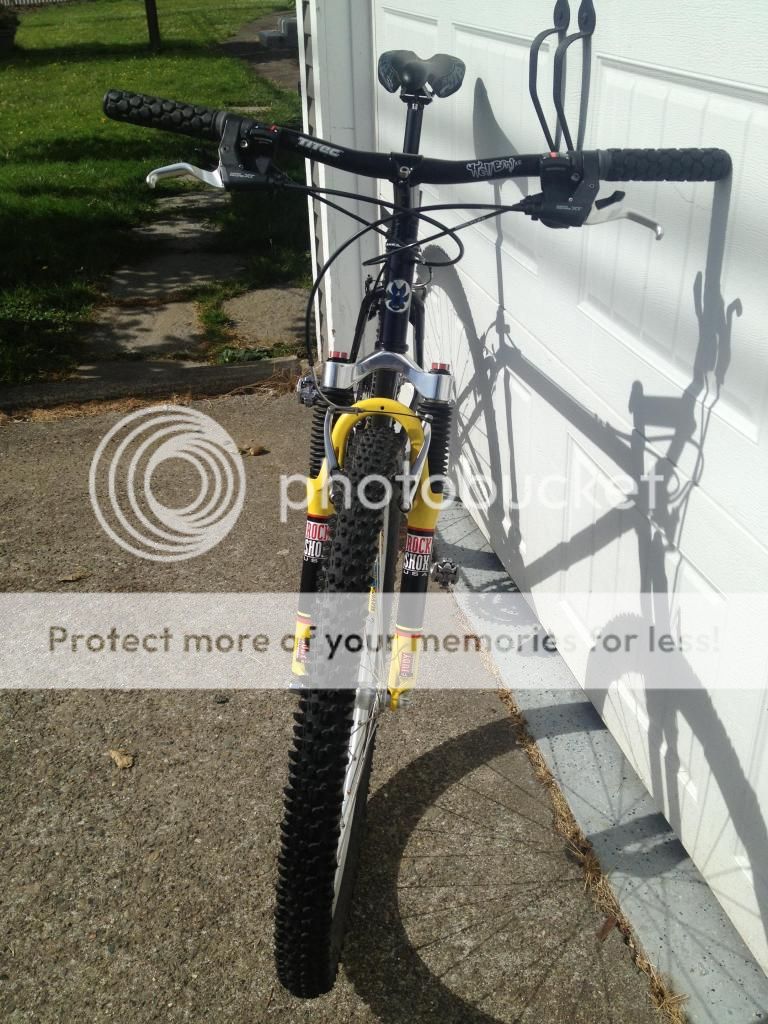
Installed (ignore my quality and tasteful front derailleur shim):
Anti-Chainsuck Device:
<Coming soon. I'll try to post accurate measurements and photos to fab your own.>
My Build up:
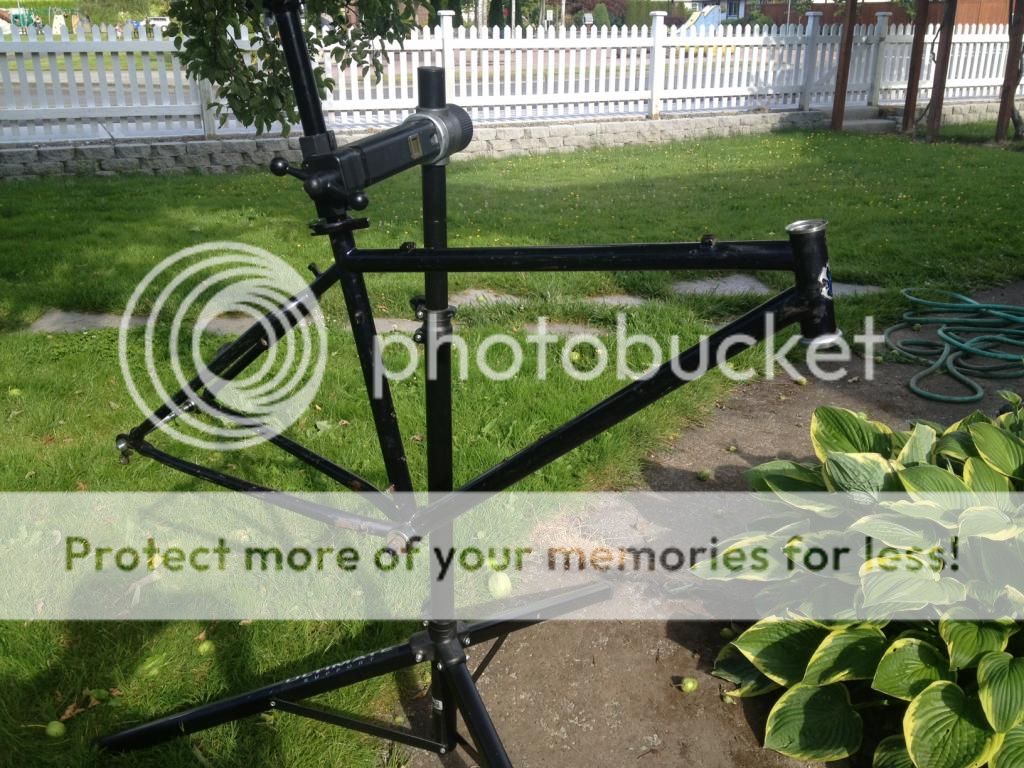
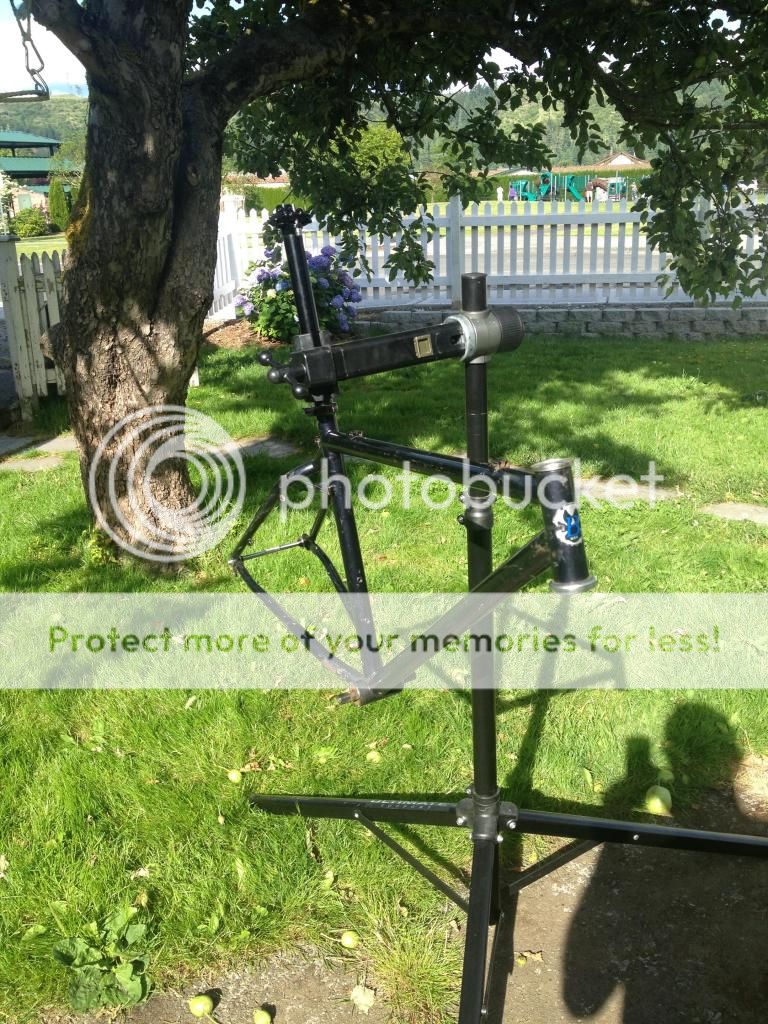
Here's my bare frame as it arrived. It's needs a correct fitting bottom bracket and a repaint to be pretty again. I'm incredibly excited. Time to build it up and see how it rides!
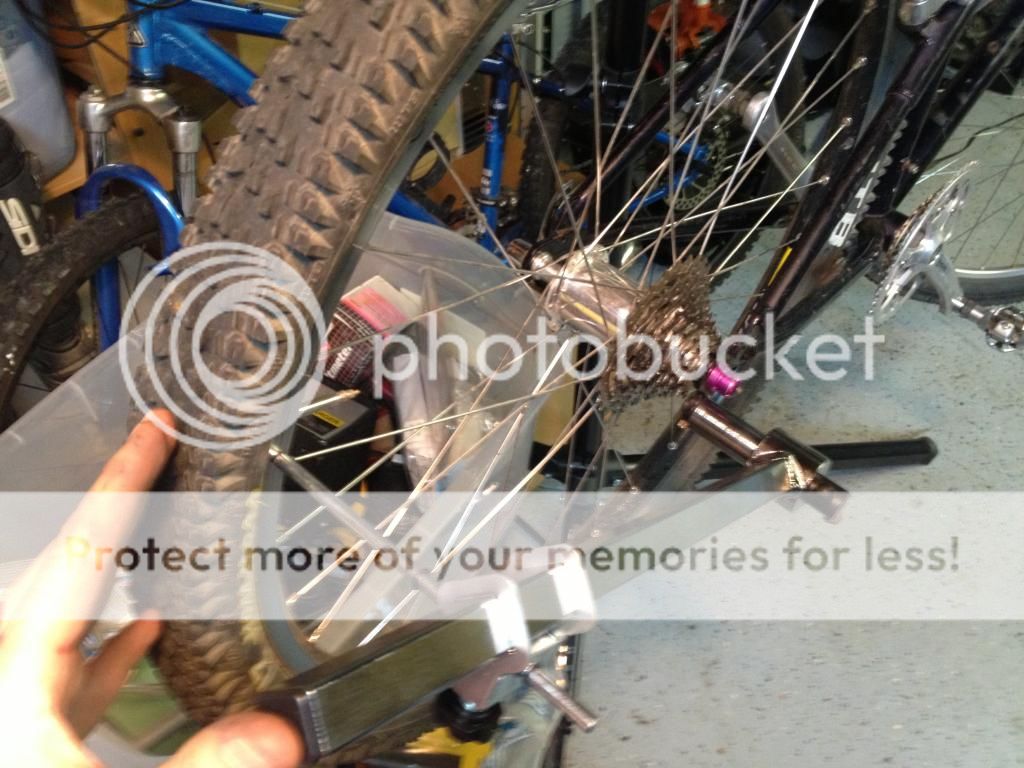
Checking the rear hanger:
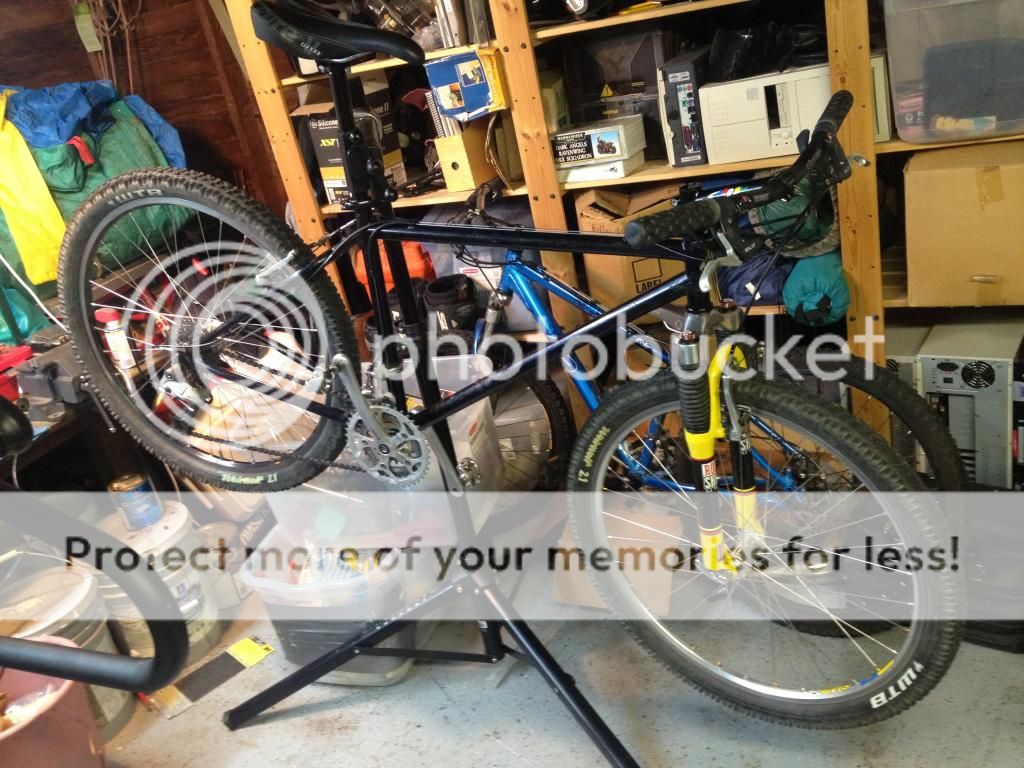
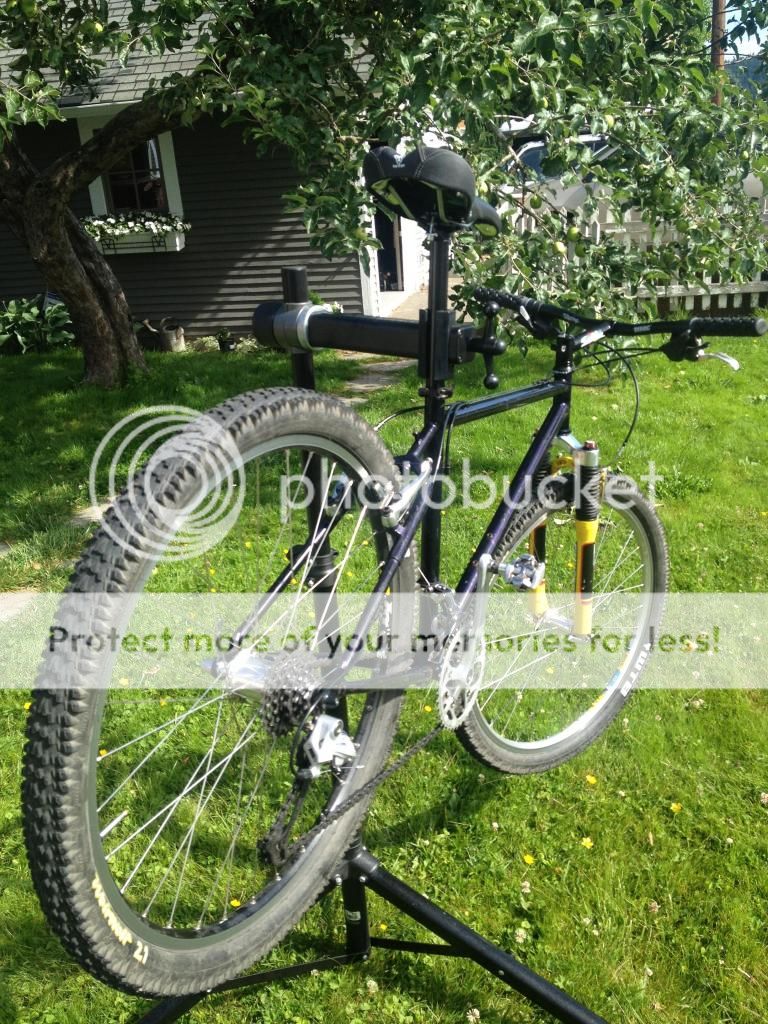
And after an all niter in the the Garage, a pot of coffee and allot of Black Sabbath... here it is at 2am the next morning!
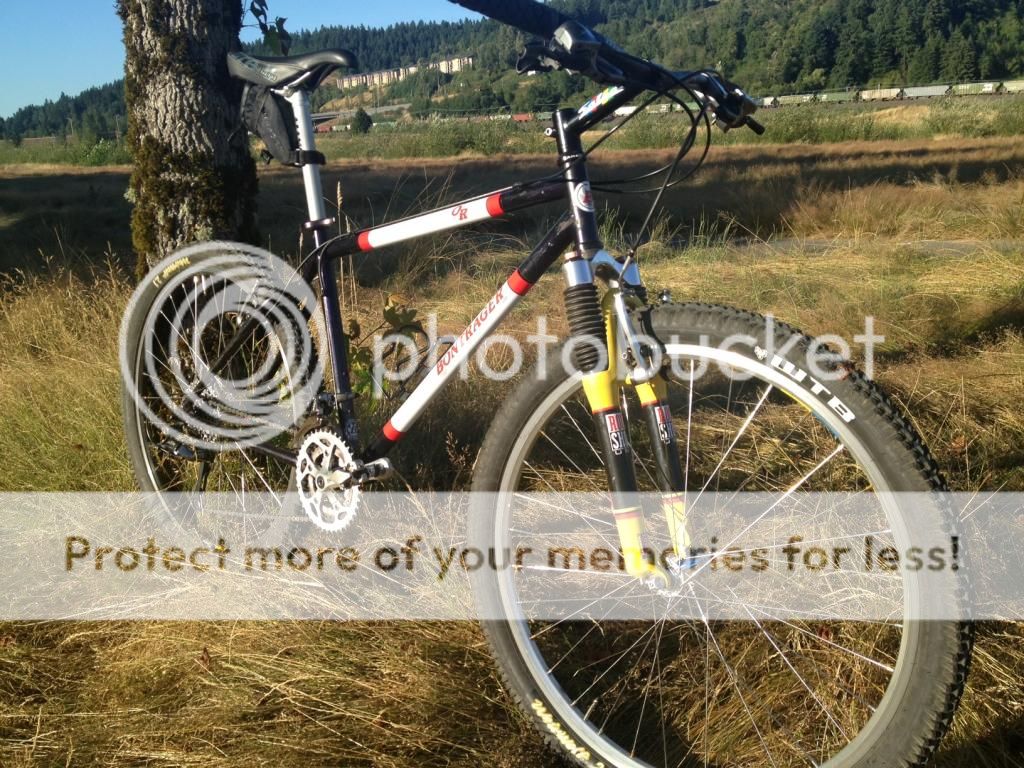
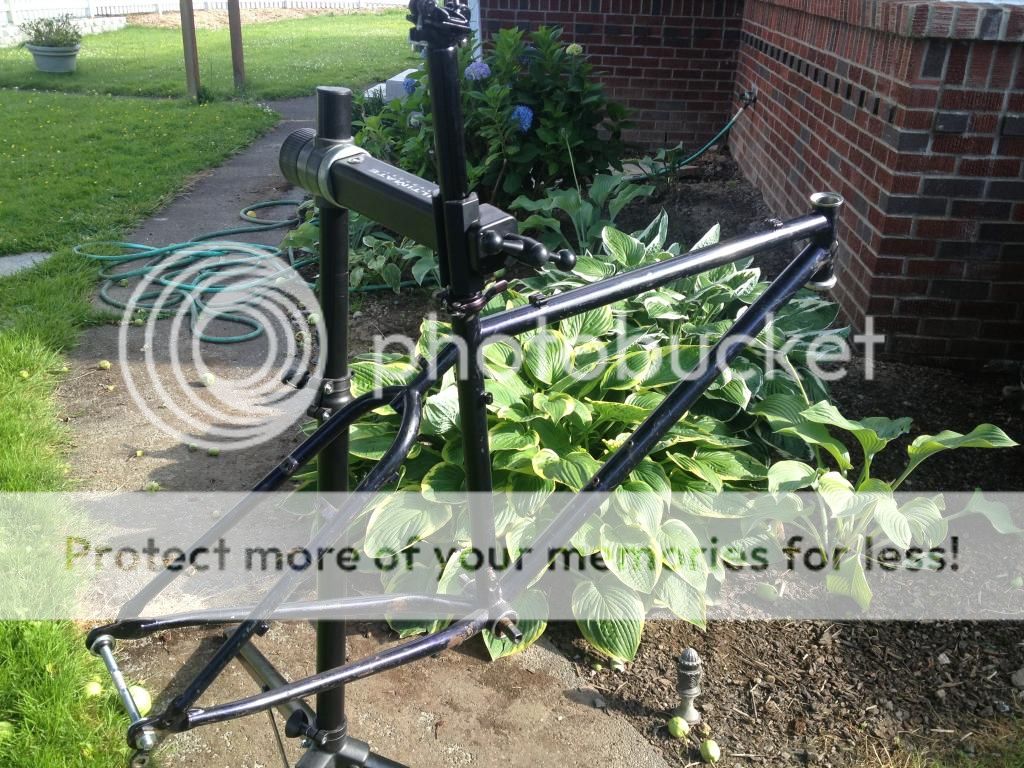
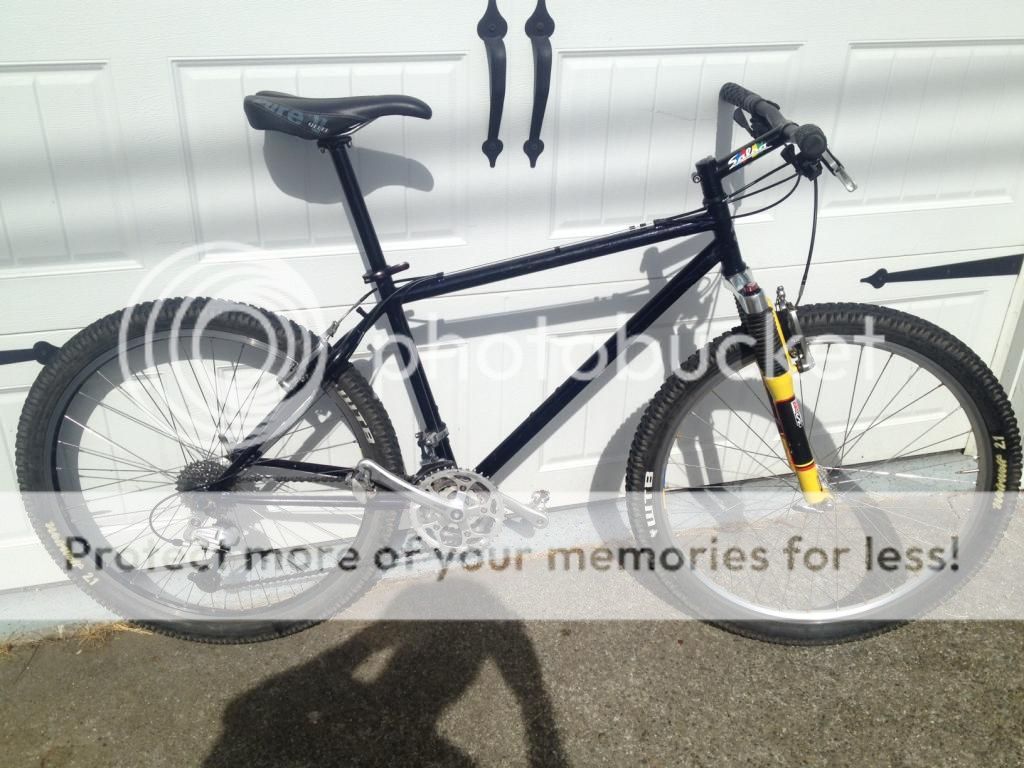
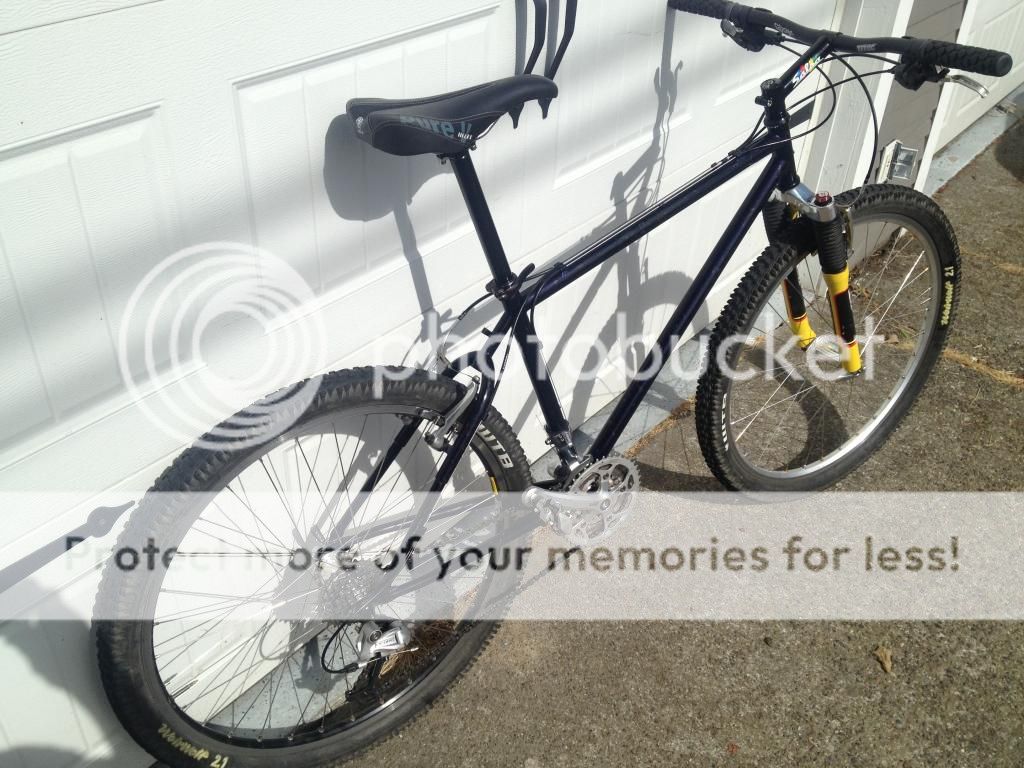
The next day in the sun. Looking better!
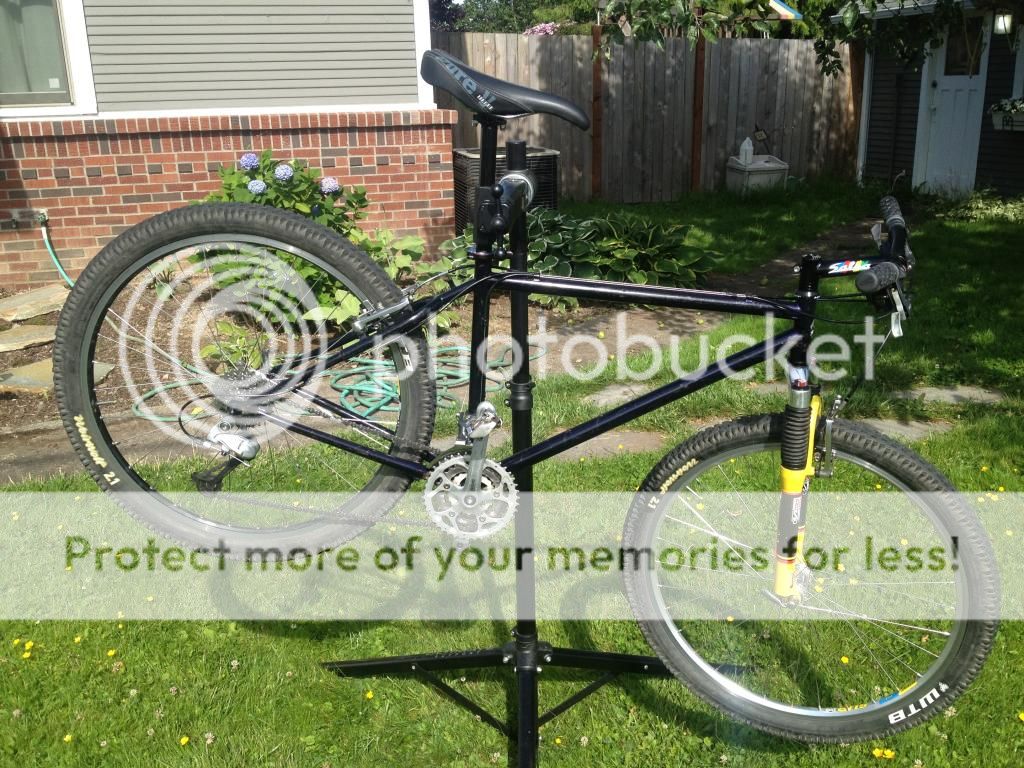
Standing (well... leaning) under it's own power!
It was suggested by Mike Muz that I make a build thread for my 1992 Bontrager Race that I am working on rebuilding and eventually repainting. I wouldn't have though of doing this until he suggested it and I thought it might be kind of cool to keep a web log of the bike as I plan on keep it long term and have wanted one since the mid 1990's when I was MTB Racing and working as a bicycle courier. I also want to return the favor to the vintage bike community and share the knowledge in one location that I have gathered all over the web.
I was casually looking for a Bontrager frame when I stumbled on an ad here on Retrobike for a used 1992 Race Frame being sold by cyberbackpacker. After PMing the seller who luckily is located in the states we got it all worked out what size the frame was and after many pics I pulled the trigger sent him the paypal and shipping monies and a week or later the frame arrived without taking any damage from its cross country trip. I couldn't have asked for a better transaction and I can't recommend cyberbackpacker enough. The frame was extremely well packed in a frame box with the rear triangle braced with a length of steel all-thread and nutted up with axle nuts. Thanks again man!
After I decided to get the frame, I realized I that I would need to get some proprietary parts that simply aren't available at your local bike shop and I'm hoping the info I share here will help someone else in rebuilding one these great frame sets. None of the info that I'm posting in this thread are things I figured out on my own, they are little factoids that I found in what feels like a million google searches and trolling old threads posted by helpful people shared in years gone by. It just seems as though much of the info is getting a bit stale in the posts I was finding with broken picture links, or based on info that the writer assumed the reader already knew. Having been out of bikes for some time, I don't recall half of what I thought I used to know and what I do recall it turns out is usually wrong. I'll try to keep it simple for guys like me who just want to build it up solid and not cock it up and/or waste a bunch of time hunting down parts that won't fit on the bike anyway.
I'll share some specs that I needed to chase down. Note that these specs do not necessarily apply to the post Trek buyout "Privateer" frames.
General pre-Trek Bontrager information:
Frame Sizing Information:
General info needed when gathering parts:
Head tube size: 1"
Seat post size: 26.8
Front derailleur (mech) size: 28.6 (1 1/8") Bottom Pull if you use the Bontrager pulley
Bontrager "Uniqueisms":
The rear brake bosses and posts are proprietary but a nearly any regular brake post that is readily available can be cut down and be used without issue.
Bontrager's have a unique pulley on the seat tube of the frame that allows the bike to use a bottom pull derailleur when the cable routing is coming from the top. To replace the pulley, simply track down a Replacement Sliding Screen door wheel at Lowe's, Home Depot or other DIY store - Google search turned one up at Walmart. The part number is B-551 is readily available on the cheap and includes two pulley's. Not bad!
The anti-chainsuck device can be fabbed rather easily with a dremel or angle cutter tool and a little patience. I plan to post a template image to use to make your own. I was able to source one from a nice forums member here and want to pay it forward on how to make your own if you can't track one down.
The frame cable stops are designed for small/road diameter cabling. FYI: The SRAM POP brake lines fit perfectly.
Decals:
The decals are believe it or not still available from the original printer used for the Santa Cruz built bikes, or from Gil from Retro Decals. I'm going with Retro Decals at this time as I actually want the original square "old school" OR decals set that SSSink did not print and does not have a template for. Not to mention that Gil seems like super cool dude, is an enthusiast and active on these forums.
As a side note, SSSink it wary of selling these stickers to people trying to sell counterfeit Bontragers which I appreciate. They seem like great guys.
Decal contact info:
SSSinc: http://www.SSSink.com/
Retro Decals https://www.facebook.com/retrodecals
Decal and color samples used from the 1994 catalog. We actually had this at the shop I worked at back in the day, and the paint chips were actually powder coated metal disks and decals were actual decal samples. It was pretty amazing in person.
Brake Posts:
Bontrager's use a design I haven't seen on other bikes but I'm only slightly old, not OLD old.
Maybe others here have seen something similar but I never have. Most bikes have a brake boss brazed or welded to the frame and then a brake post threads into the boss with large M10x1 sized threads. The brakes then ride on the post and a short M6 bolt threads into the larger post, retaining the brake onto the brake post.A Bontrager is different. It's boss is threaded for an M6x1 bolt and does not have a replaceable post semi-permanently threaded into it. On a Bonty the bolt acts like the post and requires a collar to sleeve over it to carry the brake with out any slop. It's a clean design but proprietary. To make your own "brake collar" for a Bontrager buy some Replacement Cantilever Stud's. I got mine from JensonUSA.com and they are affordable. Place the new replacement post into a bench vice and cut off the threads with a hacksaw or dremel so that the length of threads is completely removed and the post is flat. Then drill out the center of the post with a quality 15/64 or approximate that will allow an M6 bolt to slide through cleanly. I tried using a couple brand "Titanium" drills bits with cutting oil and they wouldn't bore out the post, I needed to go buy a bit individually that was designed to drill metals before I could drill the stud out. Your mileage my vary.
To make your own Bontrager brake posts:
Tools needed:
Dremel with fiber cutting wheel or quality hacksaw blade
bench vise
bench grinder or dremel sanding/grinding wheel
quality 15/64 drill bit
Materials:
Replacement Brake post or stud
M6 40-50mm bolts. 30mm is too short and it's ok to be too long you can cut down if needed. I'm trying to get stainless in this length but online they are pricey from what I've been able to find.
Post before:
Cutting and Drilling:
After:
Installed w/o brakes:
Bontrager Front Mech/Derailleur Pulley:
Parts needed:
B-551 pulley kit
I believe this is an M4 bolt but my frame still had the small bolt and collar and I didn't have a way to verify.
Example of the pulley for sale online:
http://www.rakuten.com/prod/crl-1-nylon ... OI2LvD_BwE
Installed (ignore my quality and tasteful front derailleur shim):
Anti-Chainsuck Device:
<Coming soon. I'll try to post accurate measurements and photos to fab your own.>
My Build up:
Here's my bare frame as it arrived. It's needs a correct fitting bottom bracket and a repaint to be pretty again. I'm incredibly excited. Time to build it up and see how it rides!
Checking the rear hanger:
And after an all niter in the the Garage, a pot of coffee and allot of Black Sabbath... here it is at 2am the next morning!
The next day in the sun. Looking better!
Standing (well... leaning) under it's own power!