Hi again!
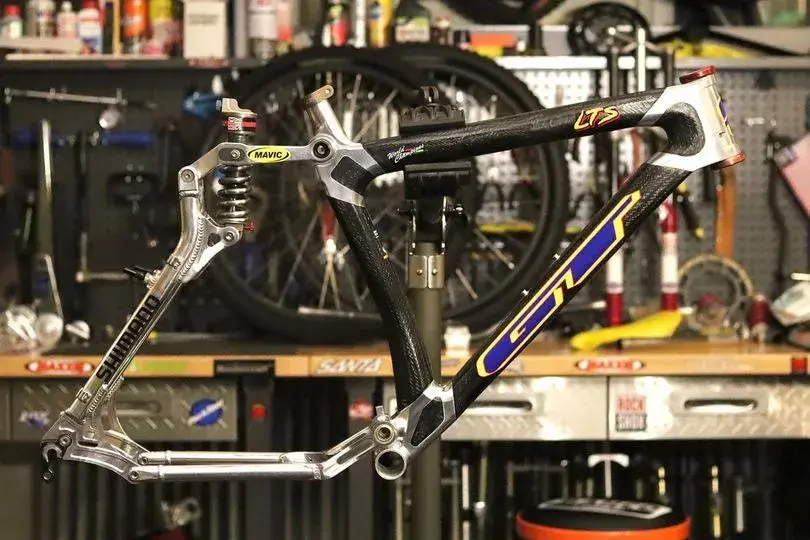
So during my summer vacation I visited a GT collector here in Finland, and came back with a bunch of parts and frames he was letting go from his stash. One of them was a 1997 GT STS DH frame that had a small starting crack under the BB. At first I had no idea what to do with it, but when I couple of weeks later overhauled a Judy DHO and fitted it with black stanchion, I got an idea for the build.

I remembered seeing this pic of Nico Vouilloz on a thermoplastic LTS prototype with the black stachioned proto Boxxer, and started gathering information on the bike. Turns out this was a prototype level DH version of the 1996 thermoplastic LTS, and they used to race these on some smaller competitions in -96. Their main bike for important comps though was still the aluminium LTS DH probably because of some reliability issues with these thermoplastic frames. Then again this is pure speculation as I got no clarification on the subject.
The proto was badged as a LTS because abbreviation STS was not braded yet in 1996, and actually the STS DH frame is the commercial follower of this DH proto for the 1997 markets. It is pretty much the same frame, but the DH proto had a slightly different front triangle tubing, but the reat triangle and the seatpost insertion lug on the seattube are pretty identical. So it was pretty acceptable at least for me to use the STS DH frame in this replica build.
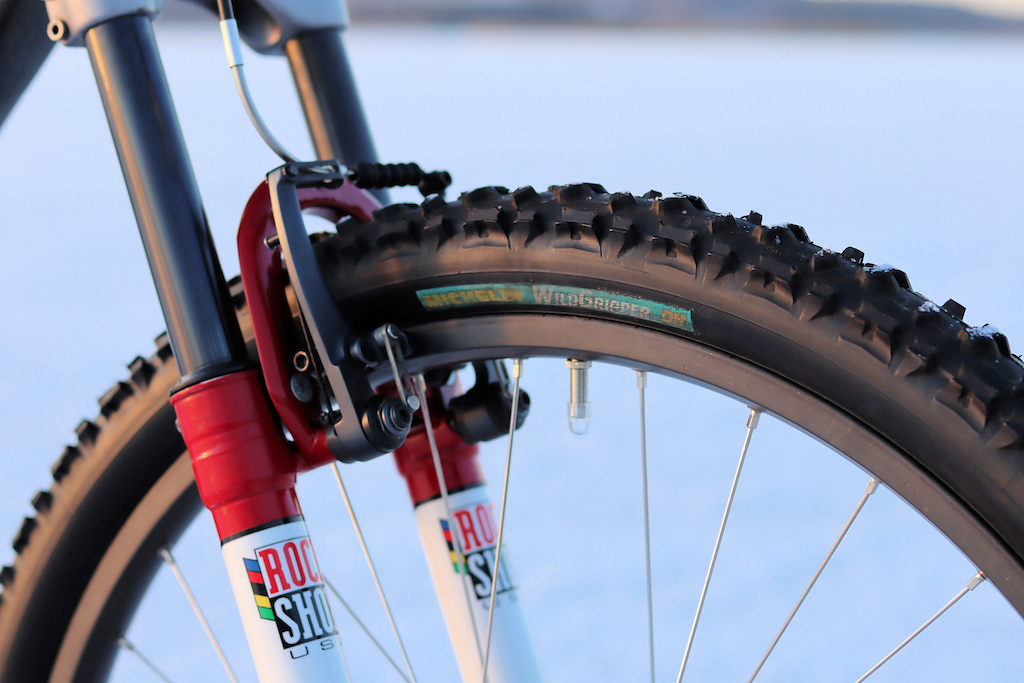
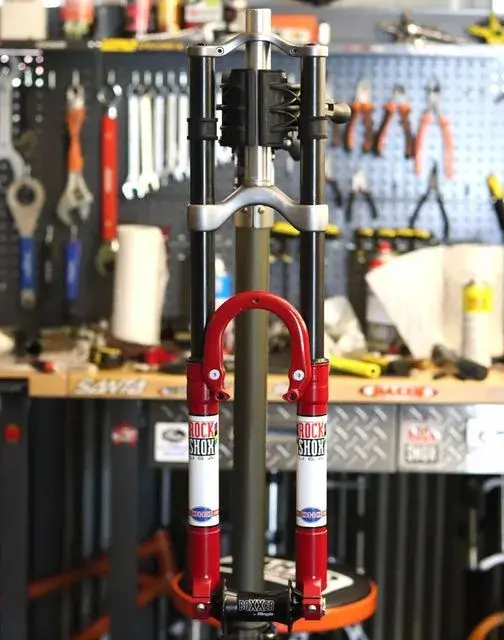
The prototype Boxxer was another thing I could never realistically get as there was only I think 30 pieces ever made, and from those only a small part had the black stanchions. Actually I know of a set here in Finland that is owned by our own DH legend I've been chatting a lot about retro builds, but it also has the clear stanchions and red crowns. The Judy DHO that I had was the first commercial double crown DH fork that came to the markets after the proto Boxxer, so again that was the best I could do. I managed to change the black stanchions on mine from a Judy XLC with only small modifications needed, and also managed to use the original DHO cartridges inside there. I also replaced the crappy elastomer/spring combinations into steel springs.

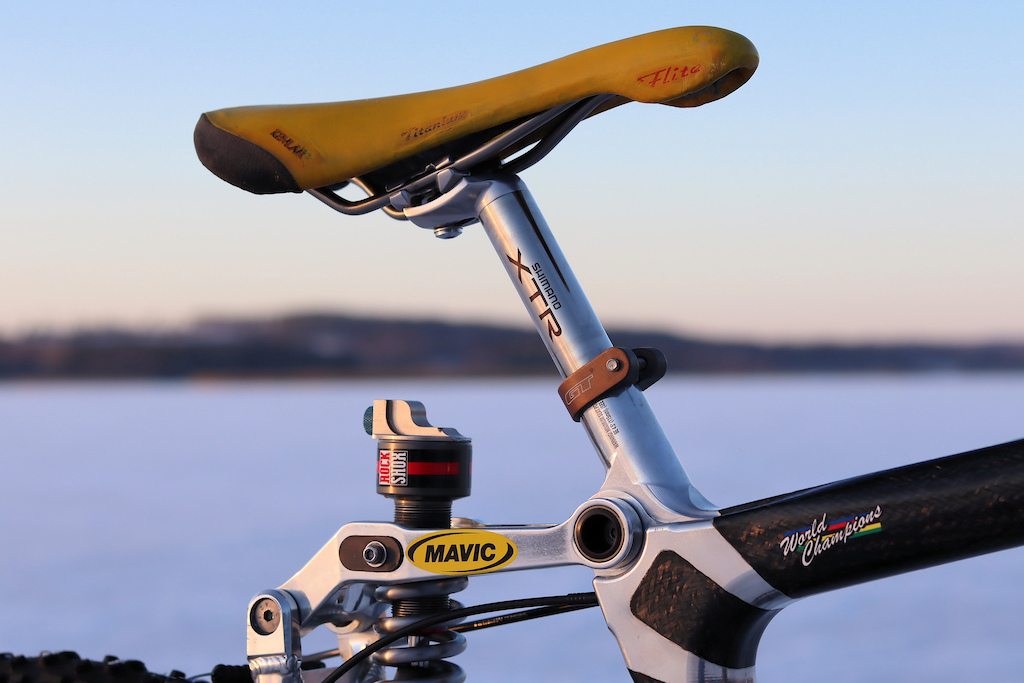
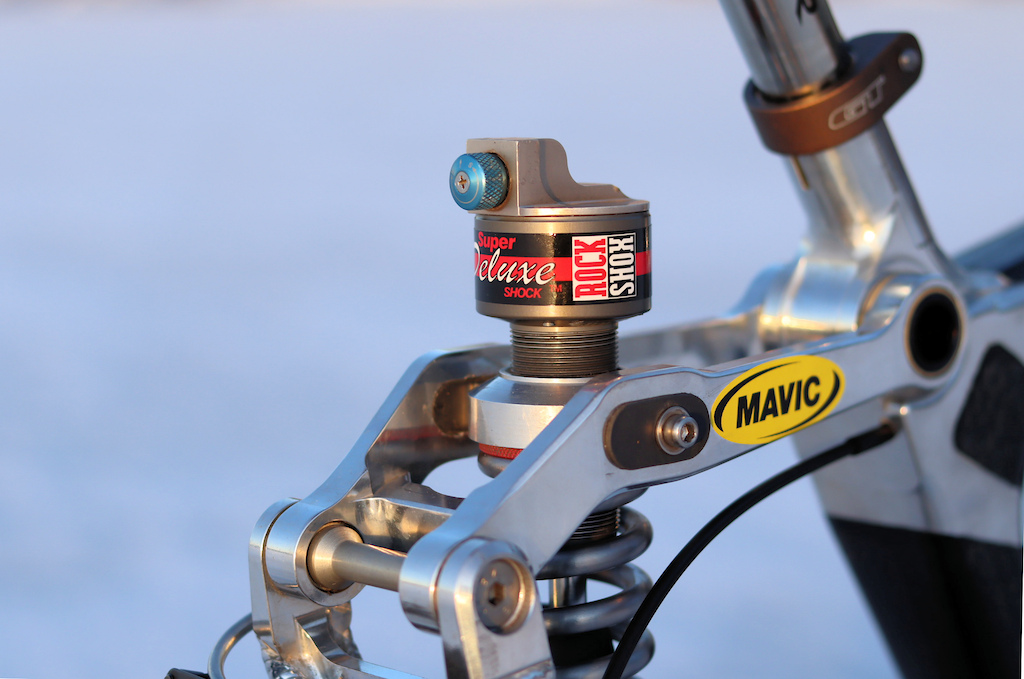
So now I had two key parts of the replica sorted out as close to the prototypes as it was realistic with my resources, and I could start researching and sourcing the needed parts and restoring the dull frame. I polished the rear end and lugs, handled the lacquer on the thermoplastic with a polishing compound, and installed new internal cable tubes to the frame that were missing. Then got huge help from Gil at retrodecals with reproducing the decals on the frame, which came out a little too big due to my own mistake, but the updated set is on the way and I will replace them later on.


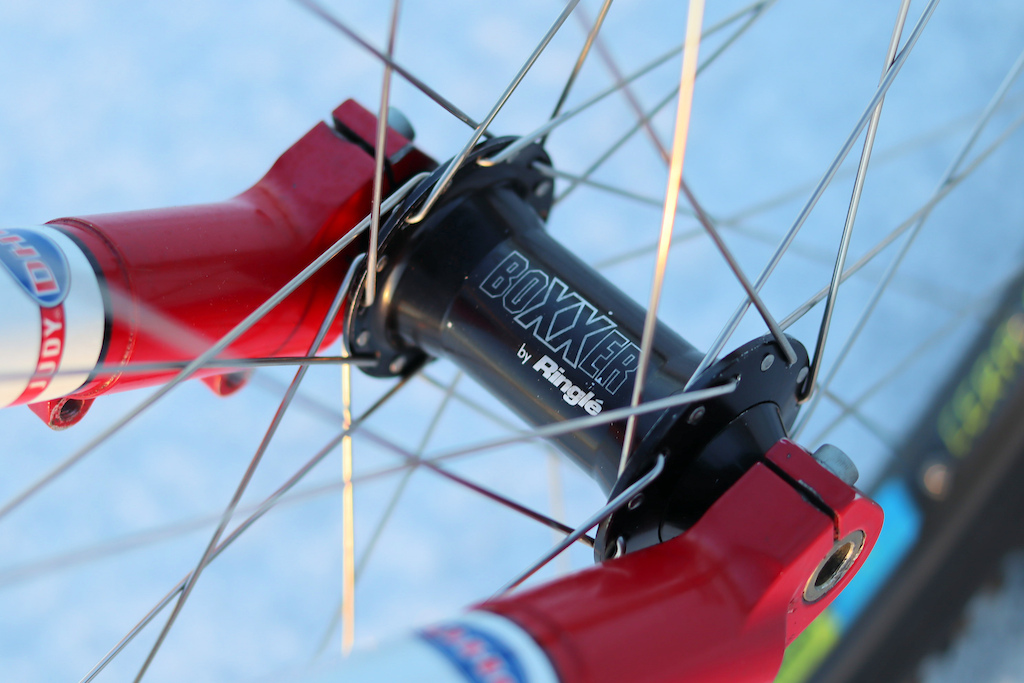
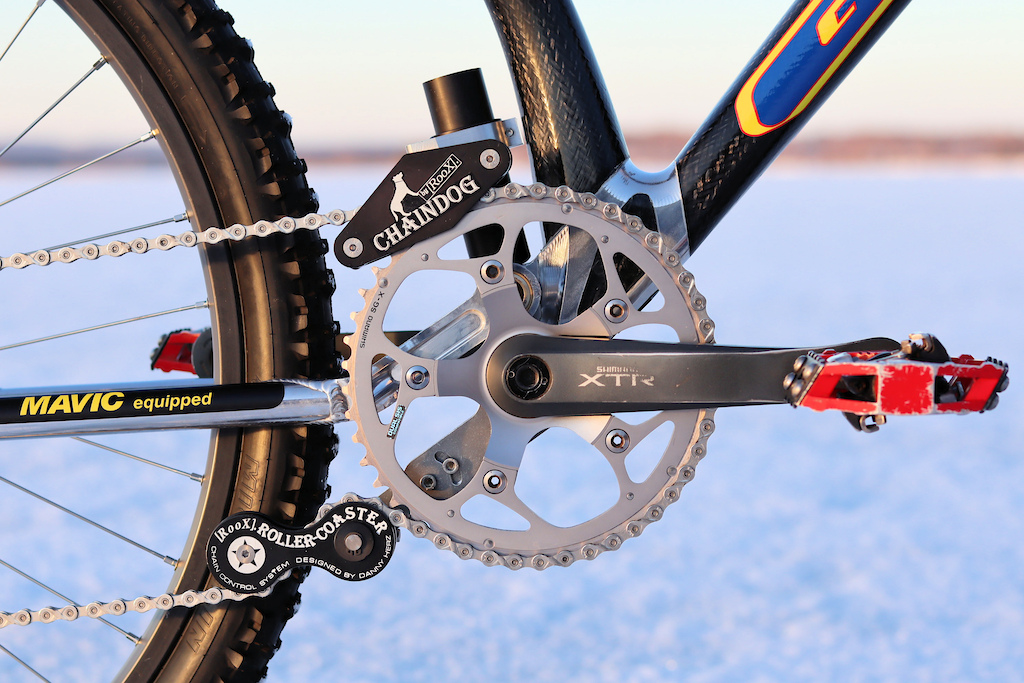
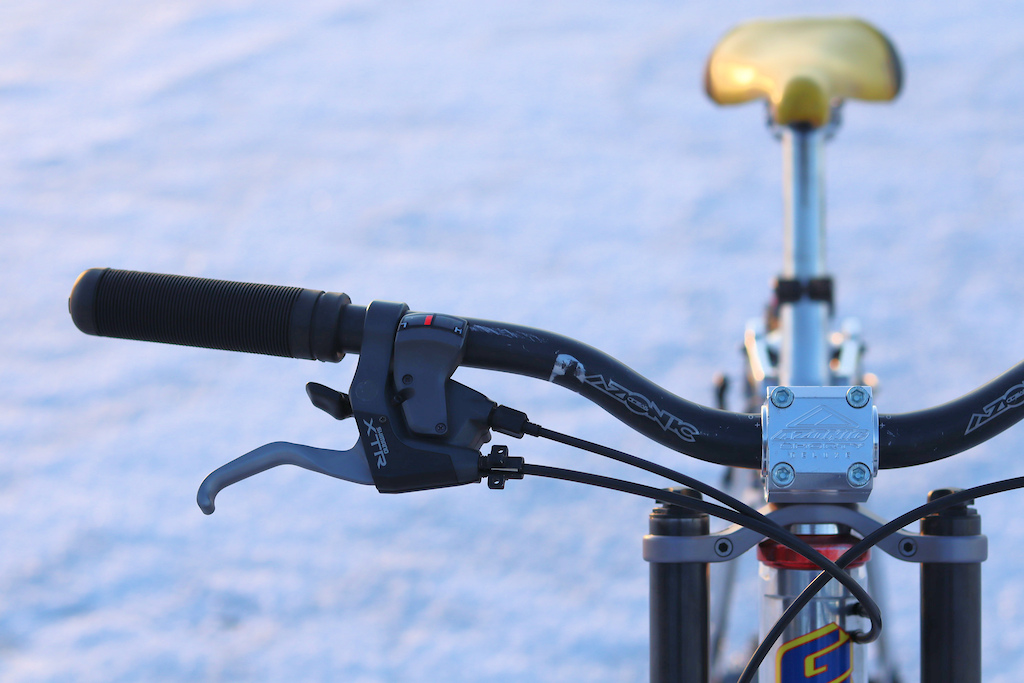
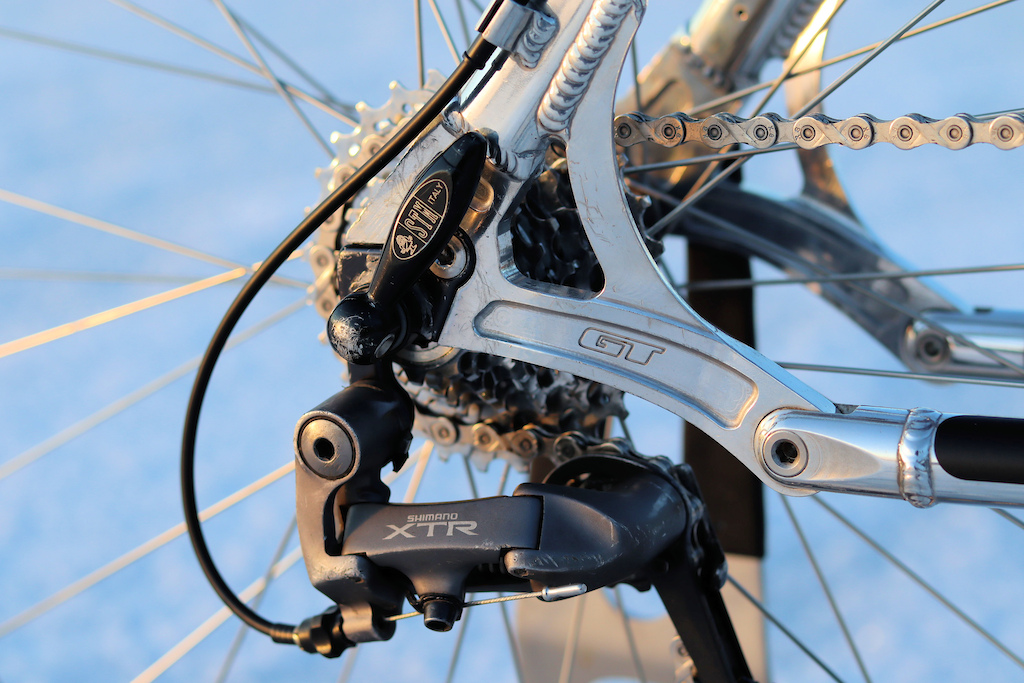
With the parts I managed to find out the spec pretty well with the help of excellent GT gurus, and had many of the needed bits in my boxes already. The front hub they used was probably some proto level 20mm non-disc boxxer specific hub, so I used its commercial version with the 20mm Boxxer Ringle. For the rear I used XTR M950 and I built the wheels on Mavic 121 rims. It had Cane Creek headset, M950 derailleur, 5-bolt cranks, BB, brake arms and combo levers, M900 seat post, black yellow Flite, Azonic bar and as stems they used either Kore or Azonic Shorty, from which I picked the shorty as I had one already. As tires they used Michelins and I used the Wildgripper DHs which should be from the same era I believe. Only thing I couldn't find was the STM chain guide so I decided to use there RooX RollerCoaster that I've always loved and they fit this quite nicely. I hope one day I'll find the STM combo but I'm not holding my breath for that

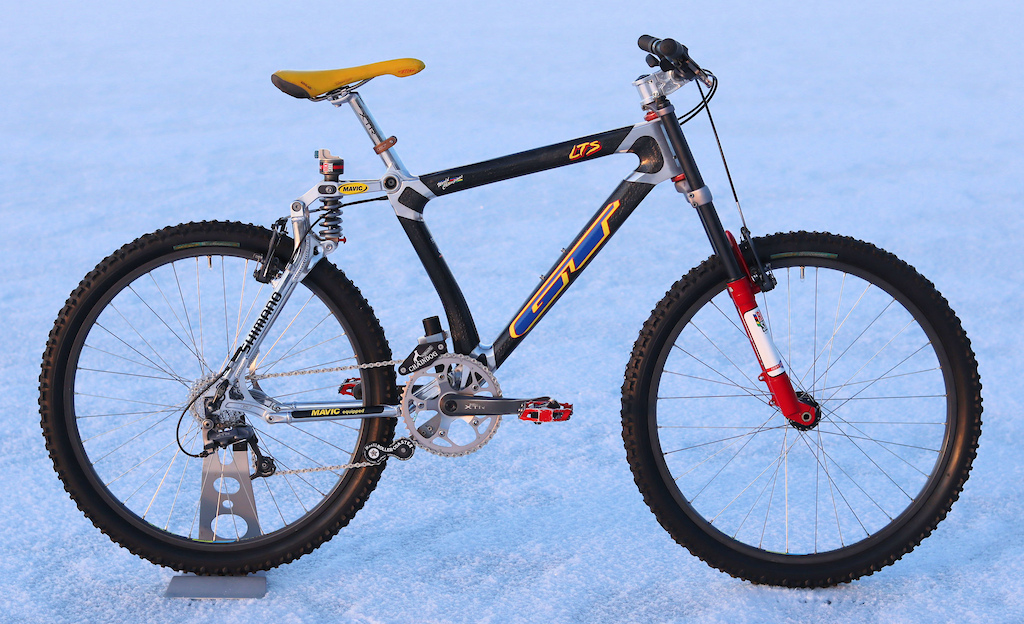
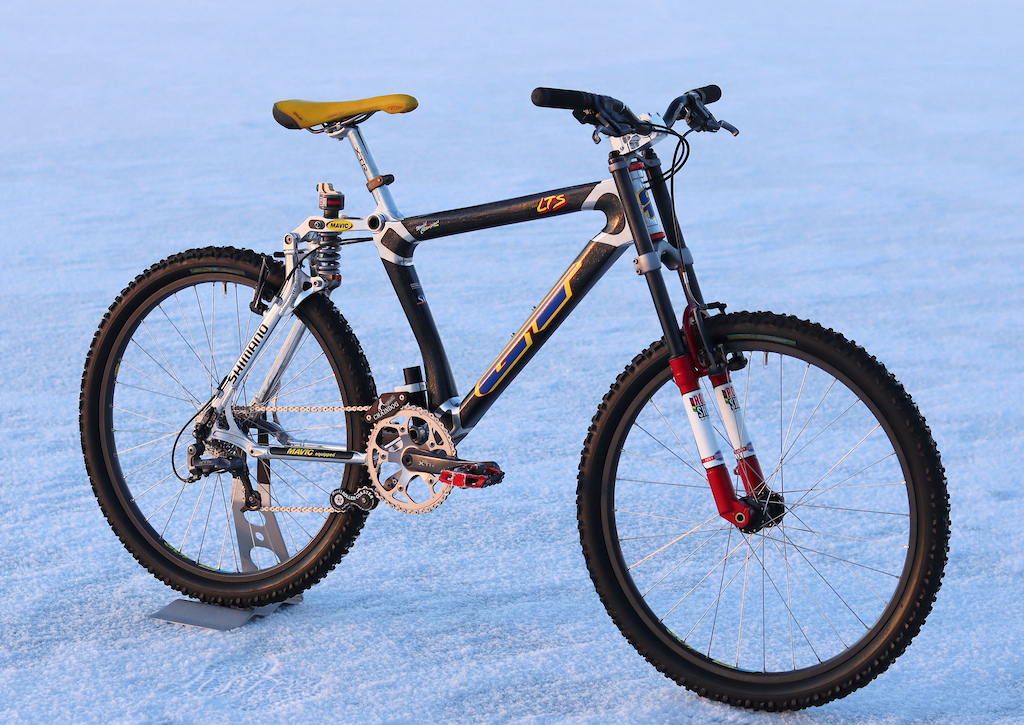
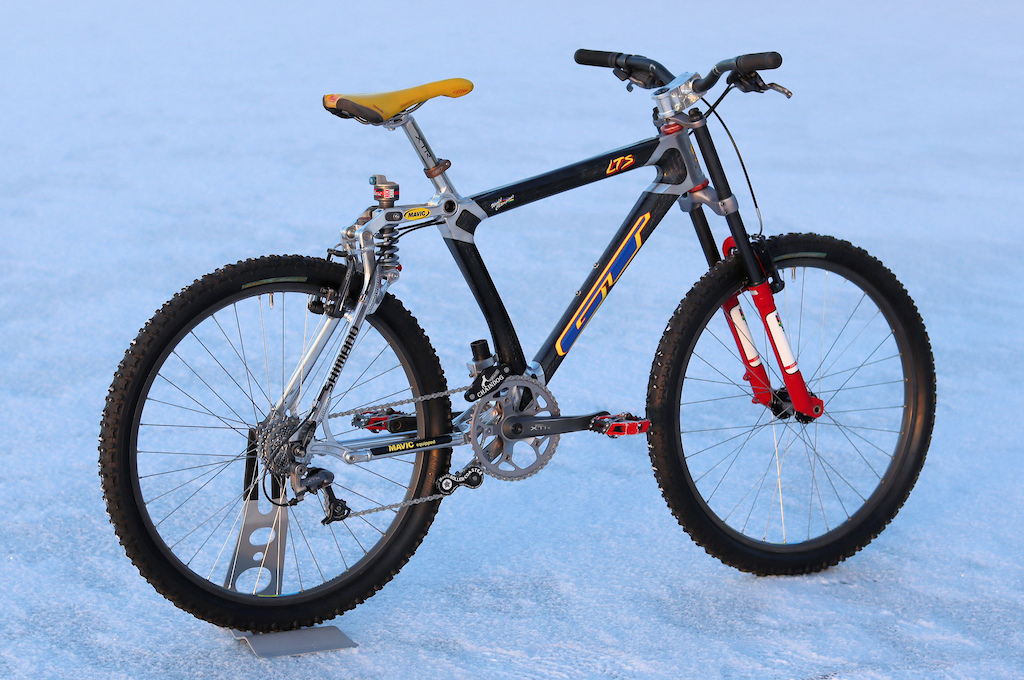
After this it was time for the best part of every project, to assemble everything together and set it up properly! It's dark and freezing here now, but yesterday there was some sunlight available so managed to take a few shots of the bike. I'm pretty happy with how it turned up, too bad I won't be able to take it for any proper rides in the Spring due to the small crack under the BB. Will take it for some cruising with the kids and also on some smooth flowy singletracks for sure!

So during my summer vacation I visited a GT collector here in Finland, and came back with a bunch of parts and frames he was letting go from his stash. One of them was a 1997 GT STS DH frame that had a small starting crack under the BB. At first I had no idea what to do with it, but when I couple of weeks later overhauled a Judy DHO and fitted it with black stanchion, I got an idea for the build.

I remembered seeing this pic of Nico Vouilloz on a thermoplastic LTS prototype with the black stachioned proto Boxxer, and started gathering information on the bike. Turns out this was a prototype level DH version of the 1996 thermoplastic LTS, and they used to race these on some smaller competitions in -96. Their main bike for important comps though was still the aluminium LTS DH probably because of some reliability issues with these thermoplastic frames. Then again this is pure speculation as I got no clarification on the subject.
The proto was badged as a LTS because abbreviation STS was not braded yet in 1996, and actually the STS DH frame is the commercial follower of this DH proto for the 1997 markets. It is pretty much the same frame, but the DH proto had a slightly different front triangle tubing, but the reat triangle and the seatpost insertion lug on the seattube are pretty identical. So it was pretty acceptable at least for me to use the STS DH frame in this replica build.
The prototype Boxxer was another thing I could never realistically get as there was only I think 30 pieces ever made, and from those only a small part had the black stanchions. Actually I know of a set here in Finland that is owned by our own DH legend I've been chatting a lot about retro builds, but it also has the clear stanchions and red crowns. The Judy DHO that I had was the first commercial double crown DH fork that came to the markets after the proto Boxxer, so again that was the best I could do. I managed to change the black stanchions on mine from a Judy XLC with only small modifications needed, and also managed to use the original DHO cartridges inside there. I also replaced the crappy elastomer/spring combinations into steel springs.

So now I had two key parts of the replica sorted out as close to the prototypes as it was realistic with my resources, and I could start researching and sourcing the needed parts and restoring the dull frame. I polished the rear end and lugs, handled the lacquer on the thermoplastic with a polishing compound, and installed new internal cable tubes to the frame that were missing. Then got huge help from Gil at retrodecals with reproducing the decals on the frame, which came out a little too big due to my own mistake, but the updated set is on the way and I will replace them later on.


With the parts I managed to find out the spec pretty well with the help of excellent GT gurus, and had many of the needed bits in my boxes already. The front hub they used was probably some proto level 20mm non-disc boxxer specific hub, so I used its commercial version with the 20mm Boxxer Ringle. For the rear I used XTR M950 and I built the wheels on Mavic 121 rims. It had Cane Creek headset, M950 derailleur, 5-bolt cranks, BB, brake arms and combo levers, M900 seat post, black yellow Flite, Azonic bar and as stems they used either Kore or Azonic Shorty, from which I picked the shorty as I had one already. As tires they used Michelins and I used the Wildgripper DHs which should be from the same era I believe. Only thing I couldn't find was the STM chain guide so I decided to use there RooX RollerCoaster that I've always loved and they fit this quite nicely. I hope one day I'll find the STM combo but I'm not holding my breath for that

After this it was time for the best part of every project, to assemble everything together and set it up properly! It's dark and freezing here now, but yesterday there was some sunlight available so managed to take a few shots of the bike. I'm pretty happy with how it turned up, too bad I won't be able to take it for any proper rides in the Spring due to the small crack under the BB. Will take it for some cruising with the kids and also on some smooth flowy singletracks for sure!


")

