Thanks for the support. That's what makes me continue, I guess...
So, onward with the tail.
As I said, I was inspired by the stories of the mountainbike pionieers and motivated by my success in making a quick release. Thought about what part I could make next, given my limited machining knowledge and resources. I was fairly certain, I wouldn't be able to come up with something original. It would have to be a copy, more or less.
And I fould this picture in the archives:
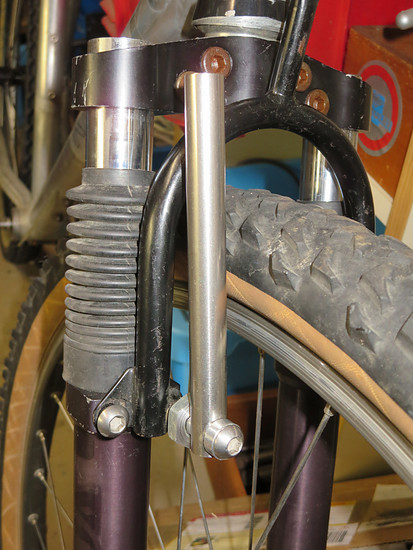
Witch in turn made me remember the fact, that one of my favourite bikes shown in the german classic mountainbikes forums also had that brake. A Marinovative Decelerator! That was exactly, what I needed in my life!
That - and the rims! Sho good!
The path is clear. Set the sails!
That was basically the origin story of me making my own set of Decelerators.
I won't go into much more detail about that build, because I already had a thread here on retrobike back then.
If you are interested, can find the whole thread right here.
This is the thread that keeps on giving. The Klein is like Triggers broom with bells on
I don't remember those Marinovative brakes, but I'm sure they did a later v brake style called "Cheap Trick" - which were like mini I-beams in profile.
You've certainly got some mad metalwork skills! Where I'd be reaching for the credit card and ebay, you're heading straight for the lathe.
I think of the Decelerators as one of the first v-brakes of sorts. I think they learned from these that they could make a brake with that kind of long lever. But its overall construction was too complicated. May well be that Marinovative realized soon, they could get away with a much more simpler design and soon came out with the Creap Tricks. As suggested by the name. It must have felt cheap to them, to make such a simple thing and it was still performin as good or better than their overly complicated, intricate Decelerator...
Timewise they got beat to it by Wissmann and his W-brake. If we are talking about who invented the actual V-brake.
For all those who might not know what we are talking about:
Yes, I think I wrote that earlyer in this tread. I'll make a pair evntually. But I didn't get my butt up yet, to order the necessary materials, like the titanium rod, I would like to use for the axles and the handle. But. I have a feeling, that time will come soon.
On with the story. Well, goin a bit off topic for my own selfish and nostalgic reasons.
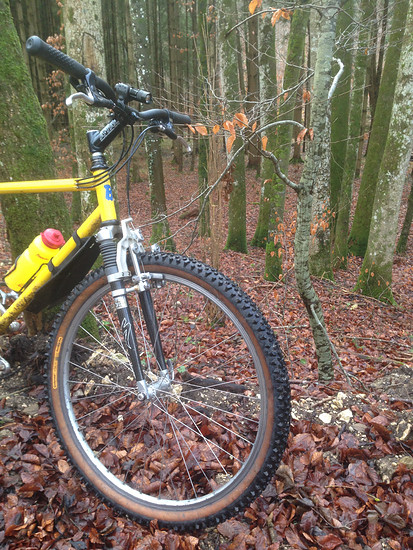
It is now January 2018. I slapped the first pair of brakes on my commuter bike (a Biketech Hikari) to give them a proper shakedown.
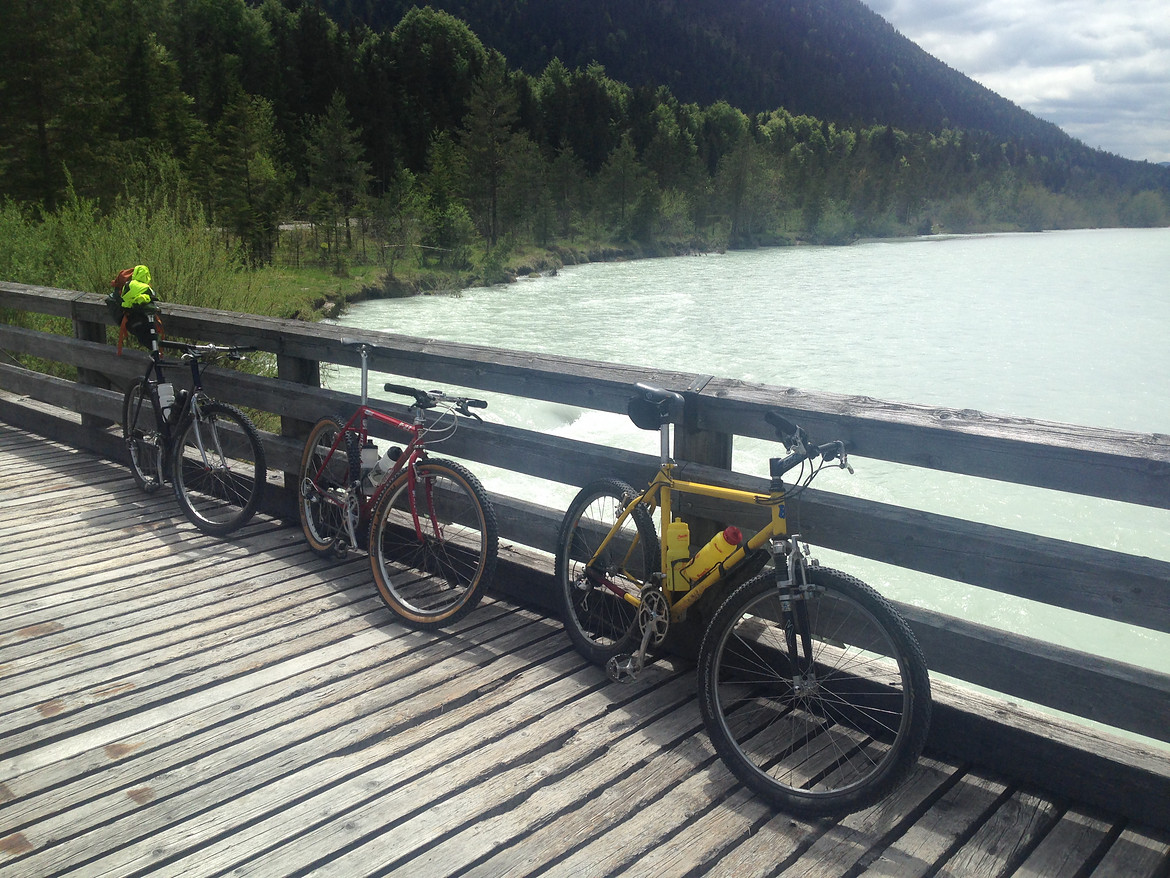
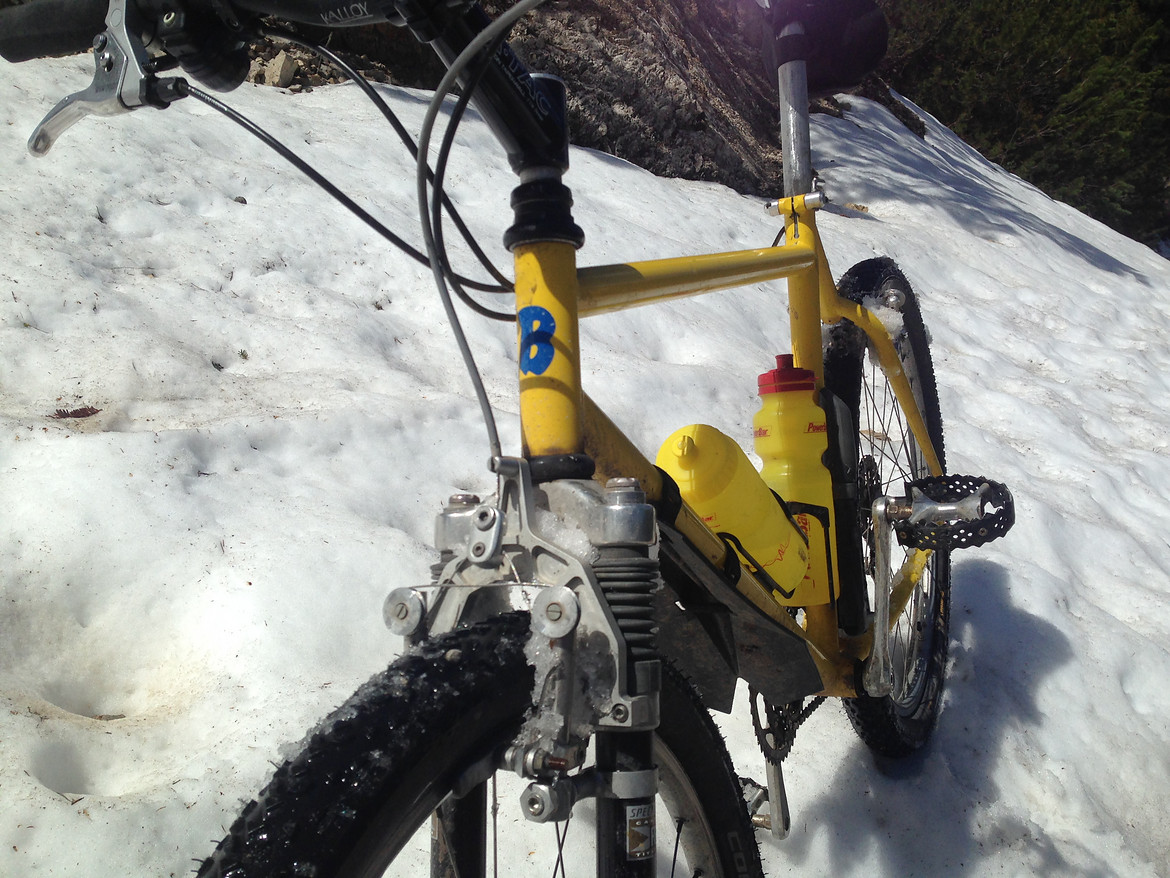
Everything worked smoothly. So I made a second pair for the back. And bolted that to the Biketech, too. I was initially planning for it to just be a short test run - for a few weeks maybe. But today I know these brakes would stay on that yellow bike for more than 3 years. I went through one set of brake pads. I rode the bike in summer and winter. I even took it to two trips in the Alps and to Italy..
Looking at those pictures, I really miss the pre covid times. I really do.
Ok. BTT:
Having a set of brakes, I set out on a small quest for finding the right hubs to use.
A set, that would fit the DIY part of this build. But also maybe the recycling aspect.
I am still not 100% sure on which ones it will be.
But let's see all the stuff I tried until today...
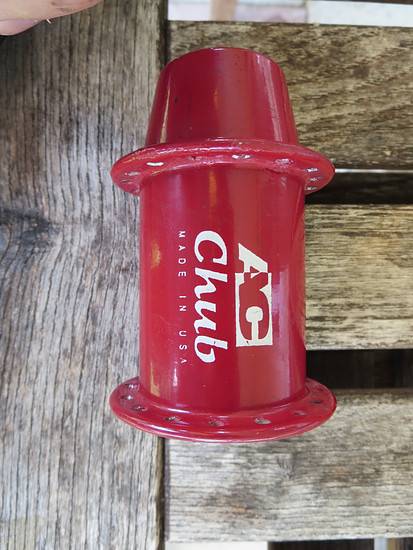
Prospect one: A set of AC chub hubs. Ugly red. The rear with quite the severe corrosion underneath the powdercoating. Also the bearings were pretty much gone. I got them a log time ago for really really cheap.
This is the rear, already disassembeled.
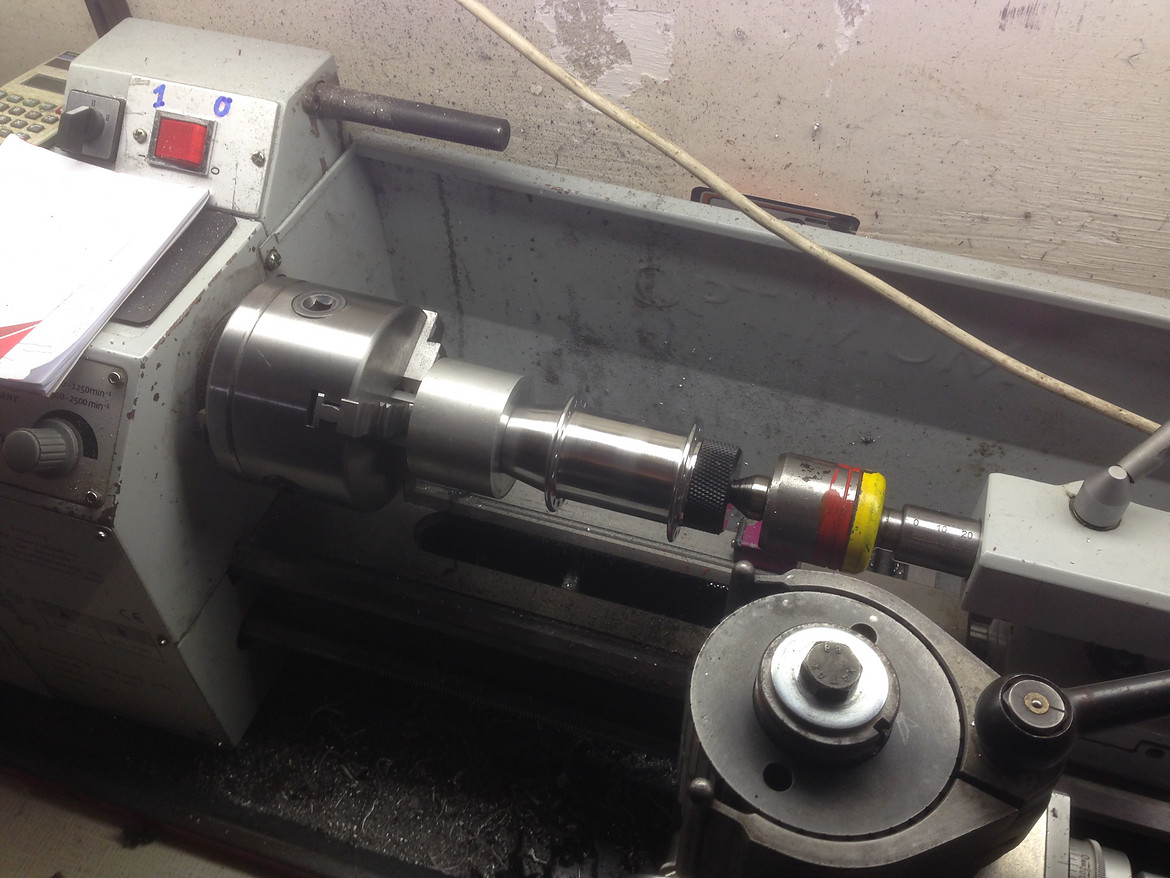
Again, took it to the lathe. Made a holder and skimmed off the powder. Some scraping and sanding later, I had a very bare hub body.
Looking at the hub in the lathe, I thought to myself: Maybe I could make my own hub? Not the whole hub. But just a body? And use the insides of some broken hub?
Yea! that soulds good. So I asked around in the forums, if maybe someone would like to send me a broken hub, or two?
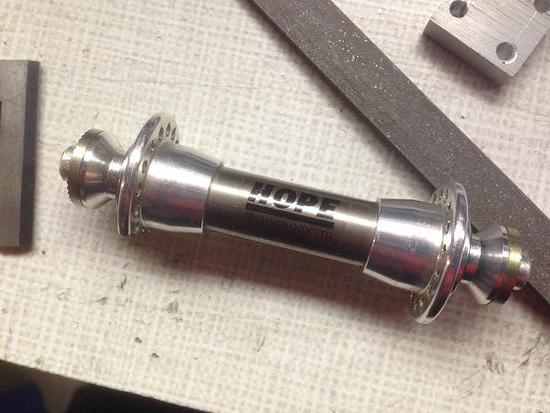
The first hub that was donated to me was this poor Hope front hub with a broken flange.
This would be my first try in recreating a hub body. That was very interesting to me, because not only did I not know anything about making such parts. I also did not have any tools beside the lathe. My biggest concern was about how to drill the holes for the spokes in any precise way. My Drillpress surely wouldn't do the job. I had watched a lot of machining videos on youtube. This old Tony, Abom79, Steffan Gotteswinter, pete22, Robert Rinzetti. I loved their stuff. And they all would have used a milling machine and a dividing head for that kind of task. But I didn't have these...
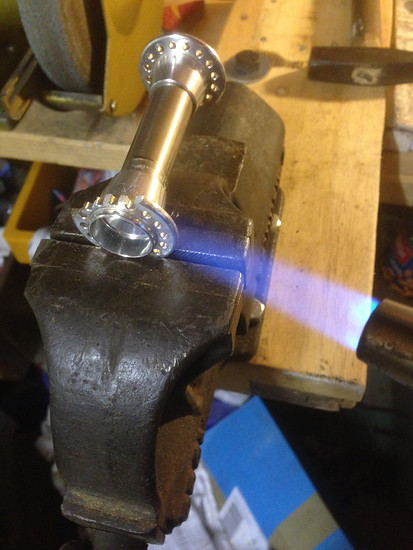
Well let's first take apart the hub and see, what's inside.
Heat releases the glue.
Not a lot going on inside those front hubs.
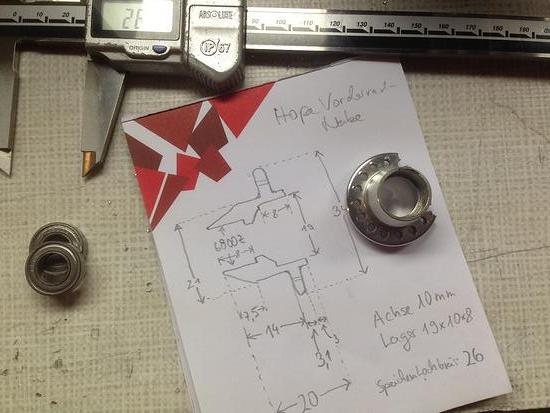
Taking notes and measurements
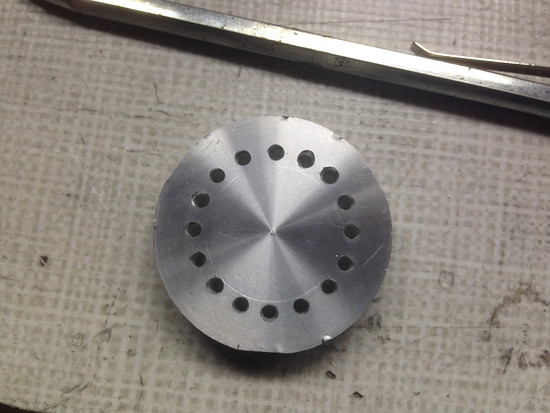
Now, the interesting part. I tried to make an even hole pattern on the drill press despite knowing it wouldn't work.
It turned out better than expected. But not nearly good enough for an actual hub part.
Back to the drawing board. I need to make some kind tool for that.
At this point I have to give credits to a lovely british guy in his shed. Steve Jordan on Youtube. I love that guy! His shed is so tiny and yet he manages to make such nice things and even film it. If you are interested in tinkering/making/machining you should really check him out.
I took several ideas from him and combined them to my little contraption, that I will try and show you now.
I will try and make that part short but still understandable. I hope I'll manage without boring you to death with my machining stuff...
How to begin? The problem at hand is, that I want to drill holes into a round part. All holes should have the exact same distance to the rotational center of the part. And in addition the distance from one hole to the next should also be the same.
The idea no is to clamp the part into the lathe and make some kind of holder that would accept a power drill or dremel tool and attach it to the tool holder of the lathe. That would take care of the "hole distance to the center of the part"-problem.
So let's start with that.
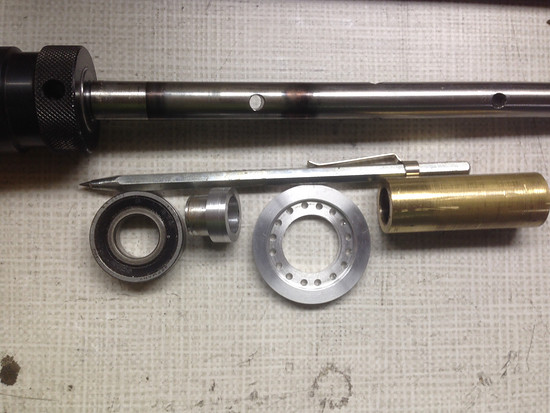
I had a spare drill chuck I had picked up at a local swap meet. And I had some bushings, bearings and axles that I salvaged from old printers.
The idea was to make a bushing that would fit in and be clamped by the tool holder of the lathe. Then the chuck would be somehow mounted to an axle shaft that would slide into that afore mentioned bushing. Which leaves us with a "spinnable" chuck that is held by the tool holder. The axle would be driven by a normal powerdrill. And of course there sould be some sort of bearing between the bushing and the chuck that will take the pressing forces while drilling/spinning.
Maybe the pictures will help you understand:
This is all the parts. Chuck already mounted to the axle (old printer part )
Then underneath the bearing plus inner and outer "rings" so it fits the axle. And the bronze bushing that will be clamped into the tool holder of the lathe.
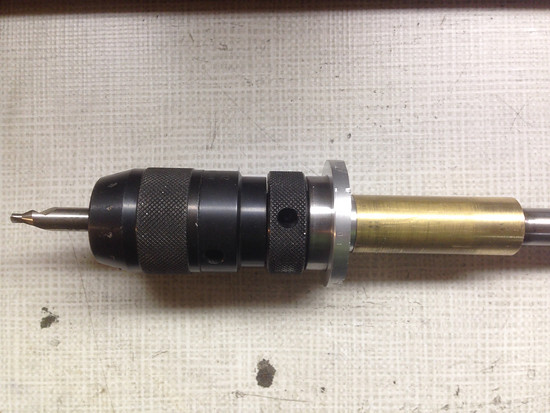
Put together it looks like this:
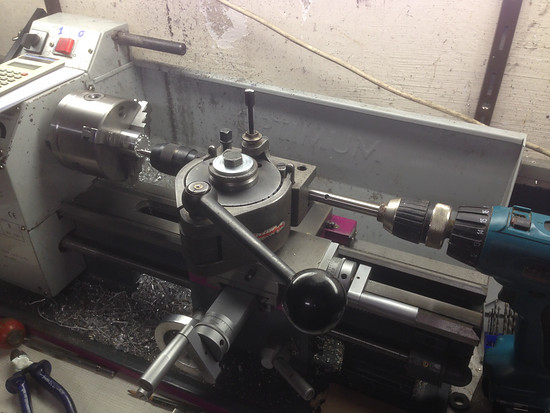
*Arnold Schwarzenegger voice*
Aand äction.
So now I am able to drill on an even diameter.
Still missing the "even distances between the holes" part.


")