Cheeky rim swap over - tools, technique, tips & hints.

Joe*Pro

Senior Retro Guru
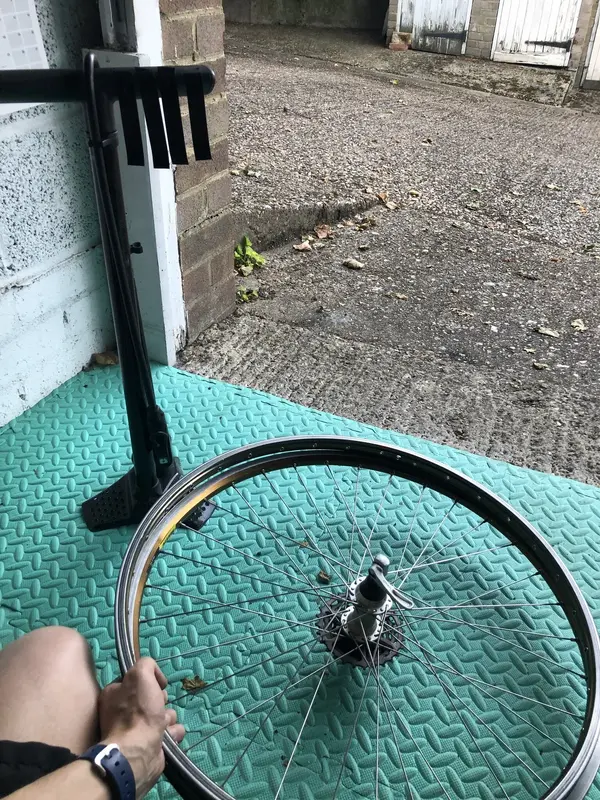
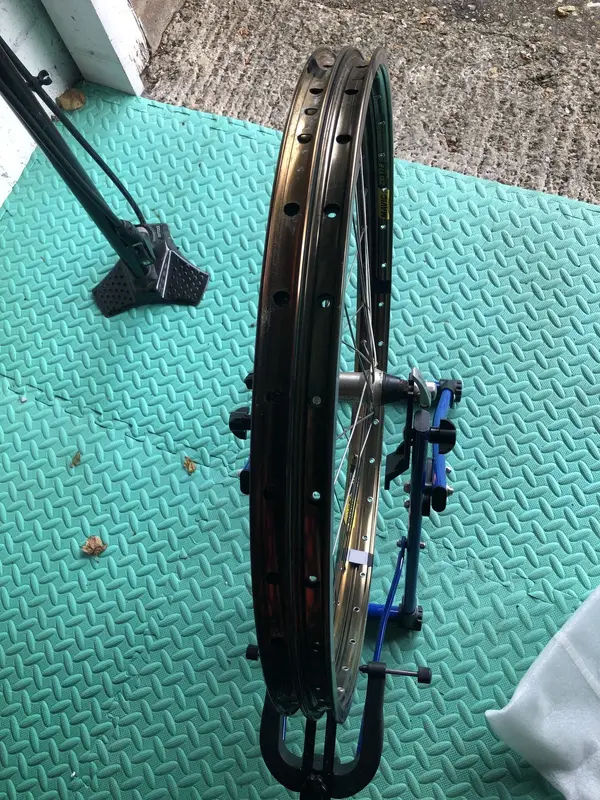
So, I finally gave in and bit the bullet with swapping my none matching rims. An easy one to start I figured, a similar Mavic 217sunset coming off for a Mavic 230TIB going on. Whilst the local bike shop wanted £55 to do a wheel build, I figured it’s something I should try give a go as a right of passage. That and I have potentially 3 to do in total if the first ones a success.

My hope was it would take me Approx 1hr or so to do (I tend to only have 2hrs free on a wknd whilst the toddler naps) and originally I had hoped I could modify my spare P2 fork into a bit of a jig, since if I wasn’t doing it on a budget I might as well be paying the LBS and going For a ride with my time.

I eventually thought better of the diy jig, as rim swap number one was a rear wheel, so the P2 was never gonna work.

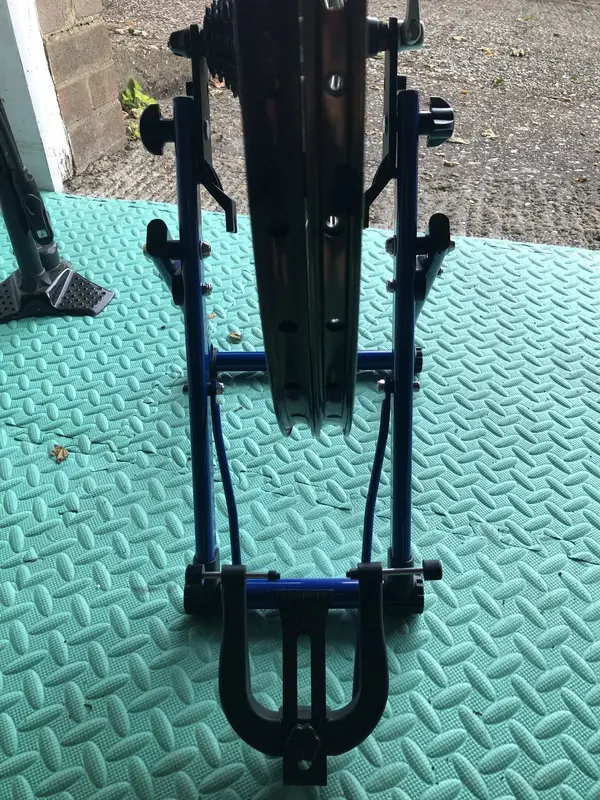
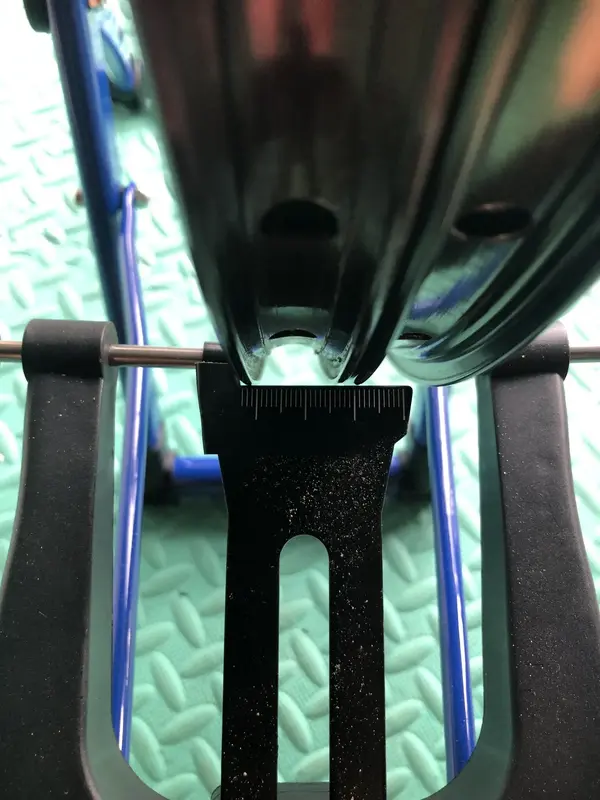
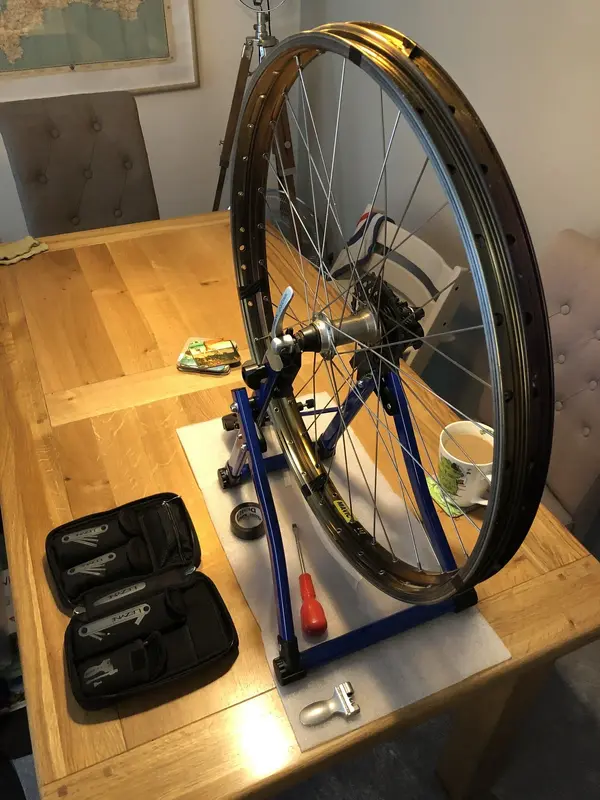
I purchased the cheapest one available in blue on eBay at £19

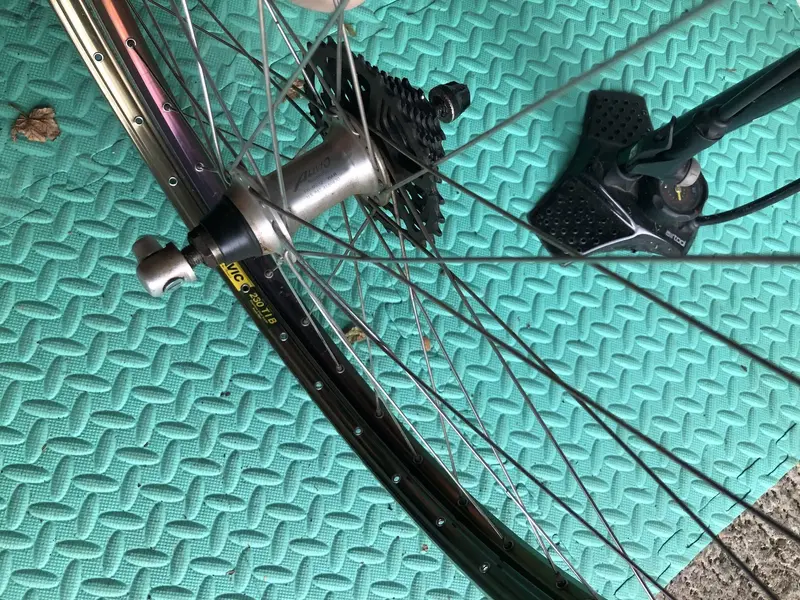
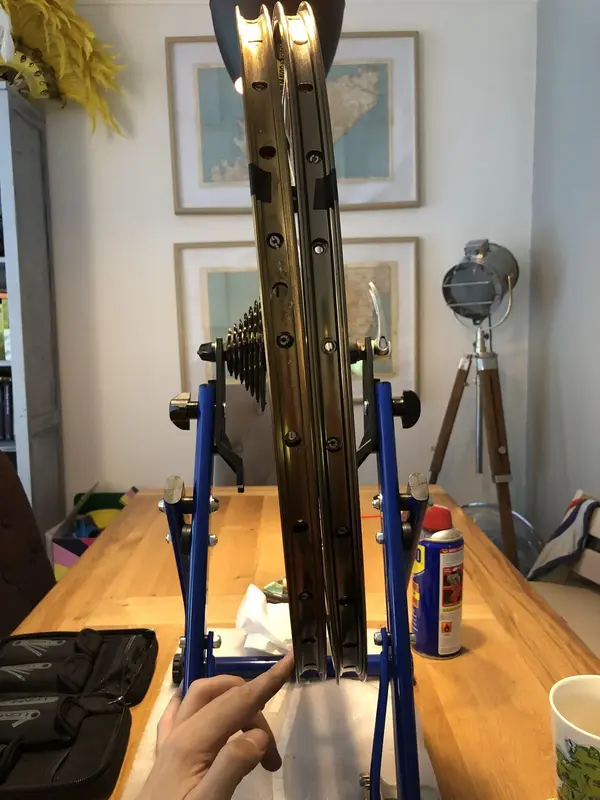
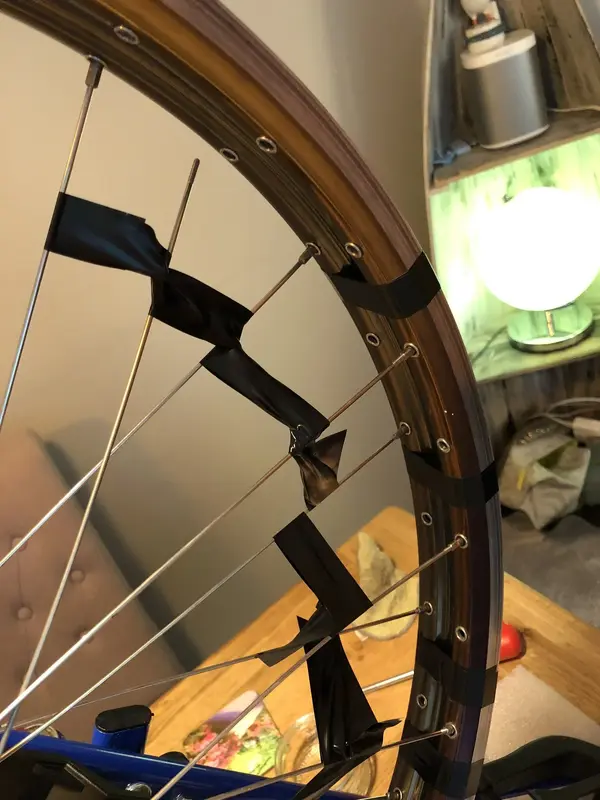
im sure I’d seen an old MBUK grime time thing that suggested: you could just tape the new rim to the old wheel, lined up correctly and then just swap 1 spoke over at a time, like for like. Then obviously just need to bring the dish back in line to centre by like 1inch and true it up, how hard can it be.
(Trying to ignore the pro wheel builder tips of, gotta have new nipples, lube the tips, double check measurements - nahhhh!!)

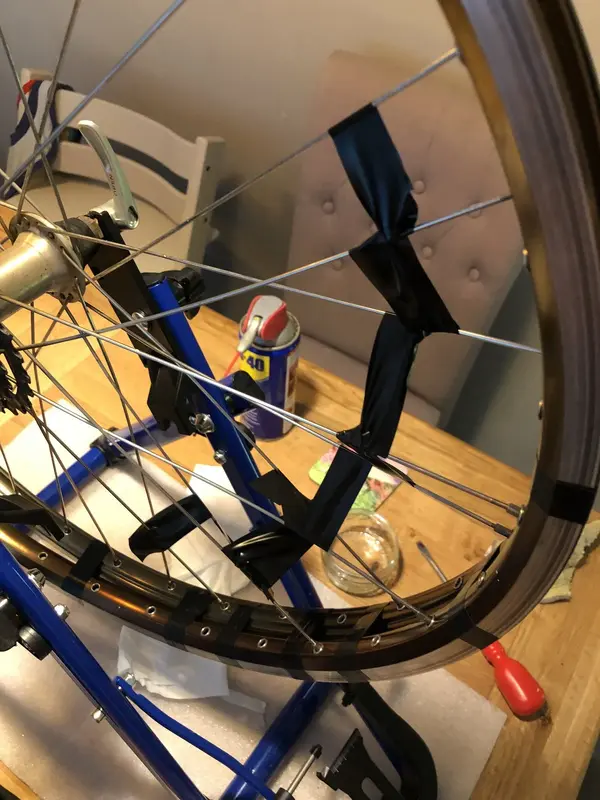
Postie delivered all the parts last week and yesterday i set to it, decided it would be sensible to do opposte spokes and rotate north/east/south/west to help minimise the old rim and the new one going so far out of true that the spoke won’t reach over to the new rim. Wasn’t sure exactly how much slack was available on the spoke thread.

Step by step pics to follow, then some ‘lessons learnt‘ for anyone else who wants to give it a go for the first time.
 
Last edited:
1) cut some tape lengths and place ready to hand. Long enough to double wrap the rim, once aligned. (I single wrapped and wasn’t enough)

2) line up the matching left & left/right & right facing spoke holes and as you see fit, the hub logo from above, with rim logo below on the floor. (Don’t forget to check the other wheel on the bike so the hubs/rim logos face the same as that one does - if you’re into that)

2.1) place wheel in the jig, mark some tap on the stand on one side with where the old original rim alignment should be ready for when you need to dish the new rim back over to centre/straight at the end later.

3) the first 4 spokes are the hardest to reach over and as you go the old wheel starts to go out of true so you have to slacken off other spokes to help it stay a bit true, whilst not slackening them off so much that the rim stretches out bigger you can’t bridge over to the new rim.

4) repeat as above, slowly tweaking/truing both wheels a bit to help keep alignment as best as possible, but the priority is to help the spoke reach over new rim.

5) as you get down to the last 4-6 spokes it becomes harder, a bit of wd40 on all the spoke threads and nipples helps with truimg. And if they really won’t reach across like mine didn’t, then wrap a bit of tape around them to mark which spoke should go where and free them completely from the old wheel and remove old rim.

6) to get the last 4 spokes in, a bit of jiggery pokery was required to slacken off all the opposing spokes to help the him have the flex to reach the last 4, generally by this point nearly all spokes should be on half thread, and the last few should then reach.

7) lastly, true it up Straight inline with that bit of tape you placed as to where the old wheel should be dish/aligned to.

Finished
 

Attachments

  • A896B36D-FEC8-475E-AA78-DA14207B4E04.jpeg
    A896B36D-FEC8-475E-AA78-DA14207B4E04.jpeg
    943.7 KB · Views: 16
  • 8C30F191-FDB6-481A-9B20-8181984BD94D.jpeg
    8C30F191-FDB6-481A-9B20-8181984BD94D.jpeg
    698 KB · Views: 17
  • B656C6FB-2E46-4045-B2C0-AC4DD4FD9D61.jpeg
    B656C6FB-2E46-4045-B2C0-AC4DD4FD9D61.jpeg
    788.9 KB · Views: 17
  • 0E46DD52-F84A-4206-A43A-B3FDFD16E297.jpeg
    0E46DD52-F84A-4206-A43A-B3FDFD16E297.jpeg
    377.8 KB · Views: 15
  • 23C854B4-0EBA-460A-AF37-3F5F375471E6.jpeg
    23C854B4-0EBA-460A-AF37-3F5F375471E6.jpeg
    808.2 KB · Views: 15
  • 3A6527B9-7710-4BCF-8517-2BDF2E634D55.jpeg
    3A6527B9-7710-4BCF-8517-2BDF2E634D55.jpeg
    429.2 KB · Views: 14
  • 1F2A2518-9634-4F5B-A1FA-401C54E6F55C.jpeg
    1F2A2518-9634-4F5B-A1FA-401C54E6F55C.jpeg
    463.1 KB · Views: 15
  • D1EC72E7-7D16-40B7-9EF7-B0E5D68AC161.jpeg
    D1EC72E7-7D16-40B7-9EF7-B0E5D68AC161.jpeg
    366.4 KB · Views: 14
  • 84343E45-4B10-4493-B164-87C32725D2F0.jpeg
    84343E45-4B10-4493-B164-87C32725D2F0.jpeg
    421.6 KB · Views: 14
  • A86C019A-841D-4D1F-9C0A-45B1F606265A.jpeg
    A86C019A-841D-4D1F-9C0A-45B1F606265A.jpeg
    346.3 KB · Views: 15
Last edited:
So took me just over 3hrs (6min a spoke on average) to do and was a lot more effort than expected given the fine spoke length tolerances. But delighted with the outcome.

was it worth it to save £30, no 🤣 but it might be worth it once ive done a couple more. And i can now say I’ve built my own wheel up, sort of !

the almost finished wheel, just another lap of nipple tightening a bit more dishing over to do.

136468AB-5412-47FC-8A4D-F19ADF31644E.jpeg
 
Last edited:
Next time dont bother with the lining up trick. Takes you twice as long as just striping the wheel. SB has a how to lace a wheel guide of you are worried about starting from scratch but its pretty easy really.
After the first few you get the knack and i reckon you can easily get down to an hour a wheel as a happy amateur.
Having said all that. Good jobwell done. Wheel building is a skill for life.
Cheers

Thought about that a lot, but spoke layout design and which lengths for which along with removing the cassette i figured would all add up to the same difference and more tools I don’t have. But yes seen a bunch of YouTube and guides on how to, just needed to give this way a go to see how it was.
 
Last edited:
One of these days...

It seems like such a vital/clutch skill. And probably quite therapeutic once you "master" it?

I have a very skilled mechanically-minded bike friend I plan to sit down and have teach me the next time he's in town.

I struggle to really learn anything properly with Youtube videos. Despite how many excellent ones exist. I usually zone out at vital times, or get too excited and too far ahead of myself. Or just restless watching. I don't really like having a screen involved when I'm doing bike stuff, either. As bike stuff is a nice break from the rest of life, which is all screen-related.

I guess I'm just a real life guidance sort of fellow!

Plus I can't zone out and click "Best Own Goals of All Time" with someone there over my shoulder showing me what to do!

Great work though Joe. Congrats!
 
Good effort. Couple of pointers tho... For prep it's much the same as you done except loosen all spokes equally a couple of turns to take a fair chunk of tension out the build then at that point fully loosen all the spokes equally till there's about 3mm of thread showing. The reason for graduall detensioning is to prevent unequal/unbalanced load stress on the hub flanges. Anyhoo, by that point the old wheel will be pretty wobbly and it will be very easy to transfer the spokes over to the new rim. Just make sure your spoke tension is in the Goldilocks zone! See the Sheldon Brown site for spoke tension of you don't have a tensioner as it's very easy to do by ear. I strongly recommend reading The Bicycle Wheel by Jobst Brandt. Building can take a while to get fast at it and swapping over as stated can be a bit finniky dependant on setup or preparation steps.
 
For anyone thinking of having a go at building a wheel or 2 this is the simplest and straight forward Youtube video I have found to lace a wheel just watch it 4 times and away you go as for the dishing you need to keep checking that as you go.I am just starting on the road of wheelbuilding and there is a lot to learn . I also bought a cheap wheel alignment stand and I screwed it down on a piece of plywood to make it more ridged and made a dishing tool from an old trolley als I bought multi spoke key and a nipple tool which I put a link to below.
Having only built one set of wheels before and struggled with lacing the video above was a revelation as I was easily able to lace a wheel without looking at another wheel to check .


When you click on links to various merchants on this site and make a purchase, this can result in this site earning a commission. Affiliate programs and affiliations include, but are not limited to, the eBay Partner Network.
Agree in hindsight loosening them all off first thing a good amount prob would have made the swap over all a bit easier.

Whilst glad I gave it a go, overall I’ve decided time/money/effort v the quality of outcome it wasn’t really worth it. As whilst we are all no doubt capable of doing 95% of the job, it’s the last 5% that makes the difference in quality and ideally requires better tools & fresh nipples. (As most of you probably new and have said in other threads)

On final truing i’ve now a few nipples a bit rounded and can’t quite get the leverage/spoke tension I thinks needed to bring the rim in tighter, without putting it back out of true. Leaving several spokes with thread still showing. So could easily be another hours work swapping half a dozen old nipples out for new and then truing up again.

So I either need to throw more money into more tools and then more time or pop it into LBS for £30 whilst I have an ice cream with the toddler on the river or take him to the British Motor Show instead this wknd 🤔
 
Last edited:
Back
Top