Balancing canti brakes

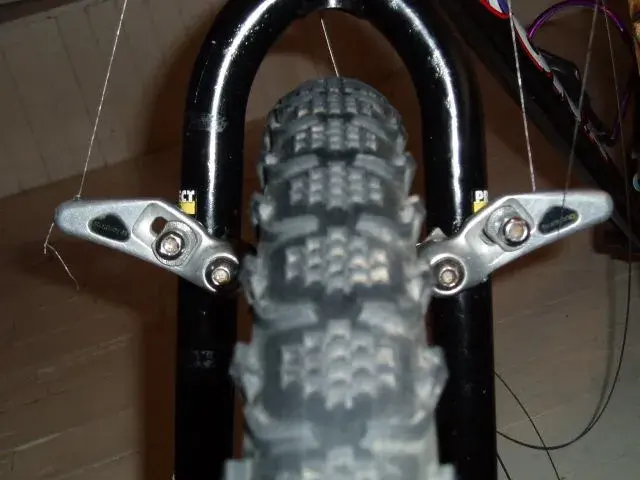
When fitted correctly, both canti's should flop down either side of the wheel at around the 5 and 7 o'clock positions. They should then set up easily from first go.

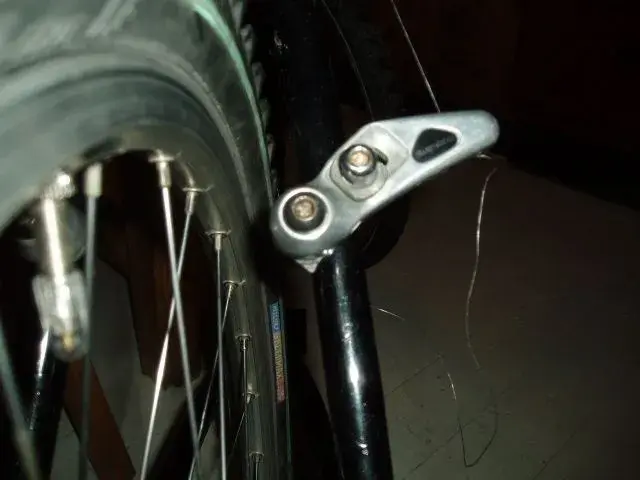
Neither spring has to be in matching holes - one can be set 'loose' to the opposite so the firmer spring can be slackened off or the grub screw can be used to tighten/ slacken off spring tension.

*and dont forget the two holes inside the cantis themselves.
 
Well, some progress thanks to you fellows. Both sets of brakes now have even tension. Spring tension starts to come in at about 70 degrees from straight up as per pics.

monor_LEGEND's tip re the plastic covers was a real help. BUT.....the wee "teardrop" sticky outy bit on the front covers points up not down. If I reverse the front springs there is no tension. Pics of back and front below (brake arms held at point where spring tension starts to be felt). Seems to me they ought to work. But have I still cocked up...... :?
 

Attachments

  • P1310147.webp
    P1310147.webp
    23.3 KB · Views: 506
  • P1310149.webp
    P1310149.webp
    16.8 KB · Views: 506
I like the newer straddles, find the proset a doddle to use and hate the old style straddles. Not to keen on the one with the outer cable attached.

Either way the all work and should be any problem. You can see a guide on the archive.
But they both work just as well, everything else is just opinion and ability to use them.
I find you can run the prosets with a lighter spring setup, could just be me. Again it all just opinion.

Anyway
Gold = Hook Side, I.e. the side you hook the straddle cable over.
Silver = Clamp Side, I.e. side you clamp the cable down on.

Once you have that sorted.
As a standard start point (designed settings)
You use the middle hole on the frame. The large spring end goes in here.

If you have SLR brake leavers or similar, which means there is a 'spring' of some sort in the lever, you put the spring end in the SLR hole.
If you have older levers then you use the other hole.

Fit covers, nobble faces the outside.
It is there to stop the canti I from going back into the spokes.

Before all that you should loosen the adjusting grub screw, cleaned and greased all the parts.

Once everything is fitted and wired up, then worry about centering and adjustment.
 
FluffyChicken":2h0jn97a said:
If you have SLR brake leavers or similar, which means there is a 'spring' of some sort in the lever, you put the spring end in the SLR hole.
If you have older levers then you use the other hole.

Hey Fluffy
What do you mean by SLR hole?
Do you mean the hole for the spring "inside" the canti arm? as i have to do this for the 1st time since '94 on some M737's soon.
 
In the original super low profile canti's (as M734 where called) and the M732 (low profile or medium profile ?) they have two holes in the spring hole on the arm.
One is labelled SLR for the newer brake levers on the block at that time.
The other is for the older style brake levers. It basically just increases the tension of the spring, so can also be used for ageing springs in SLR system.

Not sure if 737's had them, doubt it as all would have had springs in the levers by then.


the have the SLR label on them and the arrows would approximately line up with the arrow on the body
(searches for picture) if they are on correctly.
DSCF5528a.jpg
 
FluffyChicken":2en51o9q said:
Anyway
Gold = Hook Side, I.e. the side you hook the straddle cable over.
Silver = Clamp Side, I.e. side you clamp the cable down on.

Once you have that sorted.
As a standard start point (designed settings)
You use the middle hole on the frame. The large spring end goes in here.

If you have SLR brake leavers or similar, which means there is a 'spring' of some sort in the lever, you put the spring end in the SLR hole.
If you have older levers then you use the other hole.

Fit covers, nobble faces the outside.
It is there to stop the canti I from going back into the spokes.

Before all that you should loosen the adjusting grub screw, cleaned and greased all the parts.

Once everything is fitted and wired up, then worry about centering and adjustment.

Aha. Thank you Mr Chicken. All was well except for the covers. They are actually stamped L & R so I mounted them that way. However, to get the nobbles facing down, so that they do their job, the front "R" actually goes on the left side of the bike (right as you look at the front brakes to mount them). All good now.
Thanks again.
 
FluffyChicken":16irgpsz said:
I like the newer straddles, find the proset a doddle to use and hate the old style straddles. Not to keen on the one with the outer cable attached.

Either way the all work and should be any problem. You can see a guide on the archive.
But they both work just as well, everything else is just opinion and ability to use them.
I find you can run the prosets with a lighter spring setup, could just be me. Again it all just opinion.

Anyway
Gold = Hook Side, I.e. the side you hook the straddle cable over.
Silver = Clamp Side, I.e. side you clamp the cable down on.

Once you have that sorted.
As a standard start point (designed settings)
You use the middle hole on the frame. The large spring end goes in here.

If you have SLR brake leavers or similar, which means there is a 'spring' of some sort in the lever, you put the spring end in the SLR hole.
If you have older levers then you use the other hole.

Fit covers, nobble faces the outside.
It is there to stop the canti I from going back into the spokes.

Before all that you should loosen the adjusting grub screw, cleaned and greased all the parts.


Once everything is fitted and wired up, then worry about centering and adjustment.


Ahhhhhhhhhhhhhhh I had better check where my gold and silver srpings are located. I bet I havent done it right thoiugh. Great advice 8)
 
And if all that doesn't work.........

Relax, take it all off, start again. Sometimes that's all it needs. Less thought, more love.
 
Back
Top