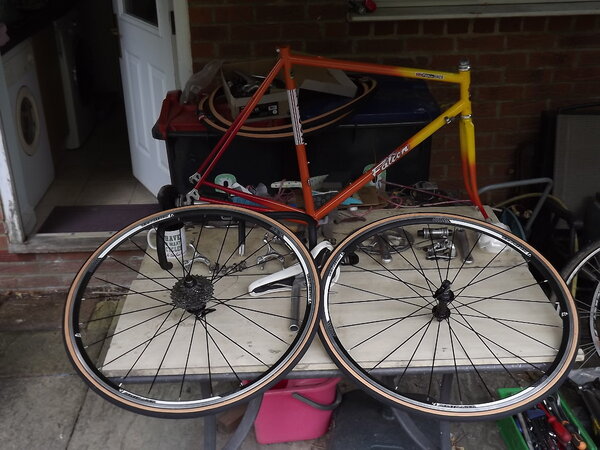
Paint your wagon! Or rather a shiny frame the rattle can way

First off, thank you for all that time Allen, very much appreciated.
A great reference work indeed. It's good to see the whole process well explained in a very methodical way, easy to follow.
I have done some spraying here and there but few and far between really and always a different process it seems, depending on what I was doing.
I will use this on a frame I need to strip quite soon. I do have one of those Lidl spray guns and a access to a compressor but this seems a good way, a bit cleaner, at least for me :)

If we can build on this I don't see why I can't sticky it :)

Jamie
 
Re:

Because of health and safety concerns (we’re all obviously pig poo thick and will probably drink it)


Without wishing to derail the thread, conscience compels me to respond to that, Allen. Bear with me:

I've not painted that many frames. When I do, I use a brush. I reasoned that I would be getting a much higher percentage of the paint on the actual frame that way, without putting the residue into what we have become accustomed to call: "The environment." In retrospect, I think I was decieving myself. My "residue" was brush-cleaner mixed with paint on old newspapers, destined for landfill, as opposed to the spray-painter's residue, much of which passes straight into the atmosphere. But then I guess rattle cans are landfill too, and I guess even spray-gun painters use old rags when cleaning out their spray guns sometimes.. or all the time..

Likewise, I did all my paint-stripping by mechanical, as opposed to chemical methods. 'Mechanical' meaning with scraper and paper in hand. Again I reasoned that I was being "environmentally conscious." But, in a strange black-comedic polarity to the painting itself, this time it was me who was dispersing toxic dust into the atmosphere, whereas the detritus from chemical stripping goes in the landfill.

Anyhow, the point is that the stuff, the 'waste', ends up in "the environment", which means that it ends up in the water, which we drink. So, as an industrial civilisation, collectively we are indeed "pig poo thick", if sustaining the viability of our species by avoiding the ingestion of our own toxic waste products is accepted as being a sign of "intelligence." Or, if you like, maybe it is indeed more intelligent to consciously down a litre of paint stripper at one sitting, and know we are doing it, than to slowly poison both ourselves and the seven
generations that follow us, oblivious to the fact that it is happening, or, maybe even worse, fully aware that it is happening... happening in a systemically ordained fashion not susceptible to change by any exercise of supposed human agency or good will.

Getting (half way) down from my soapbox, my top tip for 'mechanical' strippers: Start at the bottom bracket- especially the area between the
BB shell and the chainstay bridge. Because getting just that clean will take five times as long as doing all the tubes. If you do the tubes first, you think you've made loads of progress, but you ain't.. you just left the hard bits till last..
And, on lightweight tubes, be extra careful not to take metal from them, especially at the lug shorelines, which are so tenacious of their quota of paint that they can tempt you to resort to aggressive methods. Resist!

The lugs themselves are fair game though. The class of frames that come my way have not had their lugs laboriously refined by an artisan with a file, so I might do some of that work the frame missed when it was first put together forty years ago. That calls for a light touch and an eye for a fair curve, though. We are each blessed/cursed with some skills/sensitivities that came to us so naturally we tend to assume they are more or less universal, but chances are they are not.
 
I surprised my self here being a doer more than a teacher but it was actually quite enjoyable to do.

Also as mentioned near the top I am doing a 2nd frame so may well add some bits that are specific to that one but yes anyone that has tips and or corrections please add them, I'm sure we are all more than happy to take on board more productive ways of doing anything.

As to recycling I'm not sure about all areas but my council will and do take aerosol cans (paint included, provided they are spent) along with the plastic nozzles and caps in the recycling which is a very good thing. The left over detritus like worn out wet and dry, stripper soaked newspaper, rubbing down pads and of course the remnants of old paint finishes they will not and this does have to go to landfill, but I often surprise myself at how little actual waste I produce when painting a frame. The other thing to consider re recycling is that in doing this you are recycling a cycle which as far as the environment is concerned must be better than buying a brand new one. I'll have the cycle builders on to me now about doing them out of a living I suppose.

And to all please don't take my words too seriously, I have a dark sense of humour and there were a few attempts at humour in there as my mind wandered when I got bored writing, these I understand do quite often go over peoples heads
 
Re:

Thanks Allen, that's an excellent piece. I had a go at painting a frame a few years back and wish I'd had a resource like this at the time.

One problem I had was overspray, for example spraying the fork blades. Any tips for avoiding this?
 
Re: Re:

cromoman":1h6bdneg said:
Thanks Allen, that's an excellent piece. I had a go at painting a frame a few years back and wish I'd had a resource like this at the time.

One problem I had was overspray, for example spraying the fork blades. Any tips for avoiding this?


Overspray is a very real problem & one that is almost impossible to eliminate, however, in an effort to reduce it, you can try flagging the other tube (be it a fork or rear stay) by holding a piece of cardboard carefully between the two. Also if useing solid non metallic paints you can rub down with a superfine (1200 or 1500) wet & dry before your top clear coat.
If using metallic or pearl, all you can really do is try to keep it to a minimum then work between clear coats, finally finishing with t-cut then polish.

Also, although paints really don’t like working in the cold, you should also keep an eye on how hot the spraying environment is, as that can increase dry spray dramatically.
 
Re: Re:

PeachyPM":3pgeguil said:
cromoman":3pgeguil said:
Thanks Allen, that's an excellent piece. I had a go at painting a frame a few years back and wish I'd had a resource like this at the time.

One problem I had was overspray, for example spraying the fork blades. Any tips for avoiding this?


Overspray is a very real problem & one that is almost impossible to eliminate, however, in an effort to reduce it, you can try flagging the other tube (be it a fork or rear stay) by holding a piece of cardboard carefully between the two. Also if useing solid non metallic paints you can rub down with a superfine (1200 or 1500) wet & dry before your top clear coat.
If using metallic or pearl, all you can really do is try to keep it to a minimum then work between clear coats, finally finishing with t-cut then polish.

Also, although paints really don’t like working in the cold, you should also keep an eye on how hot the spraying environment is, as that can increase dry spray dramatically.

Yes overspray, as Peachy points out with some good points above, it can be a real bugger.

There are several iterations though as:

You can get unwanted paint on an area when doing a repair close by.

You can get a dusting of paint on anything in the near vicinity that should not have paint on it.

Or you can just simply make a mistake and paint a tube you didn't intend to.

The simple answer is make sure only the thing and area you want paint on is uncovered but that of course isn't always practical and masking take on a paint that isn't truly hard is a real pain as the glue will mark your new paint if left on for even a couple of hours. If it's not too bad it can be polished out before your top lacquer coat is applied but is something to consider. Also don't whatever you do use newspaper a mask as the ink can leach into your paint and it can also stick like glue if it gets damp.

To mask I tend to use the same coverings (be that paper or plastic) used by paint shops when doing cars which can be bought by the roll and are not expensive.

I will also say when it comes to forks, always take them out of the frame and spray them as a separate item unless its just a little repair that you are undertaking.

But in general one of the main reasons I paint outside is because of overspray, in a booth the excess paint will just fall locally even with good extraction systems, but having a large enough garden and living by the seaside I don't tend to upset the neighbours and the air is never truly still so it tends to get taken away by the breeze. Take note though, make sure there's no washing on the line if you don't want to wear your newly painted frame.
 
It must be dry enough now I reckon.

So riding it by Saturday hopefully, once the silly little bits I'm missing turn up in the post.
 

Attachments

  • DSCF3231.JPG
    DSCF3231.JPG
    186 KB · Views: 644
Re:

That fade looks great :cool: think im gonna have to try that on a future project.
i note you had fair results with Dial paint stripper .. it wouldnt touch the paint on my Cinder Cone and i had ended up
removing the paint by hand :(
 
A couple of things I might add. Always wear vinyl or latex gloves fingerprints will leave oil and can affect the finish.
If you have an old cabinet, wood is fine with enough room in it to hang a frame use it as a drying room. Add a couple of 150 watt old school light bulbs and temps will reach a dry 130 degrees F (depending on the size of the cabinet) cutting your drying time in half.
 
Back
Top