removing eyelets dremel style

FluffyChicken

Archivist
Retrobike Rider
Feedback
View
So I want to remove some eyelets as it time to get on with a frame I've had longer than I thought.

I know I could junior hacksaw them off and sand down, but my hands really bugger up doing that, they do with just cutting wood as it something about the grip.

So I have a dremel and plant of bits of all shapes and sizes. I used them randomly to do all sorts but to be honest its often hit and hope as there are so many of them.

But the frame is thin and I'd rather get it done easily rather than try through all the parts and bugger the stays up.

So which do I use to chop it off, grind what's left off, polish the area ups a bit for a better finish.
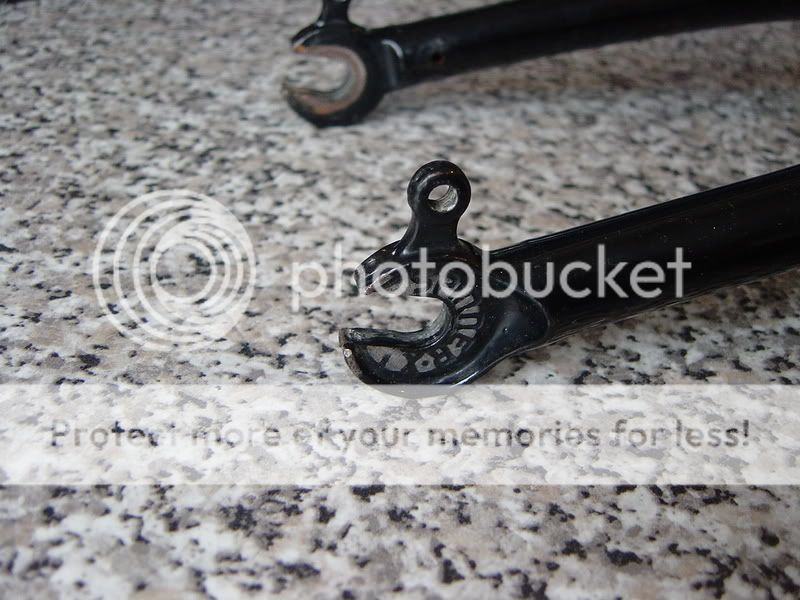
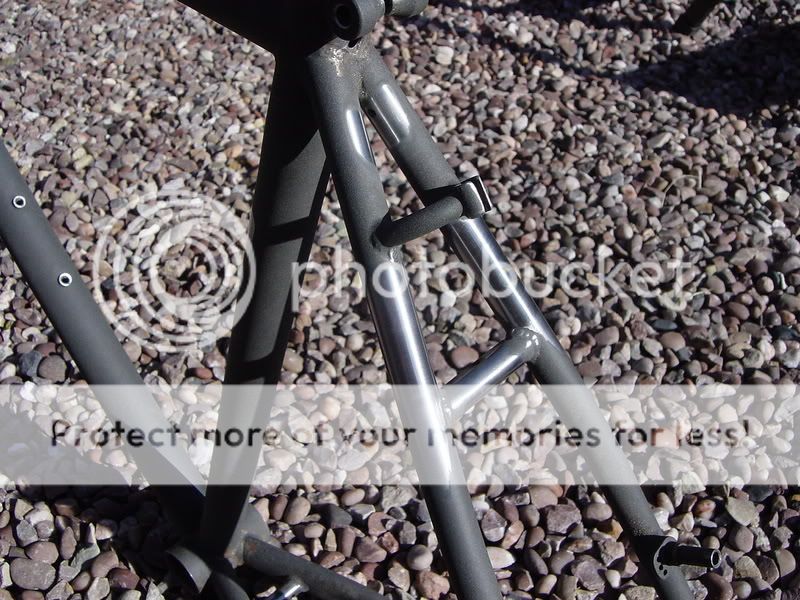
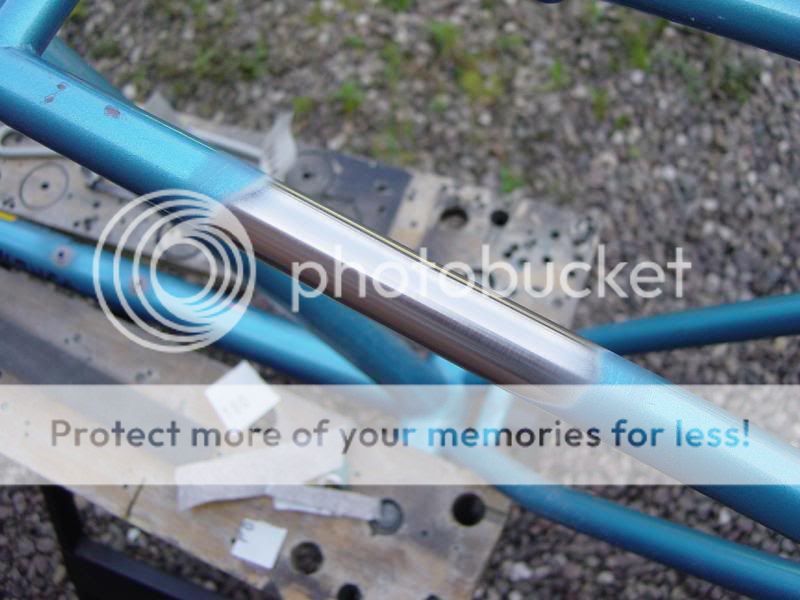
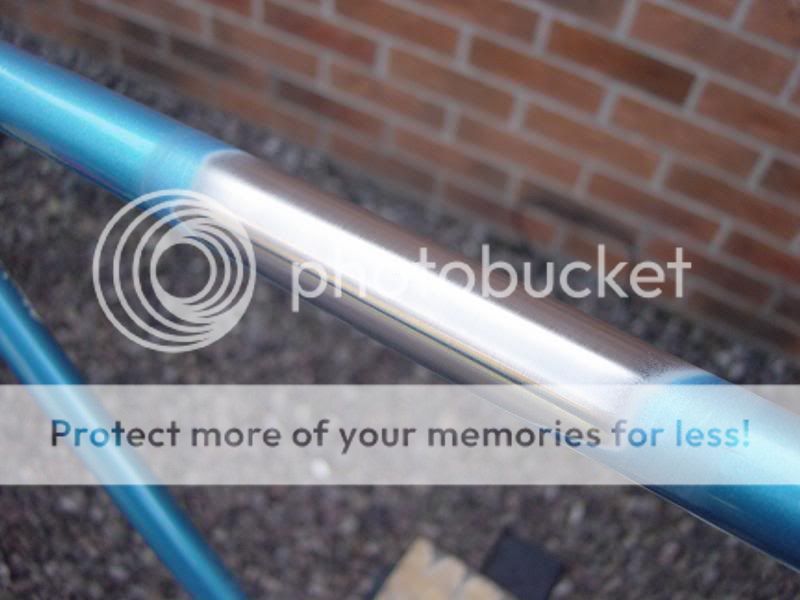
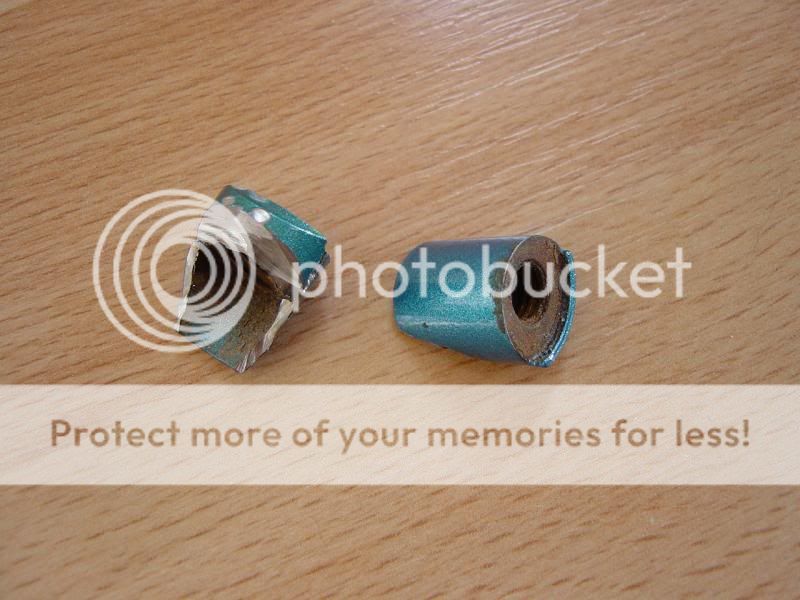
First one is this
P1050455.JPG


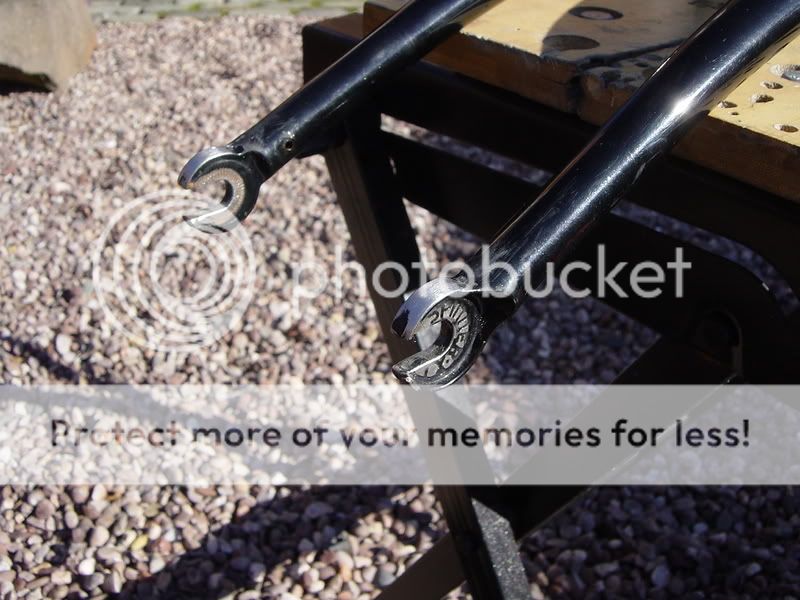
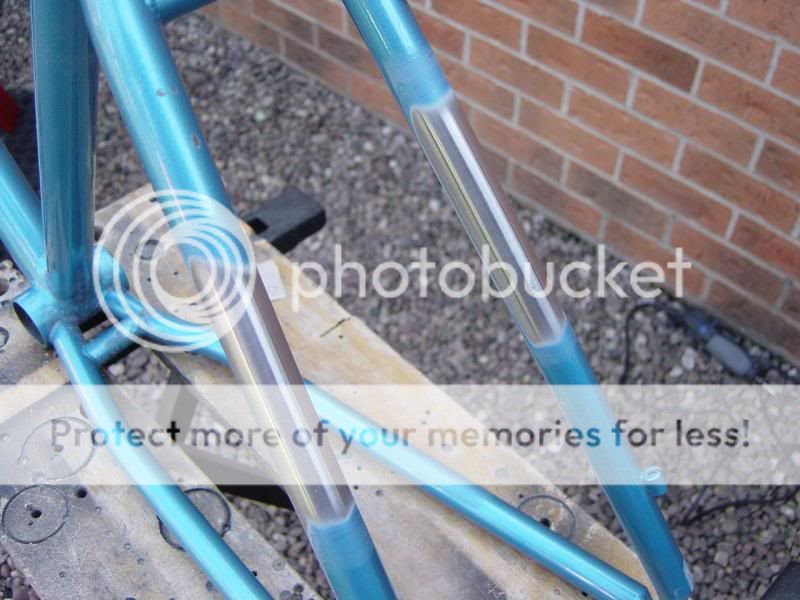
The other is a wider seat stay style a bit like these until I get a picture
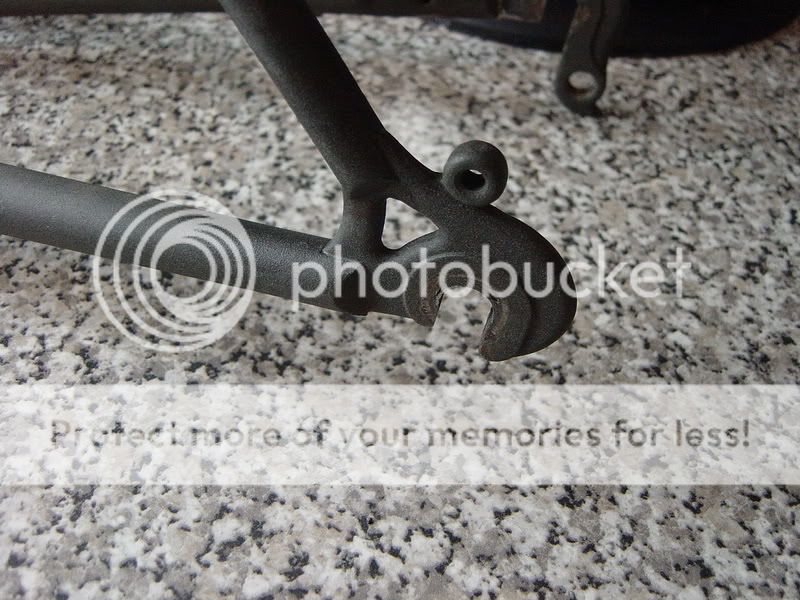
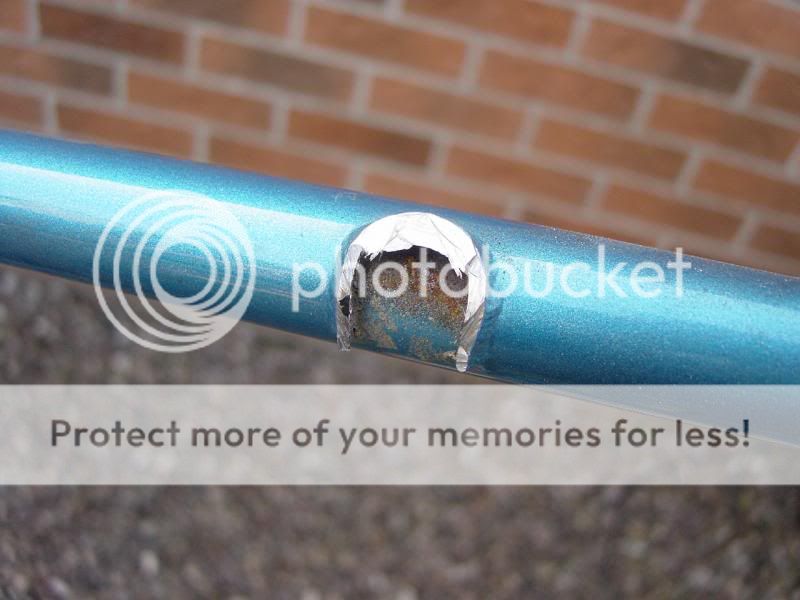
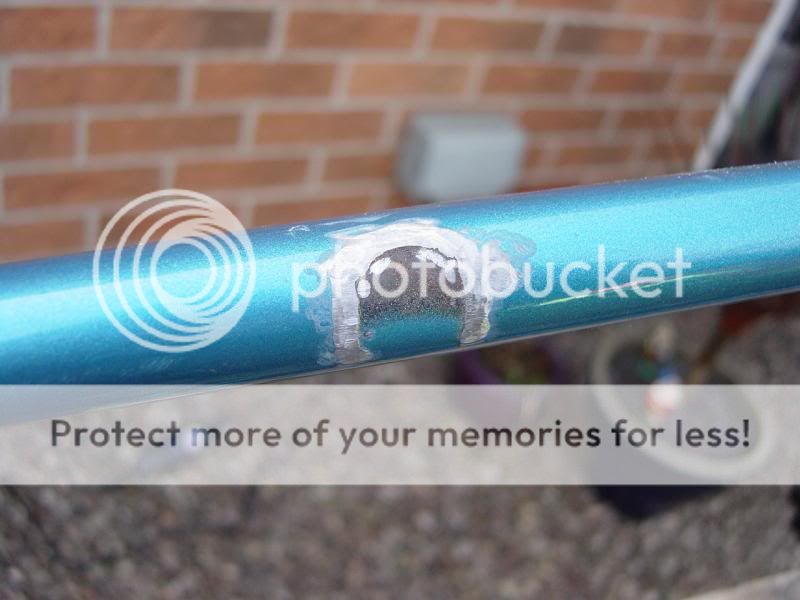
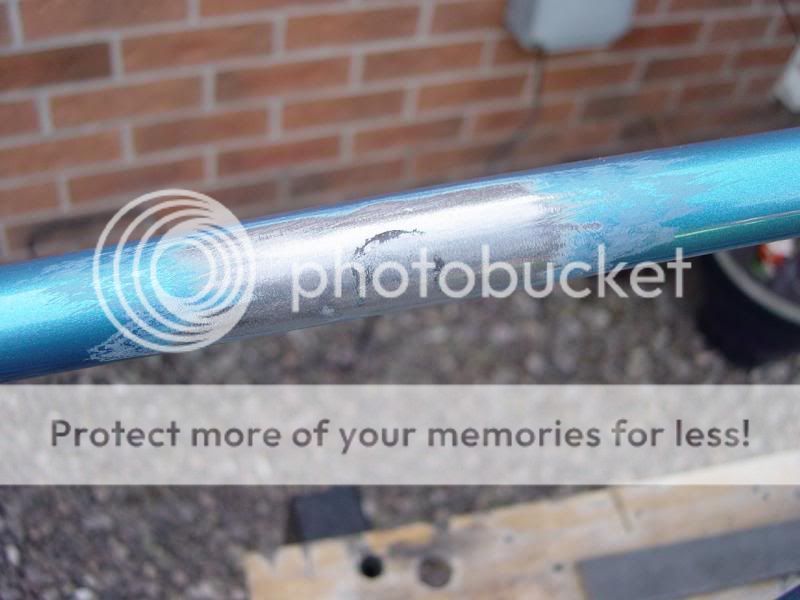
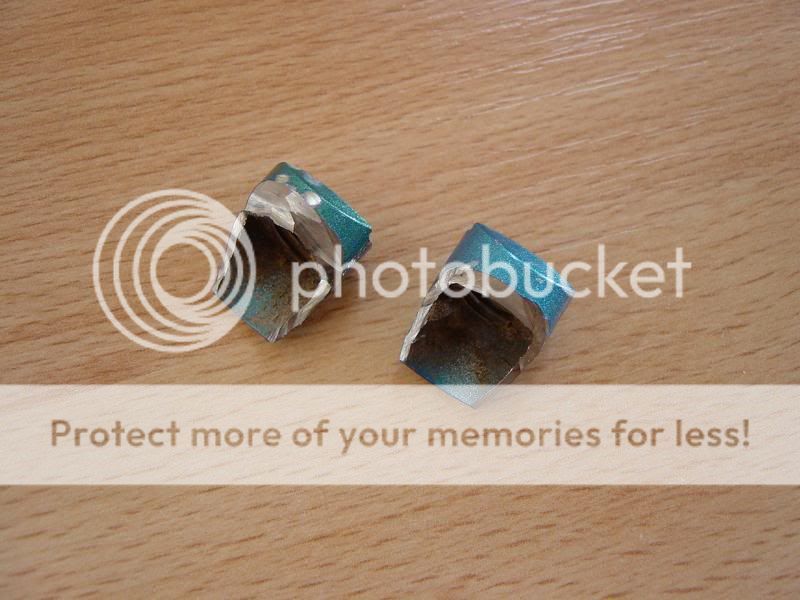
cl_tour_brazeon.jpg
 
Cutting wheel followed by a parallel sided grinding stone then sand to finish.

The fork eyelet is pretty self explanatory, but the seat stay bosses will need to be cut off in stages I'd have thought.

I'd cut the ends off with a cutting wheel back to where they are brazed to the frame to reduce the overall length then carefully cut then from the seat stay. (you may need to take them off in two halves by parting them down the centre. That'll make it easier to follow the curve of the seat stay.

Once they're roughly off, grinding stone and sanding wheel to finish. You might want to sand them by hand to finish them off, it will reduce the chance of creating flat spots.
 
Hi,

I posted before and after pics on my Marin build (I think) and defo on the yo build :D

It's easy, just take your time ;-)

WD :D
 
Did the same thing with my Cinder Cone...see the pics in the build thread I just posted. :) I used a dremel with a cut-off wheel to chop them off, then used the sanding drum to clean them up. Used JB Weld to fill in any low spots.
 
I had thought of a blow torch but no idea if it would melt the braze/solder stuff. I'm no welder figured it would be tricky near the drop out, they're not exactly pinpoint touches.

Cut off disc, check.
Grinding cylinder, check... Er which colour I never can remember which are for what.
Sanding pads, check.
Tub of gob, I mean fine filler. Will grab if I need any.

Off to read other threads, after a coffee.
 
some thoughts from my experience:

  • wear safety glasses. things can go a flying, particularly if you accidentally break the cutting disc while you are using it.
  • wear clothing you don't care for. sparks from cutting can burn small tiny holes in them.
  • let the cutting do the work, don't be heavy handed. takes time to cut and you tend to get inpatient and push which could snap the cutting wheel. then you'll have to stop and change the wheel.
  • don't stop mid cut if you can avoid it, it's a biatch trying to get a spinning wheel straight back into the slot cut. you'll most likely snap the wheel trying to get it back in.

i'd prob cut far off from the frame itself, use a grinder to get it close to the frame, and then a file and sanding to do the final leveling. safer that way. you can quickly cut/grind too much off and damage the frame.

do you have anything you can test on before going at the frame? if you haven't used the dremel with bits extensively, perhaps you should get familiar with them on something else first?
 
I have used the dremel for all sorts, just not on a bike frame and taking welded bits off. I can never remember which grinders are for what so normally try and change if it doesn't work.
There is just more at stake with the frame so thought it best to ask and see what others have done.

I have a kona and a pace I can test on ;-) muhahaha
 
well i wasn't saying it had to be a frame, unless of course it's something that's already damaged/trashed. even just cutting through some thicker scrap steel bits you may have lying around.
 
Just out f curiosty I wonder if a dental lab butane burner with a pin flame would melt the brazing off? They are only about a tenner.

Shaun
 
From page 1 of the Marin build :

WD Pro":2rzgogxn said:
Forks : Before and after ‘De Lugging’ :

DSC02914.jpg


DSC02927.jpg


Frame : Before and after ‘De Lugging’ :

DSC02917.jpg


DSC02922.jpg


DSC02919.jpg


DSC02926.jpg


WD :D

And after coating :


From page 8 of the Yo build :

Dremel work and de-brazing :

WD Pro":2rzgogxn said:
Mr Dremel came out to play ...

I managed to save this for the spares (future rebuild ?!) box :


It should still fit OK if needed, maybe slightly higher up to compensate for a slightly reduced length :


Polished to allow me to see reflections (look for the lines running along the tubes) - any distortion in the reflection / lines means something is wrong with the surface. A lump means you haven't worked the area enough, a hollow means you have c0cked up ...

I am pleased so far :D


Mr Dremel was having so much fun he called his mate over to join in, Mr Blow Torch ... :lol:


This is after the file had flatted off the initial mess, you can still see the outline from the stop :


And then the emory :


The other end :


Some more bits for the spares box :


WD :D

and some more :

WD Pro":2rzgogxn said:
These are the steps I took to remove the bosses ...

Dremel with cutting disk :

DSC08746_zpsd16d5f6f.jpg


Dremel with sanding drum :

DSC08752_zps88b4935f.jpg


Note to other owners - get some grease / Waxoyl / spray oil behind the canti bosses ... :-(

That's as far as I would dare go with an electric tool :-)

Wide file :

DSC08757_zps9049c59c.jpg


80's and then 120's :

DSC08760_zps1bff18a7.jpg


Other side :

DSC08765_zps1c20771e.jpg


Both done :

DSC08783_zpsc473613a.jpg


I will keep hold of these to draw them up :

DSC08798_zpsbfa6246c.jpg


DSC08799_zpsd574fee5.jpg


WD :D
 
Back
Top