tonedeaf101
Senior Retro Guru
- Feedback
- View
Hi there. Decided to strip down my M952’s as they were feeling really gritty in rotation and it occurred to me it could be useful to some of you too how I did it. Firstly forgive me for not using the correct terms for all the bits, I have no clue what they are all called. Secondly, this method worked for me and I hold no responsibility if you screw things up :facepalm:
Tools
Small flat blade screwdriver
17 & 14mm thin spanners(cone spanners are perfect)
Small punch
Small hammer
3/8” ball bearing or a bit smaller.
Hard flat piece of metal
White spirit.
Small magnet
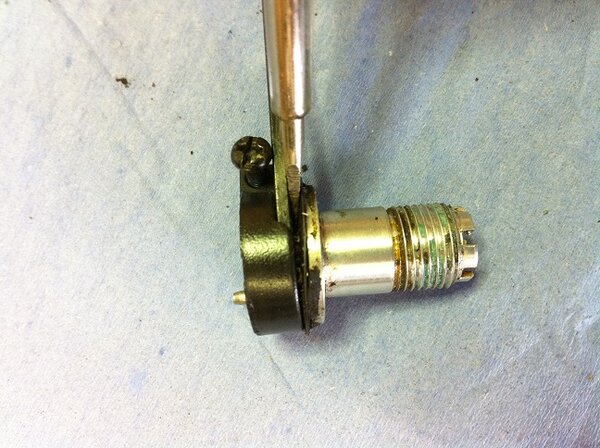
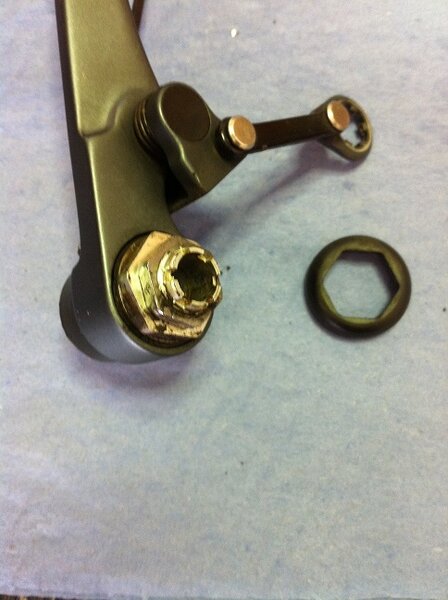
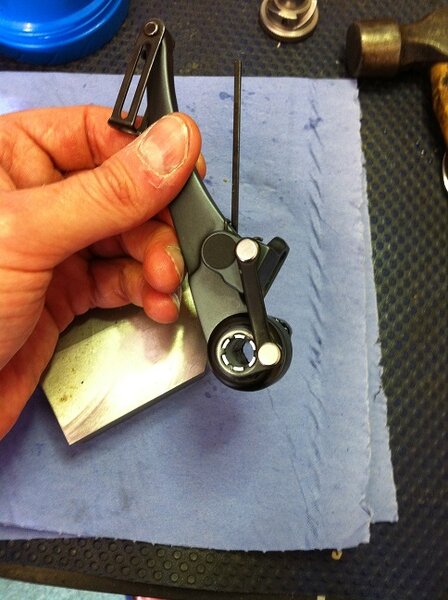
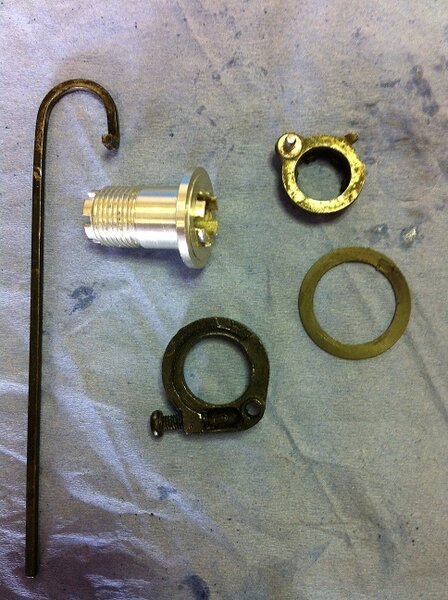
1. Using the small flat screwdriver, gently prise off the connection rod carrier. Go in from several angles, lifting a tiny amount so as to not damage or bend the castellation's on the carrier.
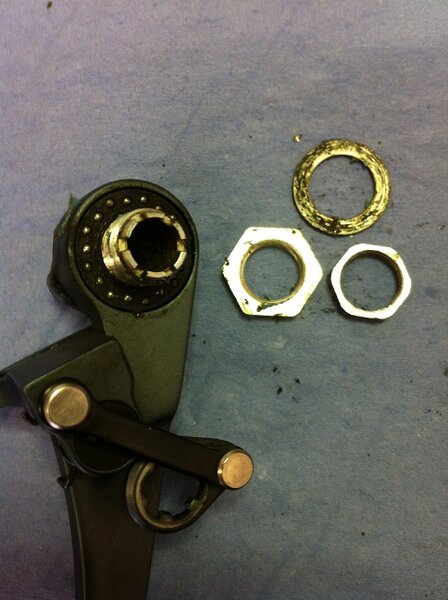
2. Remove the rubber dust shield and using the 17mm spanner to hold the big nut, use the 14mm to undo the lock nut. Std threads so counter clockwise to undo!
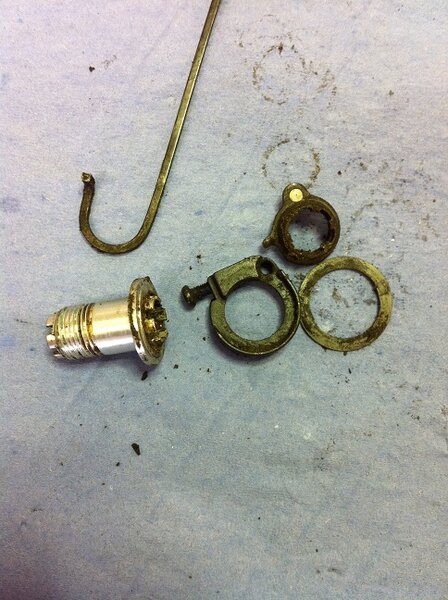
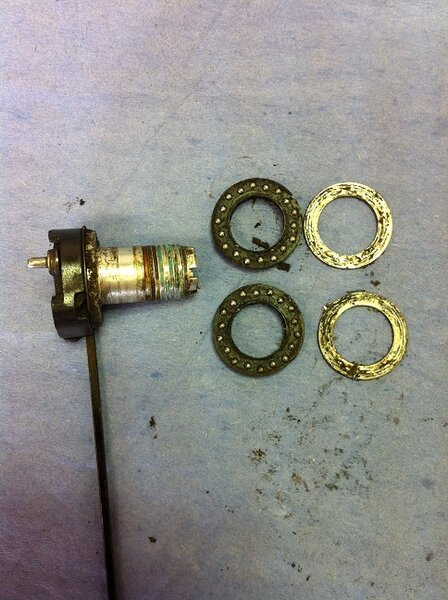
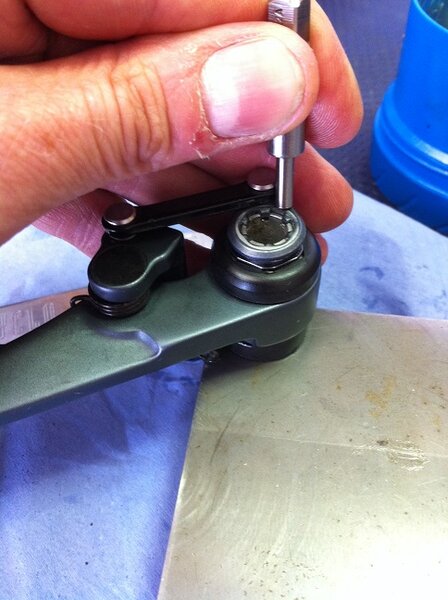
3. Remove the washer and pull out the carrier. The bearings can be removed in their housings & don’t worry about the balls falling out as they are captive, for now.
4. Using the screwdriver, gently prise apart the bits fitted to the carrier. Again, small movements from different angles so as to not mess things up.
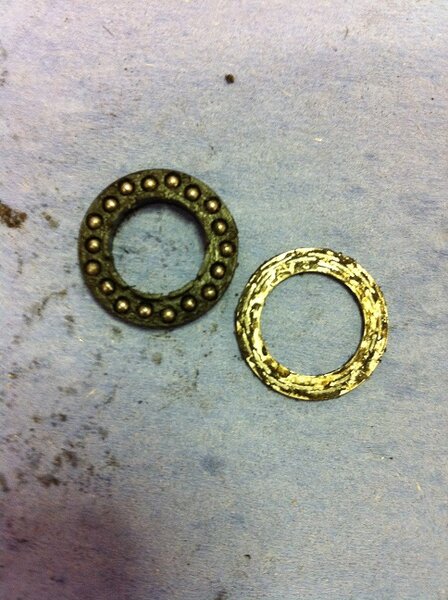
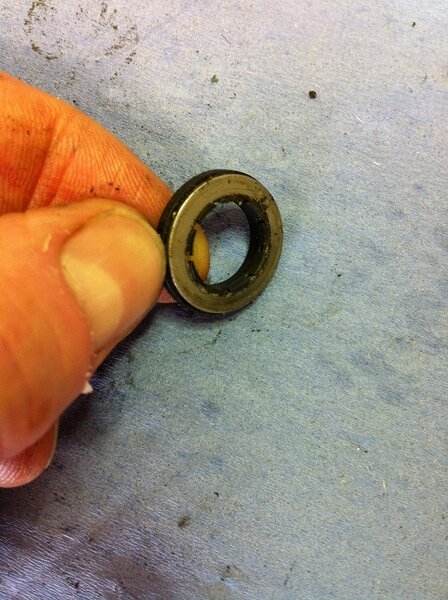
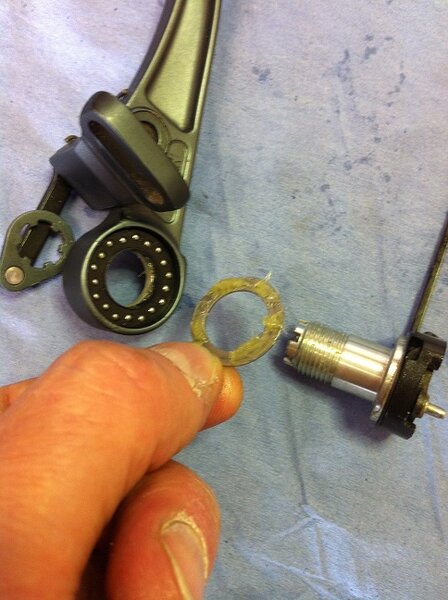
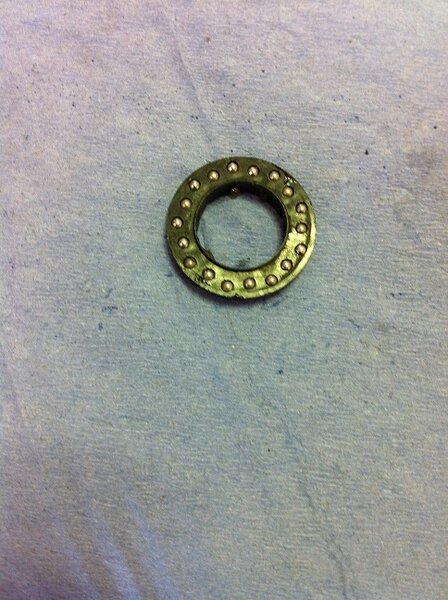
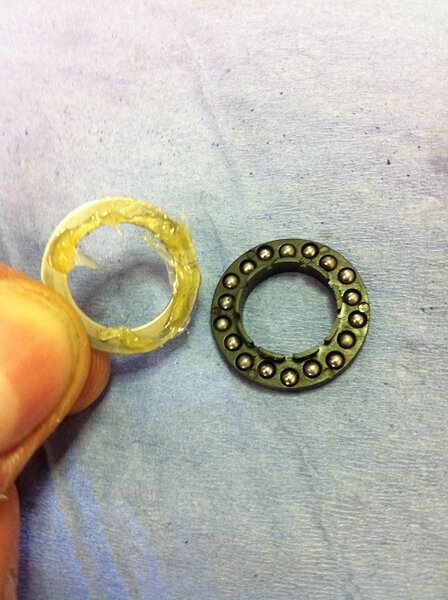
5. The bearings can now be stripped. Simply hold the plastic race and prise off the washer with your thumbnail. I placed a magnet near by so to capture any stray balls. But they were all pretty firm as gunked up with shit and corruption. Put all bearing bits in a separate beaker of white spirit.
6. Put the remaining parts in another beaker of white spirit and give everything a good clean.
7. Using the magnet capture all the balls and let them dry off. If you do loose any or they are rusty, you can get them on Ebay for a few quid. 2mm mild steel balls, nothing fancy.
8. Place a bearing race on a flat surface(castellation's should face up) and carefully place the balls back in the holes. Put a few blobs of grease on the washer then gently clip it over the castellation's. It is now safe to handle again without fear of dropping yer balls. Repeat for the other bearing and put to one side.
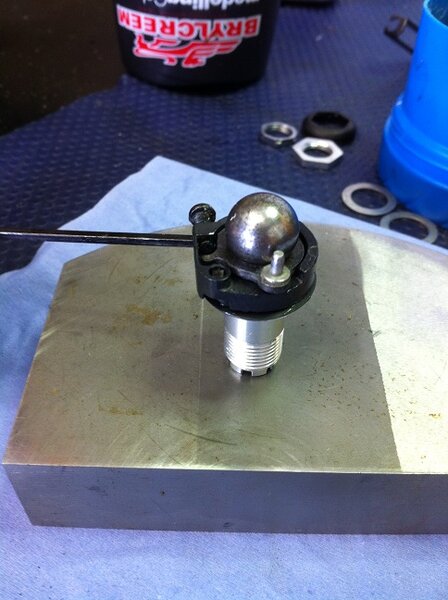
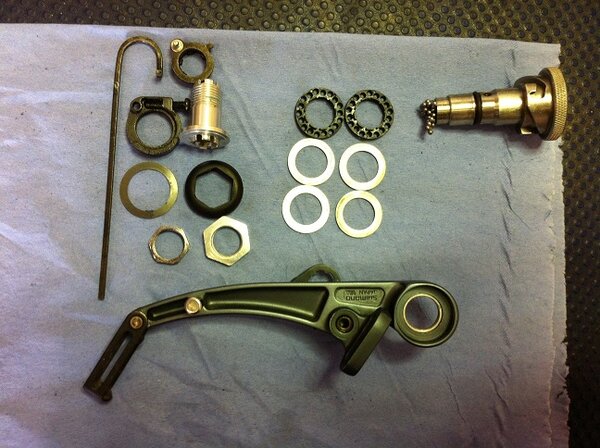
9. Reassemble the parts that were attached to the carrier. I found the best way to compress them together was by plopping a ball bearing on top, whist the carrier was on a hard surface and gently tapping it with a hammer. Means it goes on straight with equal force, as you down want to damage the end.
10. Grease up the inside of the caliper body and put the 2 bearings back in(Captive washer should face inwards. Fit 1 loose washer then insert the carrier with the spring rod at the top somewhere.
11. Put the 2nd greased up washer ontop of the bearing, then add the 17mm nut. This only needs to be finger tight plus a little tweak so the carrier can turn freely. Hold the 17mm nut firm with the spanner and tighten the 14mm locknut down onto it, firmly but not so you strip threads. Check movement is still smooth, but not wobbly loose or stiff.
12. PLACE THE DUST COVER BACK ON!!
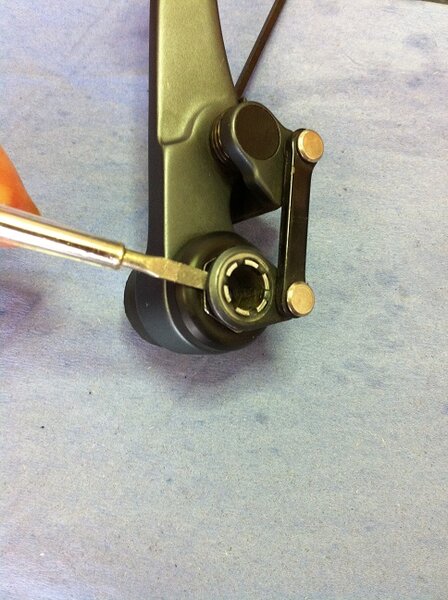
13. This part was a little fiddly, to get the angles correct and did need a bit of levering of the connection rod carrier. Just put it on lightly first to make sure the movement of the brake pad holder is good. Once happy with positioning, hold the back of the caliper on your hard surface and use a small punch to tap down the carrier, again, work your way round the edges so it goes on straight. (The ball bearing would not fit due to the connecting rod being in the way) If like me, you like looking after your kit, this is covered by the V Brake post washer/bolt when in use so don’t worry about marking the paint. I was gentle and it was fine afterwards.
14. Job done!! None of my pad holders were gritty or sticking, so I left them alone. Looks like it is just small allen bolts holding them in place so your call if you want to remove them too.
Hope that is of some use to you.
Tools
Small flat blade screwdriver
17 & 14mm thin spanners(cone spanners are perfect)
Small punch
Small hammer
3/8” ball bearing or a bit smaller.
Hard flat piece of metal
White spirit.
Small magnet
1. Using the small flat screwdriver, gently prise off the connection rod carrier. Go in from several angles, lifting a tiny amount so as to not damage or bend the castellation's on the carrier.
2. Remove the rubber dust shield and using the 17mm spanner to hold the big nut, use the 14mm to undo the lock nut. Std threads so counter clockwise to undo!
3. Remove the washer and pull out the carrier. The bearings can be removed in their housings & don’t worry about the balls falling out as they are captive, for now.
4. Using the screwdriver, gently prise apart the bits fitted to the carrier. Again, small movements from different angles so as to not mess things up.
5. The bearings can now be stripped. Simply hold the plastic race and prise off the washer with your thumbnail. I placed a magnet near by so to capture any stray balls. But they were all pretty firm as gunked up with shit and corruption. Put all bearing bits in a separate beaker of white spirit.
6. Put the remaining parts in another beaker of white spirit and give everything a good clean.
7. Using the magnet capture all the balls and let them dry off. If you do loose any or they are rusty, you can get them on Ebay for a few quid. 2mm mild steel balls, nothing fancy.
8. Place a bearing race on a flat surface(castellation's should face up) and carefully place the balls back in the holes. Put a few blobs of grease on the washer then gently clip it over the castellation's. It is now safe to handle again without fear of dropping yer balls. Repeat for the other bearing and put to one side.
9. Reassemble the parts that were attached to the carrier. I found the best way to compress them together was by plopping a ball bearing on top, whist the carrier was on a hard surface and gently tapping it with a hammer. Means it goes on straight with equal force, as you down want to damage the end.
10. Grease up the inside of the caliper body and put the 2 bearings back in(Captive washer should face inwards. Fit 1 loose washer then insert the carrier with the spring rod at the top somewhere.
11. Put the 2nd greased up washer ontop of the bearing, then add the 17mm nut. This only needs to be finger tight plus a little tweak so the carrier can turn freely. Hold the 17mm nut firm with the spanner and tighten the 14mm locknut down onto it, firmly but not so you strip threads. Check movement is still smooth, but not wobbly loose or stiff.
12. PLACE THE DUST COVER BACK ON!!
13. This part was a little fiddly, to get the angles correct and did need a bit of levering of the connection rod carrier. Just put it on lightly first to make sure the movement of the brake pad holder is good. Once happy with positioning, hold the back of the caliper on your hard surface and use a small punch to tap down the carrier, again, work your way round the edges so it goes on straight. (The ball bearing would not fit due to the connecting rod being in the way) If like me, you like looking after your kit, this is covered by the V Brake post washer/bolt when in use so don’t worry about marking the paint. I was gentle and it was fine afterwards.
14. Job done!! None of my pad holders were gritty or sticking, so I left them alone. Looks like it is just small allen bolts holding them in place so your call if you want to remove them too.
Hope that is of some use to you.