Rebuild :
I presume that most people would have gone down this route / followed these instructions to get the components re anodised (as per the majority of this batch) but there is another option …
When you consider that these components have all been reconditioned from scratched / messed up levers :

Now they are in this condition, it would be very easy and take very little work to turn them into something like the ones I did for the bear valley with just a bit of polishing / elbow grease :
Based on late 2013 prices, using the worst two skewers I bought in this batch (where all the parts were reusable) and adopting these instructions, would give me a very nice looking set of skewers for just less than £30 and an outlay of about £10 on emory and polish … The £10 on emory and polish could also be used on other projects - my polish is 5+ years old and has about a third left (and it was mostly used on exhaust tips, not bike parts ;-) ).
Admittedly a good chunk of time and effort has gone into them but it’s a whole lot more satisfying and easier on the pocket than blowing mega £’s on a mint set … ;-)
Remember, be patient and be selective on what you buy or bid on
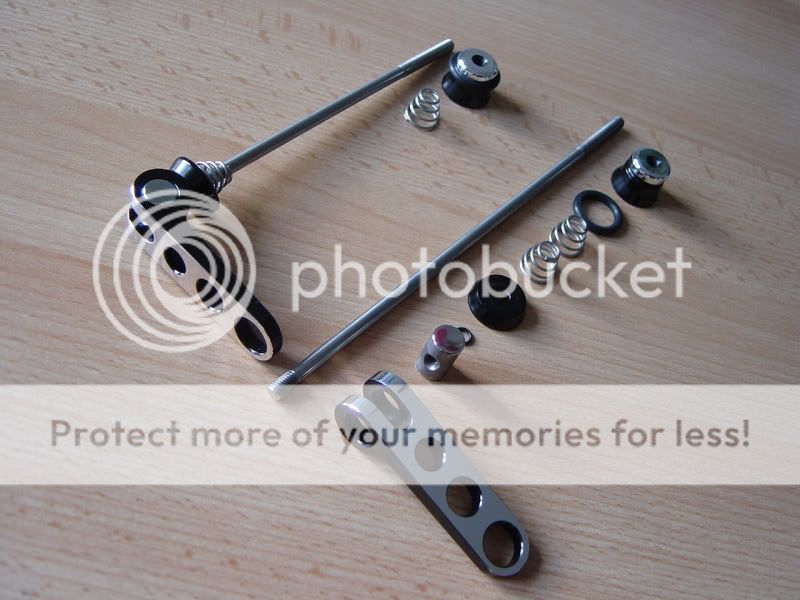
OK, so once you have sanded / polished / re anodised / measured / chopped etc everything can be rebuilt
This bit is very easy and if you have done a good job of all of the above processes, you will end up with great, new (better than new ?) looking skewers
Other than the obvious, there are only a few things to note that may help
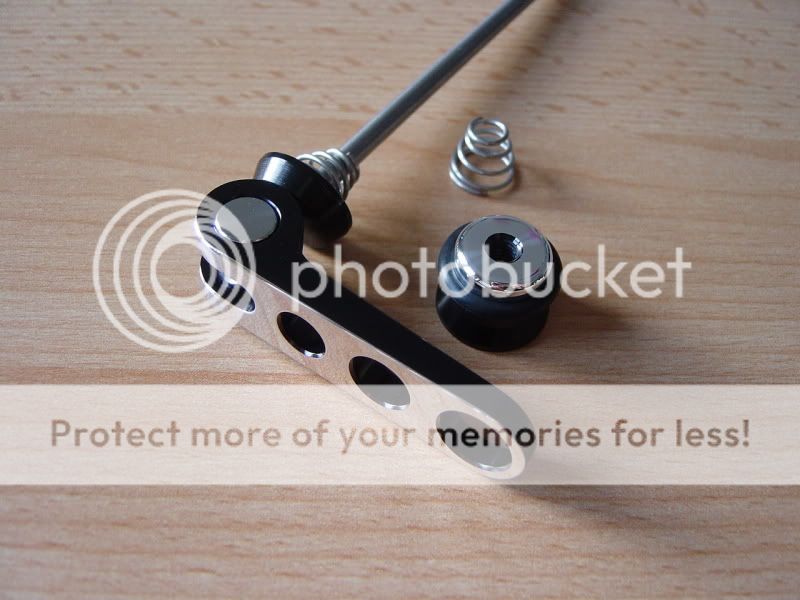
Barrel orientation – I choose to put the barrels on with the face the was originally inside, facing the outside. In my opinion, this gives a neater appearance with a chamfered hole
Standard on the right (with standard skewer end), reversed barrel on the left (with brushed finish skewer end) :

Barrel fixing – If you are going to re centre pop, I would use the barrel in the standard orientation and put a dab of thread lock on the threads before assembly.
If you don’t want to centre pop (like me) use the barrel in reverse just with a dab of thread lock. I can’t see that this item will be more prone to coming loose than any other fixing on the bike but it’s your bike and your choice – don’t blame me if you don’t check the tightness regularly and you wheels fall off … Ultimately it comes down to a simple visual check to ensure the thread isn’t backing off and disappearing back down into the thread bore of the barrel.
I used Loctite 243 (blue) which is a medium strength retainer but it can still be stripped down relatively easily if required (but it won’t ‘rattle’ loose with vibration). If you wanted a bit more security you could use Loctite 271 (red) which will keep the components together very well but could prove very difficult to strip down once cured (without the use of heat). Both products are easy to get hold of for the general public (I think mine came from Halfords ?).

Only after using the Loctite, lightly oil the lever to barrel interface and the lever to washer interface.
Coat the nut end of the threaded skewer section with copper slip / anti seize.
Add a new o ring onto the nut. I am not 100% sure of the original size (I think it is 11mm ID x 2.5mm wall), but the size that I used on the bear valley and looks good (a bit Shimano like 'chunky') is a 13mm ID x 3.0mm wall – this size should last well / better as they are not being stretched as much. Both sizes can be found easily and cheaply on eBay ;-) If you want to buy on the high street, Halfords do a selection box that contains a suitable size (where my first ones came from) and I ‘think’ they also do them in small bags but you will have to land lucky / do some searching to get a size that suits without measuring them first.
Wind the skewers up to tighten them, don’t force the lever closed like a traditional internal cam style quick release ;-)
On any strip down / wheel removal / wheel fitment, try to ensure the mating faces of the lever and washer are as clean, grit free and as lubricated as possible – the anodised finish will last much longer ;-)
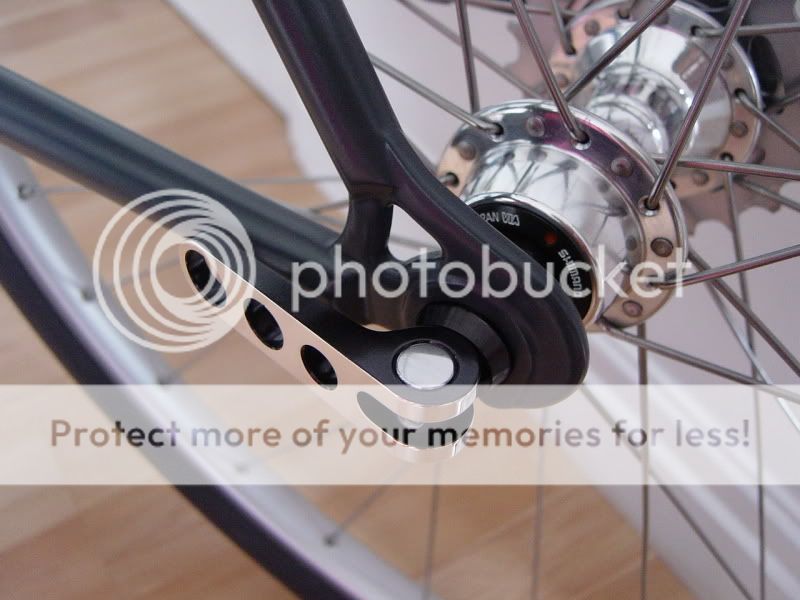
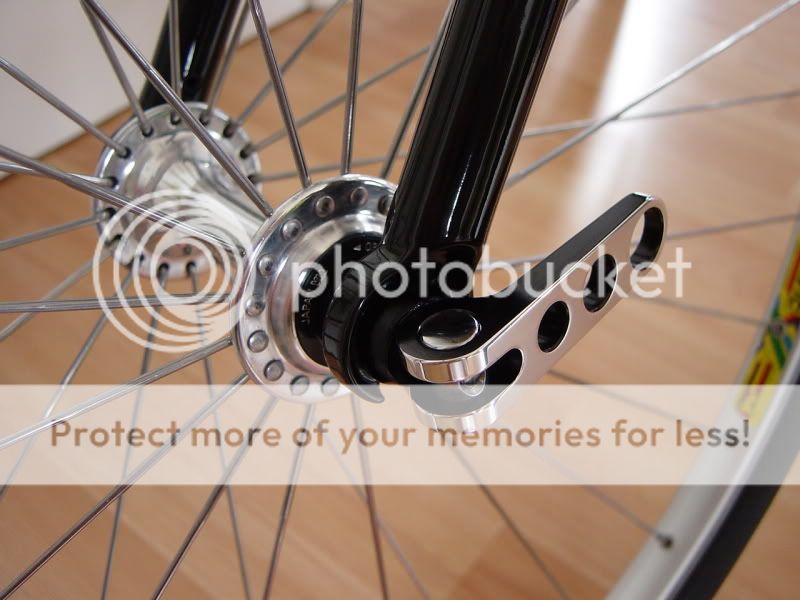
Hopefully that all made sense and you now have a cool looking set of skewers (and much cheaper than buying A1 condition or NOS … :shock !
Let us know if you have any questions and the best feedback would simply be two pictures (one before and one after) tagged onto the end of this thread
Cheers,
WD
I presume that most people would have gone down this route / followed these instructions to get the components re anodised (as per the majority of this batch) but there is another option …
When you consider that these components have all been reconditioned from scratched / messed up levers :

Now they are in this condition, it would be very easy and take very little work to turn them into something like the ones I did for the bear valley with just a bit of polishing / elbow grease :


Based on late 2013 prices, using the worst two skewers I bought in this batch (where all the parts were reusable) and adopting these instructions, would give me a very nice looking set of skewers for just less than £30 and an outlay of about £10 on emory and polish …
The £10 on emory and polish could also be used on other projects - my polish is 5+ years old and has about a third left (and it was mostly used on exhaust tips, not bike parts ;-) ).Admittedly a good chunk of time and effort has gone into them but it’s a whole lot more satisfying and easier on the pocket than blowing mega £’s on a mint set … ;-)
Remember, be patient and be selective on what you buy or bid on
OK, so once you have sanded / polished / re anodised / measured / chopped etc everything can be rebuilt
This bit is very easy and if you have done a good job of all of the above processes, you will end up with great, new (better than new ?) looking skewers
Other than the obvious, there are only a few things to note that may help
Barrel orientation – I choose to put the barrels on with the face the was originally inside, facing the outside. In my opinion, this gives a neater appearance with a chamfered hole
Standard on the right (with standard skewer end), reversed barrel on the left (with brushed finish skewer end) :

Barrel fixing – If you are going to re centre pop, I would use the barrel in the standard orientation and put a dab of thread lock on the threads before assembly.
If you don’t want to centre pop (like me) use the barrel in reverse just with a dab of thread lock. I can’t see that this item will be more prone to coming loose than any other fixing on the bike but it’s your bike and your choice – don’t blame me if you don’t check the tightness regularly and you wheels fall off …
Ultimately it comes down to a simple visual check to ensure the thread isn’t backing off and disappearing back down into the thread bore of the barrel.I used Loctite 243 (blue) which is a medium strength retainer but it can still be stripped down relatively easily if required (but it won’t ‘rattle’ loose with vibration). If you wanted a bit more security you could use Loctite 271 (red) which will keep the components together very well but could prove very difficult to strip down once cured (without the use of heat). Both products are easy to get hold of for the general public (I think mine came from Halfords ?).

Only after using the Loctite, lightly oil the lever to barrel interface and the lever to washer interface.
Coat the nut end of the threaded skewer section with copper slip / anti seize.
Add a new o ring onto the nut. I am not 100% sure of the original size (I think it is 11mm ID x 2.5mm wall), but the size that I used on the bear valley and looks good (a bit Shimano like 'chunky') is a 13mm ID x 3.0mm wall – this size should last well / better as they are not being stretched as much. Both sizes can be found easily and cheaply on eBay ;-) If you want to buy on the high street, Halfords do a selection box that contains a suitable size (where my first ones came from) and I ‘think’ they also do them in small bags but you will have to land lucky / do some searching to get a size that suits without measuring them first.
Wind the skewers up to tighten them, don’t force the lever closed like a traditional internal cam style quick release ;-)
On any strip down / wheel removal / wheel fitment, try to ensure the mating faces of the lever and washer are as clean, grit free and as lubricated as possible – the anodised finish will last much longer ;-)
Hopefully that all made sense and you now have a cool looking set of skewers (and much cheaper than buying A1 condition or NOS … :shock
!Let us know if you have any questions and the best feedback would simply be two pictures (one before and one after) tagged onto the end of this thread
Cheers,
WD


