The Unofficial Wheel Building Thread?

OK, here we go, with a few changes due to not receiving material from Ebay (man sometimes...)
Instead of 2 cross drive side, it´ll be 3 cross (as most use anyway) and non drive side will be radial, hub is 46mm hole to hole and there is enough flange material to do it safely. Let my just clear up that radial lacing on front hubs should not be done on hubs with more than 28 holes, due to the smaller hole to hole diameter (this hub I´m using is 40mm H/H) if it had been a 32 or 36 hole hub, the diameter would still have been 40mm with less material in the flange.

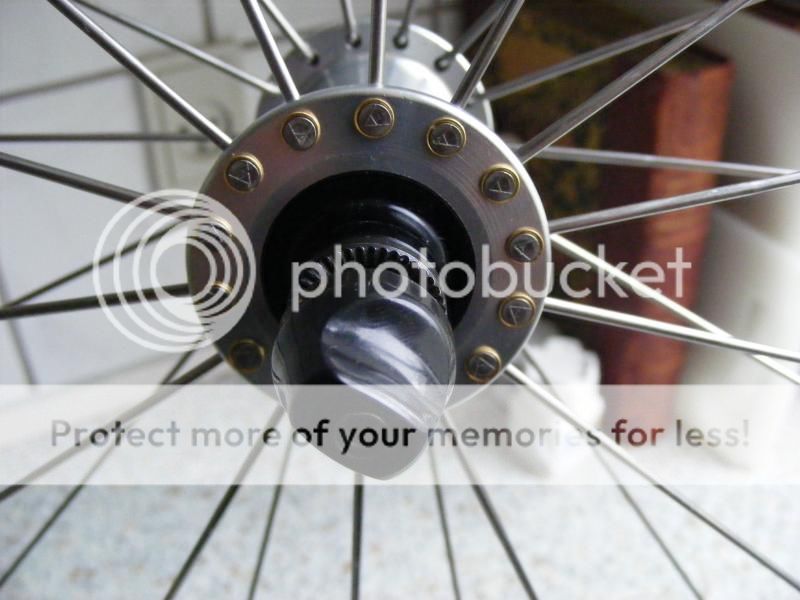
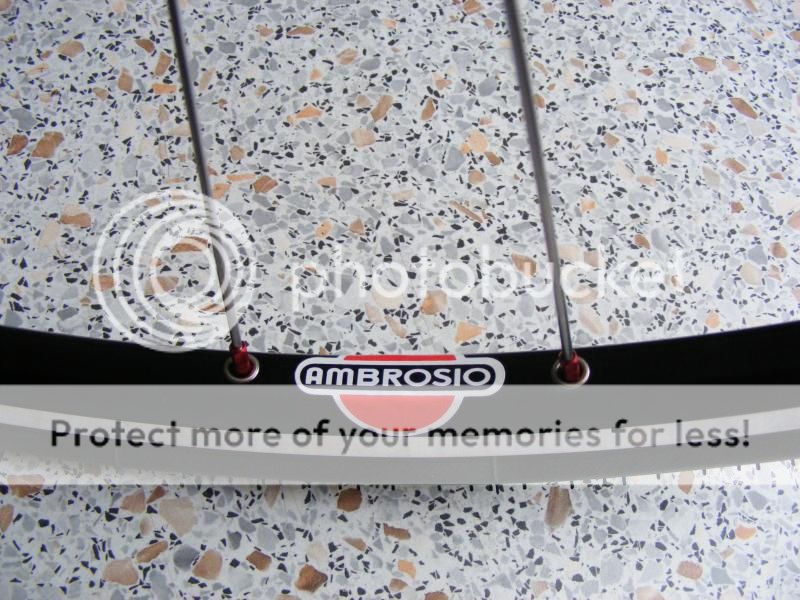
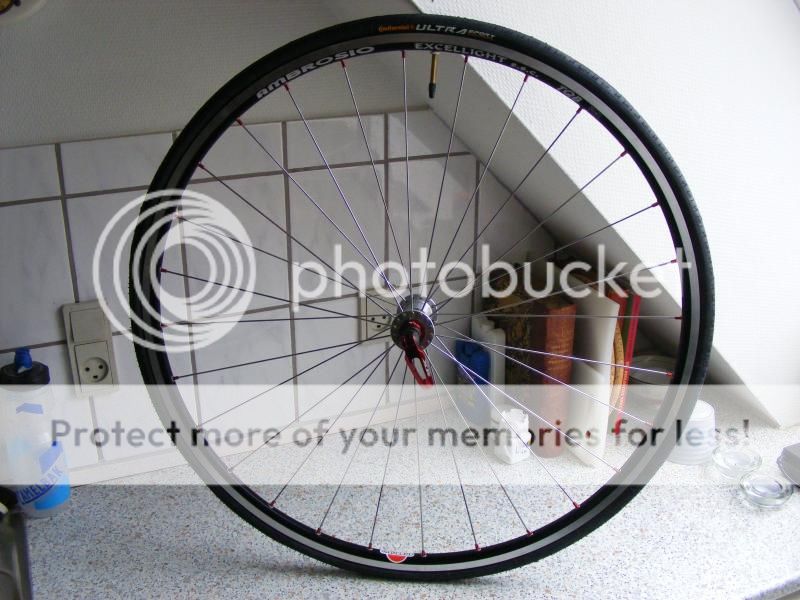
I have already built the front, since it´s straight forward I did not take pictures of the build, but here are some pics of the finished wheel.
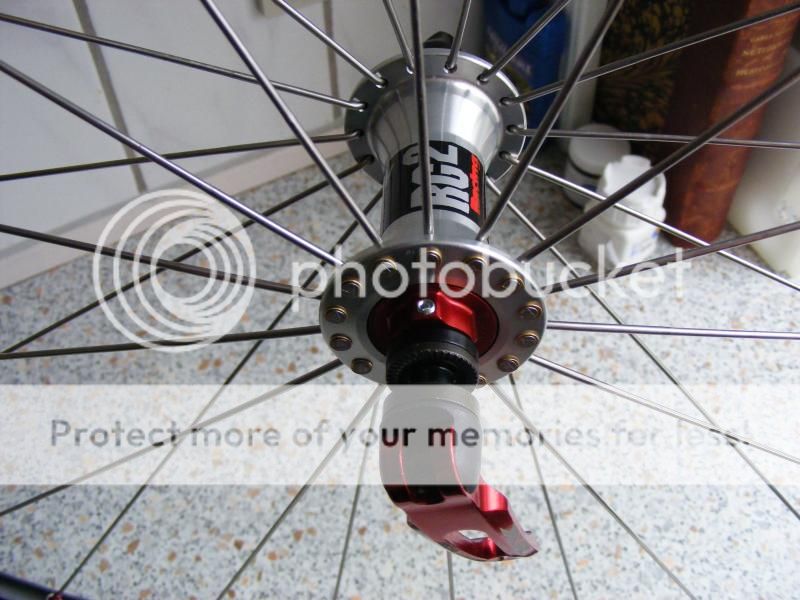


The rear wheel is where most struggle when they first try building a wheel set. I´ll try to make it as simple as possible, first you can not build a set of wheels without a spoke tensionmeter, period. Sure you can build a wheel that looks like a wheel, but you will not be able tension the spokes to a tension that makes the wheel all it can be, most tension the rear wheel so that the non drive side is near the drive side tension, this is not right and i´ll show you how you can get max. tension = stiff fast rear wheel with ease, but again not without a tensionmeter.

Normally I use a DT Swiss tensionmeter, but since it is costly, I borrowed a Park Tool TM-1 from the LBS. This cost just £55 and is just as good. First thing we need to find out, is max tension the hub and rim can safely take, in my case the hub, when radial laced can take ca. 1500 Newton, which is around 150kgf. The rim can take 1800 Newton, ie. 180kgf and the spokes can take way more, so we don´t have to worry about them.

The TM-1 works on a conversion scale of deflection in mm to kgf. So you just find the spoke diameter you are using


In this case 2mm straight gauge drive side and 1.8mm non drive side.
Max deflection on the 2mm is 0.28mm meaning 1730 Newton or 173kgf


So in our case we can go to the 28 on the scale on the Tensionmeter. now to the preparation of the rim and spokes.
 
Tools needed are:

Nipplespanner, I´m using a internal one since I´m using internal nipples. A good cheap key is the Spokey.

Wheel dishing tool.

Wheel truing stand. Unior makes a good "cheap" one that works as the Park Tool TS-2 at half the price.

Spoke Tensionmeter.

Deburring tool, for the valve hole and if you are using a rim without eyelets.

Nylon hammer and punch (to set the spokehead in to the washer/hub)

Other things needed are: Oil, Locktite or DT Swiss Spoke Freeze.


The materials for the wheel:


Step 1.

Start by Oiling the eyelets in the rim, by doing so we prevent the nipple from ceasing up in the eyelet and the job of tension the spokes become much more easy.


Step 2.

Count out the spokes needed for each side of the wheel, and put washers on each one


Step 3.

lay the spokes facing on a piece on tissue paper and apply Locktite or spoke freeze.


We are now ready to lace the wheel.
 
Following this with interest :)

BITD (1970's) we used to ride 36 wheels with radial spoking (radial and crossed over on the rear).......were the hubs different in those days?

What's the purpose of the cyanoacrylate on the spoke threads?

Sorry about the questions, just curious.

Shaun
 
Taking pics. and lacing the wheel at the same time proved a little hard :facepalm: so not so many pics. of that. To lace a wheel with two different patterns is hard for a beginner, but I have a solution, start lacing the wheel as a 3 cross in both sides.

We start by holding the hub and rim correct, meaning the drive side of the hub facing right when you hold it in front of you, this ensures that the lacing of the wheel ends up correct.

Start by putting two spokes in the hub from the outside of the flange, one in each flange, across from each other.

Take the rim and hold it vertically, so that you look at it from behind (as if it sat in the frame) find the valve hole in the rim, and jump two holes away from you and the valve hole, and put the spoke/nipple in that hole. (note that the nipplehole can be off centered from the center line in the rim, so find one that correlates with the same direction as the spoke)
Jump one hole in the hub and repeat until you´ve gone around the rim filling every other hole with a nipple/spoke. (jump two holes in the rim, one in the hub)

Now comes the tricky part, you most rotate the hub, so that you can put in the pulling spoke (the one that holds the load of the wheel)

The best way I can explain it is: standing behind the wheel (drive Side to the right) imagine you are reeving a large moterbike, this is the direction the hub should be rotated.

Put a spoke in the drive side hub flange from the inside, and have it cross over two spokes, and under one and put in the rim with a nipple. The spoke you just put in should be facing to the rear of the bike, meaning when you look down on the drive side of the hub the spoke goes the left.


Do this to the drive side of the hub only, if you want two different lacing patterns that is.

Now take the non drive side spokes out, and lace this side up radial with the correct length spokes
 
Now comes the tip to getting correct spoke tension.

Start by tuning the nipples so they just cover the thread on the spokes, working on one side of the hub at time, start with the non drive side.

When both sides of the nipples are down, start to tension the drive side only, do this until you almost reach the maximum tension of the rim (in this case circa 150kgf Do not worry about the dishing of the wheel although it is way out of dish, it is easily brought in to center when we start to tension the non drive side

When you start to tension the non drive side, start by giving the nipples on that side one turn, and then relieve the wheel of stress by taking it out of the truing stand and relieving it, do this often, since it makes truing the wheel easier.

The gentlest method demands a good deal of skill and "feeling." We sit down, place the wheel on
our lap and hold it against our thighs with our forearms. Then we grasp the 12 o'clock position
of the rim between three spokes and try to pull it upwards against the resistance of our forearms.
The wheel is rotated three spokes at a time until it has completed a full rotation, then turned over
and the work is repeated on the other side until all the spokes have been relieved and have adjusted themselves.

Now it is just a question of dishing the wheel and making it true, you will find that the spokes in the drive side are so well tensioned that you can hardly move them at all.
 
Midlife":69m2hhde said:
Following this with interest :)

BITD (1970's) we used to ride 36 wheels with radial spoking (radial and crossed over on the rear).......were the hubs different in those days?

What's the purpose of the cyanoacrylate on the spoke threads?

Sorry about the questions, just curious.

Shaun

It might have been hubs with larger flanges? I´m not saying it has´nt been done, it´s just not safe to do. But if you do it to a Campagnolo hub, I have yet not seen one fail, its the modern hubs that can´t take it, they are to focused on weight to make a hub that´s strong.

The Locktite holds the spoke in the nipple just that tad better, so if you hit a hole and the wheel tries to come out of true, it will not turn.
 
Pic. of the non drive side of the hub, hole to hole distance is 46mm and there is enough "meat" to lace radial (I hope)


I stated that I would tie and solder the drive side spokes, the wheel need to settle before I will do this.
I kinda forgot to show how to seat the spokeheads in the hub using the punch, you do this when the spokes is half way tensioned.

Finished wheels

 
Back
Top