Newbie - Raleigh Wisp Restoration!

Hi Simon

Thanks for taking the time to reply. Some very good tips/advice. After the white spirit had evaporated and a spot of oil the freewheel seems as good as new.

Phil
 
S1m0nR":gcgzbwxm said:
Hi and welcome to the site!

I'm another vintage Raleigh fan - I've got three vintage Raleighs and another two in the process of being built up gradually. I think that Raleighs of the 1980's are hugely under-rated bikes.

Before you spend a whole lot of cash rebuilding this bike, have a bit of a think about why you are doing it. If you want the satisfaction of rebuilding a bike and making your old treasured machine look like new again then don't let me stop you, however, if you want to end up with something like a mint condition Raleigh Wisp then save yourself a lot of hassle and buy a new-condition one online. The Wisp isn't a high-spec machine (although I do understand it's still a nice bike!) and emotional attachment aside, it probably isn't worth spending any time or money restoring a ratty one.

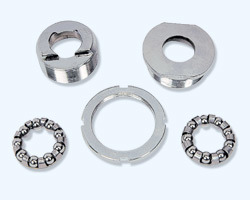
Assuming you do want to rebuild it though (and it's a lot of fun!) you're going to need a few specialist tools to get it apart and you might think about buying these while the weather is preventing you from stripping it down. One thing that you'll certainly need a crank extractor (obviously shop around).

You're also likely to need a tool or two to get the bottom bracket off depending on what type it is, as well as a large spanner and/or vice to get the non-adjustable cup out.

A set of allen keys will also be a requirement.

In terms of sourcing components, you might find it is cost-effective to purchase a second Wisp (or other '80s bike) to raid for parts - this is a technique that I've used several times in the past. If you want another set of the Stainless Steel Weinmann mudguards then you can either pay through the nose for a second hand set on their own or buy a whole bike with them on. They were often also fitted to Falcon bikes of the same vintage. These are pretty heavy though and chromoplastic ones are a lot lighter. Extra points can be scored for sourcing an original 80's ESGE set ;-) One of the arts in vintage bike restoration is to buy a parts bike, take the parts you need and then sell what's left for the same amount or more then you bought it for!

In terms of buying new components, it all depends on how far you want to take it. The Wisp originally had a Sachs Hurett gear system which was fairly widely used and is easy to find second hand, it also had Weinmann brakes and IIRC a Raleigh Custom crank set. If you want to keep it relatively original-looking then source replacement '80s parts, and there's opportunity for some weight-saving and performance-enhancing upgrades. Look at the groupsets that the more expensive Raleighs had and perhaps look at fitting those instead of the original kit. Something like a Sugino crankset, Campagnolo Record gear systems, lightweight Sakae seatpost and stem..... But bear in mind that you're bolting it all to a relatively heavy frame so don't go too mad.

If you're anywhere near Cambridge you're welcome to take a look in the parts bin in my garage - there are quite a few old Raleigh bits in there!!!

Have fun...

PS forgot to mention: Wheels.
IIRC, the Wisp originally came with 27 x 1 1/4" chromed steel wheels. You can still buy this size of wheel but tyre availability is not as good and choice is a lot narrower than the current 700c standard size. As an aside I always think you can tell the quality of an 80's Raleigh bike. If it's got the chromed steel wheels then it's usually a lower-spec bike but if it's got Weinmann alloy wheels then it's usually more upmarket.

Anyway, the point is that if you need to replace the wheels then you've got a few choices to make:

Option 1: Buy 27" wheels (might as well buy alloy ones!)
Pros: Originality, brakes will still line up, like-for like swap so you can use your existing rim tape, freewheel, tubes and tyres
Cons: Old size, poor tyre choice

Option 2: Buy new 700c wheels with hub that accepts screw-on freewheel
Pros: Good tyre choice, wider choice of wheels
Cons: You might need to exchange your brake callipers, screw-on freewheel is old technology

Option 3: Buy new 700c wheels with freehub that accepts cassette and lock-ring
Pros: current technology, lots of choice in tyres and cassettes etc.
Cons: You might need to exchange your brake callipers

If you go with option 3 then bear in mind that there are two types of free-hub and the Shimano one will give you a choice of cheaper cassetttes...

Thank you so much for this, all really helpful information.

I had a long think about it and decided that I did want to rebuild as (a) I don't really have any hobbies as such, (b) I was quite interested in doing so and (c) the whole family have bought bikes recently, some new some not, and I'd quite like to have a go at building a bike myself!

I took it apart a few weeks ago and to be honest a lot of the stuff that was there was not in great condition. The people I bought it from had it stored in a garage for ages. The only thing that hadn't gone to s*** is the frame and the wheels. I have no idea what they are but I should probably look.

The only thing I'm having a problem with is the bottom bracket. I don't know what it is - the only information i can see on it is "tange" in between the rust, dents and cracks! I'd seen online that I needed a tool to get it off but, because my boyfriend thought he knew more than I did (turns out he didn't! that felt good!) he bought the wrong one.

I'm almost certain that 90% of the things on the bike are/were original... the previous owners as I said hadn't used it in ages and said they hadn't changed anything but the saddle and handlebars. So it's a good chance that whatever bottom bracket is on there is original, but i have no clue what it is, how to get it off or what to replace it with.

I'm actually waiting for my frame to come back from being sprayed (for free by a family member who is a car body work specialist) - the bottom bracket being the only thing still on it! - and I think I'm going to take it down to my LBS so the guy there can help me.

UNLESS... anyone is psychic and can tell me all of these things (please say you are, someone!)

I've been slowly buying bits and pieces as and when I've seen them and I've got most now.

But if anyone has any kind of knowledge about my BB situation I would be most grateful.

Thanks again for the really helpful post!

Aimee
 
When you click on links to various merchants on this site and make a purchase, this can result in this site earning a commission. Affiliate programs and affiliations include, but are not limited to, the eBay Partner Network.
Hi again Aimee,

Glad to hear that you decided to go ahead with the restoration.

The bottom bracket shouldn't be too much of a problem.

If it's the one that came with the bike then the parts should look more or less like this when dismantled, although the bearings will probably have started of in metal cages:

PeugReb_Pre_BBDirty1_Comment1.jpg


The Bearing Cup on the top left is the fixed one - it just screws right in, but beware, it's a left handed thread so it screws anti-clockwise to tighten. It's probably on extremely tightly and rusted in place. There's probably nothing more likely to give you skinned knuckles than trying to undo one of these with a spanner! However, unless it's worn it can stay where it is. If you do have to remove it, find a bench vice, turn the frame over so that you can trap the flats of the cup in the vice and then screw the frame off the cup. Turn the frame clockwise to undo.

The other bearing cup should have a lock-ring (just to the right of the ball bearings in that picture). There are different types of fitting tightening for the lock ring though, the two most common are the notches that you see in the picture, (for this you need a tool like this), the other kind just needs a good-sized spanner.

The bearing cup with the lock ring just screws into the frame as you'd expect, it'll most likely have one of three fittings:

-Six-sided head that you can undo with a spanner:
gunn-co-bottom-bracket-cups-and-bearing-assembly.-%5B2%5D-604-p.jpg


or

-Raised centre section which again you can adjust with a spanner:
Bottom-Bracket-Cup-5pcs-KL-B32.jpg


or

-Drilled dimples which you need to use a pin spanner to adjust
56de_1.jpg


Once you've got it apart, check the cups and spindle for wear which will be evident as a grooved/discoloured area on the wear surfaces and if you're lucky a washout in degreasant and re-grease will suffice. The ball bearings should be in a metal holder, if they all drop out and there's lots of mangled metal in there, replace the bearings.

Whole Raleigh bottom bracket kits are available online, such as here as are the spindles but measure the length of yours and the distance between the ridges to make sure you buy the correct one and bear in mind when you re-fit it that it goes a particular way round, the longer end (after the ridge) goes on the chainwheel side.

Have fun!
 
When you click on links to various merchants on this site and make a purchase, this can result in this site earning a commission. Affiliate programs and affiliations include, but are not limited to, the eBay Partner Network.
Back
Top