Quite hard, but small 20ml enamel paint from Humbrol costing couple of pounds does it much better.All of the above are acceptable suggestions ,most non professional paints rely on solvent evaporation to dry ,paint out of an aerosol is v v thin ,no idea about how hard nail polish drys sorry
You are using an out of date browser. It may not display this or other websites correctly.
You should upgrade or use an alternative browser.
You should upgrade or use an alternative browser.
LOOK KG171 paint repair.
- Thread starter Way2many
- Start date
TreaderSteve
Senior Retro Guru
Enamels do dry slowly - in this weather I guess it wouldn't go rock hard anytime soon, especially if put on a bit thick to try to 'fill-in' the imperfections. If they painted steam trains, canal boats, stuff that was heavily used and abused with enamel paints and stood up to the abuse - then it's strong stuff. But it does need a long/er drying time when it's cold, or be put in an oven to bake (not appropriate of course).
Indeed, Mercian et al use enamels!
Indeed, Mercian et al use enamels!
Whatever you use, you need to build it up in layers. If cold in house use some hair dryer after few hours of applying and let it cool down another half a day. I never had an issue with Humbrol before.Right, done a little experimenting...
Humbrol black gloss enamel, unknown age...dried but I can still put a finger nail mark in it after a good drying period?
Acrylic black nail colour...same result?
Bit more searching me thinks.
Fact that nail varnish stays soft means it is eaither very cold where you doing it or some kind of thinner still present.
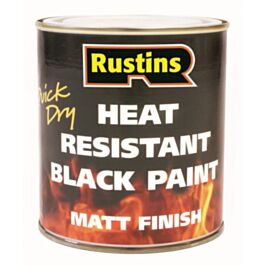
Now I used this stuff very successfully too , after finding almost a full tin in my basement some 15 years ago. Still usable and still used to cover paint chips on black metal, bikes included

Rustins Quick Dry Heat Resistant Matt Black Paint 250ml
Features: Quick drying. Based on high quality water-borne, cross-linking acrylic resin. Low VOC paint for use on metal and wood. Suitable for use on exte...DISCLAIMERThis product qualifies for next day delivery provided it is in stock and your order is placed by 1pm Monday to Thursday. For...
Ha, here's what's been going on...
the gouges on the chain stay and fork have been rubbed down with 800 grit wet n dry. This have removed any loose bits and smoothed all the edges off as well as providing a good 'key' for the paint/clear gloss.
The first fill of black paint went on and was left a week to dry, this was then flatted with 1500 grit wet n dry using a block to help. A few areas showed up needing more filling so a second fill was applied and left another week plus a another flatting session.
This gave a clean matt area with any further filling needed. Now the weird bit...don't ask...I know not why!!! I then applied a wet coat of black gloss with a finger tip on the whole area that had been flatted. This now is lovely amd smooth and shiny...but does have some small dust bits in it.
So, the polishing stage...
T-Cut, not sure if this will be a little to aggressive as I'm really looking to just polish the surface? Any thoughts, have you used T-Cut.
Ive seen this as well...https://www.ebay.co.uk/itm/166194849690
and thought it might be a better option?
When you click on links to various merchants on this site and make a purchase, this can result in this site earning a commission. Affiliate programs and affiliations include, but are not limited to, the eBay Partner Network.
stefthehat
Retro Guru
T-cut is fine ,it’s not overly dissimilar to ‘professional’ polishing compounds such as Farecla’ or 3m systems ,a little trick after the t-cut is to do the same again but with toothpaste ,the t-cut is pushed as a scratch/mark remover due to its ‘grit’ I can do the same with my ‘pro’ polishing compounds what you are lacking is mini air/electric polisher so you need to buff like crazy ,a bit of water and /or damp/wet cloth really helps ,1500-2000 is a good grade to finish on before buffing ,black and metallics are the worst at showing rubbing down marks even after polishing so don’t be overly self critical
Similar threads
- Replies
- 5
- Views
- 560
- Replies
- 0
- Views
- 475
- Replies
- 106
- Views
- 15K
Latest posts
-
-
Good tyres are expensive. Who else does skids on them anyway?😃
- Latest: MattiThundrrr
-
-
-