Groundoggy":ph9ezvz4 said:
Wondering if somebody can give me some info on the cartridge of this shock.
Recently bought a retro ride for a fix up (97 GT Zaskar). The Judy shock is new to me and I have a question about it's assembly. NorthernDave's photo is about the best info I've come across regarding assembly of the cartridge (the 1996 Judy Service Manual has crap pictures).
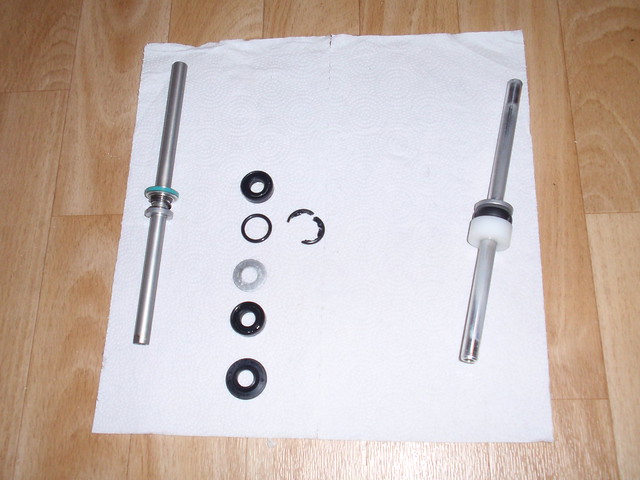
On my fork the rubber O-ring is in several pieces. I have a replacement on the way. For illustration purposes on my photo only I use a slightly smaller O-Ring and place the pieces of the old ring beside it.
I am confused on the reassembly of this cartridge. From Northern Daves photo I see the black plastic piece retaining piece laying off to the side, then from the bottom of the cartridge upwards one of the black seals with the spring inside, a flat washer and the O-ring.
I seem to have 2 of these black seals with the spring inside. I am confused where the 2nd seal goes and the orientation of the flat side of the seals during installation.
Any help would be much appreciated!
1997 is a clearer guide I think
http://www.retrobike.co.uk/gallery2/mai ... emId=72814
but I think there are possibly slight differences.
Where's the outer part ? It depends on it's design how it goes together. I see no circlip ? so assume it's a plastic model and a closed end.
Anyway, first step is carfully take the small allen screw adjuster out of the centre of the damper shaft, it'll get tough but be careful as you'll damage the small orgin and you need it. But it also needs to be out to put it all together.
Now It goes a somthign lika this.
Clean and oil lightley this inside of the damper casing
grease up one oil seal (the thick black part) don't be shy on the grease, push it into the back part (the flat side is the top)
Now I'll check this later but.
Push a seal right to the end, flat part facing out.
Anyway, some also have spacers in them to shortern the cartridge travel (and suit the damper rod) but not yours it seems.
Now fill partly with oil 2/3rd I think.
(Either finger over the end or the other shaft through the hole from the outside.)
Place shaft in (none adjuster side first) then push through while removing the above dummy rod or finger. Carfully though.
Oil will get on the carpet.
Now pump it up and down a bit, slowly, otherwise it can eject itself out the damper adjust hole.
This is to remove the trapped air.
Fill it up, have.
now it's either o-ring then metal washer or vice versa. down the shaft.
fill near to the top and pump again slowly.
Fill to the brim with oil.
Have you other lubed oil seal ready, it goes on flat side out
Loop a small plastic bit, that perished o-ring might come in handy in the seal hole and fit over the end. Tap/push down till you get 1mm outside
Pull gently on the plstic/o-ring bit to remove it from it's trapped position.
Fill the damper adjust hole with some oil, pump to check it's alll working.
Refit damper adjuster allen key bit, it can be tight and stiff this part.
That whould be it.
...well something like that anyway
")