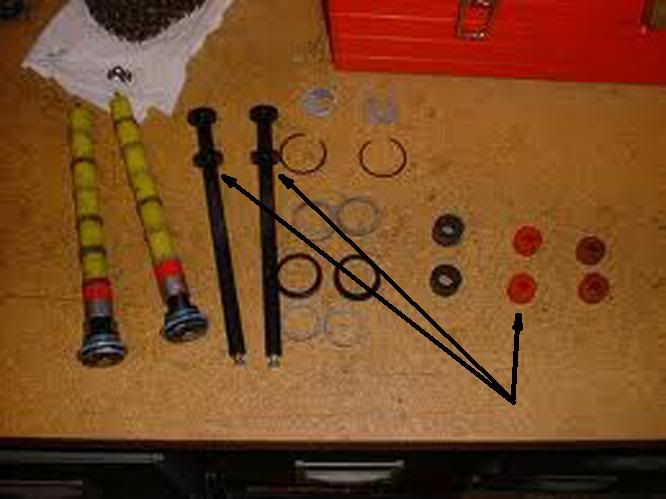
Manitou 3 - re-assembly help please!

tiboltrider

Retrobike Rider
Gold Trader
Feedback
View
Hi.

I've had these Manitou 3 forks for ages and not had a chance to use them. They'll be going on my Ti Bolt 'cos I need the Judy FSXs for an M2 build.

When I got them they were a tad un-bouncy / flat. Can anyone spot what's wrong with them please and advise on rebuild? Are there any bits missing? The parts that I have numbered 14 & 15 did not come with this fork (I have bought them since). I've found these instructions >>>

http://www.suspensionforkparts.net/manitou3.php

...but mine have springs fitted now.

Thanks.
 

Attachments

  • small 18052011660.jpg
    small 18052011660.jpg
    68.4 KB · Views: 1,921
are they flat/un-bouncy with the springs, or before?

nice crown by the way.
 
Yep, the crowns ok isn't it!

The fork came fitted with the springs (instead of elastomers) when I bought them on Ebay and the seller did say the fork was un-bouncy. So it's been like that since I've had it.

Any Manitou experts out there? :D
 
I would say from my limited experience with Manitou 4 forks that the legs (10) should have the circular clip removed and the elastomer taken off. Then assemble one each of part 15 the 14 onto the leg. Feed this through the top of the stanchion and re-attach the orange elastomer and circular clip. Repeat for the other leg (7). The rest is straight forward after that.
 
Those don't look like the internals of my Manitou 3's??

Click on the Manitou 3 tab to the right of the page in this link...

http://www.suspensionforkparts.net/manitou_manual.php

...and download a PDF of the Owners Manual.

I think you need another black plastic rod instead of the alloy one you have?

Okay, just noticed you already have the PDF link :oops:

If you want a replacement plastic rod I have a spare you can have, then you can assemble them properly.

The fact you have springs makes no difference to the rest of the assembly, you just drop them into the finished fork and screw the caps down.

You don't need #14 either BTW...

#9 and #12 are preload spacers, assuming the springs are the same length uncompressed (mine are) try assembling the fork without them and see how it rides? Depends on your weight...
 
Something was bugging me about your photo last night and I've just twigged what it was...

Parts you've arrowed #5, 6 & 7 - now I know everything is laying flat on the work surface but the black plastic compression rod should pull through the bottom of the stanchion by a good 80mm, that being your 'travel...'

MIII.jpg


The above pic isn't very good because it's an enlargement of one I found online but it serves its purpose;

The two black rods are the 'compression rods' (one for each stanchion) and they should have a single red elastomer as arrowed for topout/rebound damping slid up from the bottom to seat against the lower of the two moulded disks where arrowed before dropping through the hole in the bottom of the stanchion (from the top obviously...). You should then slide a 'bottom out' elastomer (the black ones above, second right) onto the rod and fit the large clip into the appropriate slot (they're marked with the different fork models...). The OEM skewers with elastomers are on the left, and you can see how they are identical to yours apart from your springs.

I really don't see how the alloy rod you have there works?? It looks more like the Judy upgrade rod... :?

As I said, I have a spare compression rod so if you find you can't make your fork work with what you have I'll gladly pop it in the Post for you...
 
Back
Top