Fitting the BETD GT Self Fix Disc Mount to my '98 Zaskar
Hi guys,
gt900uk just gave me a rumble a few days ago for being a slacka$$ and not posting images of my '98 GT Zaskar with the
BETD GT Self Fix Disc Mount fitted as promised earlier. So here it is...
After 500+ miles of testing, (including a 200 mile Transalp ride) I'm very happy with the BETD adapter and can be reasonably confident its a 'safe enough' mod for the Zaskar - any sign of frame cracking and I'll post a reply. My overriding concern was the amount of metal removed by drilling the dropout. Then again - look how much metal has been removed from dropouts in subsequent years, albeit with the help of some fancy finite element analysis software.
Here's a few tips:
There really isn't a lot of metal to play with, so take your time and plan it well.
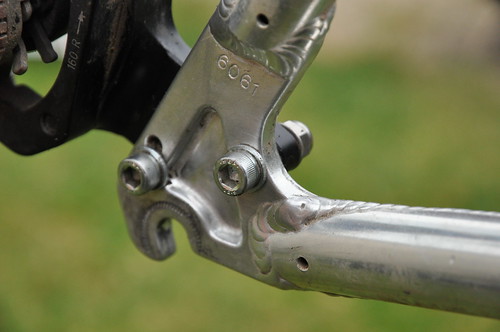
The 6061 dropout material drills very freely/cleanly. I used a new drill and some engineering cutting lubricant - engine oil would do the trick too.
Use an assembly jig: Print out the
Hayes "Frame, Std Rear Triangle, I.S." pdf drawing at actual size (1:1), glue it to a thin sheet of card and accurately cut out the holes for the disk brake and dropout. Double check the dimensions between centres are as per the drawing. Temporarily mount the jig to the INSIDE face of the brake adapter using the M4 screws and caliper adapter from your brake kit. Now release the rear quick-release and drop the jig + adapter onto the frame/axle while your wheel is still in place - the jig slips between the hub and the frame. This is to ensure the brake pad(s) are the correct distance from the axle centre, regardless of the final radial position about the axle the adapter get fixed in.
Now, with only gentle pressure on the QR clamp, rotate the jig + adapter to position the adapter so as to leave as much metal in the dropout as possible. Using a fine permanent pen, mark the outline of the adapter on the OUTER face of the dropout. Remove the jig from the adapter.
No drill press? Brace the frame so you have something solid to drill into/against:
Make up a spacer block from a piece of 3x2" or similar and jam it (gently) between the dropouts. Now you can lay it on the ground and drill away without the frame flexing.
Clamp the adapter to the dropout in the location marked with the fine permanent pen to use it as a drilling guide for 'spotting' the hole centres with a 5mm drill - you'll remove some of the anodising from inside the adapter mounting holes but that's better than getting out of position holes in your frame. Unclamp the adapter, center-punch the spot you just made and drill through first with a smaller drill (2 - 3mm) before drilling final size.
After drilling the first hole, mount the adapter to the frame using the mounting hardware. This will ensure the spot for beginning the second hole goes in the right place - remember, you only get one shot at this so a bit of faffing is some insurance against cocking it up.
To mount the adapter I used Stainless M5x25mm caphead bolts with nyloc nuts, and S.S. washers under the bolt heads and nuts and applied bike grease liberally to the mating faces and inside the holes for some corrosion protection before assembly.
I didn't file or grind the GT logo stamped on the outer face of the dropout - it appears to have been stamped into the dropout such that overall the outer face is flush anyway.
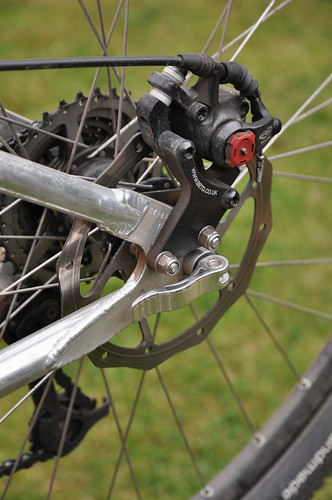 BETD Adapter on 98 Zaskar 1 of 5
 by
hairykiwi, on Flickr
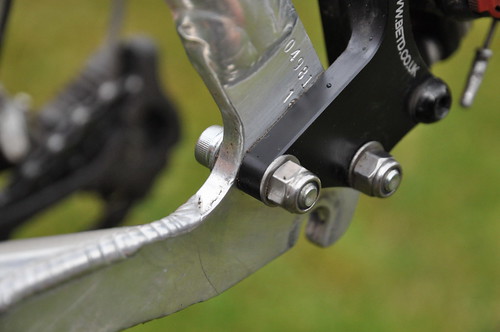 BETD Adapter on 98 Zaskar 2 of 5
 by
hairykiwi, on Flickr
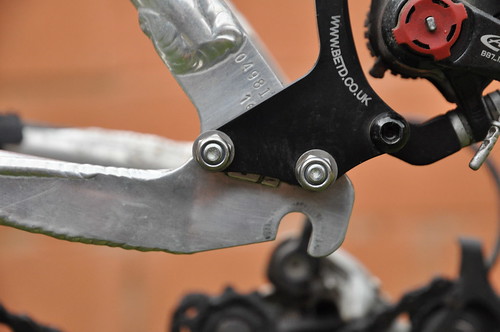 BETD Adapter on 98 Zaskar 3 of 5
 by
hairykiwi, on Flickr
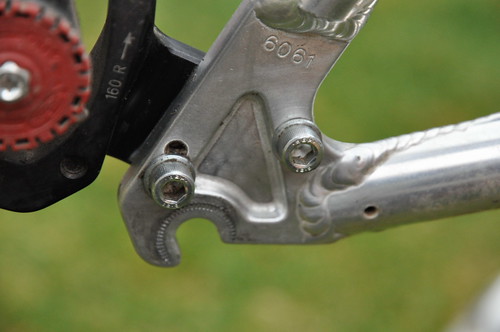 BETD Adapter on 98 Zaskar 4 of 5
 by
hairykiwi, on Flickr
 BETD Adapter on 98 Zaskar 5 of 5
 by
hairykiwi, on Flickr[/url][/url]
")