reanimation":2p157mxw said:
Cheers Mark, seen as as asked so nicely here's the next installment.
Group Set
Shimano Deore XT from the 91-92 era has been sourced. I did think long and hard about using M900 XTR as I’ve used this on other builds and love the quality and performance. In this instance I wanted to use Deore XT as bitd for me XT was the pinnacle. Yes, XTR had appeared in 1992, but tbh XTR was such a world away from my piggy bank I can’t remember ever lusting after it in the way I did XT. The colour scheme was just perfect on this era of XT group set too, the black and gold just looked the business and the quality was excellent . I hadn’t seen much of this era XT for some time until I was out riding with Dr. S around Dalby and saw the XT gear on his Fat Chance, it looked as cool in 2009 as it did all those years ago when I was an envious schoolboy dreaming of owning it.
Headset:
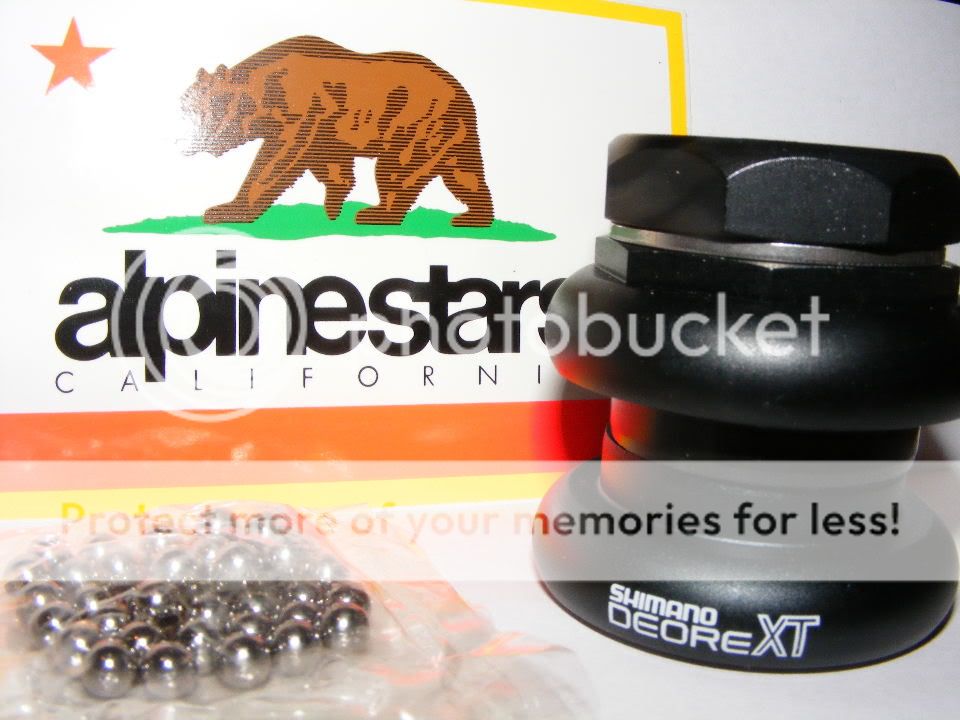
A Shimano Deore XT M737 threaded headset was eventually sourced after quite a search. Again the quirkiness of the 1 ¼” set up led to me paying a premium price for this part. But I had to have it to get the spec of this ultimate cro-mega off to the right start.
I was surprised to find that the headset uses loose bearings instead of caged ones. I must admit I’ve not had the experience of such a set up since bitd. The temptation to replace the loose bearings with caged versions is strong, but at this time I’ll run it as it was intended. As no grease was supplied with the headset I’m using some top quality Shell Retinax HD2 bearing grease to keep things moving freely.
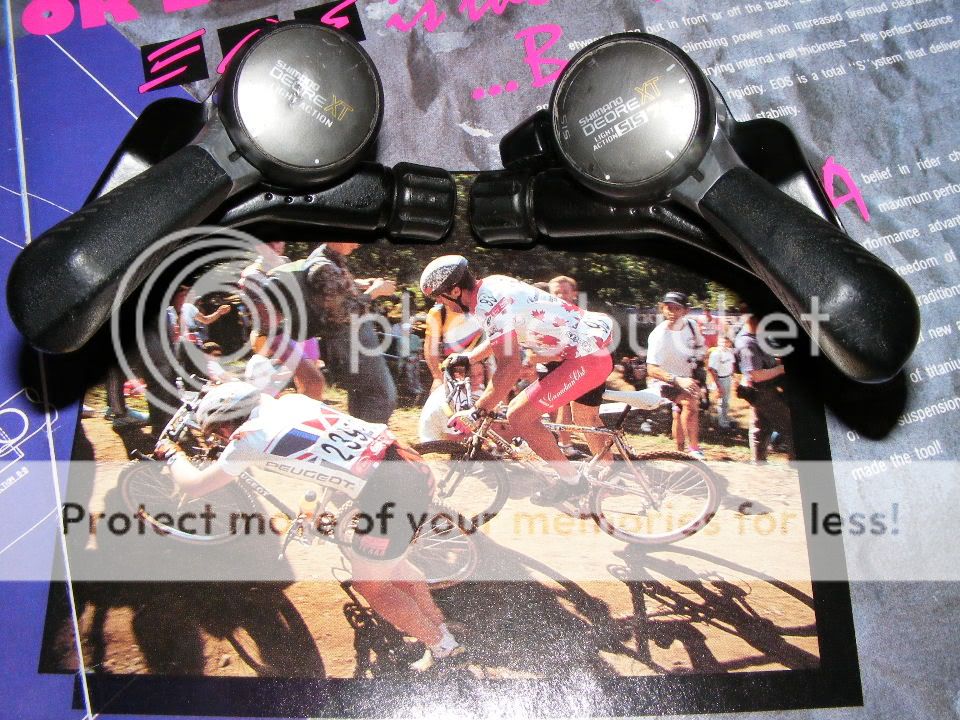
Shifters:
Shimano Deore XT M732 thumb shifters are the connoisseurs shifter of choice. With precision shifting every time and period looks, these are the only option for this build. I’ve stripped this set down and serviced the internals, the brackets were starting to show their age so rub down with wet and dry and a rattle can spray job in satin black freshened them up. Titanium bolts give a rust free durability and keep the weight respectable. My set suffer for the odd little dent to the top caps, but these shifters are so reliable it seems daft to pay big bucks just for aesthetics.
Front Derailleur:
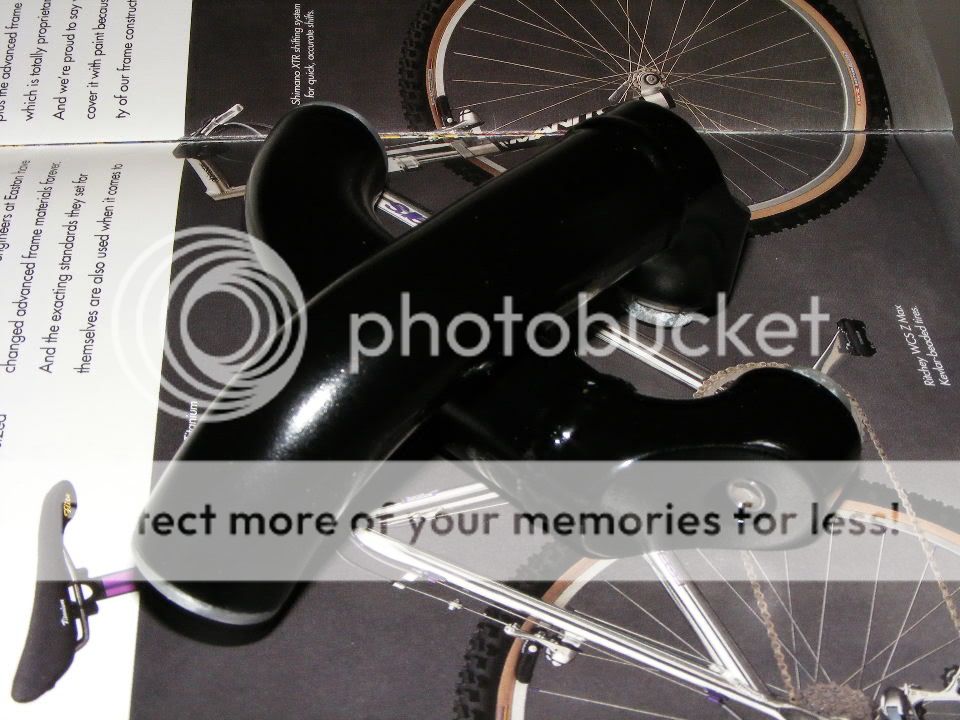
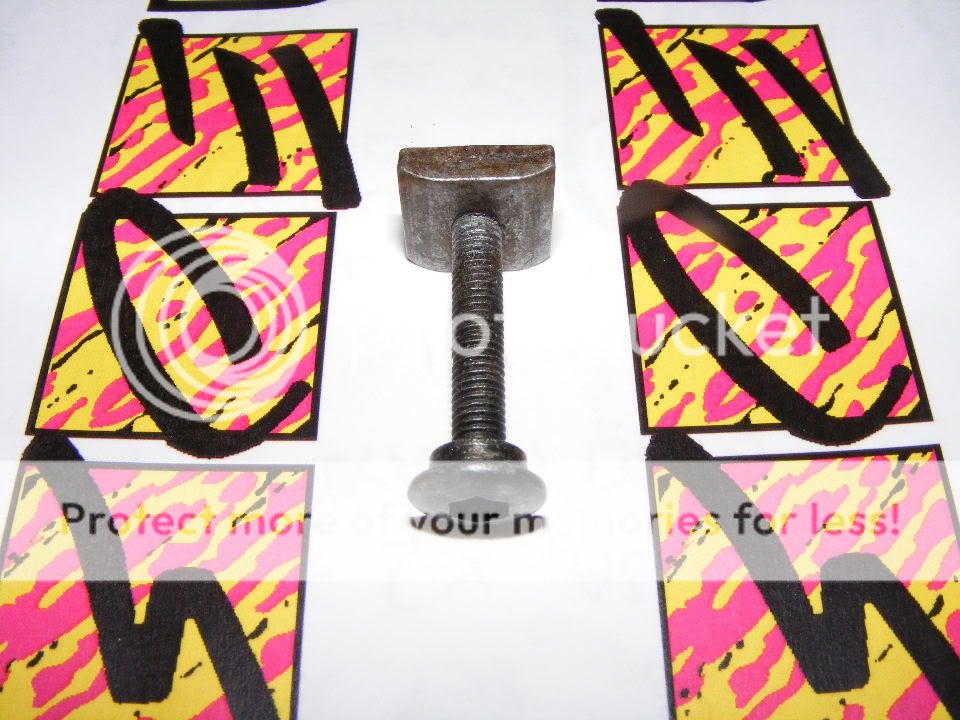
Alpinestars with curved seat tubes use a bolt on design to attach their front derailleur. The derailleurs used are the endless band type with the bolt and band removed, a longer bolt and threaded retaining piece then secure the derailleur in place. Here is a picture of the original M5 steel bolt and retainer.
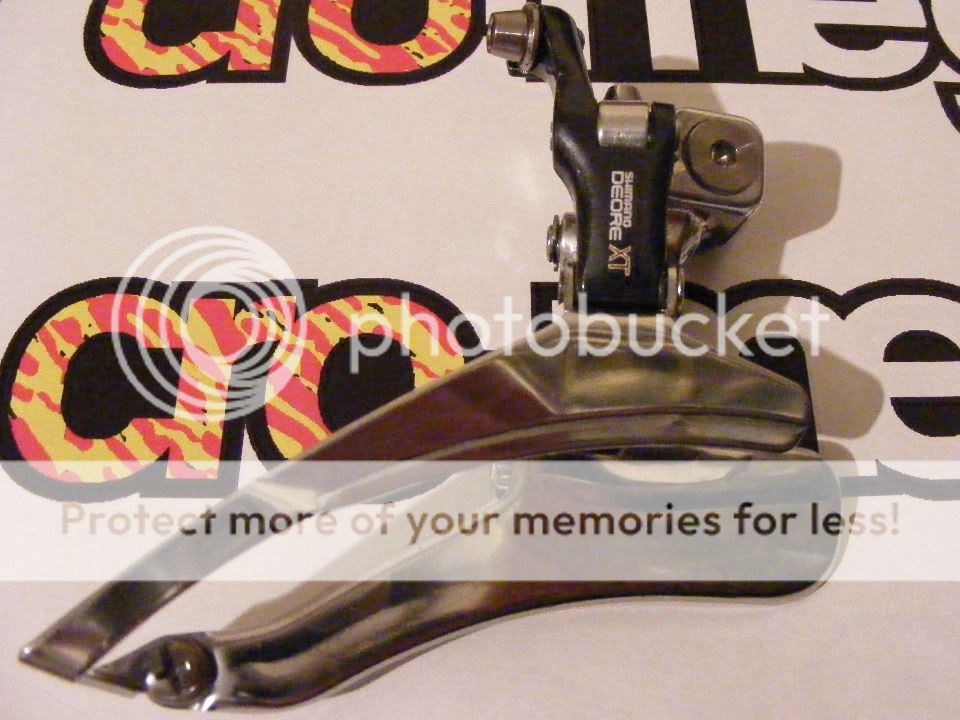
The front derailleur of an elevated alpinestars is without doubt the most fiddly and annoying part of the bike. The bolted on system has a couple of draw backs. Firstly, they constantly come loose and moved and secondly because having the elevated stay above the derailleur means adjustment of the H and L screws is difficult. So I’ve tried to eliminate these problems in this build.
To cure the loosening and moving problem I’ve utilised the original threaded retaining piece that came with the frame. The retaining piece has been drilled and tapped to M6, this is so I can run the a larger M6 bolt, this can then handle a greater torque. Thus, a M6 x 30mm titanium bolt replaces the original easy to strip steel bolt, not only should this prove stronger but also be totally corrosion resistant. I have also milled gripping grooves into the threaded retaining piece, thus it can bite into the frame and my new powder coat and hopefully keep the derailleur secure. These will bite into my nice new paintwork and frame, hopefully producing secure fitment.
The front derailleur I’m using is a Shimano Deore XT M735 endless band type. Apart from a good clean and service of the derailleur I’ve milled gripping grooves into the back of it, these like those on the retaining piece will bite into the powder coat and frame and hopefully preventing any slipping and moving of the mech. I’ve also removed the original adjustment screws and replaced with M4 x 15mm allen head titanium bolts. These allow me to adjust the derailleur easily using an allen key, thus the fiddly task of poking a small screw driver through the stays is a thing of the past.
The derailleur will further be secured using a dab of Loctite 638 retaining compound. This stuff is usually used for securing ill-fitting bearings in pump housings and such. I’m hoping my new gripping grooves and extra torque will secure the derailleur adequately, but to make sure I’ll put a dab on both the back of the derailleur and the retaining piece. Belts and braces.
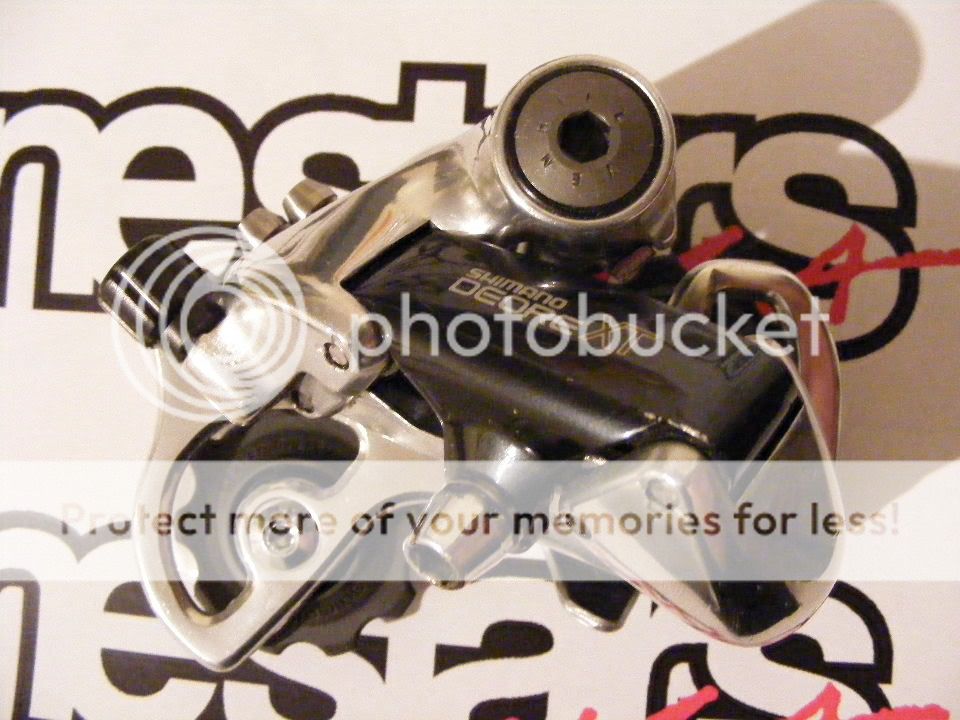
Rear Derailleur:
The M735 Shimano Deore XT rear derailleur is the classic XT rear imho. I managed to gather this short caged version from the forum and after a through degrease, service and clean it’s a turned into a beauty. Again titanium bolts in the form of a Venhill pivot bolt and span adjustment bolts are utilised.
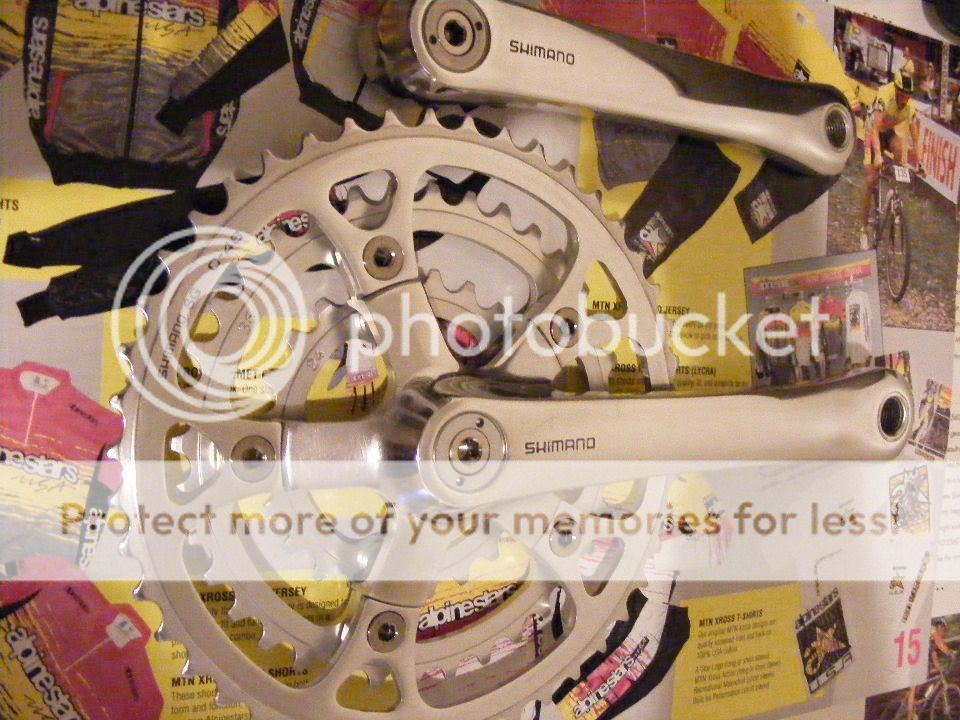
Crank Set:
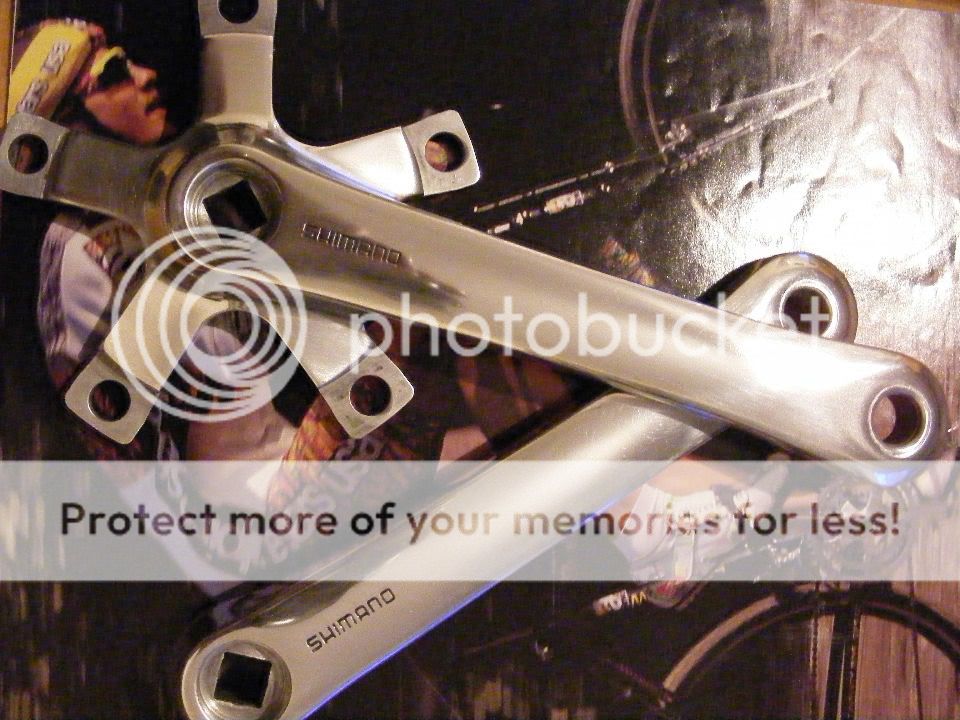
Shimano used the Deore XT M730 cranks for several years and I’ve heard few complaints about them. Yes I could go all bling on my ultimate cro-mega, but I don’t really see the point. The M730 oozes old school looks and functions perfectly. Why splash out hundreds of pounds on bling cranks that function half as well and have a tendency to crack!
Mine came with the frame but looked a little worse for wear, so I’ve polished them to a high shine. Firstly I painted the embossed ‘Shimano’ logo with gloss black paint and then rubbed the cranks to a high shine using 400 through to 2500 grade wet and dry paper, a final Autosol polish to finish.
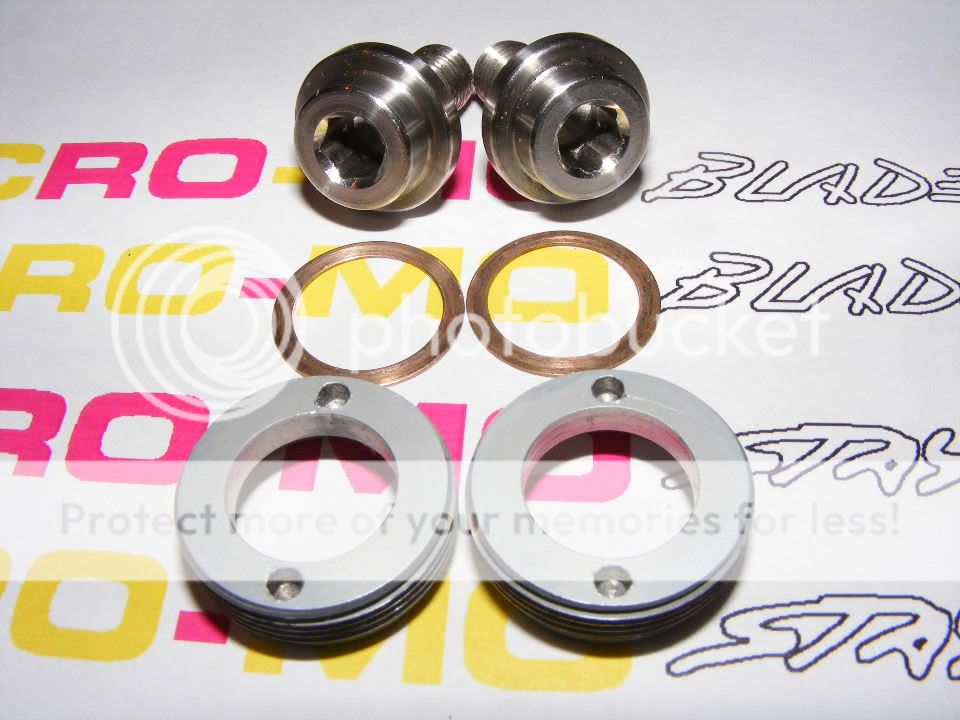
Crank Bolts:
The M730 crank set would have originally came with steel crank bolts with shiny chrome caps. The chrome caps looked great when new, but after use often rubbed and looked a cheap plastic mess. With this bike being a rider and with me being somewhat of a fiddler, I’m therefore going to fit self extracting crank bolts. I’m fairly sure these were around in 1991/92, so don’t think i'm messing up the authenticity of my ultimate alpinestars too much by using these. As I’m also looking for simple retro elegance with this bike I’m plumping for plain silver Middleburn self extracting bolts. I know and trust these bolts as this is the third bike I’ve used them on and I’ve covered many miles with them. After a quick wire brush of the threads and a clean they look great.
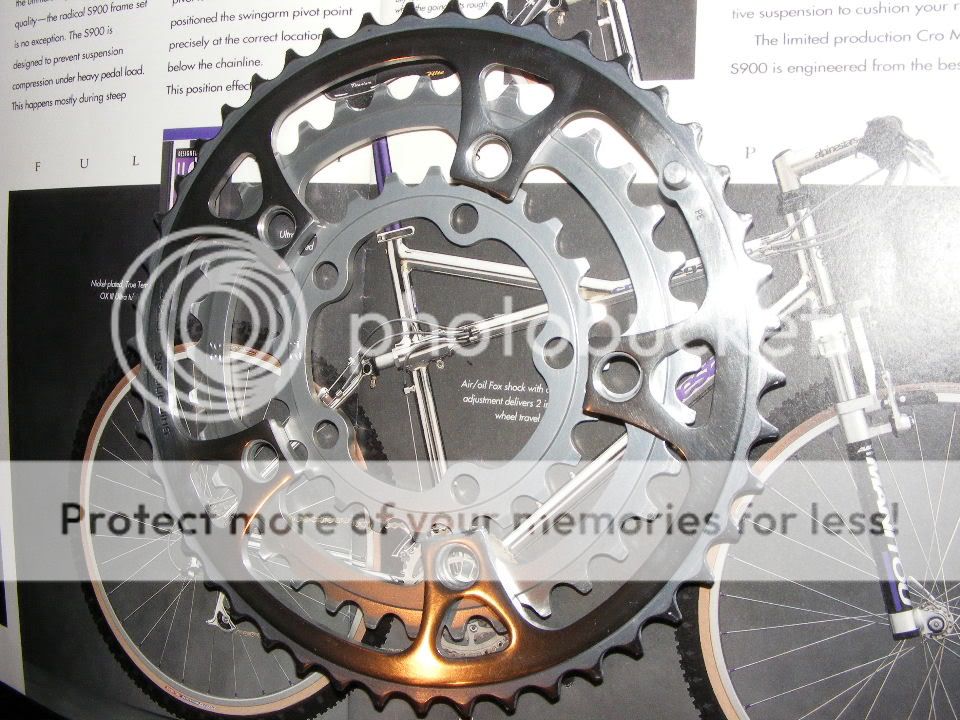
Chain Rings:
The inner and middle chain rings again came with the frame and after a thorough degrease look to have many hours of riding remaining in them. They are both the original Shimano SG ones that would have come as standard and in 24, 36 tooth. The outer ring that came with them was an aftermarket Tioga, I’ve replaced this with an original Shimano SG C-46 that I bought off the forum. All the rings have had a clean with scotch brite and the outer ring has had it’s embossed bits painted in black.
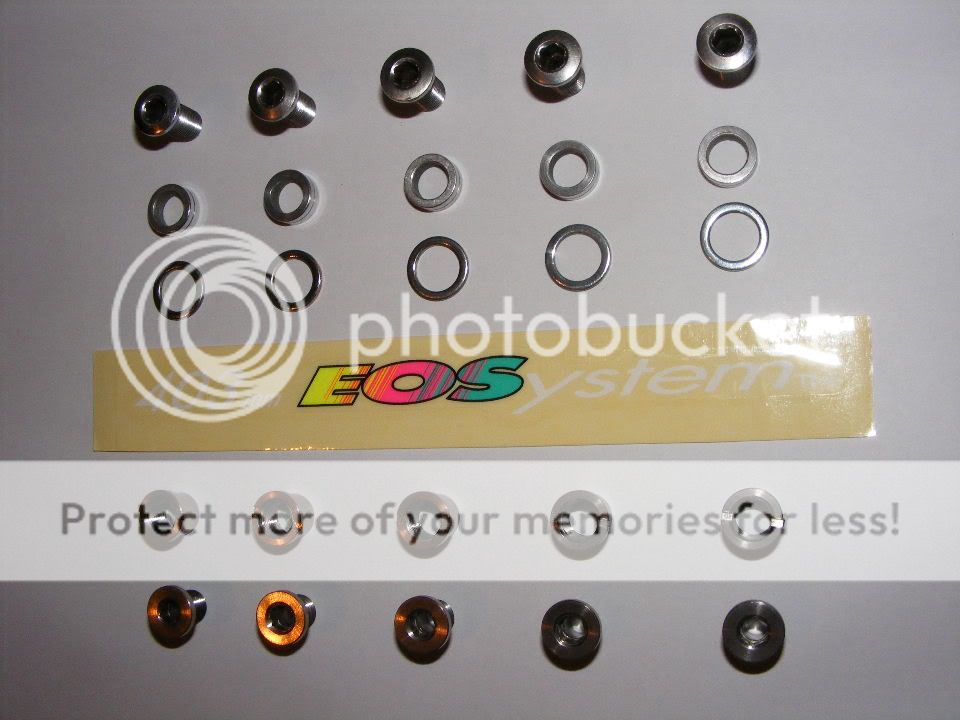
Chain Ring Bolts:
I always feel the temptation with chain ring bolts to brighten up a bike with trick anodised aluminium outer bolts from Middleburn or Brand X. But I’m going to be a bit more conservative and trick my chainset up with natural titanium ones. These are the ones from ebay that cost £2.50 per bolt, so really they are excellent value for money in comparison to Middleburns and give a discreet trickness to the build. With being titanium they should also prove stronger than aluminium ones and weights should be comparable for those who watch the scales. The inner bolts I’m using are the original bolts that were supplied with the chainset. They are in good condition and I’ve just given them a clean. The spacers have received a polish.
Chainset Complete:
Fully built the chainset looks fantastic, can’t wait to get it fitted to the bike.
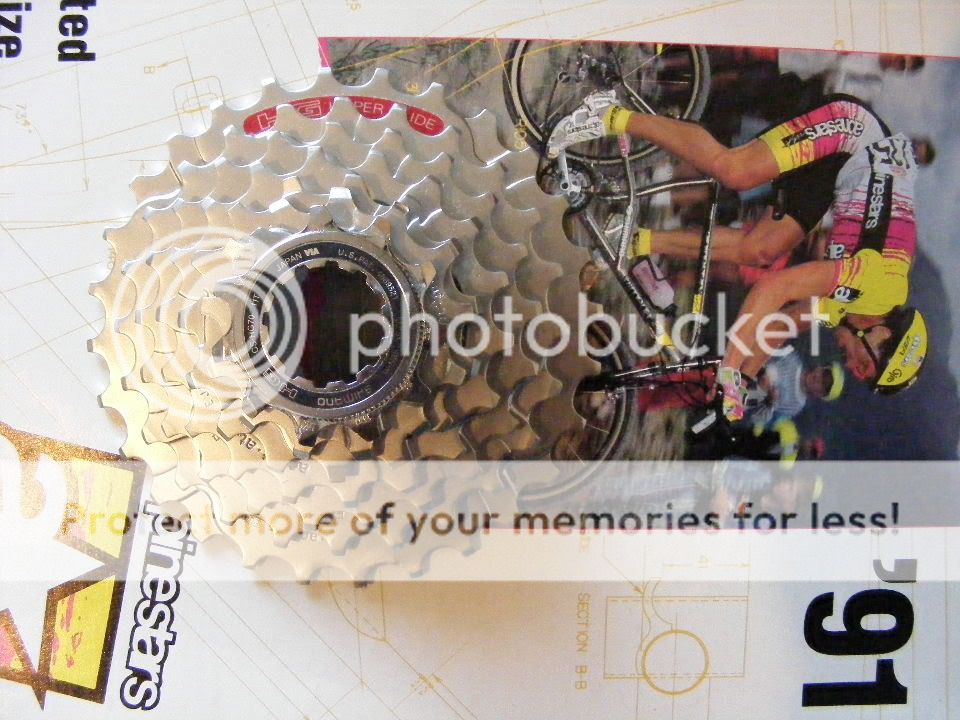
Cassette:
The correct 7 speed cassette for the 1992 M735 groupset is the HG -90, but these are now getting a tad rare and expensive, especially for NOS. I’m pursuing NOS on this component as this bike is a rider and thus I want the shifting to be spot on and have plenty of life and reliability. So I’ve taken the cheaper option and found a NOS HG-70 11-28 cassette, these were the DX equivalent in 1992 and still offers a quality shift. I recall back in 1992 most 7 speed cassettes were 12-28 and not 11-28 so I’m guessing that this 11-28 cassette is an evolution.
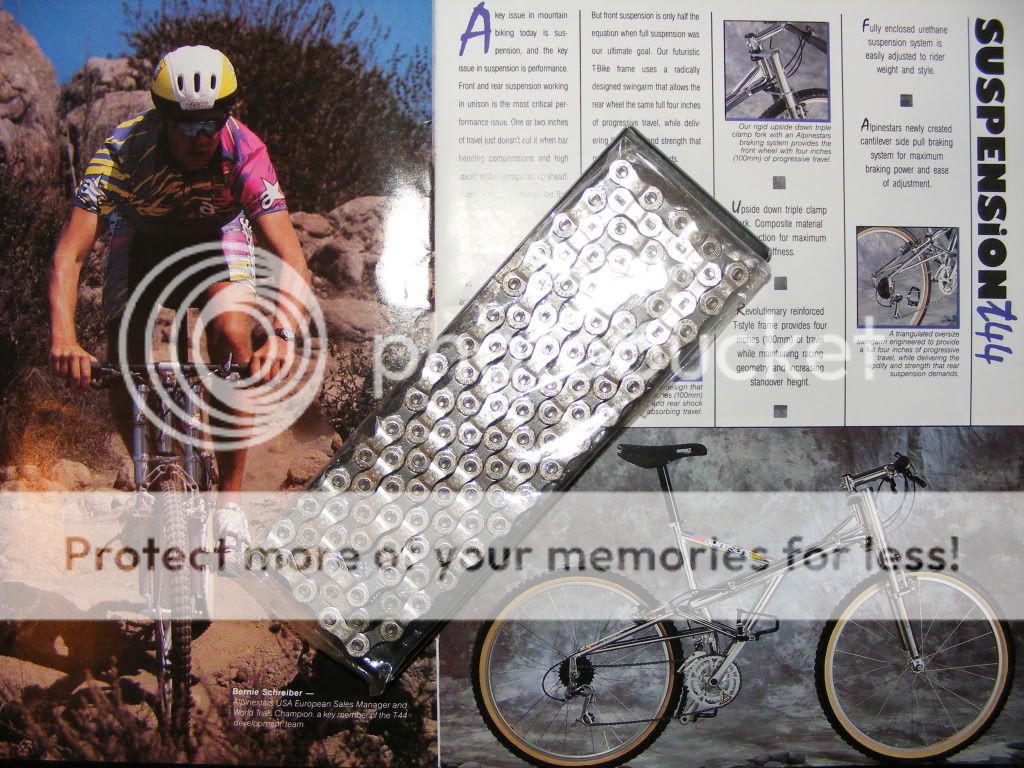
Chain:
I have chosen a Shimano HG-91 chain for this build despite being severely tempted to go with one of Srams fantastic modern chains with power link. The HG-91 is often thought to be an 8 speed chain, but it actually pre dates 8 speed as it was first introduced into the XT line up in 1991, but it is the narrow design so is really a 7/8 speed chain. I’m running one of these on the Team Raleigh Dyna-Tech and it has been faultless so far running 8 speed XTR, it should perform just as well with this 7 speed XT set up.
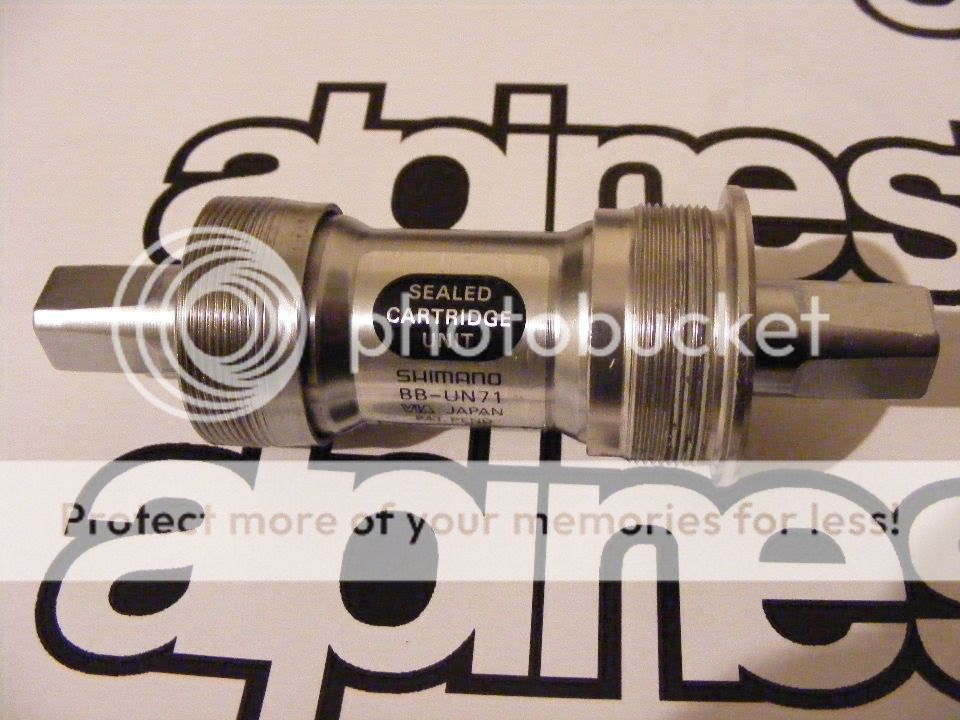
Bottom Bracket:
The Shimano UN-71 bottom bracket was first introduced into the XT line up in 1993. Mine is a NOS in 68 x 122.5mm. Feels smooth and is the perfect size for the M730 cranks and the alpinestars English threaded bottom bracket shell.
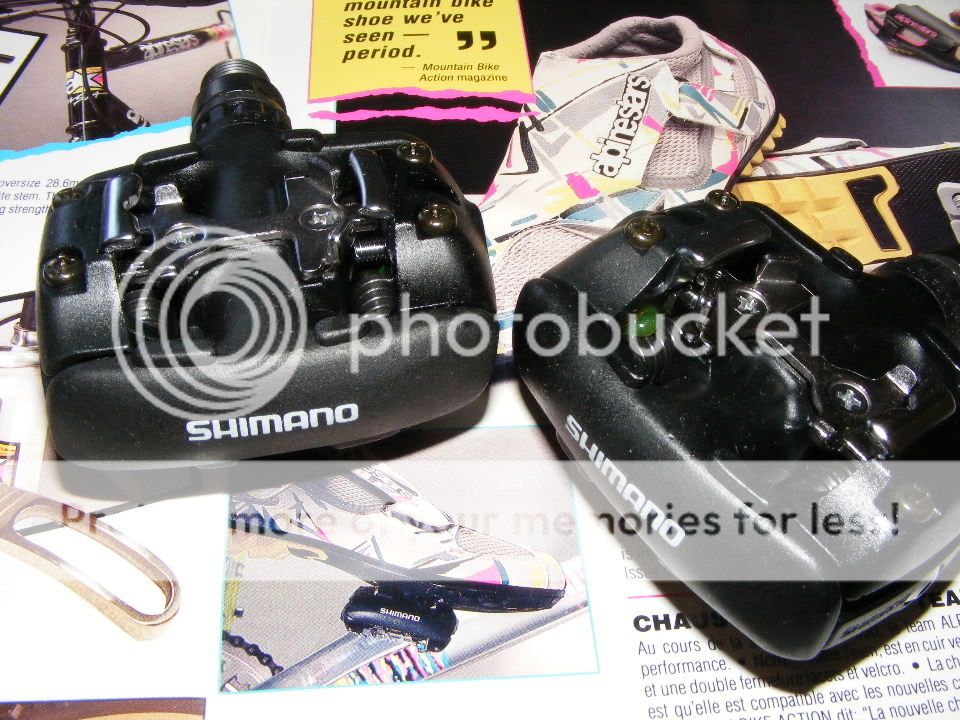
Pedals:
I use the original Shimano SPD pedal on all my retro bikes. The M737 is a bit of a heavyweight I must admit, but I like the fact that there is a large enough platform on the pedal that if you are not clipped in you can still use the pedal, which I find a problem with modern Shimano SPDs. I usually refurbish these pedal and even get Gil to do some reverse Shimano decals so I can paint the logo on, but this time I’ve treated myself to some NOS.