Touching up and protecting decals

frkl

Retro Guru
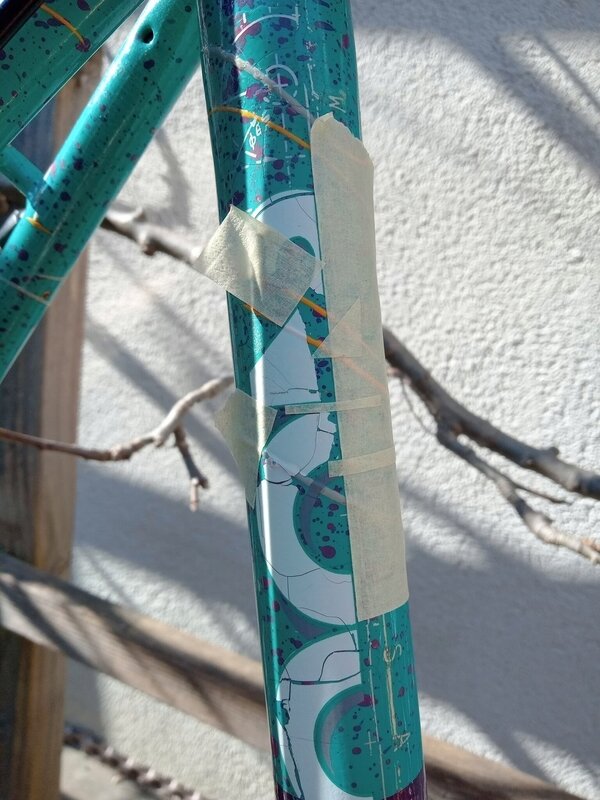
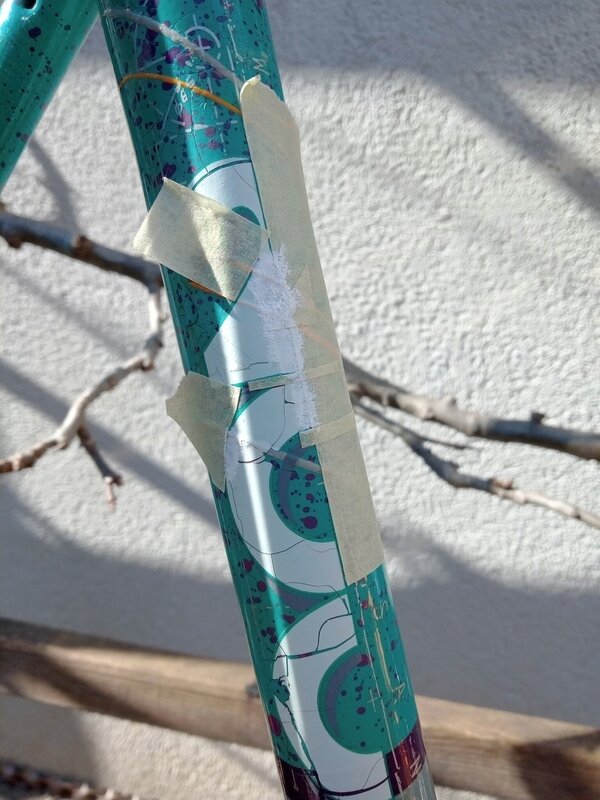
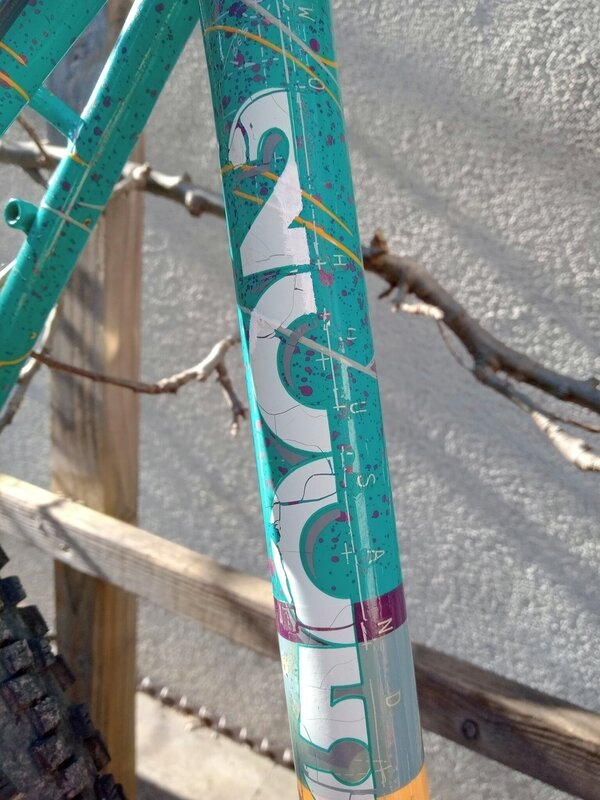
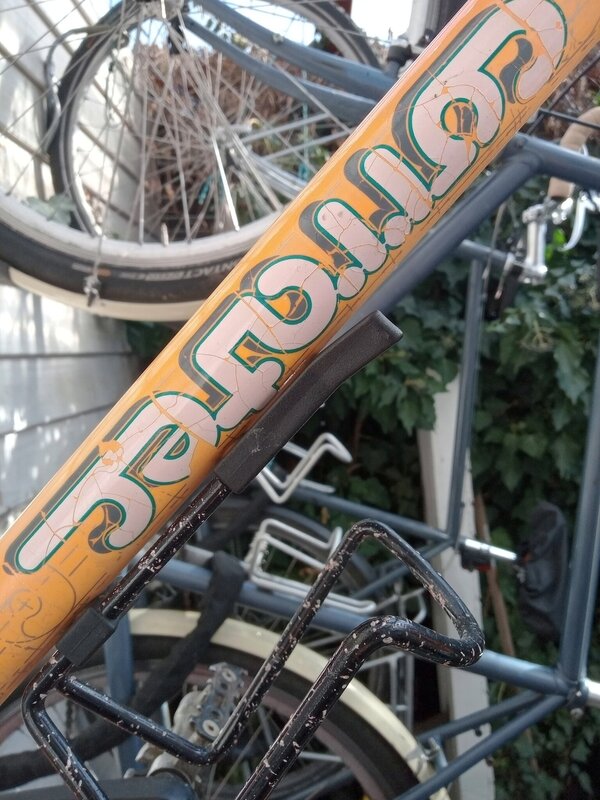
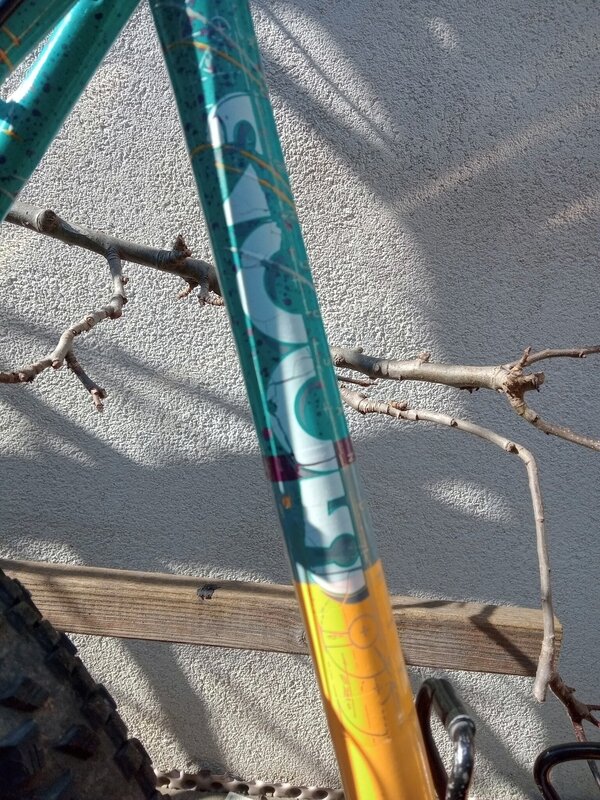
I've got some decals on a frame that are unfortunately cracking. Where they are attached, they are firmly in place, but I would like to touch them up and then somehow protect them from the elements or from me when I wash the frame. Also, because the decals cover quite a bit of each tube, they are getting in the way of polishing up the paint.
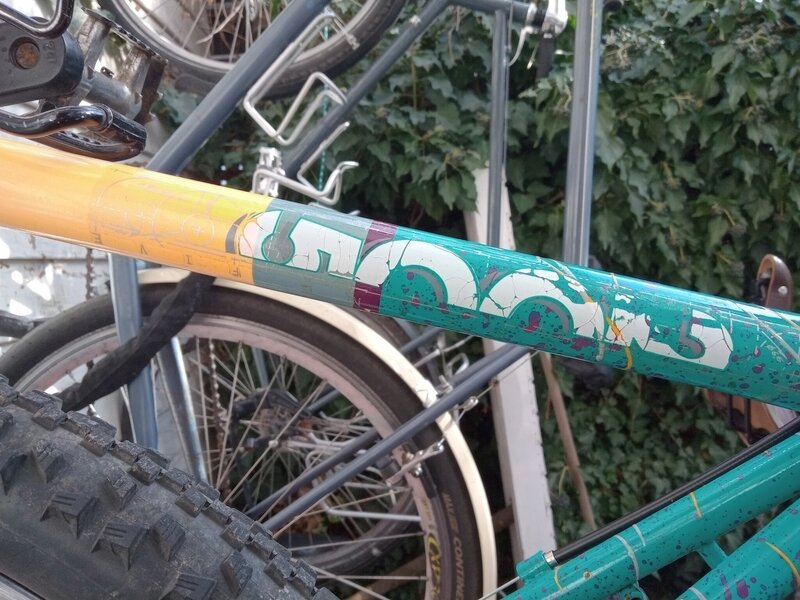
IMG_20220301_134256_249.jpg

IMG_20220301_134321_343.jpg

They need not be perfect, I use the bike regularly, so I expect wear. I also don't think replacing them is possible. Even if a set exists, it would likely be beyond my budget for this bike right now.

My plan is to use enamel paint to touch up the white primarily, maybe some of the green outlining. I would then brush a clear coat onto the decals. Once they are protected like this, i would feel more comfortable going at the paint with T Cut or some polishing compound. Hopefully I can achieve a matching gloss level.

Does this sound reasonable or is there a better way that i should try? Thanks in advance!
 
Last edited:
Super interested to see how this comes off, I would highly recommend using some sort of pin striping tape to mirror the curves of the decals to help guide you!
 
I think the patina looks really good, and suits the paint job

Trouble with a touch up is it's sooo hard to get right, and the paint can fade/age at a different speed than the decal. I'd be tempted to get it carefully clean and clearcoat it as is to preserve what is there already.

Alternatively a car detailing company might be able to apply some paint protection film, even using offcuts that would otherwise be wasted - but that may not be friendly on the wallet.
That's a very interesting perspective. The truth is that the orange paint is faded beyond much hope of restoring the color. It has a rattiness to it that is part of the character of the thing. the cracked decals fit it well.

On the other hand, the blue-green parts have held up much better. I would love to be able to get the original contrast back, but that may not be possible. Since so much of the paint is under decals anyway, it will be impossible to really work on.

I am also quite sure that mismatched touch up paint would bother me more than the current state of things. From a few arms length it is hard to see the cracks actually.

Maybe preserving the existing condition is the way to go. I think i should try working on the paint somewhere inconspicuous on the frame to see what can be realistically achieved there first.
 
Can recommend a Loew Cornell fine paint pen, think there are cheaper copies available. My detail work is terrible but these let you apply tiny amounts of paint instead of the mess I’d make with even the smallest brush!

https://www.amazon.co.uk/Loew-Cornell-Painting-Other-Multicoloured-22-06/dp/B004YZXV8U

First saw one being used for very fine stone chips on the AmmoNYC channel
This is very cool, I never knew something like this existed. This would definitely be the way to go to get the outlines
 
I also like it as it stands.. it's what the Japanese would call wabi-sabi, the view of finding beauty in every aspect of imperfection :cool:
 
Hello All,
just so you don't think I forgot your good advice, I have been pondering the patina for a week now and think I have a plan.

I am going to leave the decals mostly as they are and embrace the patina. From a distance, the cracks are not so visible. Up close, I agree that they in and of themselves look interesting.

I will touch up in a few places where bigger chunks are missing, like on the down tube. Instead of using enamel, I am going to use acrylic for both the touch up and a clear coat. It will be way easier to clean off if something goes wrong. I don't want to get acetone anywhere near the frame.

In the mean time, I also just got a 1993 frame that has the same decal design. But in 1993, they used vinyl stickers, not decals, and the stickers on the other frame are almost completely intact. So much so that I think I might be able to take pictures of them and vectorize the image--ie, I think I might be able to produce my own set of stickers if I want to at some point.
 
Ok, here is the outcome of a bit of home office lunch break bike wrenching:

IMG_20220307_140956_035.jpg

IMG_20220307_141235_662.jpg

IMG_20220307_141729_615.jpg

IMG_20220307_144926_746.jpg

The acrylic is matte, so the finish looks different, but the clear coat should take care of that. One thing i realized is that the paint needs to be thinner, to be more even. It will also be more transparent, matching the decals better, which are somewhat translucent. I will try to remove a bit with rubbing alcohol on a swab to correct this. i am glad I didn't use enamel.

The other thing--the decals are so fragile that the masking tape lift the T from THOUSAND! I think I need to get a clear coat on there as soon as possible.
 
A few days ago, our sky was deep red from Saharan sand, and everything got coated in a fine layer of red grit... But today I wiped everything down. Before the sand storm, i had experimened with the clear coat, to make sure it didn't cause peeling, and all seemed ok.

Today i brushed over all the decals with a synthetic resin varnish. I will put up pictures, but as of now can just say that i really can't tell the difference between before and after. And in this case, that is a success. The gloss level between the clear coat and the original paint is constant. The clear coated decals look completely normal.

So cool .
 
Back
Top