An FSX Inspired 1994 Specialized S-Works M2 (Finished pics page... 16!)

Oh, I hadn't seen all these helpful replies until just now...

Thanks all!

@FluffyChicken The front mech has already gone through some adjustments since the photos the shop posted. Having already had everything taken off by another shop to have a new BB fitted, and the stripped crank threads helicoiled, Etc. I'm pretty sure it's now much closer to the chainring teeth. But I'll double check that in the morning and make any necessary adjustments. A good spot, for sure. So thank you for noticing!

I have had persistent shifting issues after each shop has worked on the bike. While it's manageable/ridable right now, I do still want to do some work improving it. Originally there had been a struggle shifting to the granny ring, but after the new BB was fitted to improve the chainline this issue has been fixed. However, it now takes two clicks to shift between each of the front rings, so something still isn't right there. The rear doesn't shift as smoothly as I would like either, so it's definitely something I want to take closer look at to try and get dialed in as properly and perfectly as I can.

As for the brakes...

I'll take a few photos later, but I spent some time readjusting the rear yesterday, so that it more closely resembles the angles and heights shown in the left of the two diagrams in that old article. The "more power, softer feel" version.

@Joe*Pro I had indeed already spent some time looking at that very article, and the manual that's in the archives here, before installing the brakes. I even printed a copy of both and included them in a bag with spare parts for the bike shop when I first dropped it off!

I''ll spend a little more time on it this week. And endeavor to see if I can push the brake out even wider/lower. That said, I also think replacement springs may be in order? The front (set-up near identically) has no such problems. That set is the slightly longer version of the brake, although I'm not sure how much that would have to do with its improved feel and effectiveness?

Other options:

I have a third Tri-Align, which I purchased as they were a good price and I wanted to cover my basis in case I ran into any broken/missing parts. Anyway, I could try that set on the rear instead, or I could switch the front and rear around as I have them now. That's my current worse case scenario thinking: if one set of brakes just works better than the other, I'd rather have that set on the rear!

PS. I'll definitely reroute that rear cable too! Just need to cut down or purchase a new outer first.
 
Last edited:
NO! Best brake at the front. The front brake does all the heavy lifting, the rear is generally a drag brake or fun/skill tool.
Rear also needs the smaller arms for hel clearance, it one of the reasons it is further inboard. I think what I was looking at was the cable angle making it look more upright.
I don't know the specifics of them to properly advise, they do run the shoe boss clamp further in than others so can look more cramped up.

A lot of the shifting, brakes etc will bed in after some riding, I'd never go off initial brand new feel.

Do get use to adjusting them yourself, try different setups and go for a good ride.

Learn to adjust brake and shifting from. The bars to tune it in as you ride.

As for the front, they can be a pain. Cables, lube in the shifters, poorly mech, slight twist when clamped.
Check the mech spring is set to max to start with...

Have fun, learn to adjust the bike yourself over time. :)
 
The main points I am saying are
-Get some more pictures up.
-Learn to adjust and tweak yourself, see how they alter the bike for you.
-Set it up for you, not me.

Bike shops can be good for the basics and advice. most get people riding , but they are not normally be able to set the bike up to how you like it.

Same with suspension, try the middle, try the extremes, get a feel for it.

(all this can be an arse when you end up with 10 or so bikes ;-))
 
Last edited:
NO! Best brake at the front. The front brake does all the heavy lifting, the rear is generally a drag brake or fun/skill tool.
Rear also needs the smaller arms for hel clearance, it one of the reasons it is further inboard. I think what I was looking at was the cable angle making it look more upright.
I don't know the specifics of them to properly advise, they do run the shoe boss clamp further in than others so can look more cramped up.

A lot of the shifting, brakes etc will bed in after some riding, I'd never go off initial brand new feel.

Do get use to adjusting them yourself, try different setups and go for a good ride.

Learn to adjust brake and shifting from. The bars to tune it in as you ride.

As for the front, they can be a pain. Cables, lube in the shifters, poorly mech, slight twist when clamped.
Check the mech spring is set to max to start with...

Have fun, learn to adjust the bike yourself over time. :)

Yeah, but... skids! ; )

Really good advice again. Thanks Fluff!

Deffo going to be fiddling around for a while yet. That's half the fun anyway, right?

Will try to get in the habit of tuning as I ride, too.
 
Right then...

So I had one free afternoon all week, and I set it aside to fiddle with this rear brake of mine.

Oh what fun! What sweet, sweet relief!

After fiddling around a little more with straddle positions and cable lengths it was better but still not right. So time to really figure out what was going on... Maybe I should just take everything off and start over?

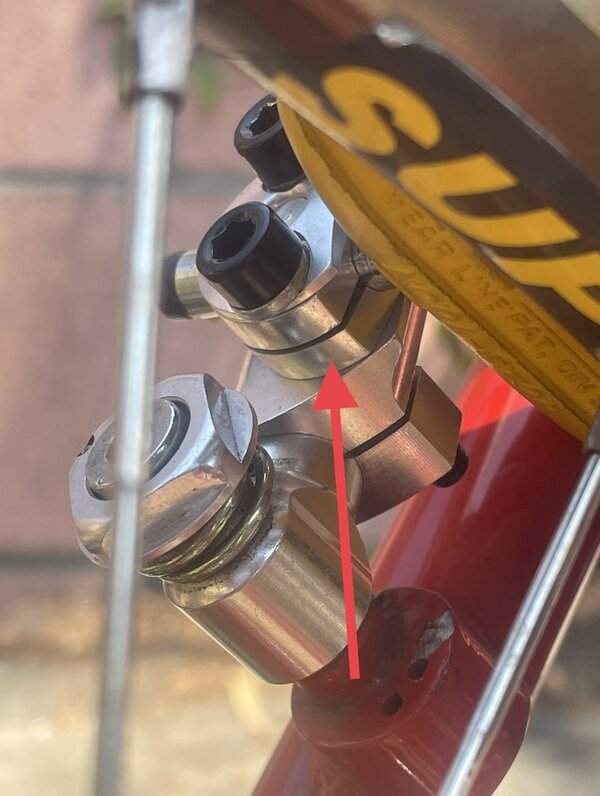
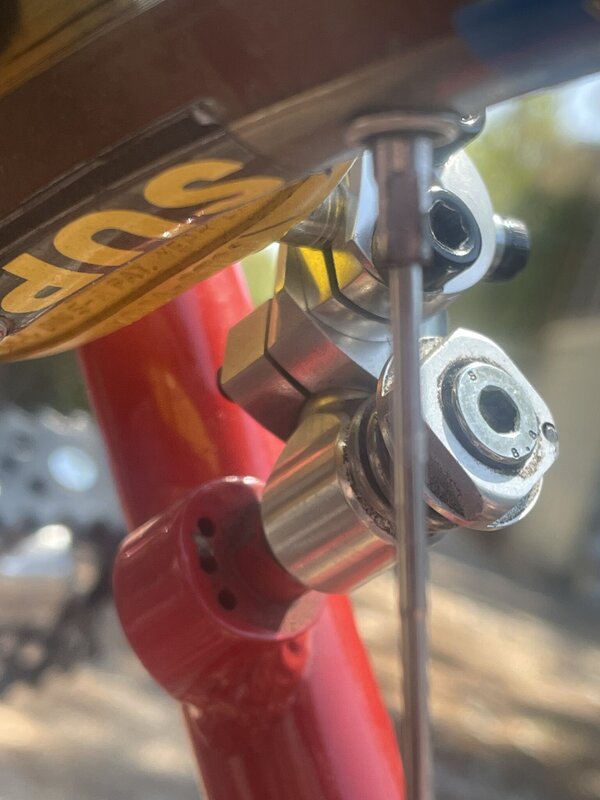
Well, there I was, sitting on the floor staring at the brake, loosening the bolt absentmindedly so that I could try realigning the brake pads yet again, contemplating just taking the whole thing off, when I noticed something; something that explained why in all my fiddling I could never quite get the brake arm and pad rotated and locked in the way I wanted to; the way I should be able to. Something I had failed to spot at any other time...

The little slit on the brake pad holder, the slit the bolt passes through in order to tighten/loosen; this little slit on the brake pad holder:

tempImageVOuZVd.jpg IMG_1154.jpg

Well that was pointing upwards!**

Which it shouldn't be. Which meant that the pad holders themselves had been installed not only upside down but as a result on the wrong arm. Which meant the pads themselves couldn't be angled correctly to the rim. Which meant the brake itself couldn't work properly. No matter how perfectly I might have figured out the angles between cable hanger, straddle cable and brake arm, the pads still weren't able to hit the rim in the right way, and the brake itself was fighting against physics and geometry, and probably gravity Etc.

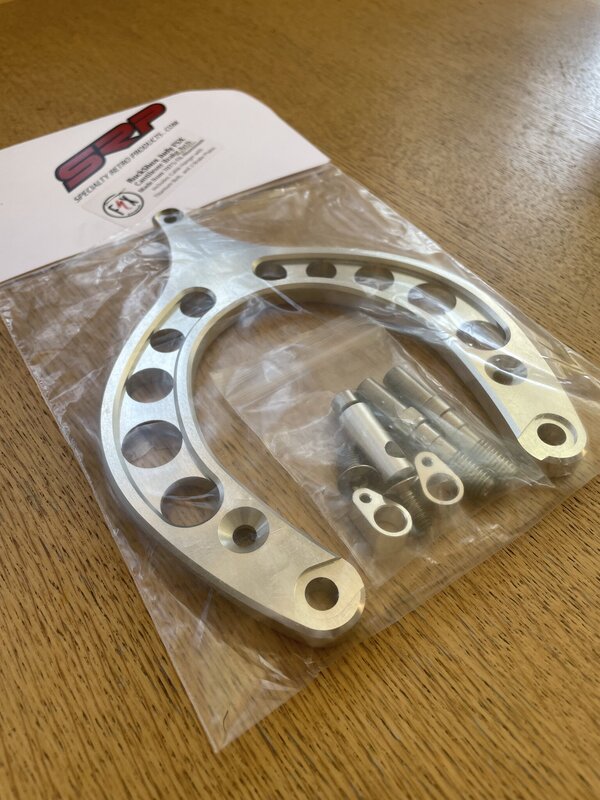
How I failed to notice this before beggars belief. In the earlier photo of the brakes before I installed them you can clearly see the pair with the arms on the wrong way!

Woods, trees, Etc.

That's what I'm claiming.

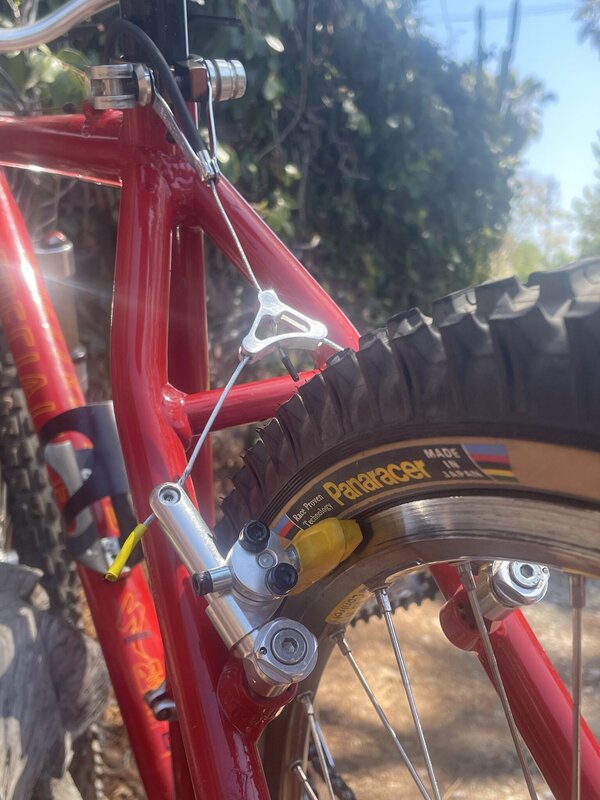
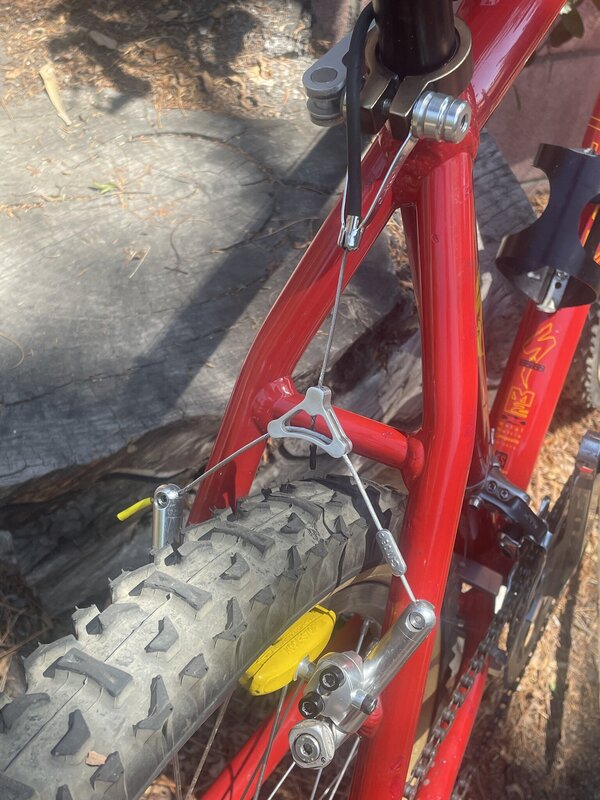
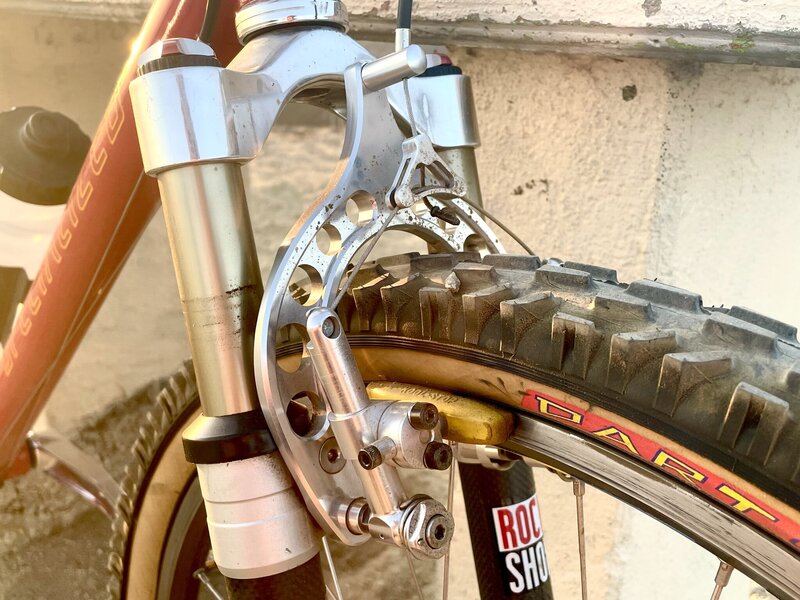
Anyway, this is how everything looks now, the right way up with the right angles at play:

tempImageDNK55w.jpg tempImageLy2TaP.jpg

A few things to note:

1. Please ignore the yellow electrical tape! The aforementioned bike shop failed to return the black crimps I purchased and left with them. And I'm still waiting on an online order to replace them to arrive. Which is good, because I quite like the look of that yellow tape, you know, so have ordered some yellow crimps now instead!

2. Fresh cable inners and straddle cables have been ordered too. All the messing around to get the positioning right means they could all do with a refresh I think.

3. I still haven't rerouted the cable below the seat clamp QR yet, but I currently don't need to because...

4. I'm very happy to report the brake now works like an absolute dream!

V's be damned and skids for days!

I do have more cable outer on the way as well, just in case I change my mind about that. But for now I'm very happy with the brake's performance.

And it's probably quite tragic just how much satisfaction and joy I took in finally diagnosing and then fixing this problem.

Thanks everyone for the help and advice and guidance along the way!

As always: you're all greatly appreciated.
 
Last edited:
Well this is very exciting...

tempImagepzvLMh.jpg tempImageiCcWwM.jpg

Now I just need to pray for a quiet morning/afternoon/evening one day this week!

As I've already said to @kokies privately, when I began this search I couldn't have imagined in my wildest dreams this would have been the solution presented to me.

I cannot wait to get this on now.

(The bike itself is going to need a good clean and polish before it's final photoshoot, what with all these weeks of riding it "unfinished"!)
 
So this bike has been finished for a while now, but hopefully no one minds that I've been too busy riding and enjoying it to get around to posting the final spec and accompanying photos!

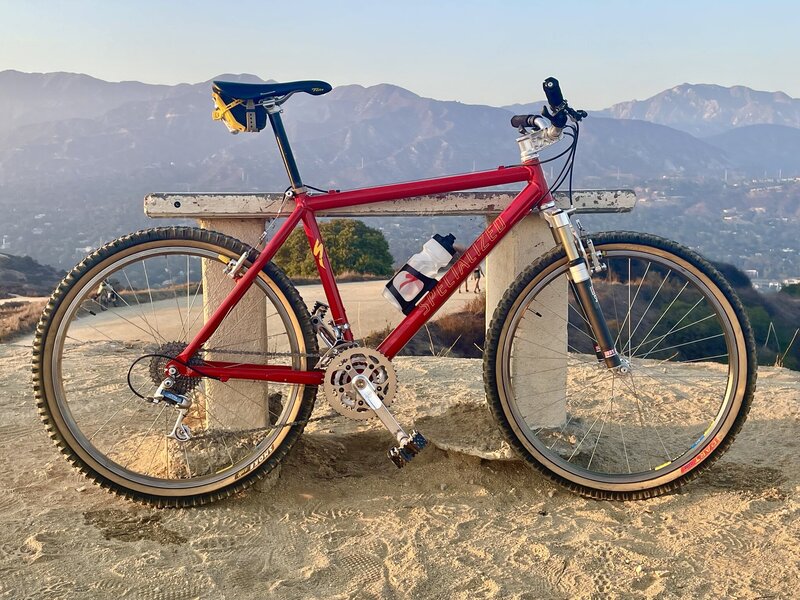
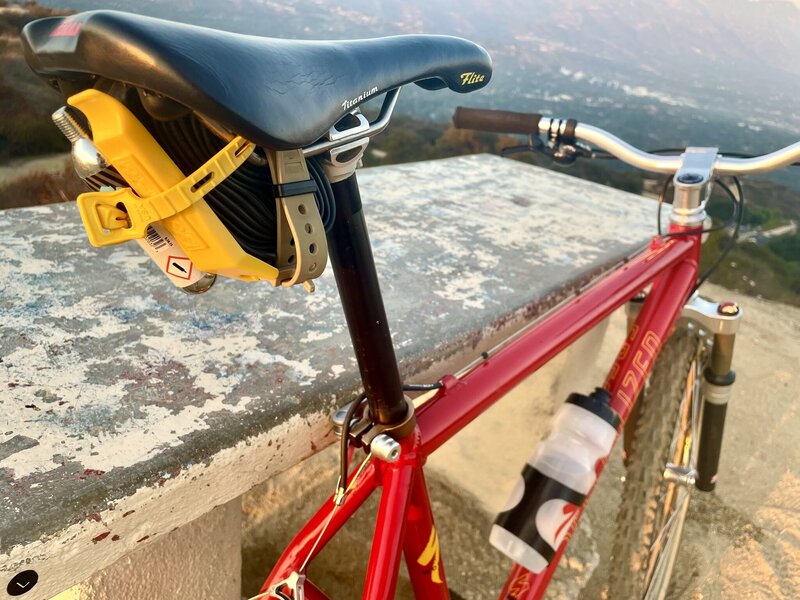
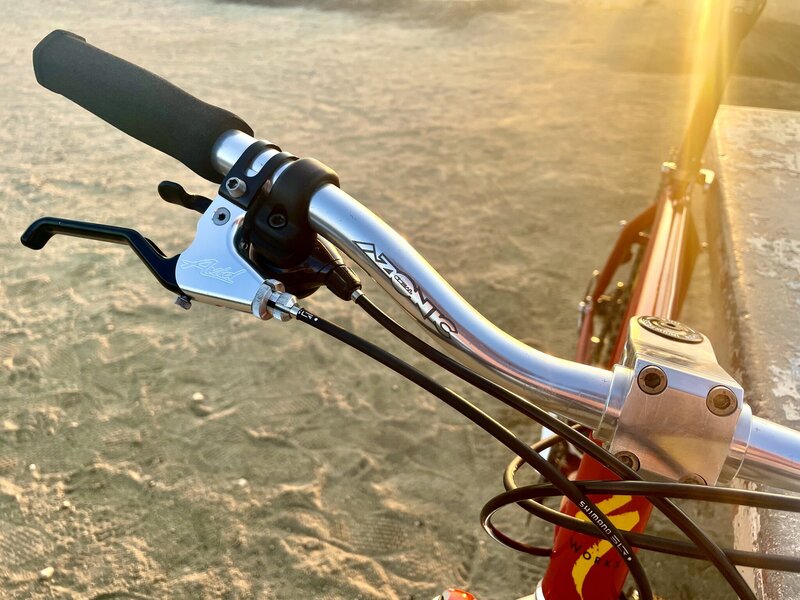
Well, last night I had a beautiful sunset-to-dusk ride, and managed to sneak a couple of pics.

I hope you won't be too offended that the bike is covered in dirt...

IMG_3523.jpeg

Or that there's already a couple of chunks missing out of the foam grips!

Just know that it's ridden "hard", with love, often.

Anyway, here's the "final" spec:

Frame: 1994 Specialized S-Works M2

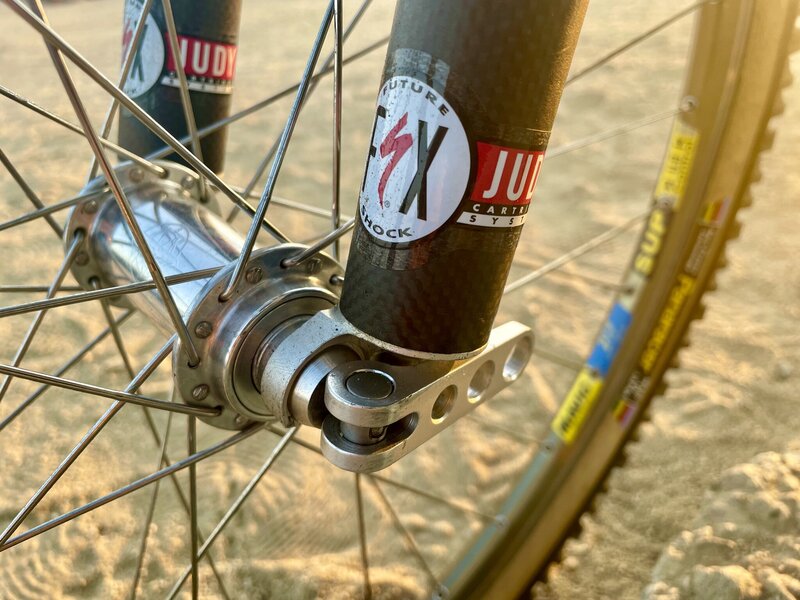
Fork: Rock Shox FSX Judy
Headset: White Industries EC34
Stem: Azonic (World Force) Shorty
Handlebar: Azonic Double Wall Riser
Grips: Ritchey WCS Foam True Grip

Brakes: Avid Tri-Align
Brake Pads: Koolstop Quik Klaw
Brake Cables: Shimano SLR
Cantilever cable hangers: Avid Tri-Dangle
Brake Levers: Avid Ultimate

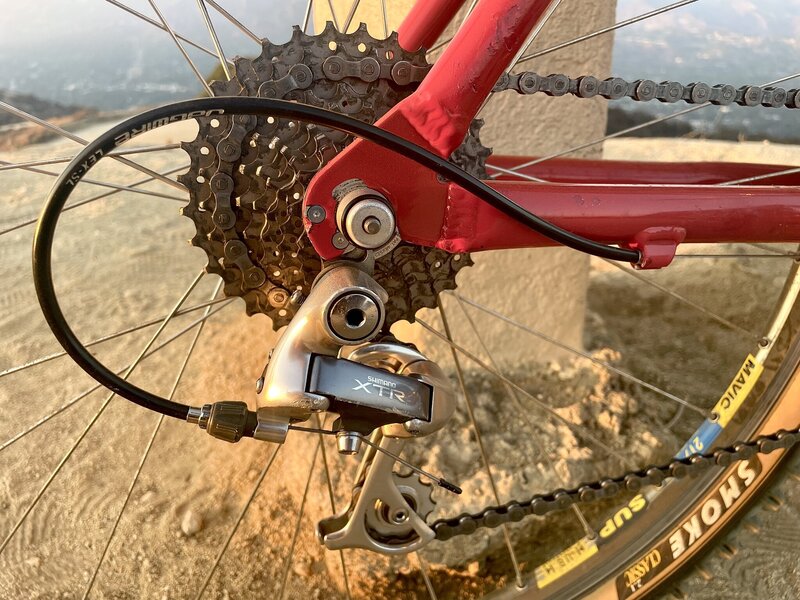
Shifters: Shimano XTR M900
Front Derailleur: Shimano XTR M900
Rear Derailleur: Shimano XTR M900
Derailleur Cables: Jagwire
Cassette: Shimano XTR M900
Chain: SRAM (whatever the LBS had in stock at the time!)
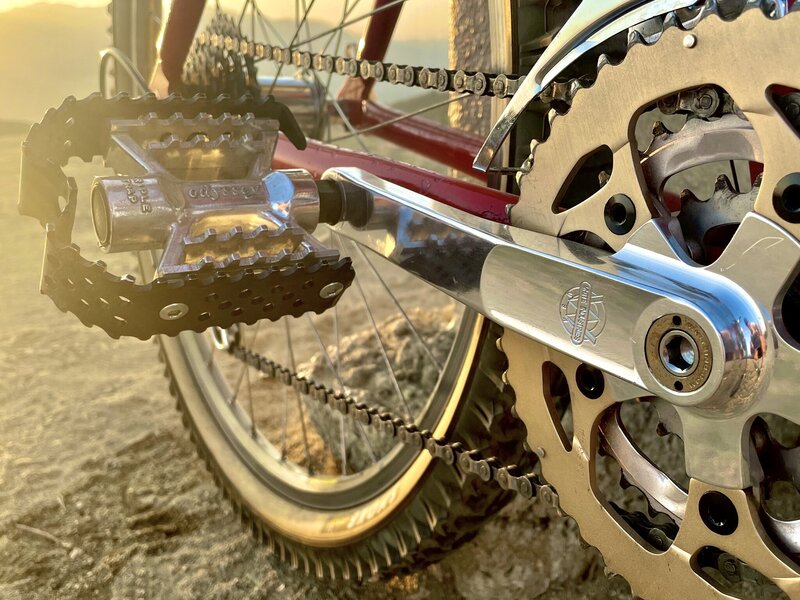
Cranks: White Industries C-Series
Crank Bolts: White Industries
Chainrings: Sugino
Chainring bolts: Generic
Bottom Bracket: Whatever the hell the bike shop stuffed in there without asking.
Pedals: Odyssey Triple Traps

Hub Skewers: Ringle 'Holey' QR
Rims: 1994 Mavic SUP 217
Hubs: White Industries
Nipples: Unknown
Spokes: Unknown
Tyres: Panracer Smoke and Dart (Repro)
Tubes: Continental

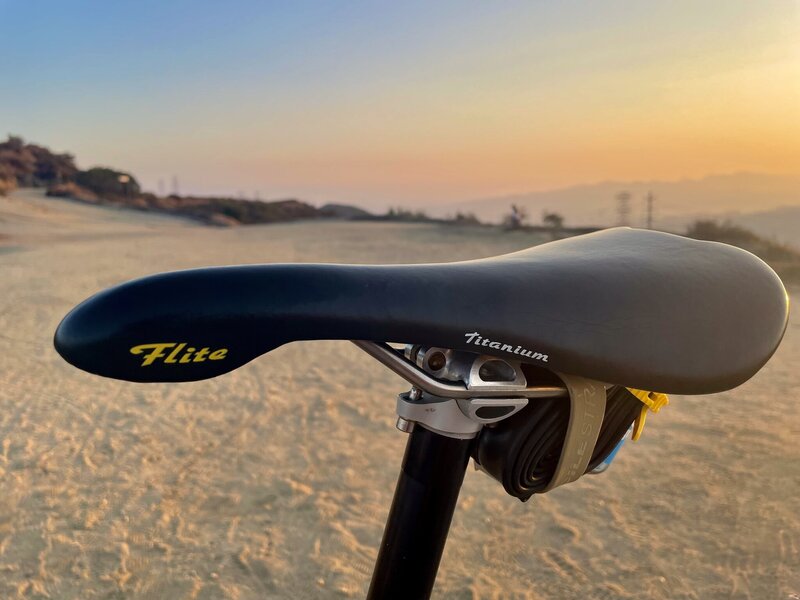
Saddle: Flite Ti
Seatpost: Syncros
Seatpost Binder: Ringle 'Holey' QR

Misc: Shogun shifter perches; Ringle H2O; Ringle Anti Chain Suck plate.

Weight: Lol
 
Last edited:
Glad you’re out enjoying it. Let’s have a dusty photo shoot next
 
Exactly like that :cool: Where are the pics taken?
 
Back
Top