I've recently done a lot of work bringing my 1997 Zaskar up to scratch after not having ridden it for maybe 10 years. My brother also had a 1996 GT Backwoods which has also not been used for the same amount of time and I decided I could have a bash at this too,
It had fitted a pair of RS Indy XC's which we'd fitted some sort of spring / damper unit but they were a lightweight set and now far too soft for my brother to ride. So we ended up finding a set of '97 Judy DH's on eBay which seemed pretty reasonable and these became my first job to strip, clean and rebuild.
I've taken photos along the way, not sure if they will be of use to anyone but either way I've enjoyed getting them back looking and working great again.
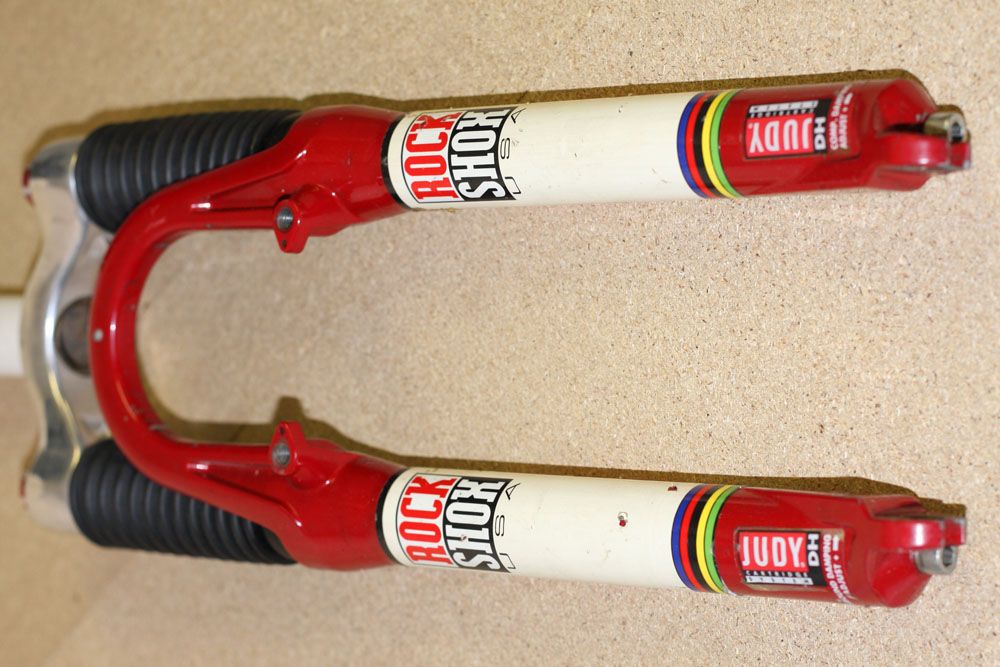
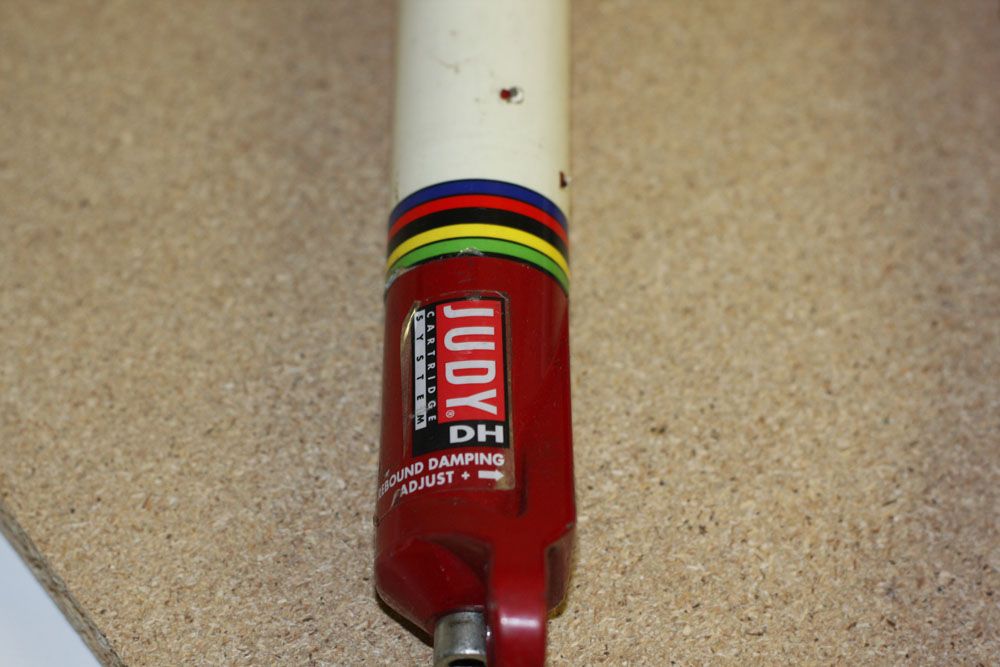
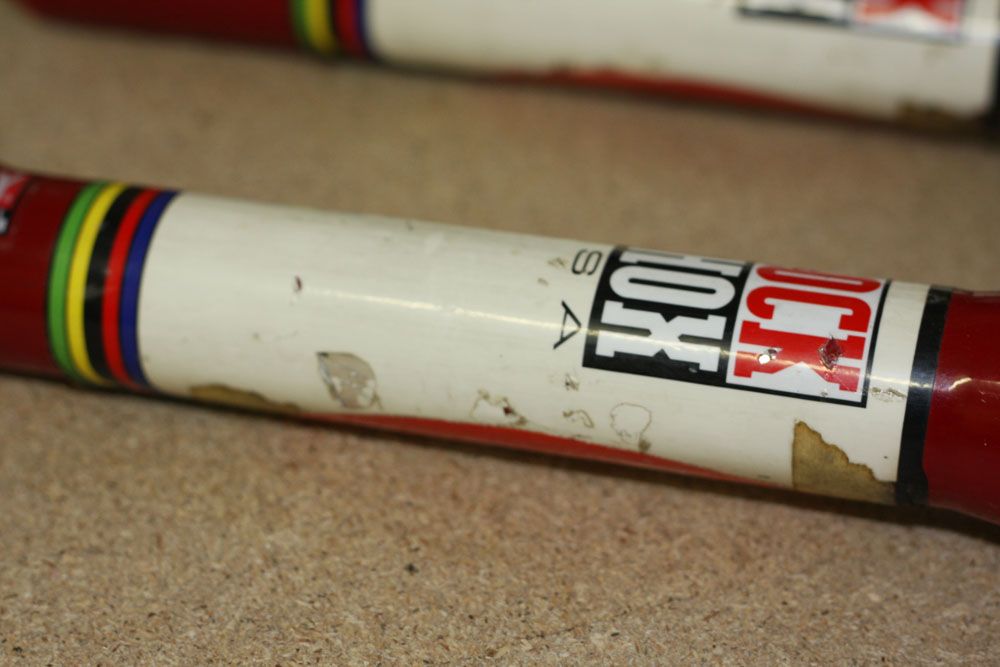
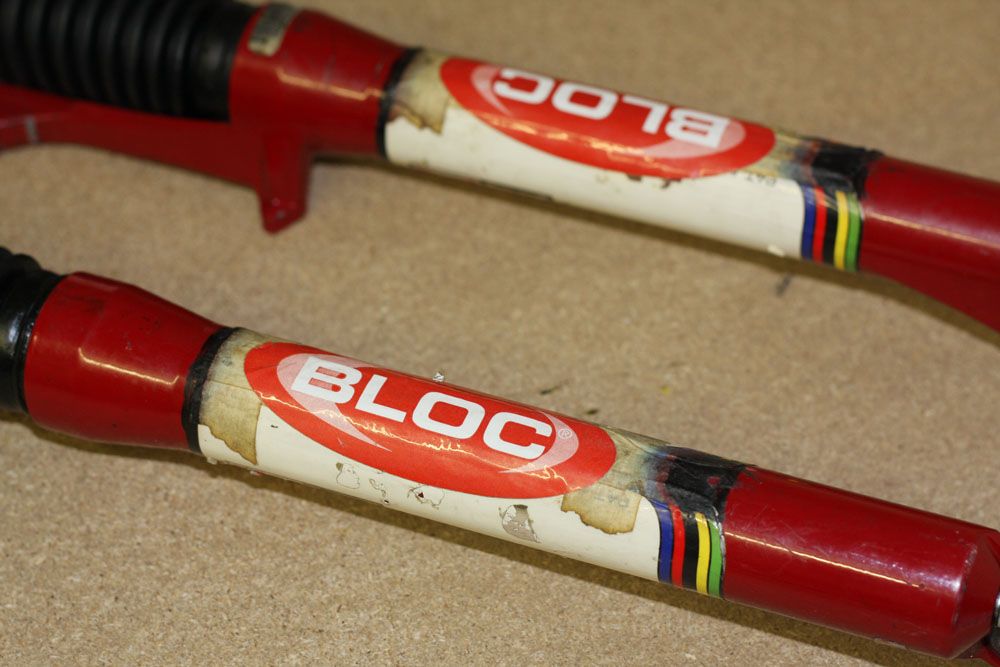
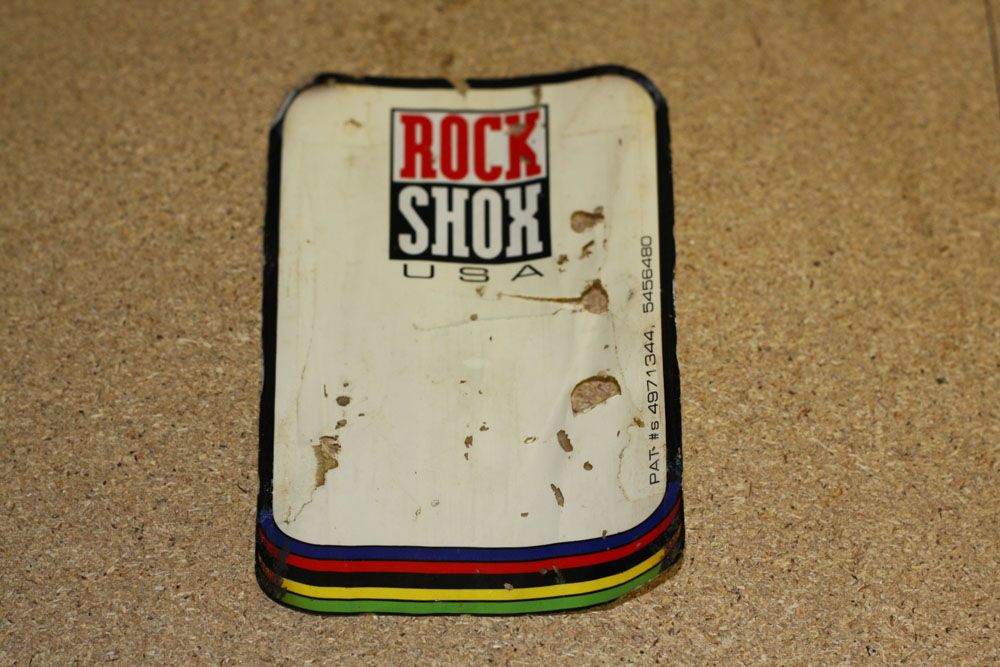
So, as they came after winning the auction. Dirty seals, and a lot of chunks out of the decals. Also some masking tape and other stickers on the rear which look like they were added to stop the original decals coming off.
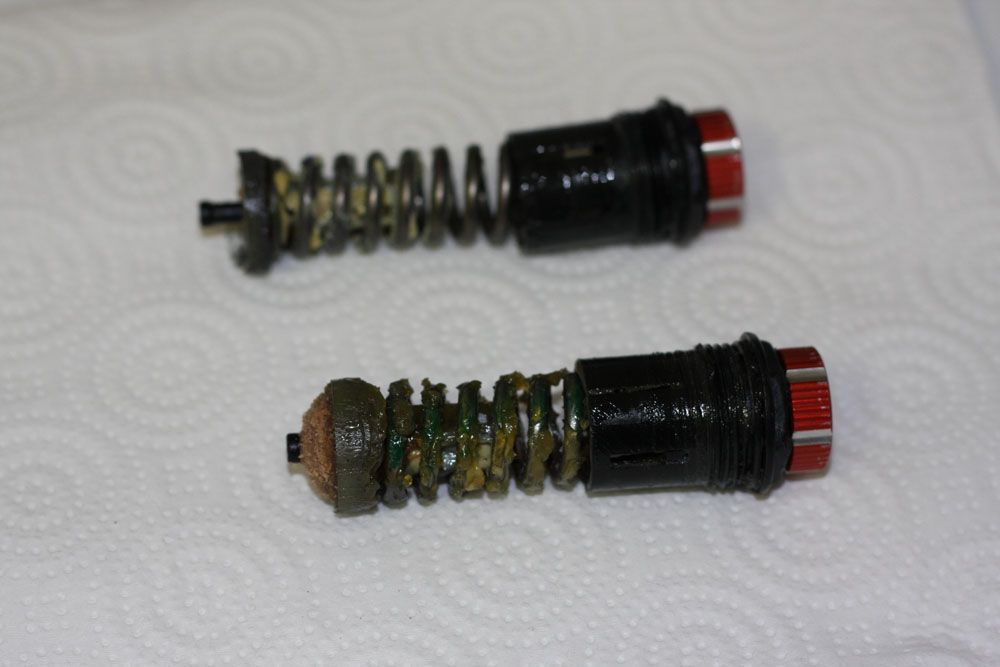
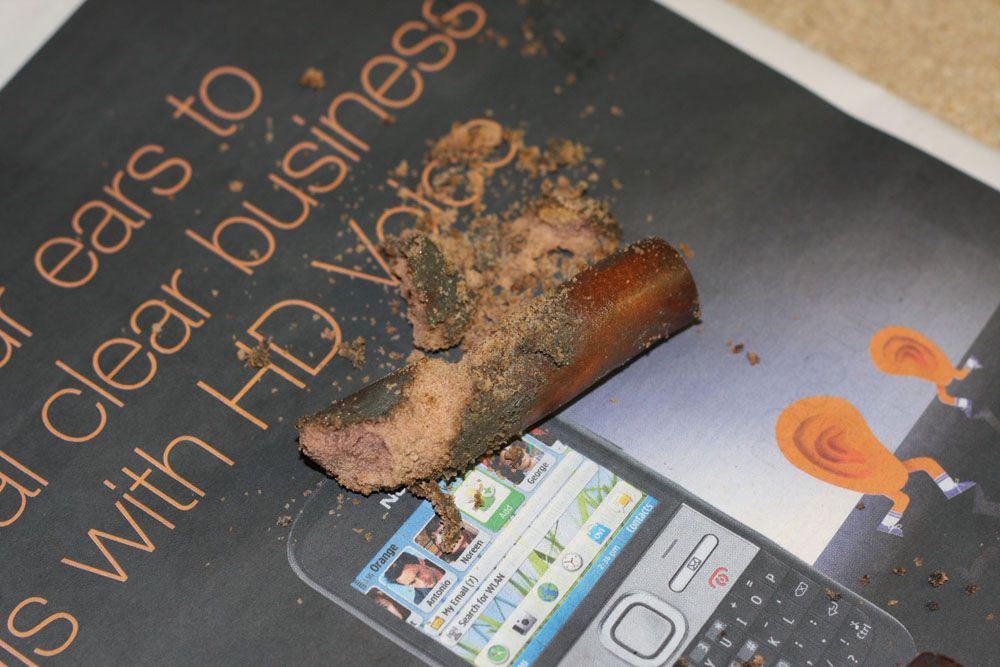
They seemed to only have about 10 - 20mm of travel at best. It seems this was solely from the top springs as the elastomers were totally shot.
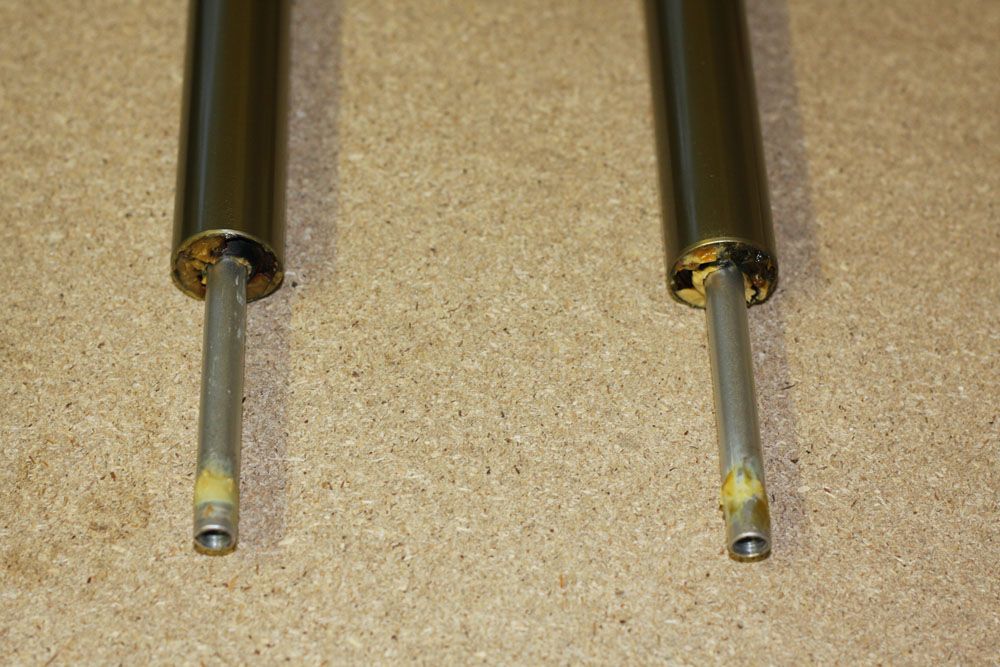
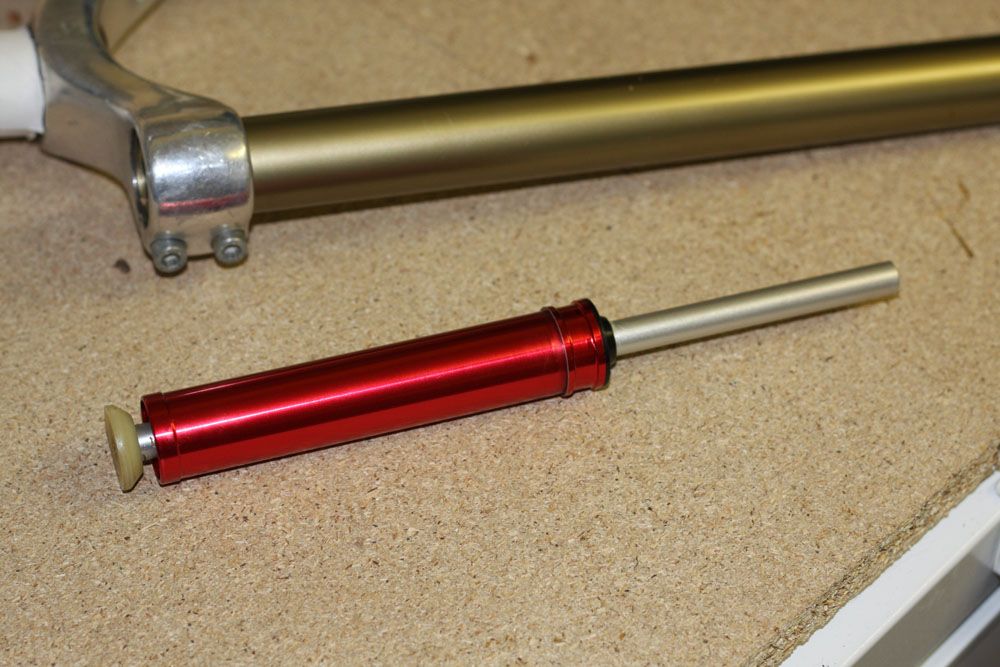
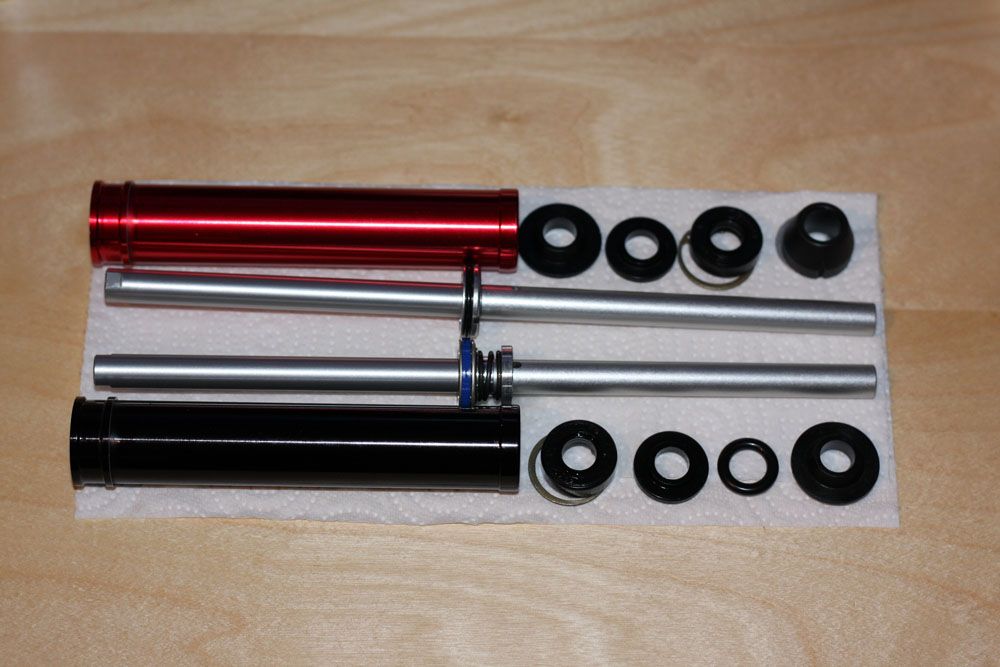
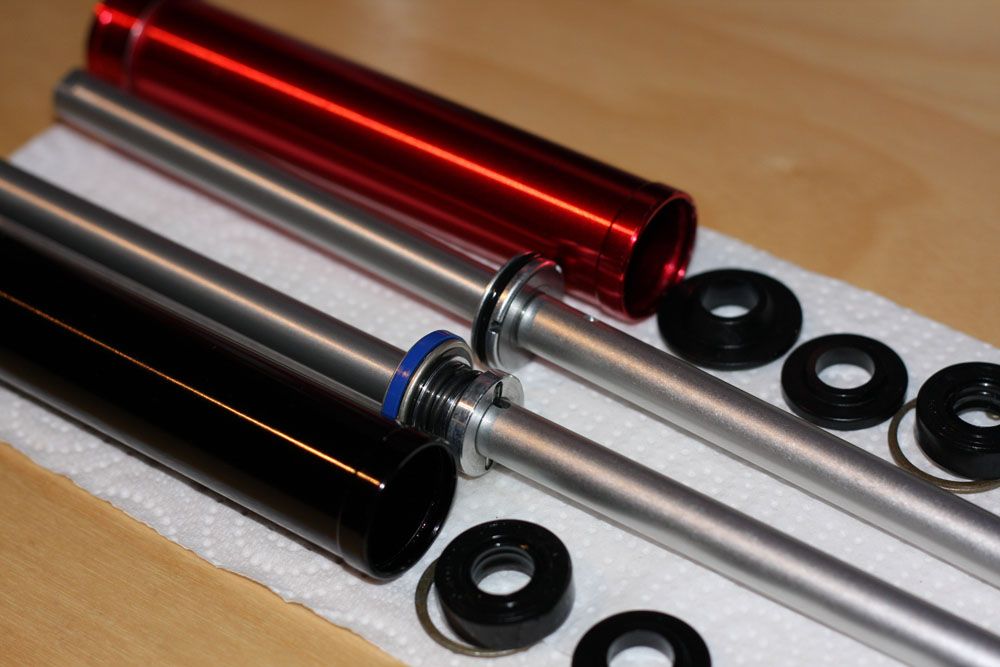
Other than this tho, the condition inside was actually very good. Very little wear on the stanchons / cartridge legs etc etc.
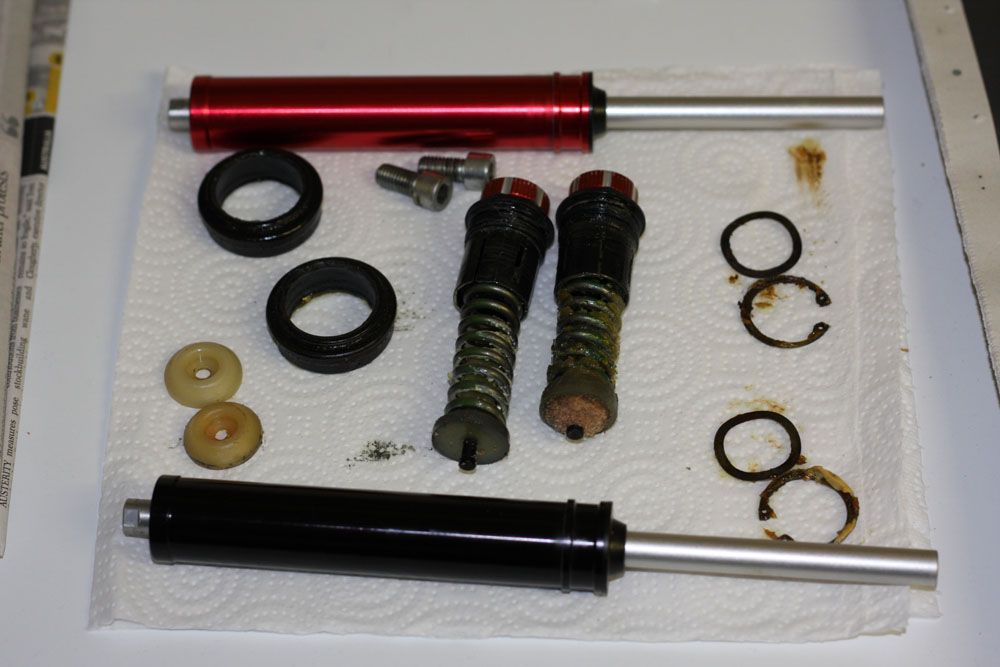
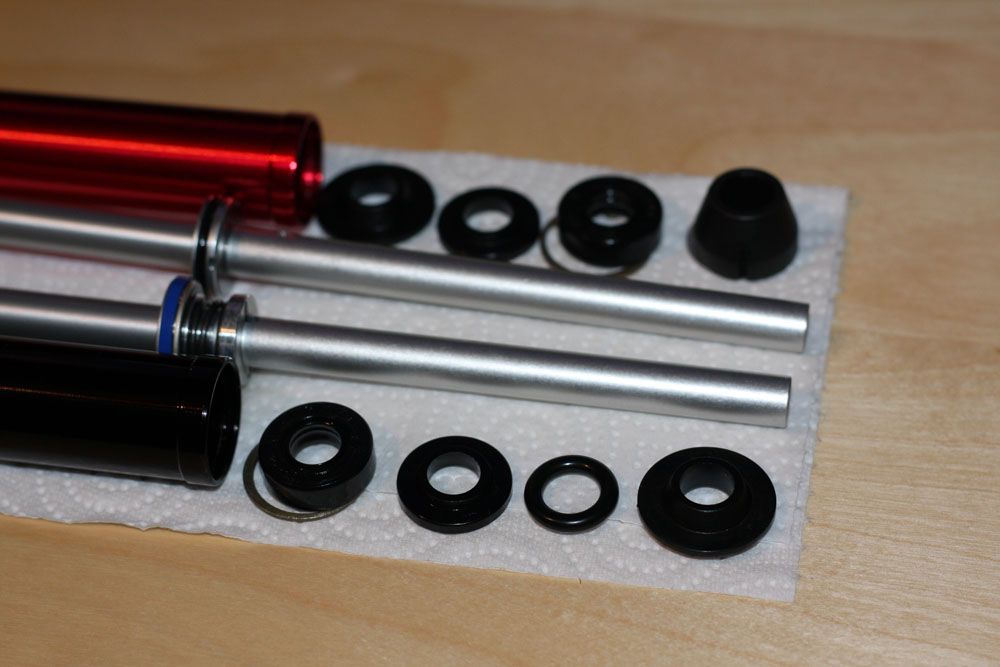
Most of the inner parts stripped and to be cleaned up.
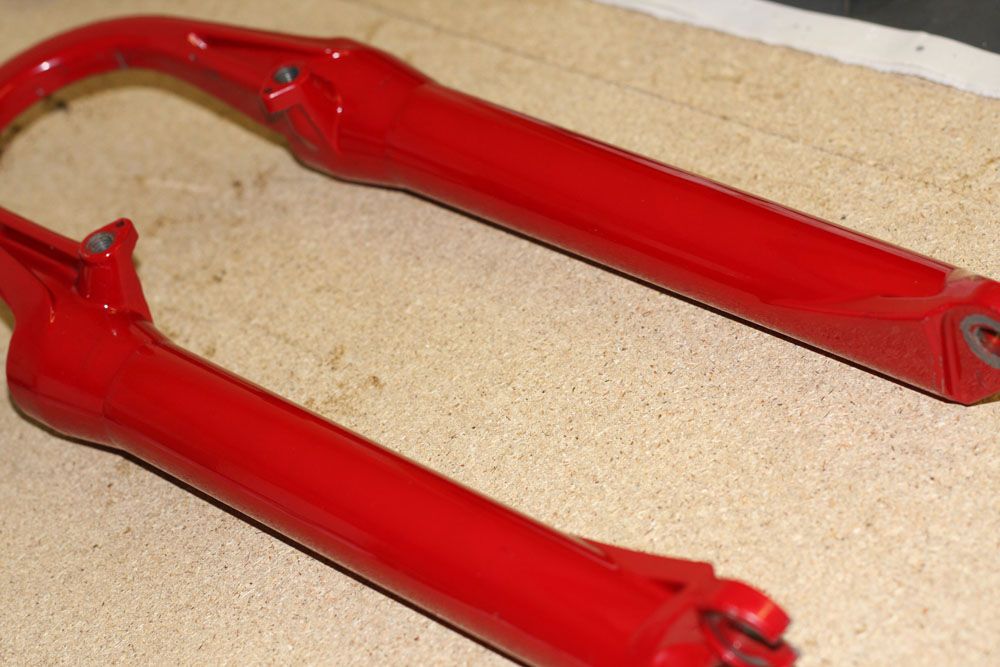
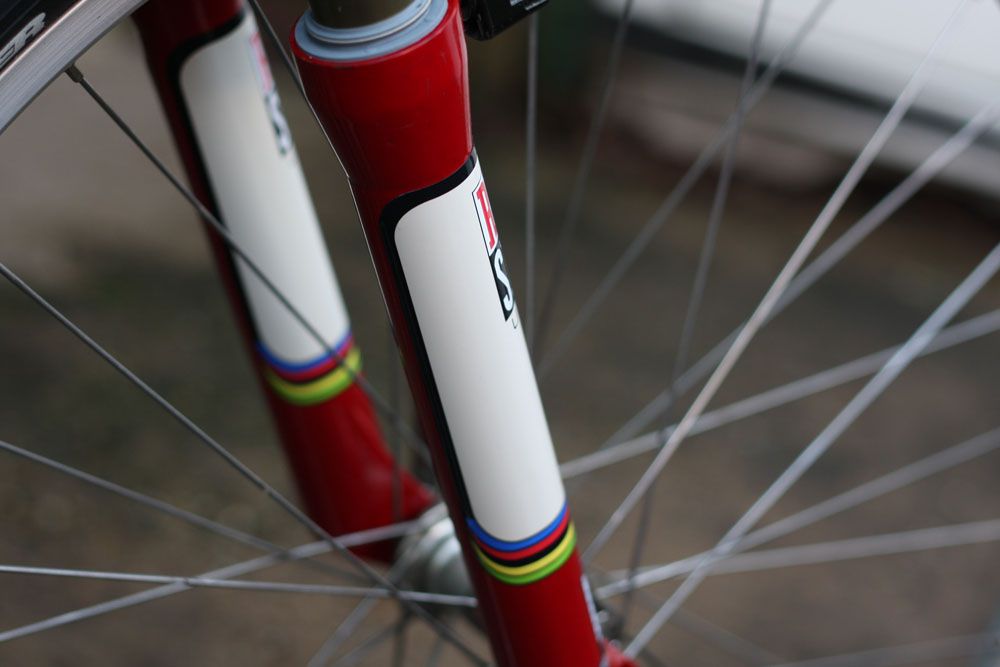
So I set about removing all of the old decals / stickers to see how bad the paint was, which to my surprise actually looked very good indeed. Seems the decals were actually the only parts with the knocks and chunks missing.
I managed to save one of the decals whole. This was then placed inside a clear food bag and scanned for tracing on the PC as a basis for the new decals.
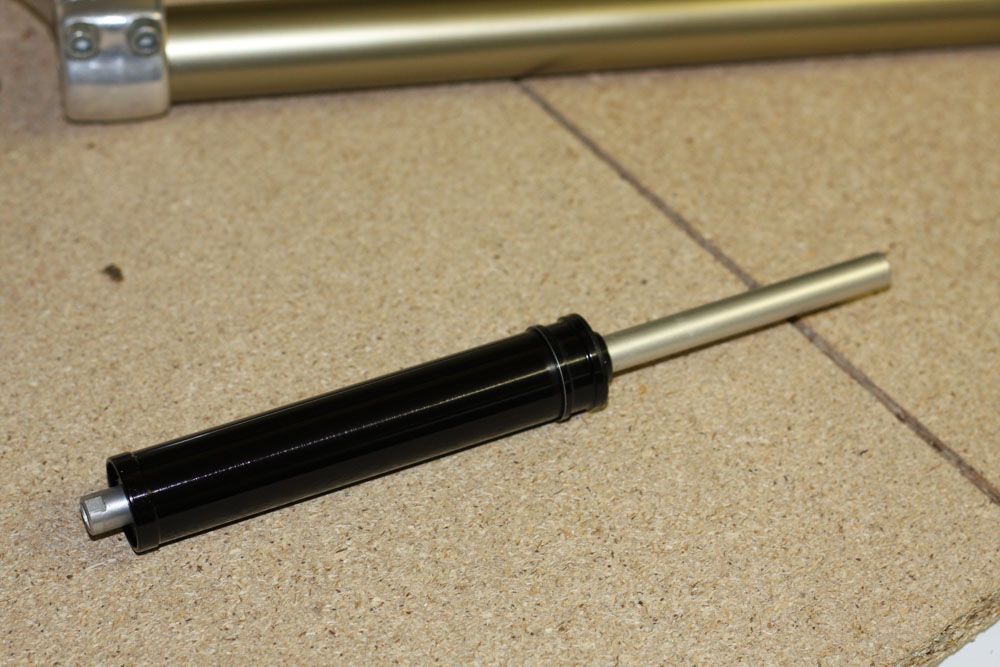
Stripped down the damping cartridges and cleaned then up. Was hardly any oil left inside them also so were definitely in need of a service.
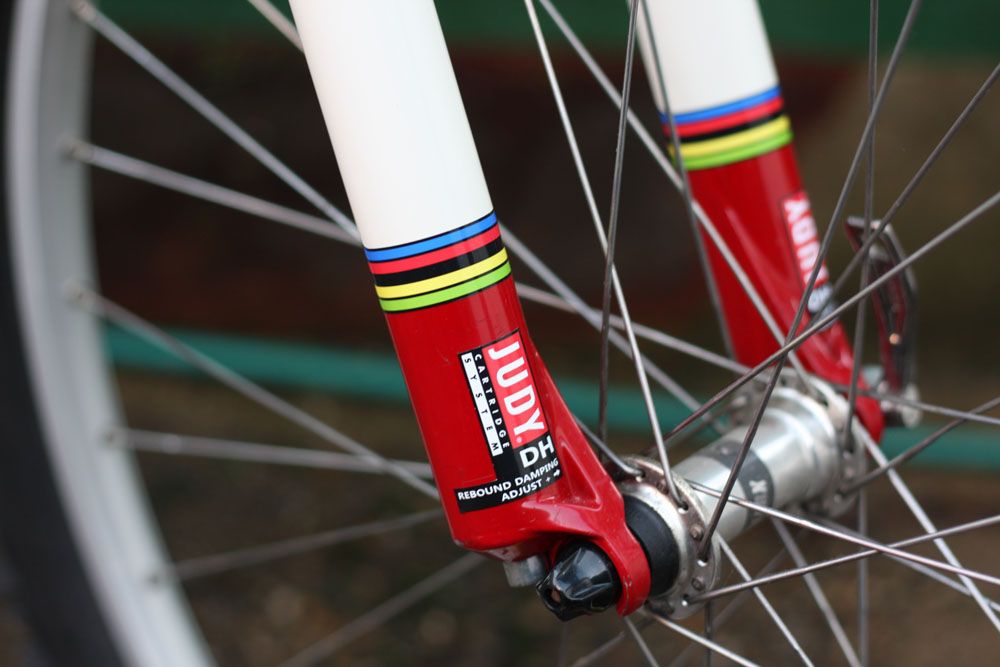
From here it was a case of refilling and assembling the damping cartridges. Then fitting the new top seals, the newer samurai seals so they can run without the dust boots, and basically grease up and fully reassemble. We've changed the spring / elastomer stack for a set of medium weight springs which should suit my brother perfectly.
The new decals were completed on the PC and printed out on glossy white vinyl, cut out and applied to the forks. Not done any decals before myself so not sure how long this method of print will last.
So the finished product back on the bike...
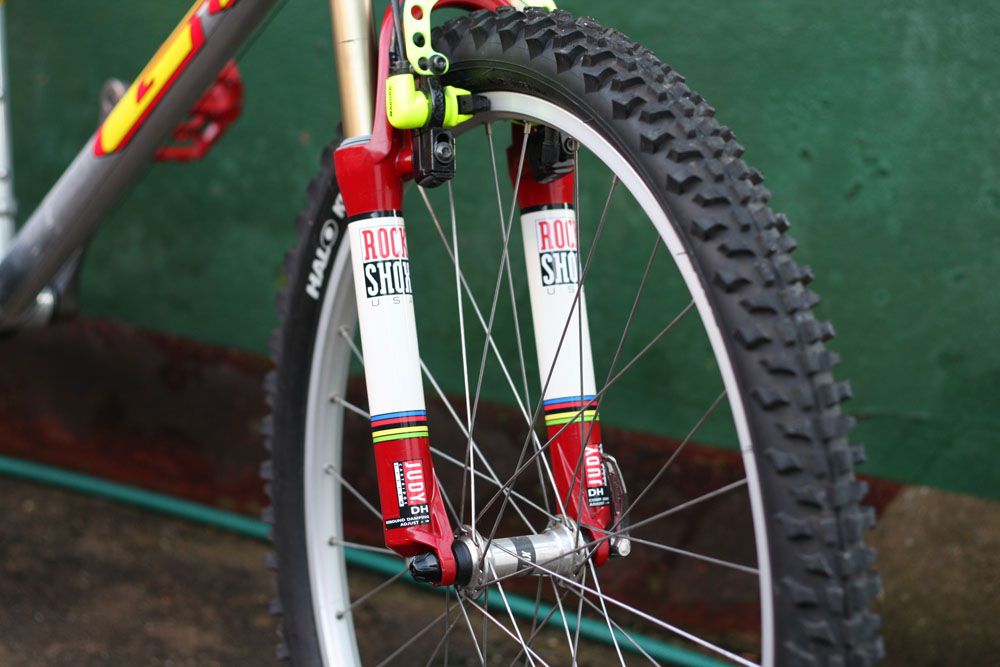
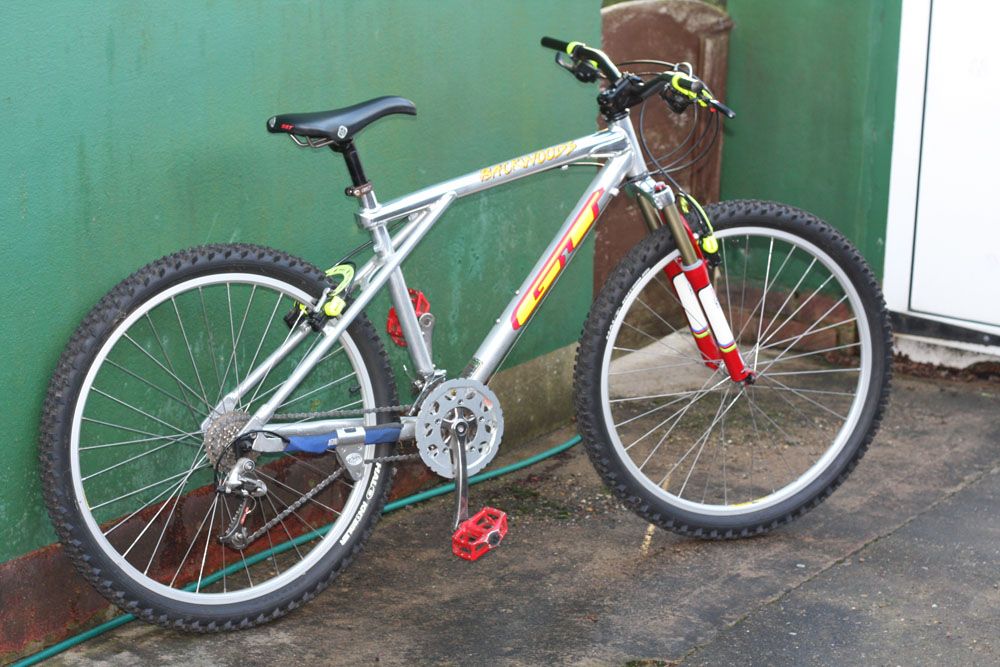
Really pleased with the result both the look and how the forks now work. Just need to get the rest of his bike done now so we can get out on them again")
Nick
It had fitted a pair of RS Indy XC's which we'd fitted some sort of spring / damper unit but they were a lightweight set and now far too soft for my brother to ride. So we ended up finding a set of '97 Judy DH's on eBay which seemed pretty reasonable and these became my first job to strip, clean and rebuild.
I've taken photos along the way, not sure if they will be of use to anyone but either way I've enjoyed getting them back looking and working great again.
So, as they came after winning the auction. Dirty seals, and a lot of chunks out of the decals. Also some masking tape and other stickers on the rear which look like they were added to stop the original decals coming off.
They seemed to only have about 10 - 20mm of travel at best. It seems this was solely from the top springs as the elastomers were totally shot.
Other than this tho, the condition inside was actually very good. Very little wear on the stanchons / cartridge legs etc etc.
Most of the inner parts stripped and to be cleaned up.
So I set about removing all of the old decals / stickers to see how bad the paint was, which to my surprise actually looked very good indeed. Seems the decals were actually the only parts with the knocks and chunks missing.
I managed to save one of the decals whole. This was then placed inside a clear food bag and scanned for tracing on the PC as a basis for the new decals.
Stripped down the damping cartridges and cleaned then up. Was hardly any oil left inside them also so were definitely in need of a service.
From here it was a case of refilling and assembling the damping cartridges. Then fitting the new top seals, the newer samurai seals so they can run without the dust boots, and basically grease up and fully reassemble. We've changed the spring / elastomer stack for a set of medium weight springs which should suit my brother perfectly.
The new decals were completed on the PC and printed out on glossy white vinyl, cut out and applied to the forks. Not done any decals before myself so not sure how long this method of print will last.
So the finished product back on the bike...
Really pleased with the result both the look and how the forks now work. Just need to get the rest of his bike done now so we can get out on them again
Nick