Airborne 2000 Lucky Strike DB Rebuild

Now I have most of the components I have updated my build weight sheet :

AirborneWeight181010.jpg


You can see I am a few weights missing (guesstimates in purple shading) and some of the weight will be reduced a ‘little’ (steerer getting cut down, Ti bolts for brakes etc) so I will update it as and when I know more.

If anyone can help out with the RRP’s I am missing (in red shading) it would be appreciated ;-) :cool:

You can now see why I know the build won’t get to around 20 lb ;-) It will be interesting to see how the built weight compares to the calculated weight though – I think it should be quite accurate as the list is pretty comprehensive. If anyone can see any errors / glaring omissions please shout up :D

WD :D
 
Cheers for the feedback bud... So??? What's happening with her? Let see some build pics! More importantly... Get out and ride her! Later mate
 
It's no where near built, but it is moving on ... :LOL:

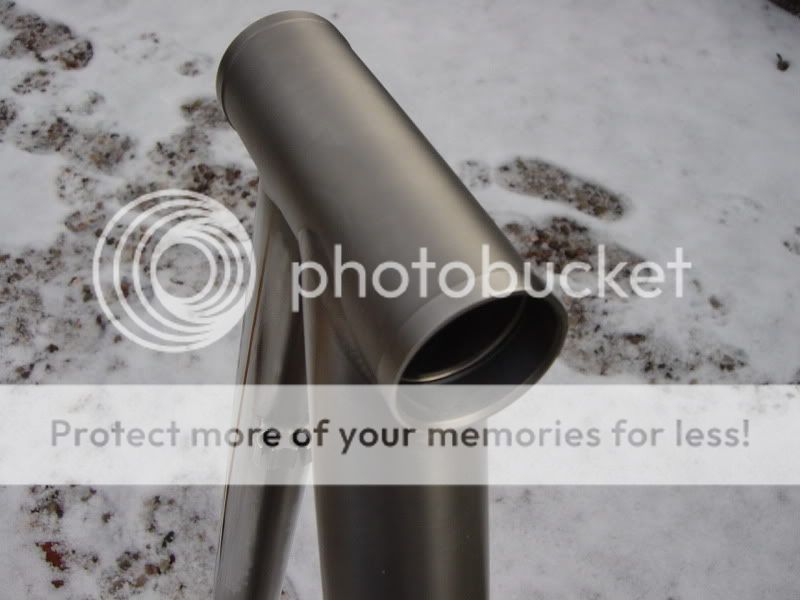
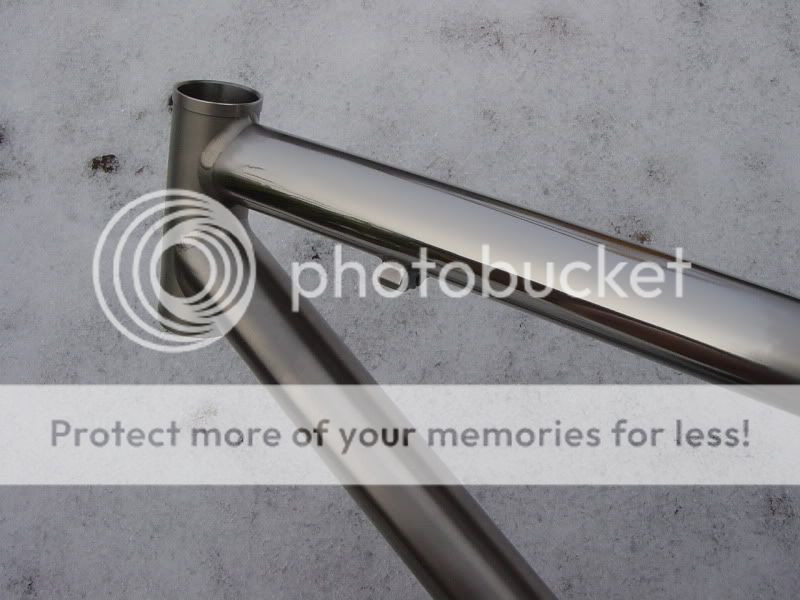
The headset came out a while ago and there was witness of some distortion around the bores for the cups (they were both very tight at the back). After a while the penny dropped :LOL: and it appeared to have been caused by the welding as the distortion on the inside followed the weld on the outside perfectly. It also looked like this had caused the faces to be a little out of square.

I spent the afternoon in the bike shop today and managed to :

Ream the headset bores.
Face the head tube.
Run the tap though the bottom bracket threads.
Face the bottom bracket shell.

Pleased to say everything went well :cool: The headset bores are now round and correctly sized :D the head tube faces are square :D

The bottom bracket thread (distorted a little from the dint mentioned in an earlier post) also cleaned up perfect :D One of the shell faces was slightly out but that is now perfect to :D

By chance I found that the frame had some form of datatag in the seat tube. It was a bit awkward to remove (especially when I actually moved it down past the bottle bosses :oops: :LOL:) but I have now found a method for removing them fairly quickly with no special tools and no damage to anything other than the tag :? That info won't be getting posted on the net ... :LOL:

All the Ti bits have now been prepped ready for blasting and I had a trip to the blasters last weekend for a trial with glass media.

The glass was a little course so the next stage is to try calcium - Doing this tomorrow (pending weather) as the calcium booth was waiting on a part last week :D

The guy also has a stainless bead blaster so that might me another option ...

I hope I can achieve the nice matt finish I got on the bits for the Marin so I can do some blingy polished artwork :cool: it's a shame the booth I used last time isn't big enough for a full frame :-(

Pics coming soon :D

I also found a lot of info on Airborne and the frame is defo a 2000 (I will update my thread title :LOL:). In late 2000 they offered a disk brake option and changed the geometry and some of the frame detailing. This one seems to be a hybrid of the change over period as it has the early 2000 geometry but the late 2000 features.

The features I refer to are the design of the head, canti bosses, dropouts and disk mounts etc

The geometry change lengthened the stays and head tube (early being shorter in both respects). Interestingly the longer head tube moved the welds away from headset bores so I reckon they knew about the problem I just fixed ... ;-)

I also have the sizing charts and luckily, according to Airborne, I fall slap bang in the middle of the range recommended for the 18" which you sold me :cool: 

If I can suss out how to post pdf's up, I will add all the info in here :D

WD :D
 
Good stuff :cool: Sounding like it'll be very tidy when it's done ;)
 
You have PM ref PDF's


Titec bars, well with the Titec 118 the BERTS came with them.
The Titec PG (is that your 150 ?) didn't need them so didn't come with any.
 
wadsy":2sx555w3 said:
Good stuff :cool: Sounding like it'll be very tidy when it's done ;)

Thank you :cool: if it builds / rides as I hope it will be my last bike for a long time :D

marin man":2sx555w3 said:
Will it be done for christmas do you think........... :LOL:

2011 or 2012 ? :oops: :LOL:

FluffyChicken":2sx555w3 said:
You have PM ref PDF's

Titec bars, well with the Titec 118 the BERTS came with them.
The Titec PG (is that your 150 ?) didn't need them so didn't come with any.

Email incoming on Monday :cool: they are all on my work pc (only phone net access at home), they were all rescued off that link posted in retro chat :cool:

Yes, PG = 150. I asked and people still thought they would crimp, hence the berts - belt n braces etc :LOL:

This morning at the blasters went well - a few experiments on a ti quill stem :D

Calcium blast media works well :cool: the bead blasting is also quite nice but a bit to course for the finish I am after :D

I have left the stem with him to experiment, the aim being to polish / sticker some things (like the Marin bits) this week whilst he refines his technique so we can finish it next week some time :D

I am not sure if the stickers will hold up though as it seems a bit of a harder environment than the small booth I used last time :? Pretty sure we have found the same blast media though as after the first experiment Tom came out with a interesting look on his face "This stuff glows n sparks when you blast it, never seen that before ... ?" - I have, on the Marin bits ... :cool: :LOL:

I did go to the graphics shop this afternoon but it was shut :-(

WD :D
 
USE Ti posts were approx £82 to £112 for 220/350/420 sizes, in early 90's
Guess 330 would be ~£95 ?
and would COME with the shim (so take that off)
Hope that helps
 
Cool collection of parts and will make a great build :cool:.

Can vouch for the Spinergy Xyclones mentioned earlier in the thread... Got a few sets and really nice wheels to ride with.

Good luck with it and look forward to seeing it on here finished :)
 
Thanks for the info / comments :D

The reamed and refaced head tube, you can just see the slight colour change in the metal where the weld is at the back :

DSC05724.jpg


More so at the bottom in this shot :

DSC05726.jpg


Polished area (on both sides) for my name :

DSC05735.jpg


The pics of the bottom bracket shell didn't come out :-( and it was to dark when I had finished / noticed to get any more :-(

All parts are now fully protected / plugged etc ready for blasting :D Seat post and frame are polished ready for graphics :D

WD :D
 
Back
Top