Marin 1990 Bear Valley Rebuild - FINISHED !!! PAGE 38 !!!

The package has now gone for coating :

DSC05162.jpg


:D :D :D

The Marin forks and a sample part off the ProFlex, can't wait for them to get back :cool:

WD :)
 
fingers":18kju8la said:
Amazing...

The brazing work tooks top draw, excellent job!

Thank you, the best work I have done on it that no one will see :cry: :LOL:

Well sorting through the bits to build it up (itching to get the forks back :LOL:
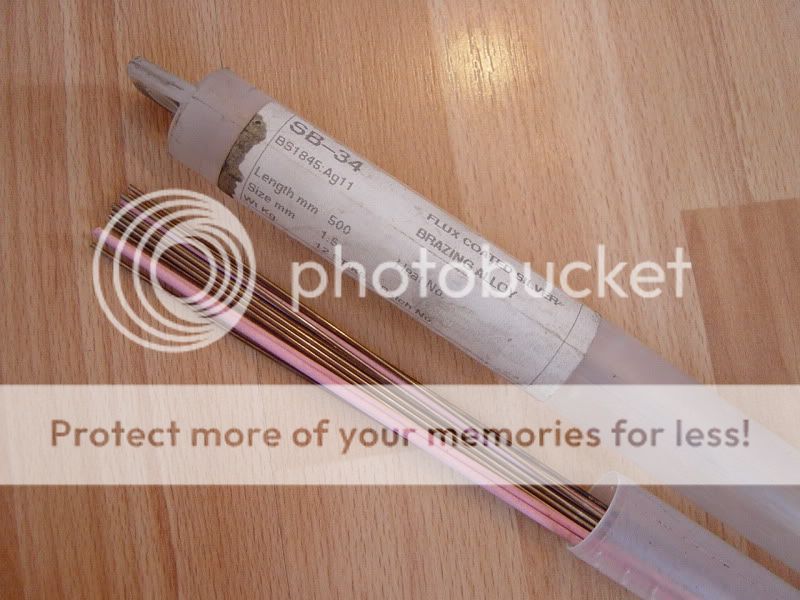
), I was reminded about the QR’s which had a bit of a story …

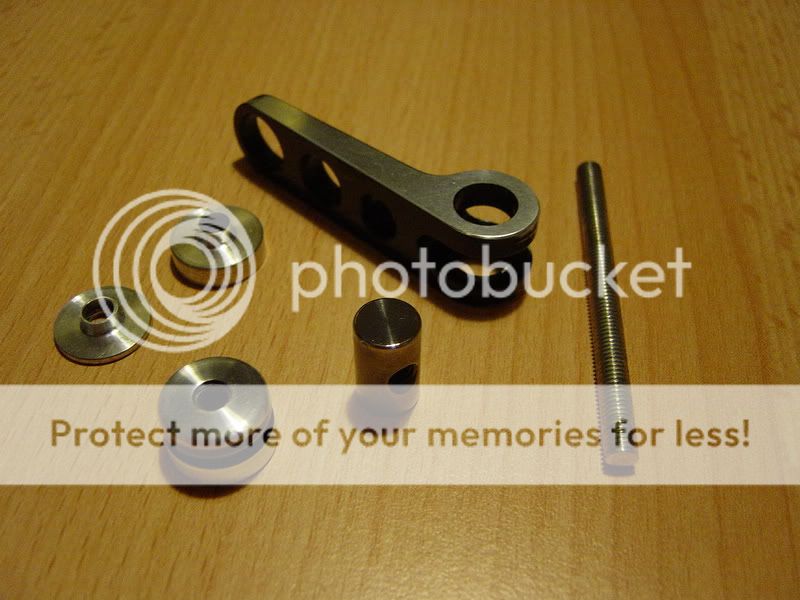
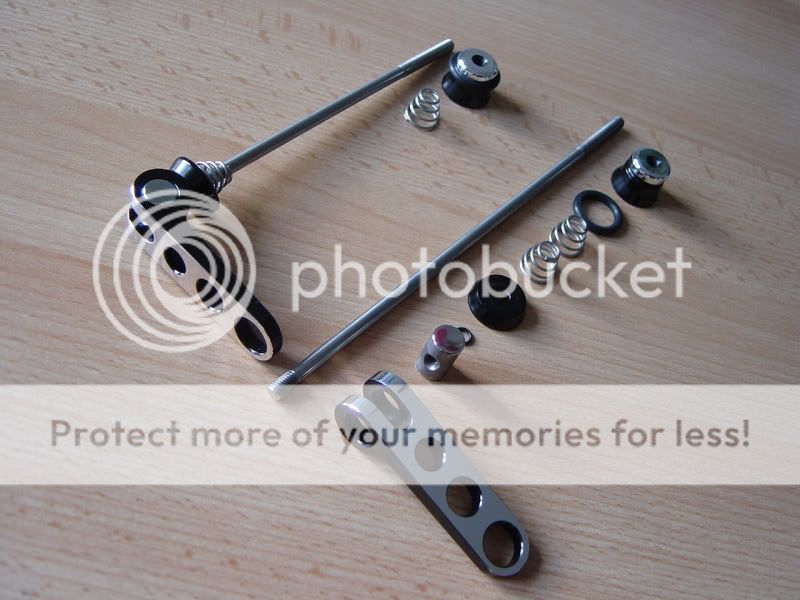
I originally had Ringle holeys (silver) on the wheels and these were striped, cleaned up and sent for black (hard) ano with other bits, unfortunately though they ‘suffered’ a little with hidden corrosion (mentioned way up this thread somewhere) which was highlighted by the re-anodisation process. Two of the three levers were good but one leaver and the nuts / washers didn’t look pretty enough for me to put on the build. The new bits I made for the seat came up really good :

DSC03459.jpg


DSC03461.jpg


DSC03830.jpg


And are defo on the build to stay but I ended up with a new set of USE ti spin sticks on the wheels :?

I had been keeping my eye out for a wheel set of ringles to complete the look of the Marin but didn’t have much joy. They would need to be in black A1 condition so I could use them ‘as is’ or another colour in A1 condition so I could get them re-anodised in black again without fear of the same problems as last time :? Also I didn’t want to pay for another batch of ano until all the bits off the ProFlex are ready to go so I could get it all done at once.

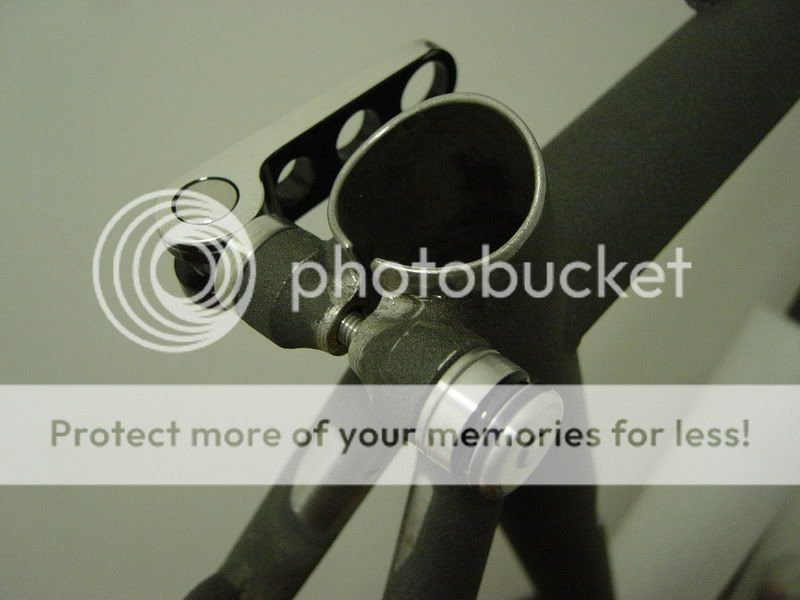
I don’t know why I didn’t think of it earlier but Mum’s orange had come to the rescue with the temporary loan of the USE ti post - and it also had black ringles … :cool: Dad (who really owns mums bike :LOL:) spotted the brand new spin stixs and actually wanted them to keep so the deal was done and I ended up with a ‘pretty good but not mint’ set of black ss holeys :cool:

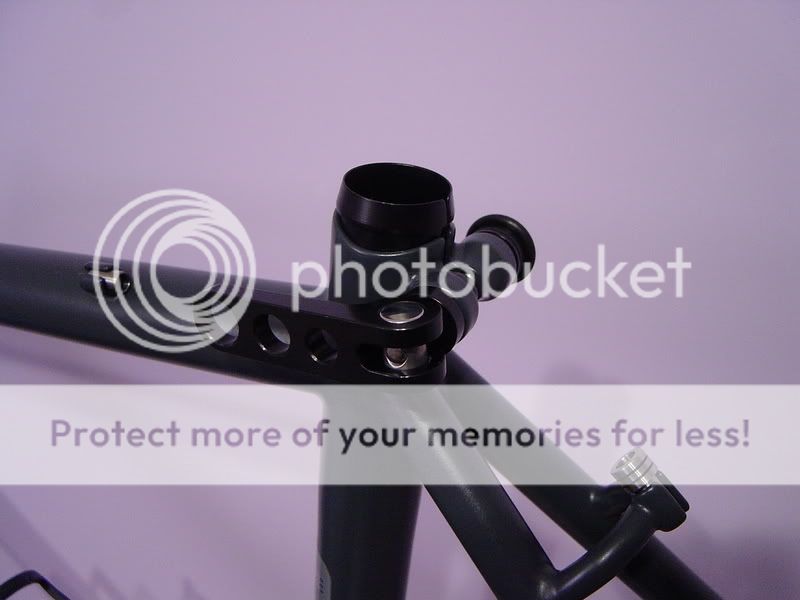
Should I clean them up ready for ano or should I use them as is until I can get them done with the ProFlex bits ? hhmmm, well my impatience got the better of me and I went to work with the wet n dry to remove a few scratches to go down the ano route :LOL:

Looking at the first one part way through the process got me thinking, I could really bling them up without having to go through the cost and delay of fresh ano ;-) A few hours later and I was pretty pleased with myself :cool:

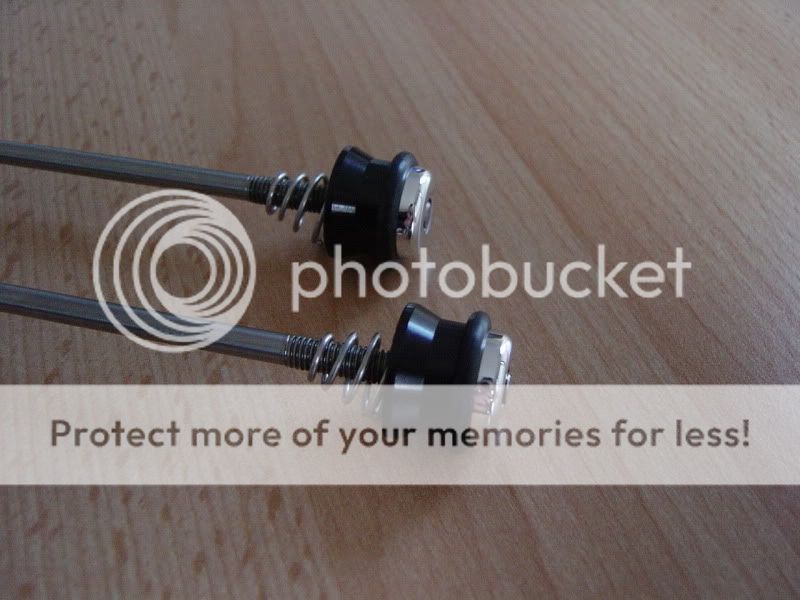
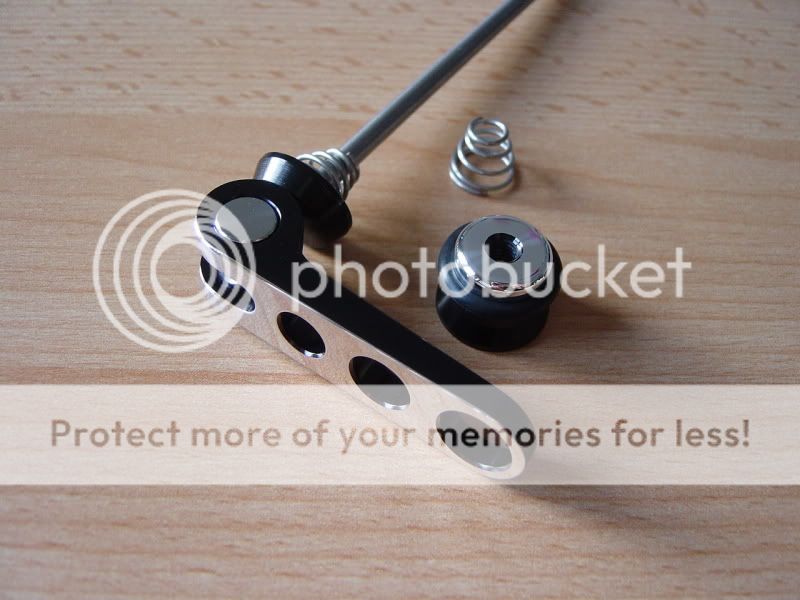
Black / polished alloy, new Ti rods (bought for £4 off here ages ago on the off chance that they may come in useful :LOL:) – chopped to perfect lengths and polished ends, polished barrels and new O rings :

DSC05171.jpg


DSC05187.jpg


DSC05188.jpg


DSC05174.jpg


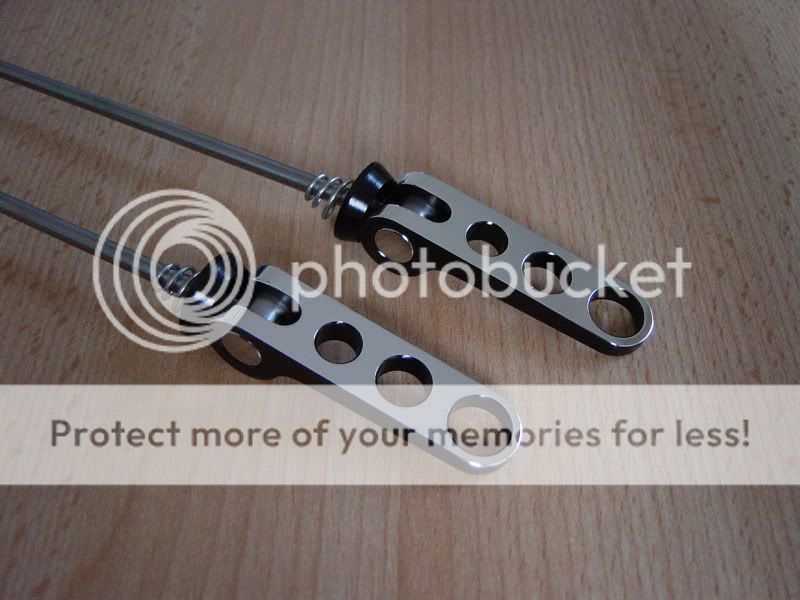
They are now assembled and loctited. I think they will actually be easy maintenance – If I scratch them (so long as I don’t take a chunk out of them) I can just strip, flat and re-polish as all the vulnerable parts are now silver / bare alloy anyway – Its seems a win / win situation all round as they actually suit the build better to !

I am now looking out for one black holey in good condition (doesn’t matter if it’s a seat or wheel QR) – I can flat / polish the lever to use on the seat QR and this would give me two good levers in full black hard ano to use elsewhere / keep as spares / possible sell etc.

Just the rear derailleur to assemble (its all in bits) and spruce up now, shouldn’t take long - if I can remember how to put the springs and o rings back … :LOL:

WD :D
 
How much for a full WD Pro bike valet? I would be willing to spend £££s! Mind you what would the turnaround time be?...

BTW I have had a dent brazed by a very respected frame building company (not the one you used for the forks lol) and it was absolutely crap compared to the job you have done- which looks top class.
 
WD Pro":3deb18bw said:
My torch was (butane / propane mix).....

The brazing rods from work :

DSC05062.jpg

I would like to fix and fill various dents and was wondering where I might procure a torch and these rods at a reasonable price? How many rods did you use in the course of fixing your forks, so I can get a gist of consumables cost.

I wouldn't mind being able to do actual brass brazing eventually if possible, if someone knew of the spec fo the torch for that.
 
CTK":o7kc1kkp said:
How much for a full WD Pro bike valet? I would be willing to spend £££s! Mind you what would the turnaround time be?...

About 2035 with current hobbies and family commitments etc :oops: :LOL: 2035 is my retirement year… :LOL:

CTK":o7kc1kkp said:
BTW I have had a dent brazed by a very respected frame building company (not the one you used for the forks lol) and it was absolutely crap compared to the job you have done- which looks top class.

I thought I had removed all references to them so I didn’t cause any problems – I had better recheck … ;)

Dr.Robotnik":o7kc1kkp said:
WD Pro":o7kc1kkp said:
My torch was (butane / propane mix).....

The brazing rods from work :

DSC05062.jpg

I would like to fix and fill various dents and was wondering where I might procure a torch and these rods at a reasonable price? How many rods did you use in the course of fixing your forks, so I can get a gist of consumables cost.

I wouldn't mind being able to do actual brass brazing eventually if possible, if someone knew of the spec for the torch for that.

My torch is / similar to what a plumber would use. I think it came from B&Q and is maybe made by ‘flo-gas’ or ‘go-gas’ or similar – I will check tonight. I have had it a few years (bought for leveling bitumen around cobbles) but I don’t remember it being expensive, maybe £20 ish. It’s a simple handle / head attachment that’s screws onto those self sealing gas canisters and it has a push button ignition.

It was OK for working in the middle of a single tube but I don’t think it would be man enough to do a full lugged joint etc where the mass you are heating is much larger and requires a even temp all around the lug.

I would guess you could get the rods from any local welding supply place and they would also be able to guide you on the grade required etc. Before I found mine at work I had looked on eBay and people sell small kits of rod & flux to do small jobs etc.

The rods I used were the pre coated / flux (pink) ones in the picture. A) Because the flux was one less thing for me to think about and B) they were the only rods I knew the grade of – I have no idea what the other non-fluxed rods are :-(

To do all the repairs pictured above I probably used no more than 4” of rod and most of that actually gets filed off again, the actual braze left on the finished item is very minimal. Just remember that you need a long enough piece of rod to hold onto though ;-)

Other than that I had nothing special, the colour doesn’t get bright enough to warrant goggles (but would be a good idea if your doing a lot / large area, or for H&S) and the girlfriend held them in position why I worked i.e. holding the forks by the dropouts was OK / not to hot – the heat affected area is very small for a quick repair like this and the ‘thin’ tubes heat and cool quickly – check the area of discolouration in the pics.

WD :D
 
Excellent. I am just trying to fill some dents too, so fingers crossed a B&Q jobby will be up to muster.

If you could post a picture or spec of yours that'd be great. Cheers.

I'll also pop down to my local welding supplier and get a crash course in what's needed.

It's been many years since I had a go at brazing, I've got so many projects going through my mind now.

Keep up the stirling work.
 
Dr.Robotnik":2he61wr0 said:
Excellent. I am just trying to fill some dents too, so fingers crossed a B&Q jobby will be up to muster.

If you could post a picture or spec of yours that'd be great. Cheers.

I'll also pop down to my local welding supplier and get a crash course in what's needed.

It's been many years since I had a go at brazing, I've got so many projects going through my mind now.

Keep up the stirling work.

Here you go :

5c55a6ce.jpg


No pc / laptop / Internet at home :oops: so the iPhone and photobucket app has done me proud :cool:
 
Back
Top