1993 Marin Bobcat Trail

Following your renovation with interest. Just bought a 93 Eldridge Grade in pretty good nick for £30, and unsure whether to leave it as it is or renovate. It has most of original bits other than Alivio chainset, and acera rear derailleur , although hope to rectify these. One thing puzzles me though - is there any difference in frames such as Eldridge Grade, Palisades Trail and Bobcat or were the bikes just differentiated by their components.
 
Not sure if there was much difference. I am sure someone on here is more knowledgable about the bike industry but I'd have thought that many of the Marin branded components would be the same from bike model to bike model, maybe just changing in colour. Surely it would be cheaper to keep the number of different parts to a minimum, i.e is the stem on a Bobcat any different to a Muir Woods ora Bear Valley?

In my own opinion if the geometry is the same then most of the early to mid range bikes should ride very similarly, with changes like grips, saddle, pedals, tyres and brakes having more effect on the ride than an extra few 100g in the frame. We'll see how mine turns out but so far I am buying good quality components that will be in keeping with period but much better quality than Altus C10 or whatever came with it originally.
 
gerryattrick":1dcj6wim said:
Following your renovation with interest. Just bought a 93 Eldridge Grade in pretty good nick for £30, and unsure whether to leave it as it is or renovate. It has most of original bits other than Alivio chainset, and acera rear derailleur , although hope to rectify these. One thing puzzles me though - is there any difference in frames such as Eldridge Grade, Palisades Trail and Bobcat or were the bikes just differentiated by their components.

The differences are hard to spot - lowest end bikes (Muirwoods, Bolinas) had straight gauge tubing, Bear Valley and Palisades had Tange butted MTB and Eldridge grade and Pine Mountain had Tange MTB OS (double butted), Team Marin had Prestige. As far as I know the coloured parts were the same throughout the range (up to pine Mountain at least).

1993 catalogue here: http://www.retrobike.co.uk/gallery2/main.php?g2_itemId=12573
 
Thanks. I had one of those catalogues (in English) that I must have read a hundred times as a young boy, dreaming of one of the top the range Marins.
 
There was a geo change around the bv. I 'think' the change was bv upwards upto the introduction of the bv se then the change was bv se upwards. My 90 bv has an os downtube but is still on a 1" headset. The tange sticker that it came with quoted tange, cr mo, butted, mtb and o s tubes - I am still looking for an exact match :)

I know for sure I have 'exactly' 3 deg between head and seat tube but will have to wait until it's built and on level to determine if it's 70/73 or 71/74. The other sizes are easy to mesure if anyones up for comparison ? :)

Would love to find a 90 bv scan as I seem to recall it being db, it was a long time ago and my memory isn't great :LOL:
 
Thanks for the info. Have decided to renovate and will look on e-bay for Deore DX rear changer and chainset. Does anyone know of any bike meets at Midlands/Wales/South West where they have spares markets.

In reply to Widow71 I have always found Hammerite Kurust to be a good treatment for neutralising surface rust. It can be overpainted/primed (possibly using Framesaver???) or should give good protection alone in a sealed area like a tube. Just clean the inside with wire wool attached to a rod and then use a similar method with a piece of cloth to coat the inside of the tube. Not sure how it works with threaded areas though so best to keep those masked!
 
Finally. Finally after hours the old paint is now off the frame and somewhere outside mixed in among the gravel and the grass. I late night trip to B and Q just before they shut allowed me to buy some wire wool and rubber gloves. However the wire wool I bought was too fine a grade so great for polishing but not so great for the coarse scrubbing action I so desired. Also the gloves I bought were useless so the vigorous rubbing that I preformed so within minutes developed large holes at the end of every finger. Not wanting to be put off, and because the shops were now all shut, I just carried on hoping that should my skin burn off it would at some point grow back again (as I type this my typing finger is slightly tender).

The result of the work is that my back aches slightly from bending down, my nice jeans I forgot to change out of are covered in various chemicals and bits of paint, and my eyes are somehow perfectly fine (I could not find my eye protection when I got to where I was working on the bike). But about 98% of the paint if off the frame. Result. There are a few areas where you can see a bit of the old primer still remaining in the fiddly bits but I really cannot be bothered to keep scrubbing to get it all off. As I ran my finger over the frame it felt really smooth so hopefully when I prime the frame this will not show up. I saw a program recently on Quest called 'A 4x4 is born' which is where I have taken most of my inspiration from for the paint job and doing it myself. Having seen other programs like American Hotrod I am under the impression that a whole car can be primed and painted in a single day, ready to leave the paint shop the next morning for further work!

So the frame is looking good. For something that is made from steel, 17 years old, been kept in all kinds of conditions and recently was used as a commuter bike around Bristol I think it is looking in pretty good condition. The small areas of surface rust have been wet and dried into oblivion. Internally I honestly have no idea what it is like. It rattles a bit but the rattly bits won’t come out. My ingenious plan is that once I have painted the frame I will maybe put some superglue into the tubes (just a little bit mind) which will stick to the ‘bits’, and fix them in position. I’ll then squirt in a load of ‘frame saver’ or even just some thick motor oil and swish it around a bit. Out of sight, out of mind.

My big decision before I start painting id whether to de-lug or not. I am never going to fit panniers or mud guards to the frame so I will never use them. I have seen a few other fellow Marin owners cut them off. My question (to myself mainly) is can I be bothered and does it really make the frame look significantly cleaner?

I am almost there with the parts I will need. I got a highly polished set of XT cranks the other day from Sithlord which means I am now questioning if I should start polishing the other parts I will add to the frame.

Thanks for all the responses to my questions so far – there really is a wealth of knowledge about things that to normal people are quite useless but yet fantastic on here.

Lewis
 
Chop em off :LOL:

They do look cleaner and if nothing else, it will be easier to paint with a few less mud / rust traps :)

There are a few pics of my de lugged bv in my build thread.

WD :)
 
Slow progress, but progress a least.

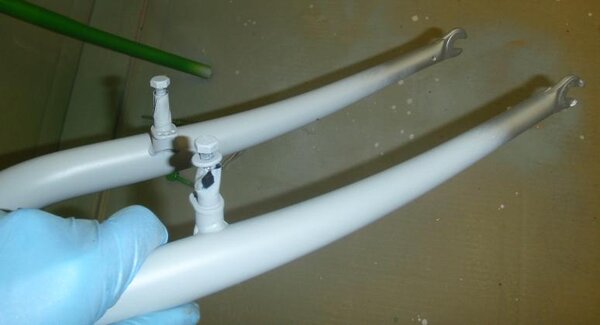
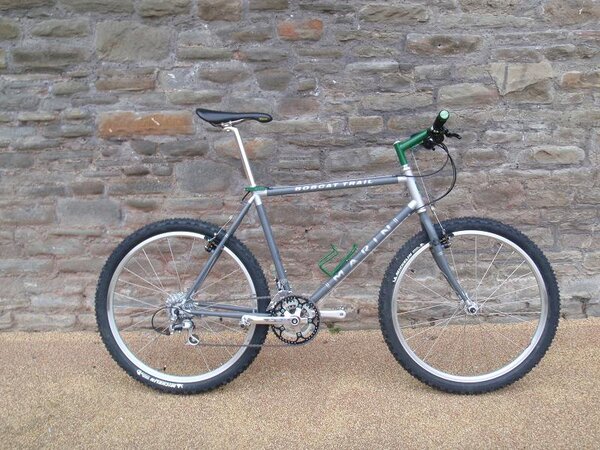
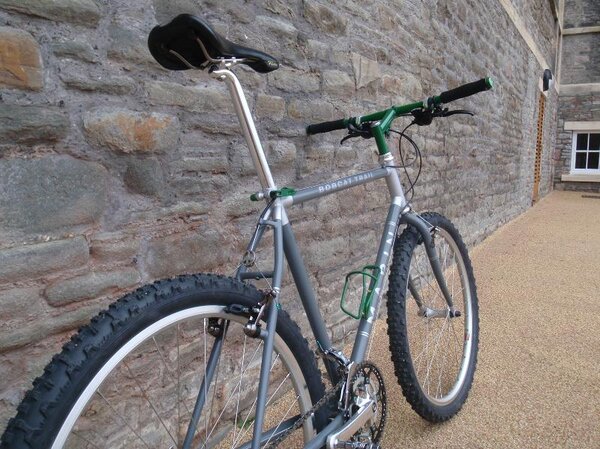
The last few weeks have been spent chopping and painting. The extra bits of metal for panniers etc were hacked off with my trusty hacksaw, then filed down until they were smooth with the frame underneath. The frame looks a lot cleaner to the sad few (like me) who will look too closely at the bike and it does save at least 5g so all good. The photos below show the results of my labour which I am quite pleased with.

As far as painting went I rubbed down all the bare metal parts with some wet and dry and then cleaned them with some very cheap and nasty Boots nail varnish remover. If I had been planning ahead a bit more I would have just used some pure acetone which would have been free from work but in my excitement I was not thinking clearly. Once the last of that had evaporated off I started with the primer. I used some Plasti Kote Metal Primer in grey because that is what B&Q sell. This went on in several thin coats.

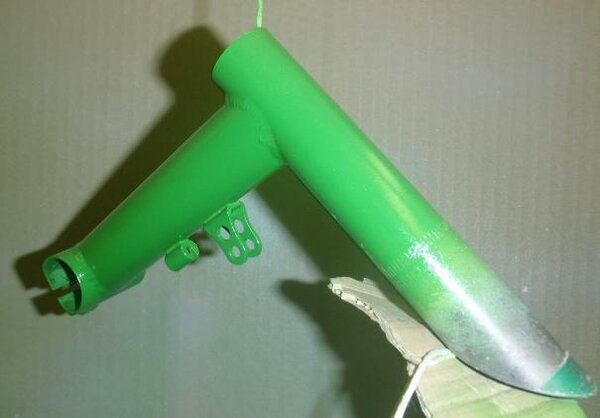
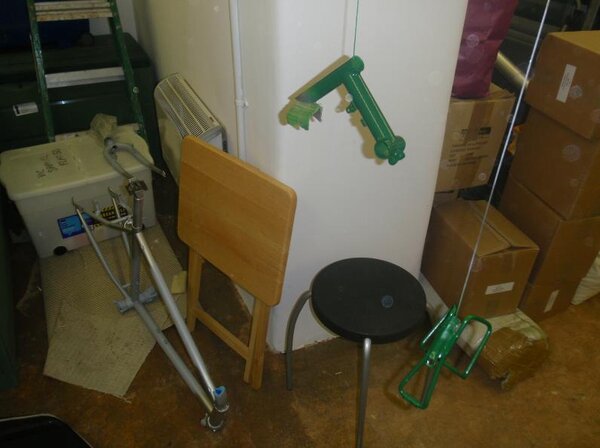
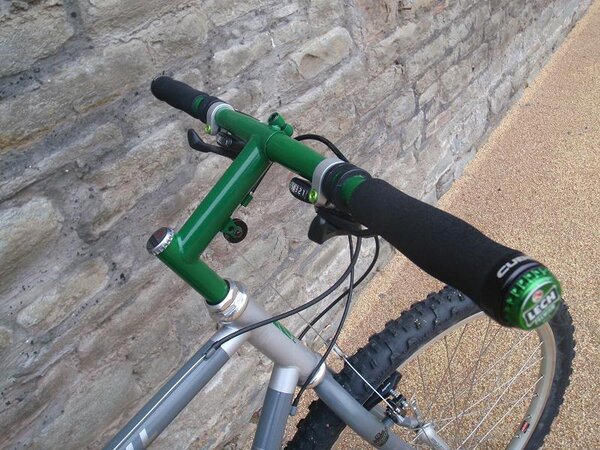
I started with the bits that would end up green - the stem; handlebars; seat QR and bottle cage. I really was very lucky with the cage as it is my original Marin lite thing I first had 17 years ago. To be honest I was a bit disappointed when I look at what I had sprayed when I looked at it the next morning and the paint was still soft and a bit tacky. Did I get rid of the grease from the surface properly? Is Plasti Kote paint actually a bit shit? So I left my painted things on a super hot radiator in the bike store (where I am doing all this work) and 48 hours later the paint had really hardened well. It was so hot that when I picked them up to have a look I immediately dropped them chipping off a bit of the paint. For the frame I took a while to mask off all the area that needed protecting and blank off the threaded holes with the old bolts which were all rusty and going to be replaced.

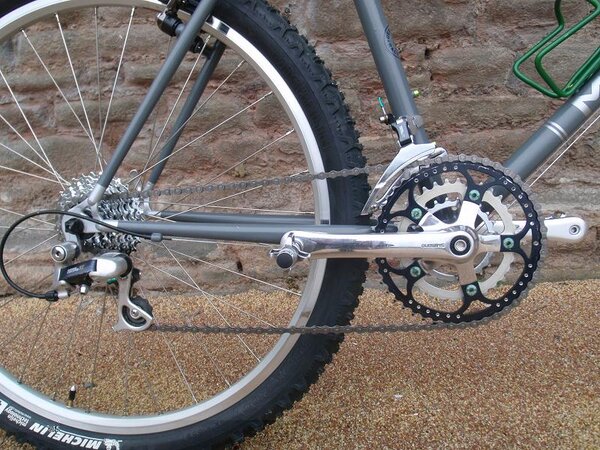
I initially painted the green bits with what looked like the correct colour green on the can, but on the bars and stem it looked a bit too bright. There were two problems with this. Firstly it did not match the green of the headtube sticker that I have from Gil_M to stick on, and secondly it clashes a bit with some green anodised bolts I have already loctited on the chainring. I am a bit of a tart with this bike now. Never mind, another trip to see what B&Q had to offer and I did a few more coats in a darker, and if I may say so, classier shade of green.

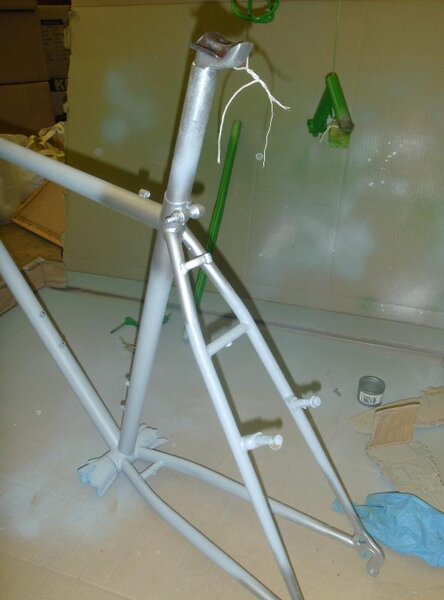
The frame, now primed, looks actually pretty good for what was a few months ago a cheap, rusting commuter bike. The surface looks pretty smooth and just waiting for the final colour. I have already painted the areas that should be silver in silver (Plasti Kote again). I am now leaving this to harden for a good few days until I mask these silver areas off and I spray the final coat of dark grey.

That may well be the dullest post you have read today. Keep your eyes peeled for the next thrilling instalment.........................
 

Attachments

  • P2020156.JPG
    P2020156.JPG
    33.2 KB · Views: 5,981
  • P2020164.JPG
    P2020164.JPG
    35.5 KB · Views: 5,980
  • P2020166.JPG
    P2020166.JPG
    45.7 KB · Views: 5,981
  • P2020161.JPG
    P2020161.JPG
    42.1 KB · Views: 5,981
A few photos of what I've been up to......

Not all 100% retro, but in the retro spirit I think (i.e. rigid with cantis).
 

Attachments

  • P4050247.JPG
    P4050247.JPG
    115.2 KB · Views: 5,866
  • P4050237.JPG
    P4050237.JPG
    118 KB · Views: 5,865
  • P4050244.JPG
    P4050244.JPG
    114.6 KB · Views: 5,866
  • P4050239.JPG
    P4050239.JPG
    134.6 KB · Views: 5,866
Back
Top