Got my frame back from the sprayers yesterday ") after starting this project a little over 5 weeks ago.. Here's a little run down and what I did to it so far during that time..
after starting this project a little over 5 weeks ago.. Here's a little run down and what I did to it so far during that time..
The frame was an ebay purchase which looked fairly good in the pics, but on delivery it was in a rougher state than I was hoping. There was no way I could save the paint on it without changing the whole scheme. The initial plan was just to tidy the frame where needed without too much outlay but now another plan had to be followed.
The same day it arrived I soon made the decision to strip it back to metal, removing all the cable guides for a nice clean look. It was going to single speed only from now on so this was an easy choice to make. Off to the inlaws I went to make good use of the workshop there. After a bit of hunting to find the necessary power tools that would be needed the frame was soon taking shape and was pleased with how it was turning out.
Quess it took me 4 days overall and with many hours to get it as best as i could...bearing in mind I've never done any metal work to this extent before. The paint was all removed by hand with very course sandpaper whilst various files make quick work of smoothing out my handiwork.
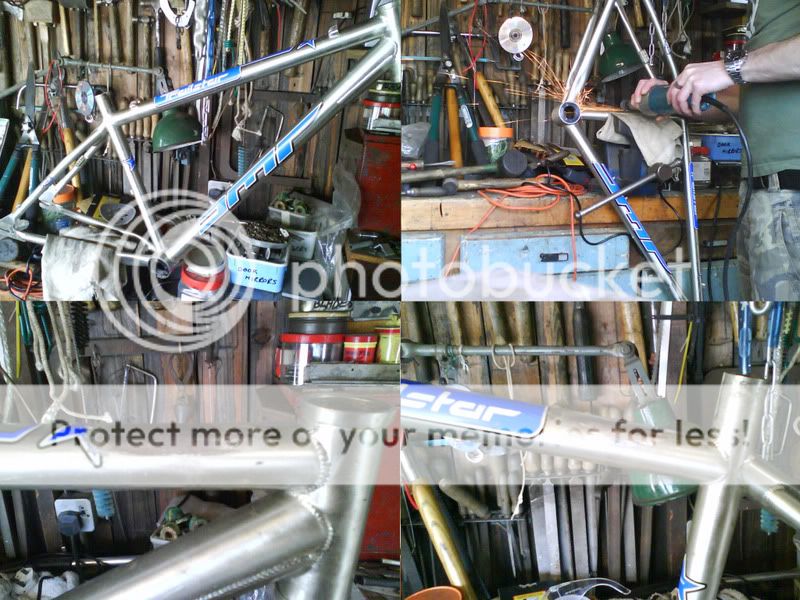
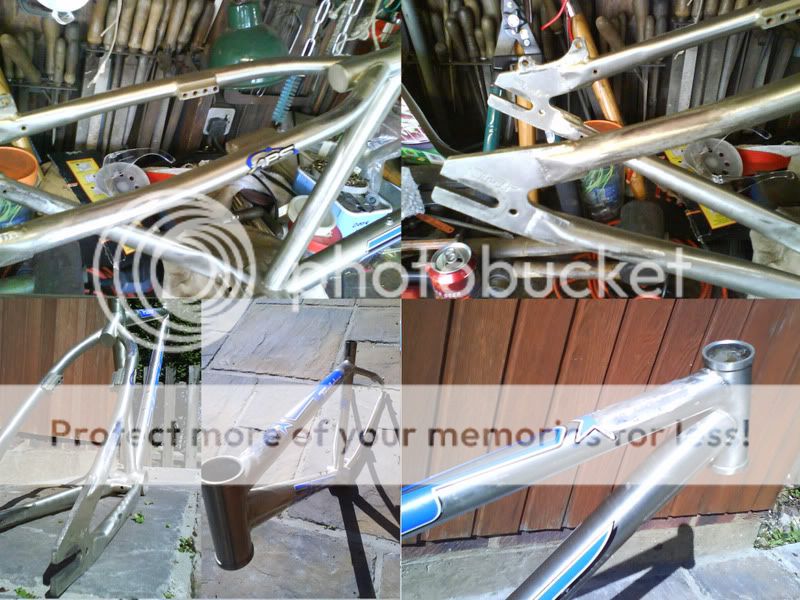
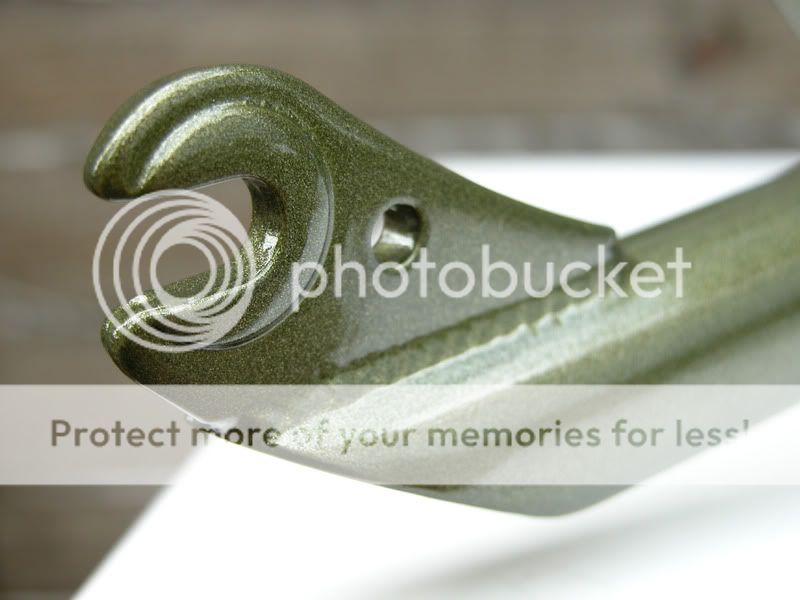
On the final day a decision was taken to remove the v brake mounts, something I had been thinking over during the course. It wasn't a job I was looking forward to as there was a fair bit of metal there to cut and grind down. They soon came off after a bit of work and really improved the clean lines I was aiming for. It was truly satisfying seeing it in its current state, ready for whatever was to follow.
The next day I set about visiting a local powder coaters for quote. It wasn't far from me, and on turning up a guy was there returning two frames that he had coated. Apparently they hadn't done what he had asked for so they had to rectify them. This got me thinking that maybe this wasn't the place for me...so I got my quote and left. They wanted £50 for the coat and £30 for a sandblast which had to be done. Sounded more than i had expected,.. but anyway I was off to try elsewhere.
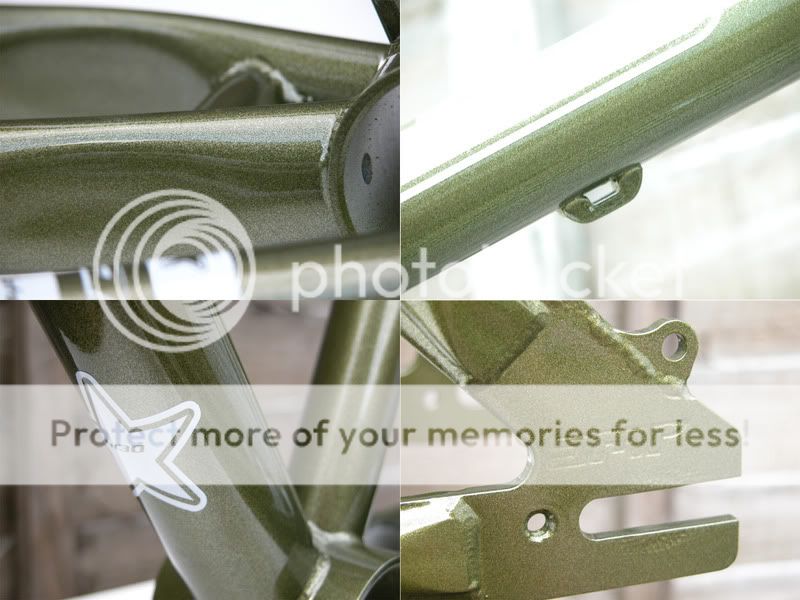
In the meantime I wanted to try and have some hose guides brazed onto the frame. This wasn't something I considered initially but soon thought it would be the best thing to do to save me having to resort to zip ties, something I was trying to avoid.
Upon searching the net again I soon came across Colour-Tech in Dartford run by Dave Crow. Not too far from me and considering he specialises in frames was worth a call. I admit, I was a bit naive as to what he did initially as was mainly wanting to just have the hose guides brazed onto the frame, but the enthusiastic call soon put me straight after finding out he could do the the whole brazing and painting for me. With address in hand I took a drive down to show him what was what.
You know the sort of people.. the ones that know what they're talking about and make you feel at ease with the job you're asking of them? Well, Dave is one of them.
After a bit of chat, a small tour of the workshop and spray booths it was easy for me to leave my frame in his capable hands.
If you ever get the chance to visit that place I would highly recommend it. Seeing all the shiny frames hanging there and the type of work he does for various manufacturers is enough and shows what he's capable of and the standards achieved.
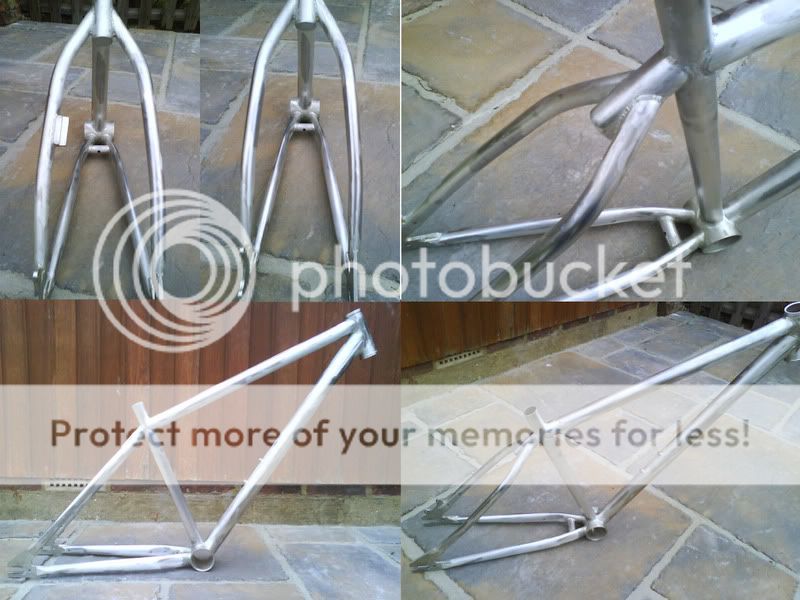
All that was left for me to sort out was to get the forks and finalise the decals.
I had already reproduced most of the frame decals but was just waiting on the forks that I'd purchased off ebay to arrive so I could do the decals for them.
Almost 2 weeks later and they turn up! It was a bit of a wait, but not wasting any more time I immediately copied the decals and run them down to Colour-Tech to be blasted ready for painting along with the frame.
While I was there I showed a series of colour swatches that i'd printed giving a rough idea what I wanted. I still was undecided as to how to do it,..it was driving me nuts!
In the end, I pointed at two greens swatches and said i'd have something inbetween them two but in a metallic. He got a good idea what it was I was after and I was more than happy to just see what come of it. This would be something to look forward too when it finally came to seeing it... it was the anticipation of the unknown! Was kinda exciting.
Now it was down to me to get the decals produced asap as they were going to be lacquered.. No pressure then.
All decals were copied directly by applying tracing paper over the frame and tracing them. There was no way I could remove any of them so this was the best way to do it to achieve what I wanted.
Points were used for positioning of lines etc which once done, were scanned to give me a 100% scale rough for me to go on. I used illustrator to redraw the decals following the guides i'd made producing an accurate copy.
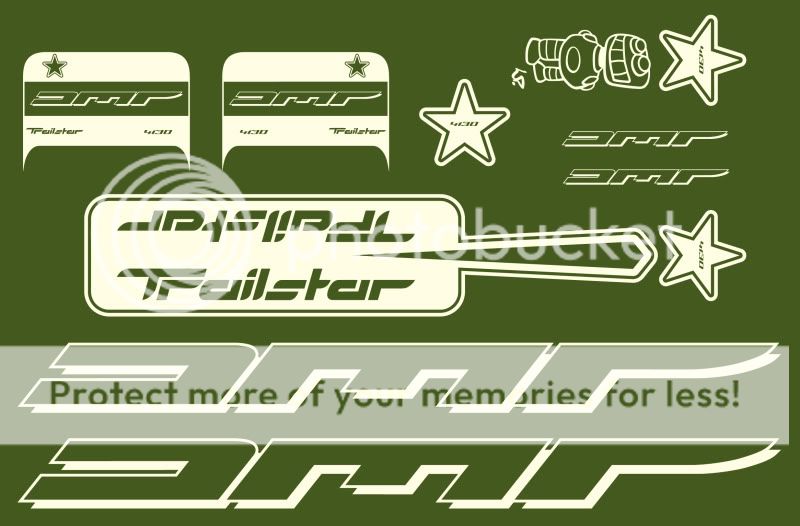
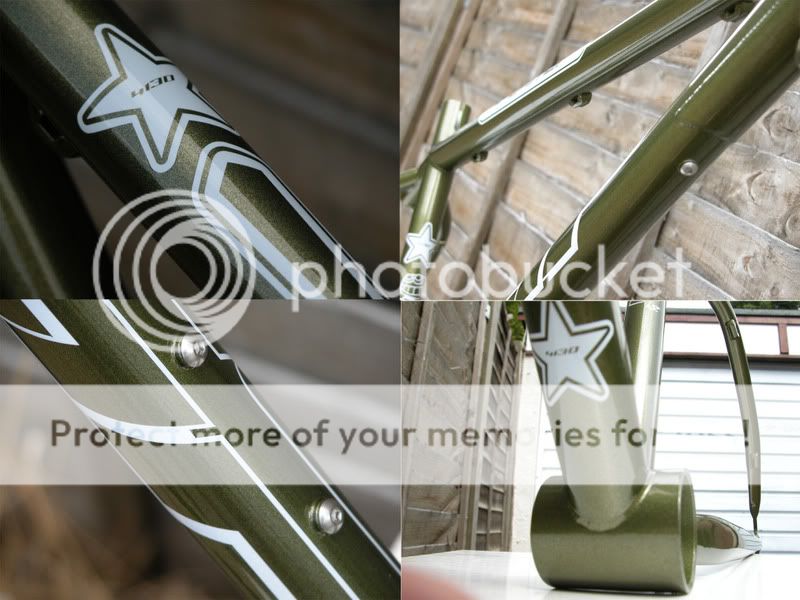
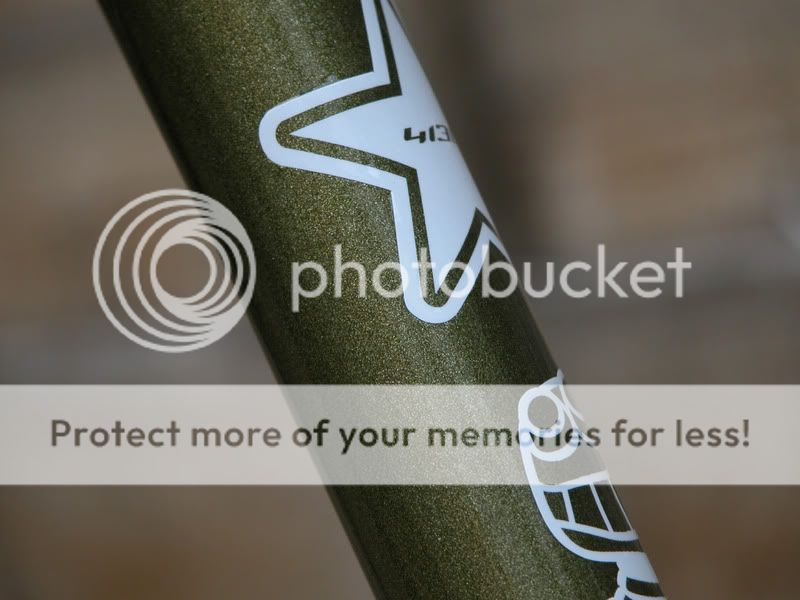
All the decals were simplified as I was wanted them in a single colour rather than the three colour of the originals. It took a little work but soon had them looking right. I added a personal touch of my own in the form of a character i'd illustrated some time ago, whilst tweaking certain areas to make the whole thing a bit more unique. Was certain they'd compliment whatever colour the frame appeared in allowing the frame colour to come though and become part of the decal.
After some dead ends and a fair bit of worry I managed to get the decals made, finally!
My girlfriend had a word with a friend who works at a printers she deals with. He helped out and was able to get them run off for me....albeit after some anticipation by myself. I had no idea what method and how they would turn out. I was expecting to have them printed in whichever way they could, but instead I was surprised to see them appear as lazer cut vinyl. I was grinning from ear to ear when she brought them home on the thursday night... the looked amazing, the quality exceeded expectations, and to top it off they were done for free
I wasted no time marking them up and loosely cutting them out ready for application so I could run them down to Colour-Tech the next day. It was a relief knowing that stage had been completed successfully.
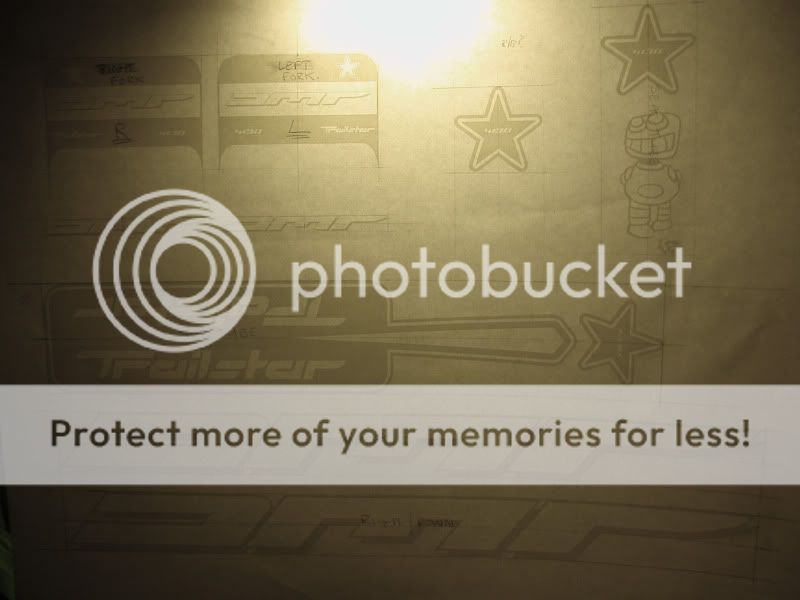
>here the sheet is rear lit as it was the only way to view them behind the top sheet<
The frame and forks at this stage were both wearing their primer complete with 5 nicely brazed hose guides. Dave was handed all the frame positions for each decal all which i'd loosely scribbled down on note paper. That was it now,..he had everything needed to complete the job. Off home I went knowing the next time i'd return would be to collect the finished piece that would be ready the following friday.
Friday comes and I have no car as it was in the garage having work done on it, so it was left to wait over the weekend for picking up monday. Luckily the weather was good and had some awesome riding to do in Danbury with some mates... What a fun day that was Vertical 40ft drop off galore! We'll be going back there again very soon.
The final drive to collect the frame was an exciting one, not knowing exactly how it was going to finally look...but I was in for a great surprise.
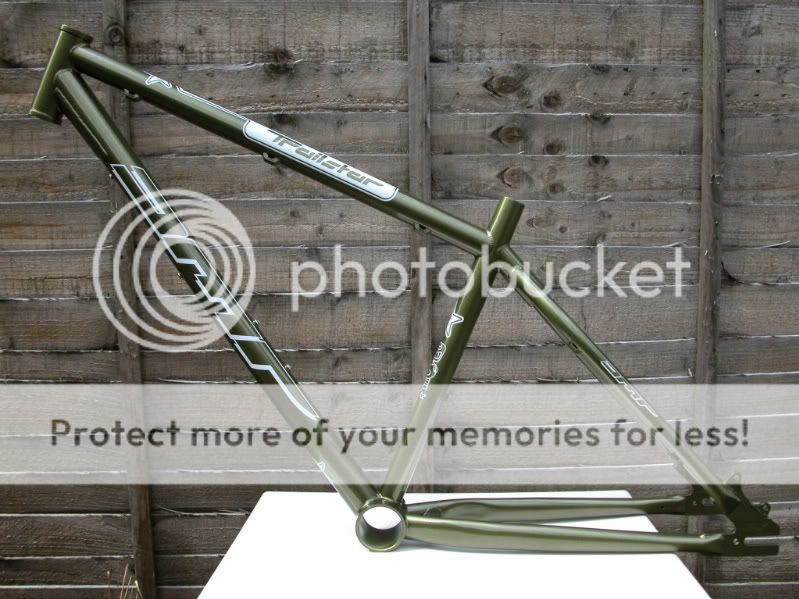
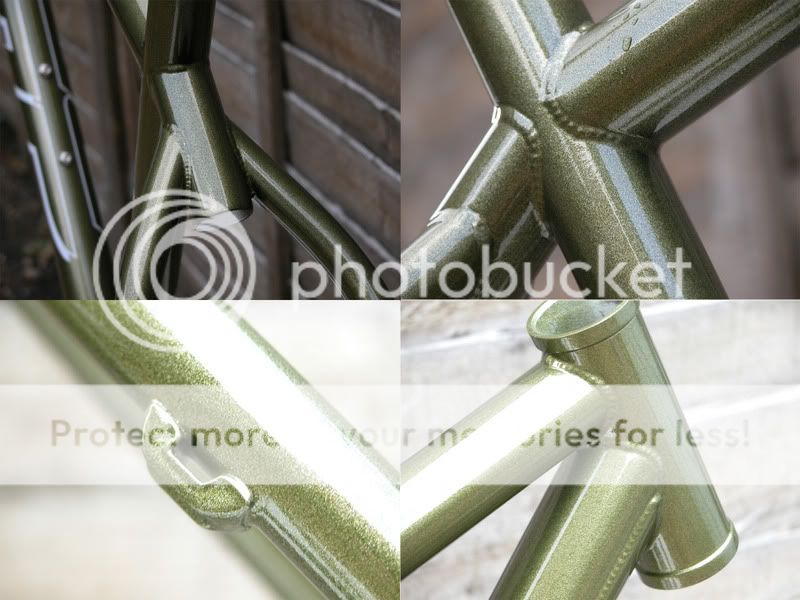
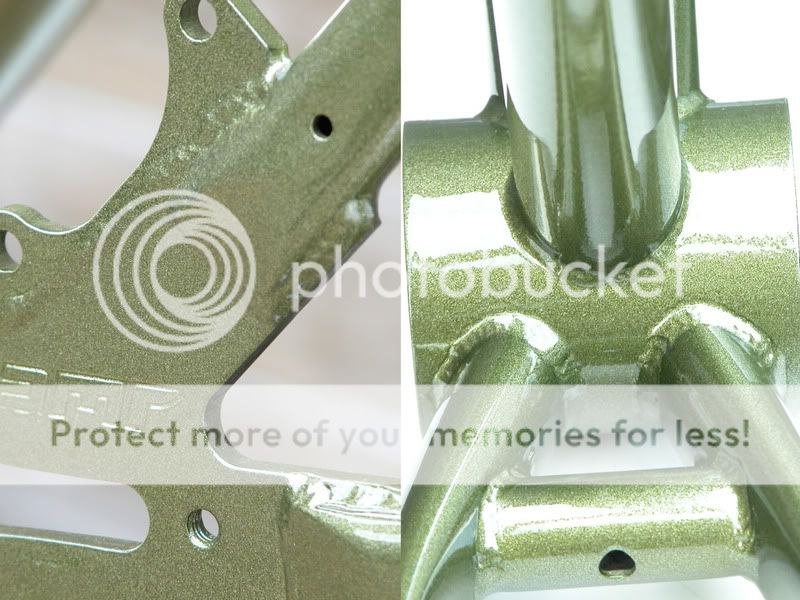
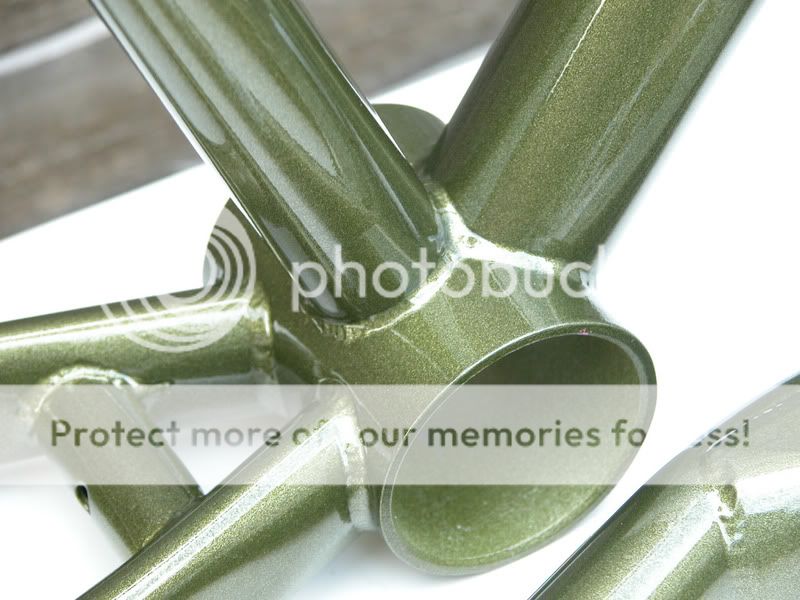
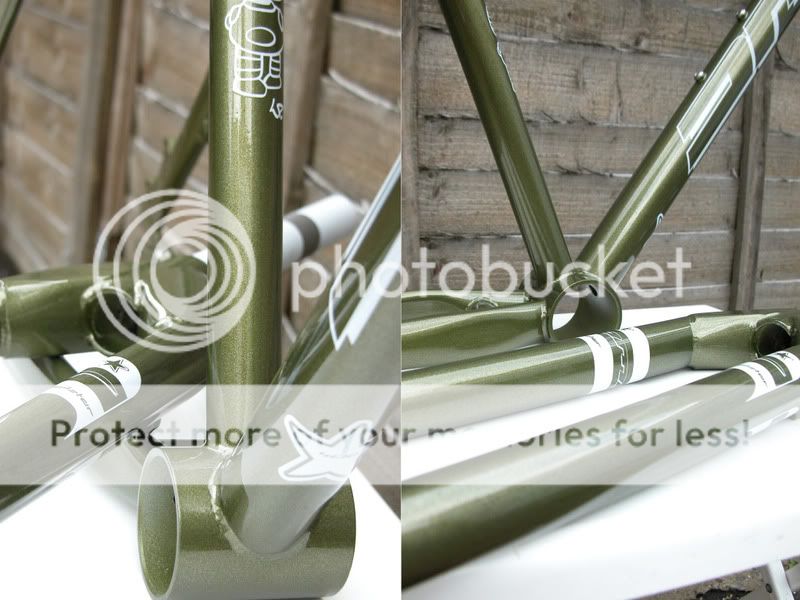
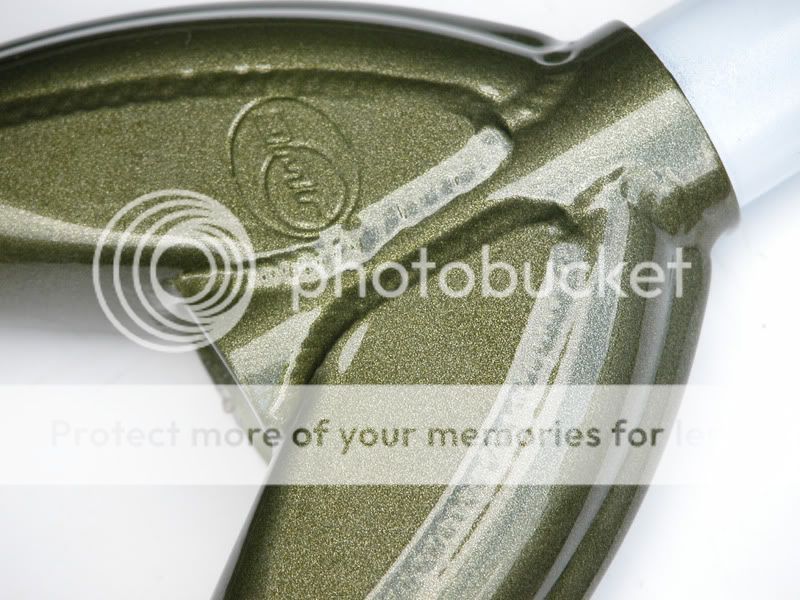
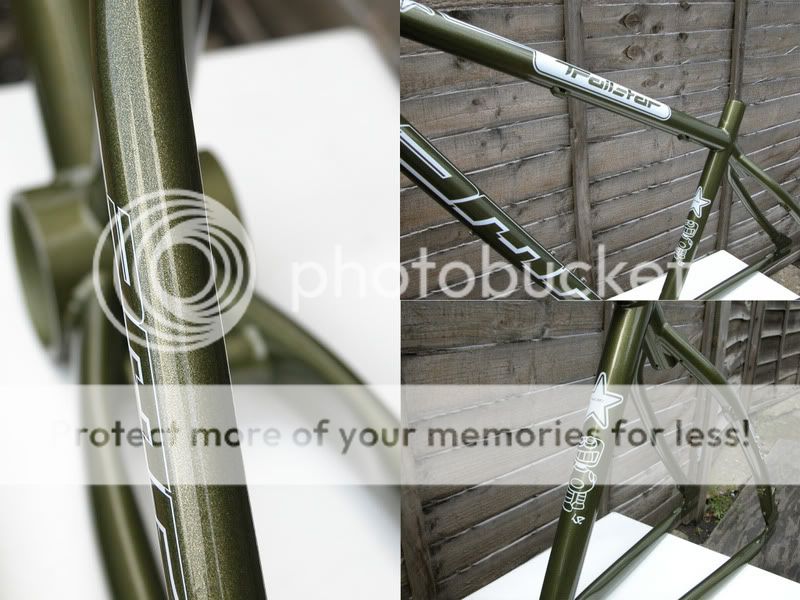
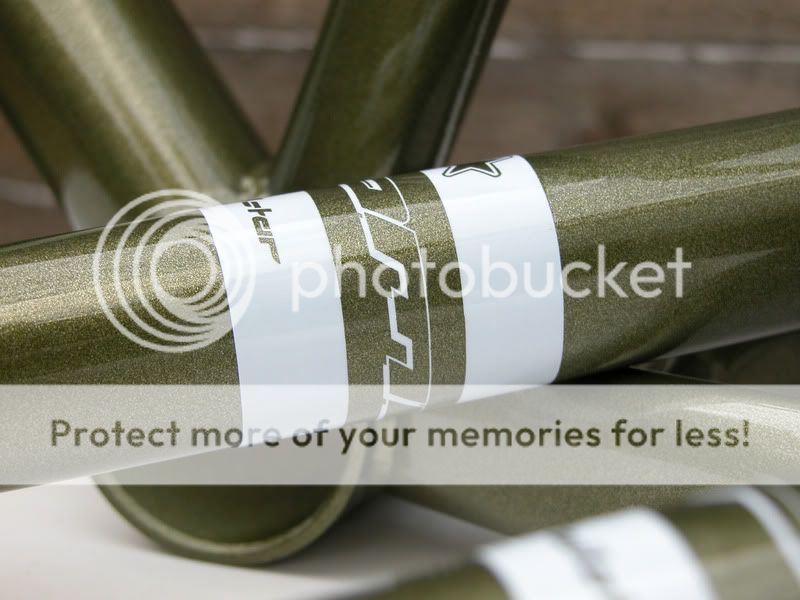
The job he had done was amazing to say the least! I cannot fault it in any way. The colour is spot on and was something I could never have envisaged from the outset. Loved the use of gold in the metallic which really makes it shine when the sun's on it.
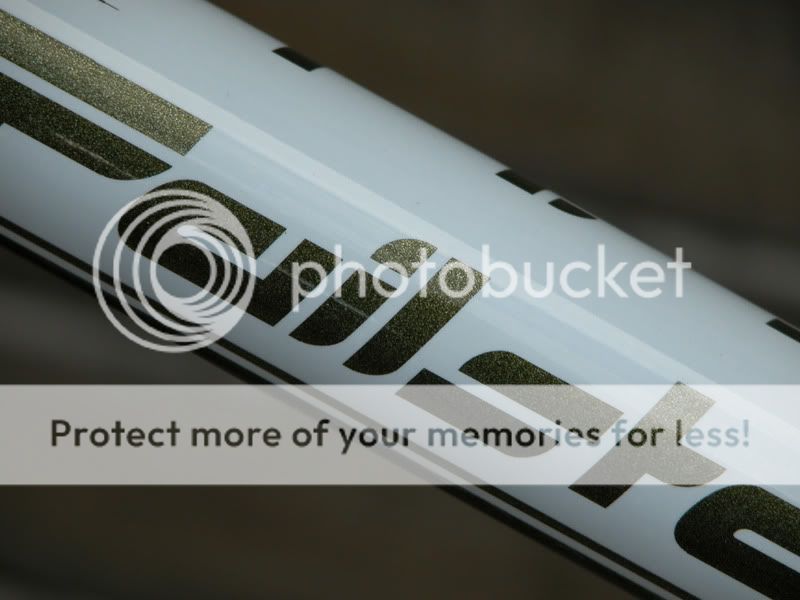
The decals had been applied faultlessly and appear seemless under the clear coat lacquer. I think he could tell I was pleased with the work he had done, and rightly so.
All in all, this has been a big learning curve for me with regards to pulling it all together and getting the frame completed.
Dave Crow at Colour-Tech gets the biggest shout from me as without his dedicated time and patience, plus without all the work he puts into making sure you get what you ask for this would have gone pear shaped long ago. I am one very happy customer! Comes highly recommended
...here are the fruits. Hope you like
(apologies for the amount of piccies..I was excited)


I will slowly acquire parts for the build as and when. Am still undecided exactly how it is going to end up and what I wish to use but i'm in no rush. I just want to build a nice, fun rider for myself and something to enjoy.
Getting the frame to this stage was my main concern.. its pretty much a blank canvas now and i'm looking forward to seeing it come together in time.
If you have any thoughts of what might work well with it then please feel free to pass them on... In the meantime hope you liked what you see and don't think I was too nuts going all out on this humble DMR like i have
Cheers,
Wayne
after starting this project a little over 5 weeks ago.. Here's a little run down and what I did to it so far during that time..The frame was an ebay purchase which looked fairly good in the pics, but on delivery it was in a rougher state than I was hoping. There was no way I could save the paint on it without changing the whole scheme. The initial plan was just to tidy the frame where needed without too much outlay but now another plan had to be followed.
The same day it arrived I soon made the decision to strip it back to metal, removing all the cable guides for a nice clean look. It was going to single speed only from now on so this was an easy choice to make. Off to the inlaws I went to make good use of the workshop there. After a bit of hunting to find the necessary power tools that would be needed the frame was soon taking shape and was pleased with how it was turning out.
Quess it took me 4 days overall and with many hours to get it as best as i could...bearing in mind I've never done any metal work to this extent before. The paint was all removed by hand with very course sandpaper whilst various files make quick work of smoothing out my handiwork.
On the final day a decision was taken to remove the v brake mounts, something I had been thinking over during the course. It wasn't a job I was looking forward to as there was a fair bit of metal there to cut and grind down. They soon came off after a bit of work and really improved the clean lines I was aiming for. It was truly satisfying seeing it in its current state, ready for whatever was to follow.
The next day I set about visiting a local powder coaters for quote. It wasn't far from me, and on turning up a guy was there returning two frames that he had coated. Apparently they hadn't done what he had asked for so they had to rectify them. This got me thinking that maybe this wasn't the place for me...so I got my quote and left. They wanted £50 for the coat and £30 for a sandblast which had to be done. Sounded more than i had expected,.. but anyway I was off to try elsewhere.
In the meantime I wanted to try and have some hose guides brazed onto the frame. This wasn't something I considered initially but soon thought it would be the best thing to do to save me having to resort to zip ties, something I was trying to avoid.
Upon searching the net again I soon came across Colour-Tech in Dartford run by Dave Crow. Not too far from me and considering he specialises in frames was worth a call. I admit, I was a bit naive as to what he did initially as was mainly wanting to just have the hose guides brazed onto the frame, but the enthusiastic call soon put me straight after finding out he could do the the whole brazing and painting for me. With address in hand I took a drive down to show him what was what.
You know the sort of people.. the ones that know what they're talking about and make you feel at ease with the job you're asking of them? Well, Dave is one of them.
After a bit of chat, a small tour of the workshop and spray booths it was easy for me to leave my frame in his capable hands.
If you ever get the chance to visit that place I would highly recommend it. Seeing all the shiny frames hanging there and the type of work he does for various manufacturers is enough and shows what he's capable of and the standards achieved.
All that was left for me to sort out was to get the forks and finalise the decals.
I had already reproduced most of the frame decals but was just waiting on the forks that I'd purchased off ebay to arrive so I could do the decals for them.
Almost 2 weeks later and they turn up! It was a bit of a wait, but not wasting any more time I immediately copied the decals and run them down to Colour-Tech to be blasted ready for painting along with the frame.
While I was there I showed a series of colour swatches that i'd printed giving a rough idea what I wanted. I still was undecided as to how to do it,..it was driving me nuts!
In the end, I pointed at two greens swatches and said i'd have something inbetween them two but in a metallic. He got a good idea what it was I was after and I was more than happy to just see what come of it. This would be something to look forward too when it finally came to seeing it... it was the anticipation of the unknown! Was kinda exciting.
Now it was down to me to get the decals produced asap as they were going to be lacquered.. No pressure then.
All decals were copied directly by applying tracing paper over the frame and tracing them. There was no way I could remove any of them so this was the best way to do it to achieve what I wanted.
Points were used for positioning of lines etc which once done, were scanned to give me a 100% scale rough for me to go on. I used illustrator to redraw the decals following the guides i'd made producing an accurate copy.
All the decals were simplified as I was wanted them in a single colour rather than the three colour of the originals. It took a little work but soon had them looking right. I added a personal touch of my own in the form of a character i'd illustrated some time ago, whilst tweaking certain areas to make the whole thing a bit more unique. Was certain they'd compliment whatever colour the frame appeared in allowing the frame colour to come though and become part of the decal.
After some dead ends and a fair bit of worry I managed to get the decals made, finally!
My girlfriend had a word with a friend who works at a printers she deals with. He helped out and was able to get them run off for me....albeit after some anticipation by myself. I had no idea what method and how they would turn out. I was expecting to have them printed in whichever way they could, but instead I was surprised to see them appear as lazer cut vinyl. I was grinning from ear to ear when she brought them home on the thursday night... the looked amazing, the quality exceeded expectations, and to top it off they were done for free
I wasted no time marking them up and loosely cutting them out ready for application so I could run them down to Colour-Tech the next day. It was a relief knowing that stage had been completed successfully.
>here the sheet is rear lit as it was the only way to view them behind the top sheet<
The frame and forks at this stage were both wearing their primer complete with 5 nicely brazed hose guides. Dave was handed all the frame positions for each decal all which i'd loosely scribbled down on note paper. That was it now,..he had everything needed to complete the job. Off home I went knowing the next time i'd return would be to collect the finished piece that would be ready the following friday.
Friday comes and I have no car as it was in the garage having work done on it, so it was left to wait over the weekend for picking up monday. Luckily the weather was good and had some awesome riding to do in Danbury with some mates... What a fun day that was
Vertical 40ft drop off galore! We'll be going back there again very soon. The final drive to collect the frame was an exciting one, not knowing exactly how it was going to finally look...but I was in for a great surprise.
The job he had done was amazing to say the least! I cannot fault it in any way. The colour is spot on and was something I could never have envisaged from the outset. Loved the use of gold in the metallic which really makes it shine when the sun's on it.
The decals had been applied faultlessly and appear seemless under the clear coat lacquer. I think he could tell I was pleased with the work he had done, and rightly so.
All in all, this has been a big learning curve for me with regards to pulling it all together and getting the frame completed.
Dave Crow at Colour-Tech gets the biggest shout from me as without his dedicated time and patience, plus without all the work he puts into making sure you get what you ask for this would have gone pear shaped long ago. I am one very happy customer! Comes highly recommended
...here are the fruits. Hope you like
(apologies for the amount of piccies..I was excited)
I will slowly acquire parts for the build as and when. Am still undecided exactly how it is going to end up and what I wish to use but i'm in no rush. I just want to build a nice, fun rider for myself and something to enjoy.
Getting the frame to this stage was my main concern.. its pretty much a blank canvas now and i'm looking forward to seeing it come together in time.
If you have any thoughts of what might work well with it then please feel free to pass them on... In the meantime hope you liked what you see and don't think I was too nuts going all out on this humble DMR like i have
Cheers,
Wayne