1995 Boulder Starship - FINISHED Page 4 - Picture Heavy

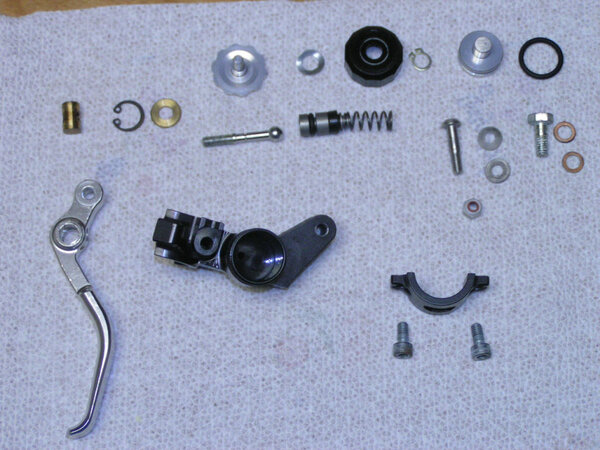
I overhauled the other brake lever this weekend and its condition was distinctly different from the other. This one, used for the front brake basically looked pristine. The seals looked like new, the oil was clean. All in all it could have been new, rather than 10 years old.

The first lever, for the rear brake, has a secondary seal in the master piston (make three seals where as the other lever and the service kits only has two), corrosion in various spots and on the hose clamp. Could not be more different.

I have discolored the rear disk before through heat build up on long downhill descents, so I am wondering if I have boiled the brake fluid before and if this boiling can accelerate corrosion of the brakes?

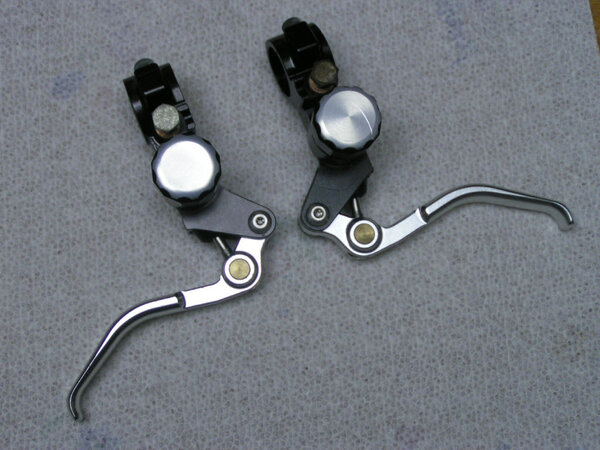
Anyway, regardless of the conditions both brakes have new internals so hopefully I will not have to worry about them in the future.

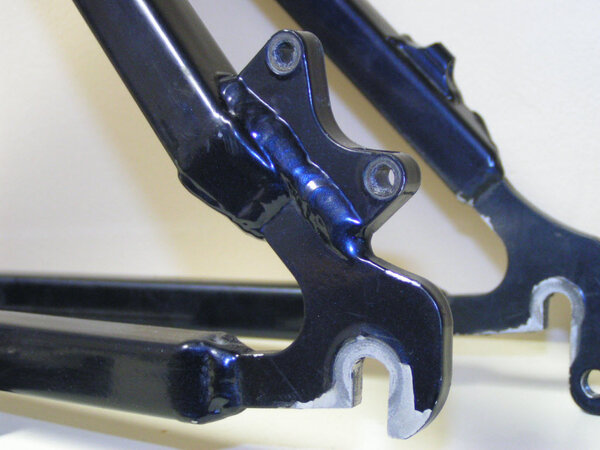
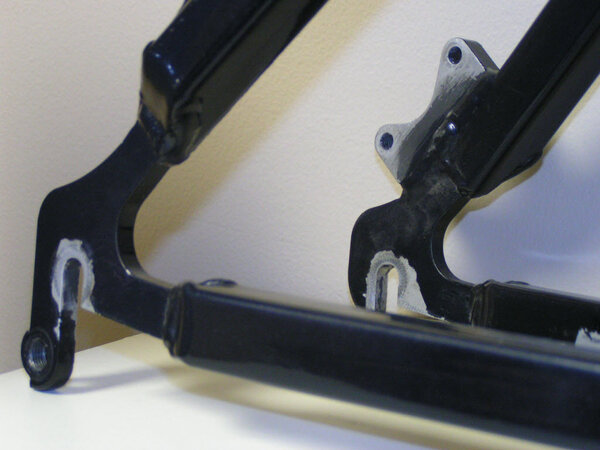
I've also remove my forks and given them a though clean. Next part is to strip them down and service them.

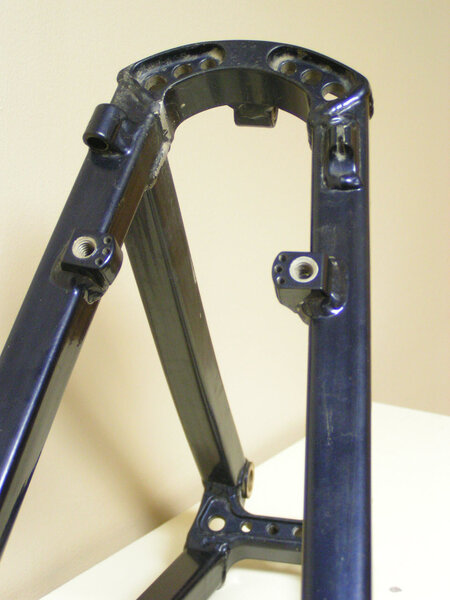
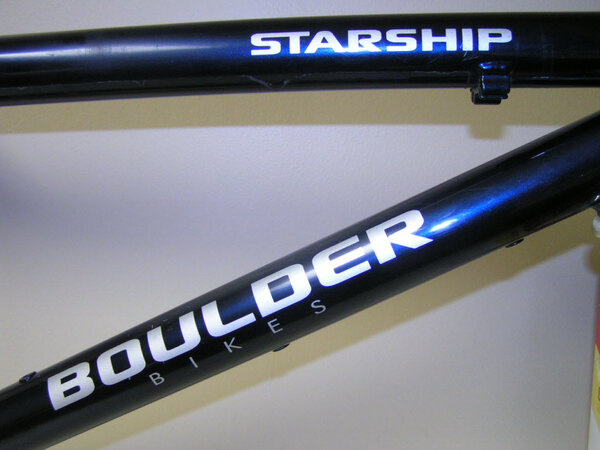
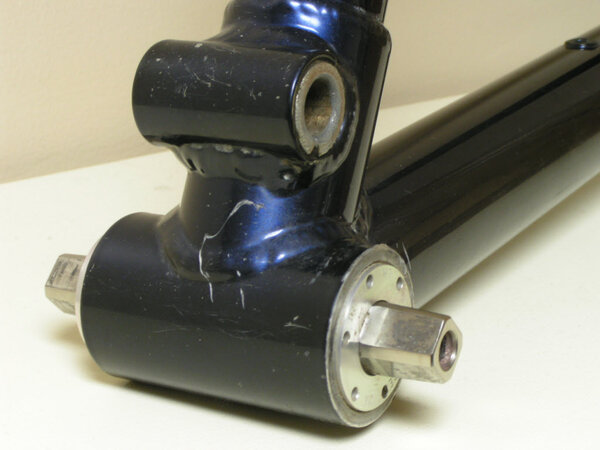
I'm also debating on if I should service the pivot point on the Boulder. I seem to remember that I needed lithium grease last time I did it (in about '99) but I can't remember now and I do not have instructions on the service.

Anyone know how to service a Boulder Starship pivot point and what grease I need for it?
 
I saved this from their web site a few years back, hope this is what you need.

STARSHIP SWINGARM BUSHING INSTALLATION

1. Remove rear wheel from frame.

2. Remove cranks and bottom bracket (this step is not mandatory but it makes bushing replacement very easy) and hold frame in a large vise by clamping the bottom bracket shell.
NOTE: Use some type of smooth vise jaw covers to protect the BB shell surfaces.

3. Remove the link that connects swingarm to shock.

4. Remove left swingarm pivot bolt and cap and tap pivot axle out with a soft punch (aluminum or brass) or wooden dowel. Remove the swingarm.

5. Knock out pivot bushings from swingarm and frame with steel punch. Be careful not to damage the inner surfaces of the frame or swingarm where the bushings reside.

6. Install new bushings in frame (steel w/Teflon lining). Grease and then install the left side (non-chain side) bushing first with a smooth-faced vise or c-clamp (use the aluminum pivot cap as a spacer on the drive side of the frame pivot boss to avoid marring the surface of the frame pivot boss) until the flange is flush with the pivot boss face. Grease and install the drive side frame bushing (leave a slight gap between the bushing flange and the face of the frame pivot - don't press the bushing in all the way).

7. Install swingarm bushings (oilite bronze) with c-clamp or soft-faced vise. Use red Loctite if available. The bushing with the thinner flange goes on the chain side.

8. Check for fit between the frame and swingarm bushings. The fit should be snug. If the swingarm won't go on the frame then press the chain-side frame bushing in a bit more until the swingarm fits properly.

9. Reinstall pivot shaft. Grease it liberally with a non-lithium based grease and tap it in with a hammer and soft punch or dowel. A small amount of the Teflon coating may be "skinned" off the new bushings by the axle as you install it. This is normal and assures a "perfect" fit.

10. Reinstall pivot cap and bolt. Tighten bolt until the washer on the drive side pivot bolt just starts to "pucker" or pull through. Clean, grease and reinstall link.
 
Thank you that was great! Just what I needed.

I'm not ready to replace the bushings but mine is tight so I don't think I need to. It just creaks a bit so I was to knock out the pivot axle, grease it and reinstall.

Its NON-LITHIUM grease I need. I'm glad I found that out. I know it was lithium something....
 
Did something stupid this weekend...

Why oh why did I do something stupid?

I decided to totally strip the frame of all components (excluding the Royce BB and the Chris King headset) and I got to the point where only the hydraulic rear brake line was left. However, I can't just take it off as it is in an eyelet on the rear triangle so I need to remove one of the hose fittings.

I unscrew the thing, slide back the brass thingy and try to take off the banjo fitting. It won't move. I give it a bit more welly and pull out the inner core of the hope damaging it. Rats!

I've never touched the hose before and it was in perfect shape, but now I need to buy a new one. That'll teach me! Now I have to see if I can recover the fittings from the old hose as they are still stuck in it so that I only need a new hose (~$20), or if I need both the hose and new fittings (~$34).

On a positive note I totally stripped the Hope calipers and the seals and pistons look good so no new parts required there. I have also now removed the old datatag fro the bike and the datatag stickers from the frame. I've also removed peeling rubberized tape that was on the top tube that was protecting the frame from the brake/gear cables. Anyone know were I can get some more to replace it, or should I just leave it off.
 
A few days back I overhauled the brake levers.
 

Attachments

  • brakes exploded.JPG
    brakes exploded.JPG
    113.8 KB · Views: 1,570
  • brakes.JPG
    brakes.JPG
    96.9 KB · Views: 1,570
I have now also knocked out the pivot pin holding the rear swing arm onto the main triangle.

The pivot was amazingly tight, totally encased in crud and it took a lot of effort if knock it out. I used 3/8 inch hardwood dowel as a drift and managed to go through a couple of these in getting the pin out.

I have now cleaned it all up. There is a little bit of corrosion on the pin but I think it will be okay for now. Surprisingly, given how tight is was, the pin feels loose in the swing arm making me wonder if the rear end will not be tight anymore. I'll find out when I put it back together.

I am now focusing on cleaning up the frame. The paint does look beat up but that is not surprising giving the riding this bike as had in the past. For now, I will use a rubbing compound try to clean up the frame somewhat and then polish it back up. I think, that if the pivot on the frame does need replacing then next winter I might consider respraying the frame to give it a total restoration.

I'll provide photos when I have some.
 
Frame photos

Okay here are the frame photos. The frame has been stripped of everything bar the headset and the bottom bracket (I have no need to remove these).

These are of the rear swing arm..
 

Attachments

  • disk mount.JPG
    disk mount.JPG
    72.2 KB · Views: 1,565
  • disk mount reverse.JPG
    disk mount reverse.JPG
    59.4 KB · Views: 1,565
  • Swing Arm Pivot point.JPG
    Swing Arm Pivot point.JPG
    69.7 KB · Views: 1,565
  • Swingarm.JPG
    Swingarm.JPG
    107.9 KB · Views: 1,566
These are of the front triangle..
 

Attachments

  • logos.JPG
    logos.JPG
    66.5 KB · Views: 1,564
  • seat tube.JPG
    seat tube.JPG
    114.9 KB · Views: 1,564
  • Main Triange Pivot point.JPG
    Main Triange Pivot point.JPG
    56.2 KB · Views: 1,564
Back
Top