Reviving a Hustler - build thread

ovim

Dirt Disciple
I've enjoyed a lot reading the build threads over here and thought I also could share my current project. I've been making slow progress with it over the past couple of months and it's getting there but it'll still take a month at least to get it ready.

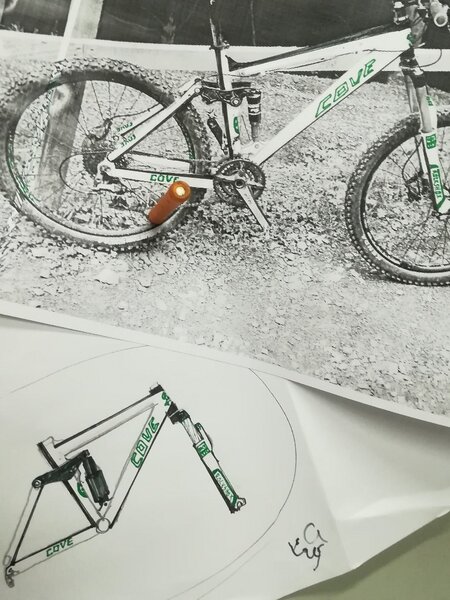
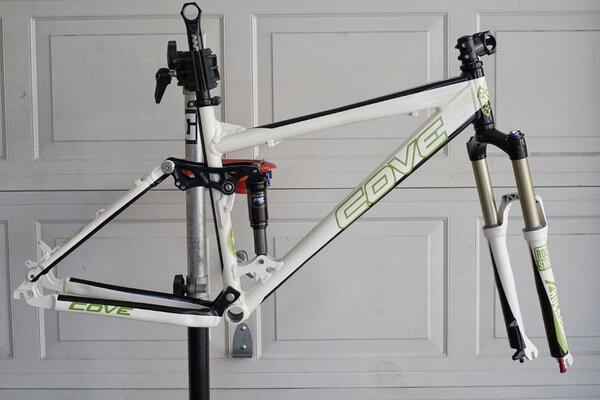
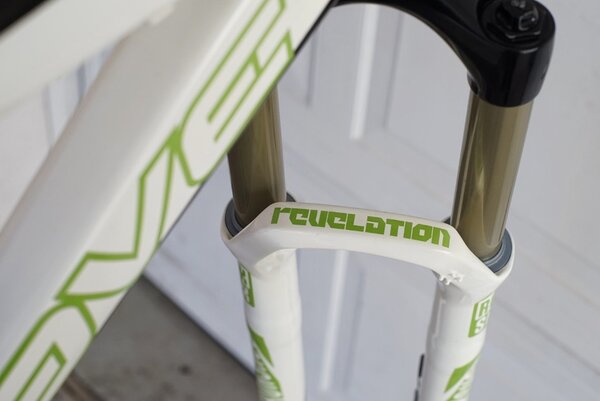
My son had been asking for a full suspension bike since last spring and in August I started looking for a suitable bike for him. I hoped that if I waited patiently I could get an "obsolete" 26er for a reasonable price. Weeks went by and all the cheap bikes I found were the wrong size but then I came across a medium 2012 Cove Hustler with a RS Revelation dual air forks and a Fox RP23 shock for less than 200eur.

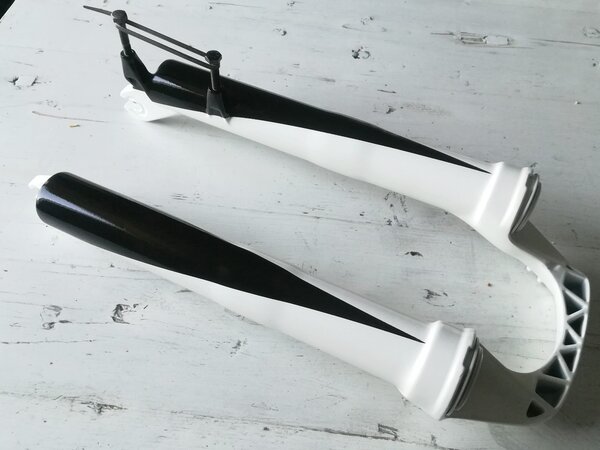
I messaged the seller and learned that the frame was very well used with worn bearings and that it had had an extra gusset welded to the toptube-seattube junction by some previous owner and that the forks worked but the stanchions had some scratches. I decided to take chance with it since the price was so low and so after a few days I received the package.

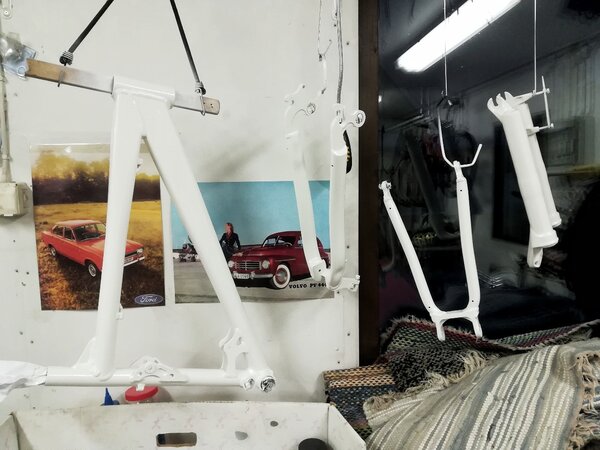
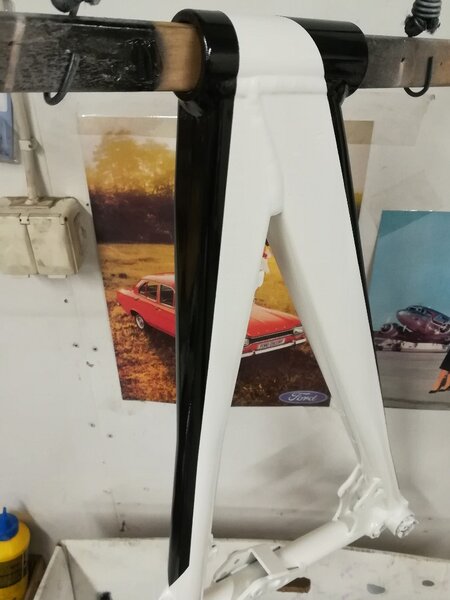
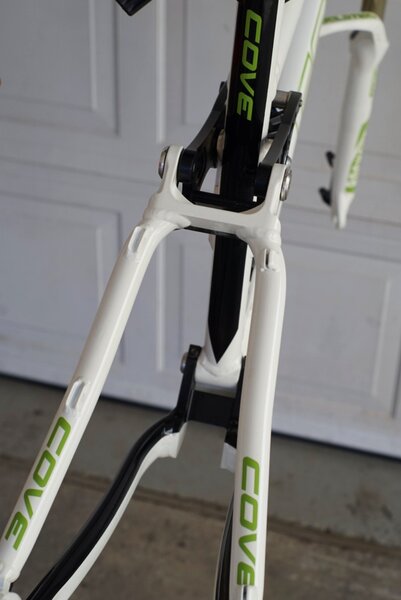
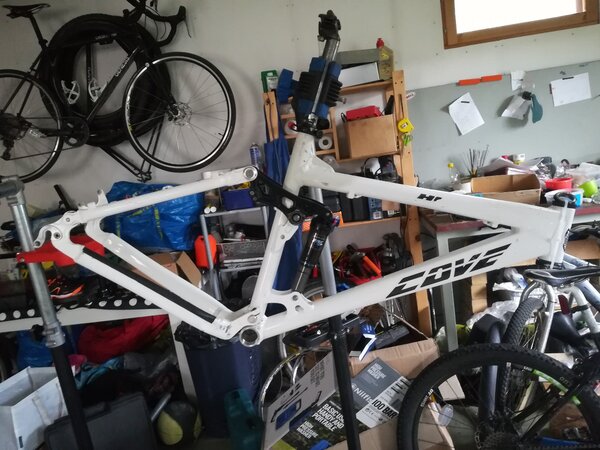
Here's the frame. It had a lot of scuffs and scratches and the added triangular gusset at the end of the toptube had been painted with a brush in slightly different shade of white.
 

Attachments

  • IMG_20181001_093259-1280x960.jpg
    IMG_20181001_093259-1280x960.jpg
    210.8 KB · Views: 3,154
After thoroughly checking what I had bought I started planning how I could get it back to life. The frame looked worse "in flesh" than in pictures and if I wanted it to look good once again new paint would be the only way to go.

The fork was holding air and didn't leak oil either but there indeed was a few scratches on the stanchions. Also the crown and the legs had scratches, scuffs and cable rub marks.

On the bright side the shock had been serviced frequently and was in good shape but the mounting hardware and the frame bearings were badly worn so I started disassembling the frame and making a shopping list for the different bearings etc.
 
Since I was trying to keep it cheap I decided I would paint it with spray cans and try to use the original paint as a base. I removed the stickers and filled bigger scratches and marks on the frame with automotive filler. After the filler had dried I sanded it down and also sanded the original paint a little bit to give the new paint something to grip to.

After covering the threads etc I started to paint. I chose white as my main color because I thought that if the paint chips it wouldn't look too bad with the white original color underneath :)

I followed the instructions on the can and applied light coats a few minutes apart. I was pleasantly surprised that the 24h drying time written on the can was true and I could actually sand the paint the next day if needed! I spent a few nights perfecting the coat and managed actually to get a very nice finish with this paint in my dusty and dirty garage.

Here's the paint I used, it's some kind of alkyd resin made by Dupli-Color:
 

Attachments

  • IMG_20190103_142756-01-1280x1706.jpeg
    IMG_20190103_142756-01-1280x1706.jpeg
    162.2 KB · Views: 3,120
  • IMG_20190107_083625-01-1280x960.jpeg
    IMG_20190107_083625-01-1280x960.jpeg
    181.2 KB · Views: 3,121
I like repaints ;) and white bikes are always goodlooking!
Did you remove those dustiwipers from your fork legs before painting?
 
Dare":3g006ycx said:
I like repaints ;) and white bikes are always goodlooking!
Did you remove those dustiwipers from your fork legs before painting?
Thanks! A new set of seals and wipers is coming so I used the old ones to keep the paint from getting inside the leg :D
 
In my experience it is always better to take old wipers out and then use masking tape to cover the holes.
 
Dare":31t80ckz said:
In my experience it is always better to take old wipers out and then use masking tape to cover the holes.
Ok, i just stuffed some old rag to the hole and put the wiper on top of it, hopefully not too much paint has found it's way under it.
 
Re:

With everything being so white, i started thinking about other colors.

I had already bought a pair of black NOS DT Swiss X1900 wheels with bright green decals so I decided to try to match my frame decals to that green. I bought a Cove vinyl sticker set from ebay and a RS Rev set for for the forks too from the same seller. I haven't compared the stickers side by side with the rim decals but I hope the vinyl green wont be too far off from the green on the rims.

With the white frame and green graphics I still felt I needed something. I made a few sketches and decided I would add some black stripes to the frame.

In my opinion a color scheme with only two colors (one for frame, one for decals) has to have a really beautiful main color and finish and/or somehow extraordinary decals to make a compelling bike. I don't have either, so I added black.
 

Attachments

  • IMG_20190114_221305-01-768x1023.jpeg
    IMG_20190114_221305-01-768x1023.jpeg
    176.7 KB · Views: 2,978
  • IMG_20190114_221405-02-768x1024.jpeg
    IMG_20190114_221405-02-768x1024.jpeg
    152.4 KB · Views: 2,978
  • IMG_20190115_191858-01-768x1024.jpeg
    IMG_20190115_191858-01-768x1024.jpeg
    85.6 KB · Views: 2,978
  • IMG_20190112_134047-01-1280x960.jpeg
    IMG_20190112_134047-01-1280x960.jpeg
    126.1 KB · Views: 2,978
Re:

Paint job is done, it's not perfect but it's actually pretty good for a diy spray can job. Before applying clear coats I carefully wet sanded the surface and got rid of the "ridges" at the border of black and white. After a bit too much sanding I had to touch up the black with a permanent marker in a few places, but luckily it worked ok and doesnt show through the clear coat.

Yesterday evening I applied the vinyl decals to the fork. My black triangle thingy sort of works with the decals but I wish I had thought about it a bit more.
 

Attachments

  • IMG_20190203_232837-01-1280x960.jpeg
    IMG_20190203_232837-01-1280x960.jpeg
    141.9 KB · Views: 2,553
  • IMG_20190204_072415-01-1280x695.jpeg
    IMG_20190204_072415-01-1280x695.jpeg
    108.3 KB · Views: 2,553
Re:

After applying the decals also on the frame I decided to add a few layers of the same clear lacquer to keep the decals from peeling.

The scratches on the fork stanchions I carefully sanded and filled the deeper scores with two-component "chemical metal". Then I sprayed clear coat on the scratches and after letting it dry I carefully wet sanded (1000-2000 grit) the coat away so that only the scratches were left filled. Now I can't feel the scratches even when running my fingernails over them. Time will tell how long my repair will last.

After adding new bearings to the frame pivots and fresh wipers, o-rings and oil to the shock and forks I started to put it back together. I installed a Cane Creek S2 headset and it's starting to look a little like a bike.

I wish I had a matching "Hustler" decal, now it just says Cove all over, but other than that I like it.
 

Attachments

  • _DSC3828-01-1024x682.jpeg
    _DSC3828-01-1024x682.jpeg
    87.9 KB · Views: 2,260
  • _DSC3829-01-1024x685.jpeg
    _DSC3829-01-1024x685.jpeg
    50.5 KB · Views: 2,260
  • _DSC3830-01-1024x1534.jpeg
    _DSC3830-01-1024x1534.jpeg
    103.3 KB · Views: 2,260
Back
Top