Based on the fantastic feedback I got with the single pivot Mount Vision Pro from 1998'ish era (seen here... viewtopic.php?f=21&t=112170 ), I pondered on what the other models in the range would ride like. After a few false starts and several bikes later, I considered myself educated enough to know exactly which model I wanted to use as my base. It was actually a B-17 with 130mm travel upfront that defined my desires. It was fairly cheap, grubby, but very capable, and in fact it recorded some incredibly quick times around local trails once I'd swapped the shock and tyres for something more suitable. They've got just short of 6 inches of rear travel, and a slightly longer rear swing arm which of course gives a longer wheelbase. There were three models made using this size shock, and they're B-17, DH FRS, and the Wildcat Trail. Said test bike (which has since moved on to a family member)...

Why did I do this? The Mount Vision is great for xc stuff, but there was always a feeling in the back of my mind that there was much more you could get out of these frames with a little geometry and travel tweaking. I would regularly find myself wanting more travel when the trails got really fierce. Without going too far away from the original concept, these frames can deliver a lot more. By carefully considering some lightweight parts, I imagine the overall weight will only just be above that of the Mount Vision Pro I've just completed.
So, what we have for this build is a 1998 DH FRS, with a '99 B-17 rear end with the more amicable disc mount. I cleaned up the rear end by removing the canti mounts, and then drilled out the cable stops on the front triangle so that I could use cable ties if desired. The frame was dropped off at my local powdercoat and blasting workshop last week. Pure Brilliant White was the chosen colour, and I collected it from them this morning...


Nice and fresh!
Next, I dug out the spacers I'd had made last year, which Rampage did an incredible job of cleaning up and anodising for me. A new set of replacement bearings, and Titanium bolts to replace the old steel ones...

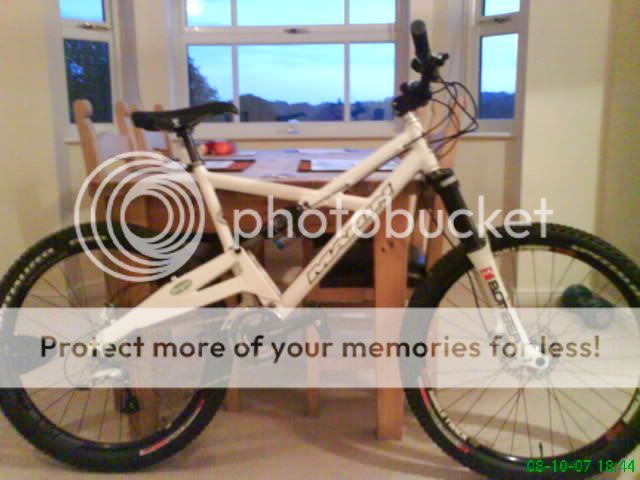
So, I put it all together with the shock that I'd used on the test bike. It's a Rock Shox Monarch 200 X 57mm, with brand new Fox bushes. For front forks I opted for some matching Rock Shox SID RLT's. These have just had a recent service by my very capable cousin. I couldn't wait to see what it would look like on some wheels, so I borrowed a set from another bike to get an impression of how it will look when built up. The wheels are very similar to what I'll be using anyway...

These seat clamps are from eBay, and they're great value for money, and really light. I swapped out the steel bolt for Titanium too...


That's it for now, but hopefully I'll get some more done next week.

Why did I do this? The Mount Vision is great for xc stuff, but there was always a feeling in the back of my mind that there was much more you could get out of these frames with a little geometry and travel tweaking. I would regularly find myself wanting more travel when the trails got really fierce. Without going too far away from the original concept, these frames can deliver a lot more. By carefully considering some lightweight parts, I imagine the overall weight will only just be above that of the Mount Vision Pro I've just completed.
So, what we have for this build is a 1998 DH FRS, with a '99 B-17 rear end with the more amicable disc mount. I cleaned up the rear end by removing the canti mounts, and then drilled out the cable stops on the front triangle so that I could use cable ties if desired. The frame was dropped off at my local powdercoat and blasting workshop last week. Pure Brilliant White was the chosen colour, and I collected it from them this morning...


Nice and fresh!
Next, I dug out the spacers I'd had made last year, which Rampage did an incredible job of cleaning up and anodising for me. A new set of replacement bearings, and Titanium bolts to replace the old steel ones...

So, I put it all together with the shock that I'd used on the test bike. It's a Rock Shox Monarch 200 X 57mm, with brand new Fox bushes. For front forks I opted for some matching Rock Shox SID RLT's. These have just had a recent service by my very capable cousin. I couldn't wait to see what it would look like on some wheels, so I borrowed a set from another bike to get an impression of how it will look when built up. The wheels are very similar to what I'll be using anyway...

These seat clamps are from eBay, and they're great value for money, and really light. I swapped out the steel bolt for Titanium too...


That's it for now, but hopefully I'll get some more done next week.


