cagiva gezzer
Devout Dirtbag
Not really a "correct" place to put this. But the final product is securing my retro bikes. I hope this inspires you to beef up your security by seeing just how easy it is to put in a ground anchor! 
Some photos of how to put a ground anchor into a shed. It took me a number of months to get around to doing this. Partly working out how to cut a neat hole in the shed base, partly how to secure a ground anchor and mainly what one!
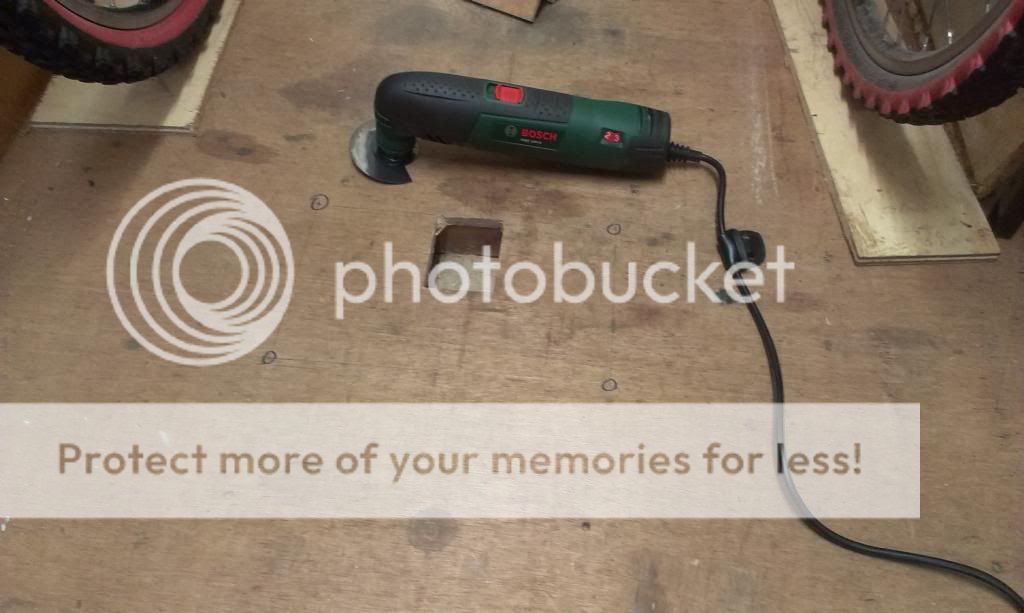
1) Hole cut with oscillating multi tool (on offer in Argos)
2) Anchor from Security for Bikes and I can't recommend them enough.
3) Complete, reassuring, instructions came with the anchor.
So, how I installed my injection resin kit into the shed. This of course assumes you have a concrete base and you're not trying to bolt it into mud..
Look under the shed for where the bearers run and make a good judgement. Locate the nails inside the shed to help you find them.
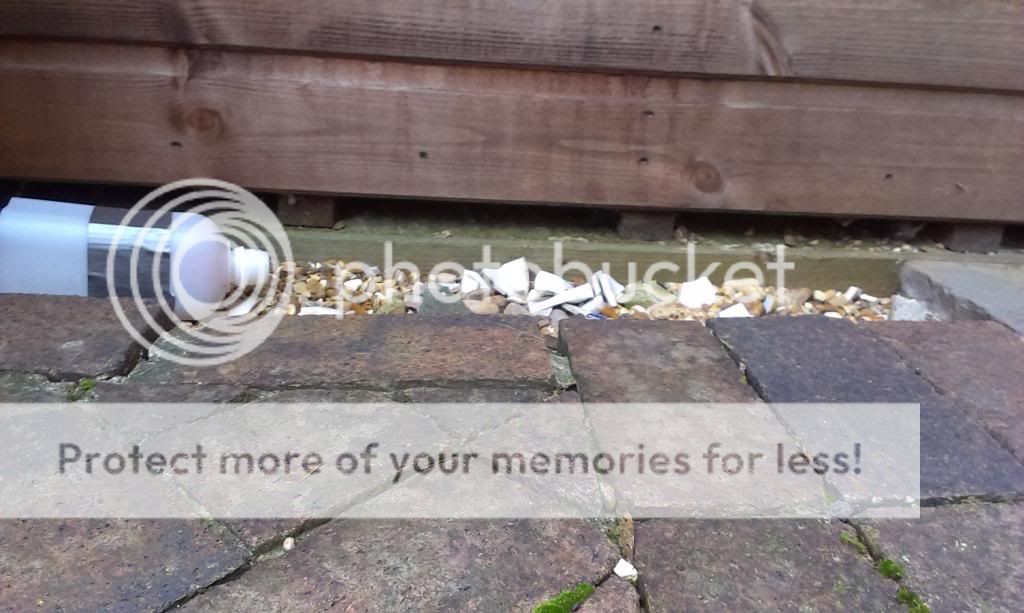
Place round anchor in position and measure up.

Cut out a tester hole. Partly to see how the new tool works / cuts. Luckily got it just in the right spot!
Cut out the access hole full size. Cut sections of wood to box in the new hole to keep the cold / mice out. Little did i know these would be extremely useful later..

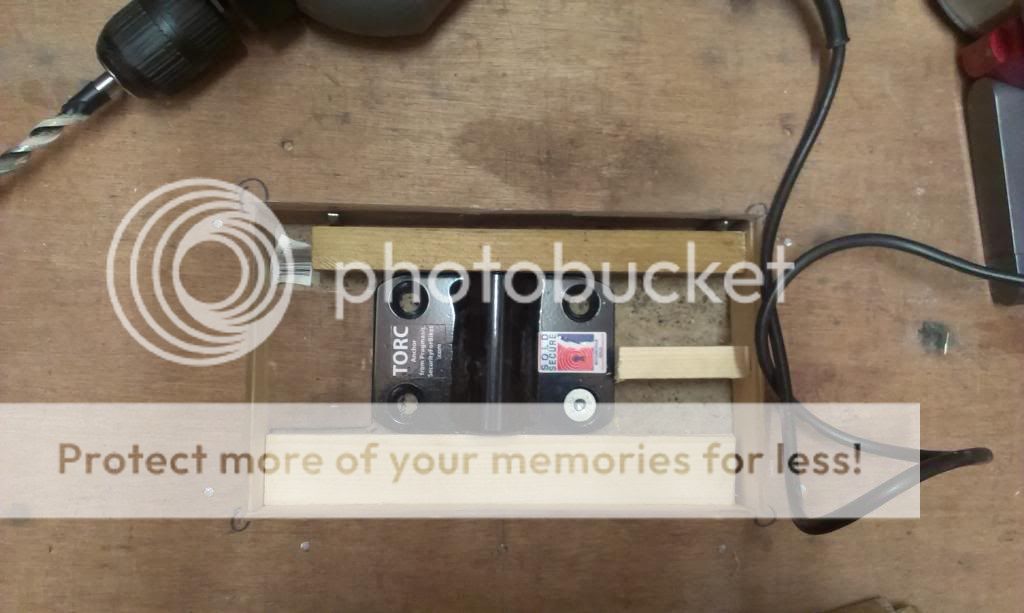
Secure new bearers under floor and place anchor in desired spot. I drilled one hole first and the anchor drifted slightly. You can see in this photo that I boxed the ground anchor in with spare wood. This allowed you to use the base plate holes to guide the drill bit and keep it all square. Notice the cheap hammer drill. It survived and I wasn't concerned it if died during duty as it's £20 from argos. It would have cost me the same to hire one for HSS. It sparked, groaned, smelt and squealed. But it survived!

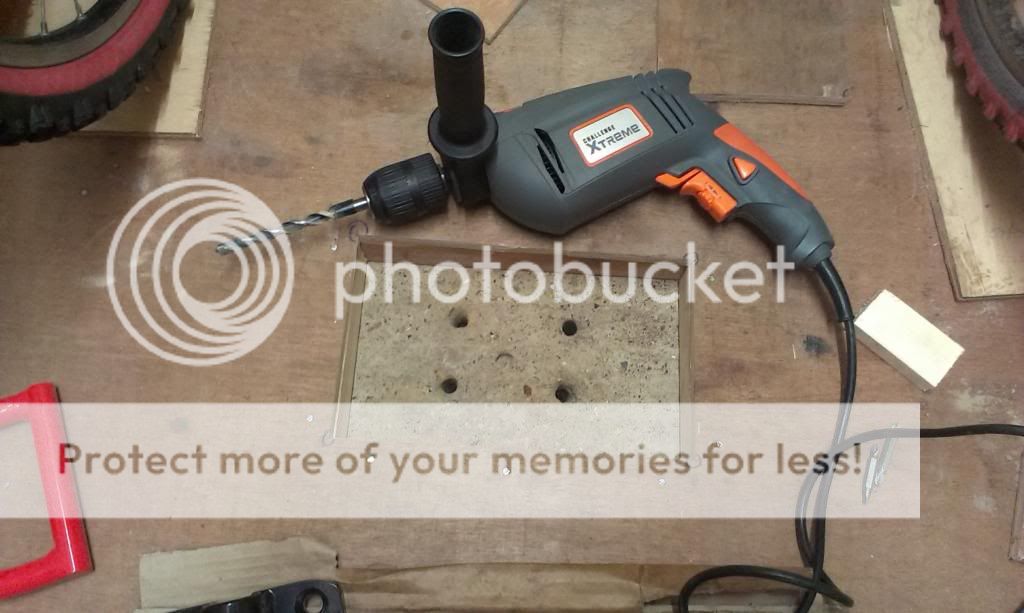
Holes complete & cleaned out with hover / air hose. Note the tester hole in the middle to see if the drill can cope..
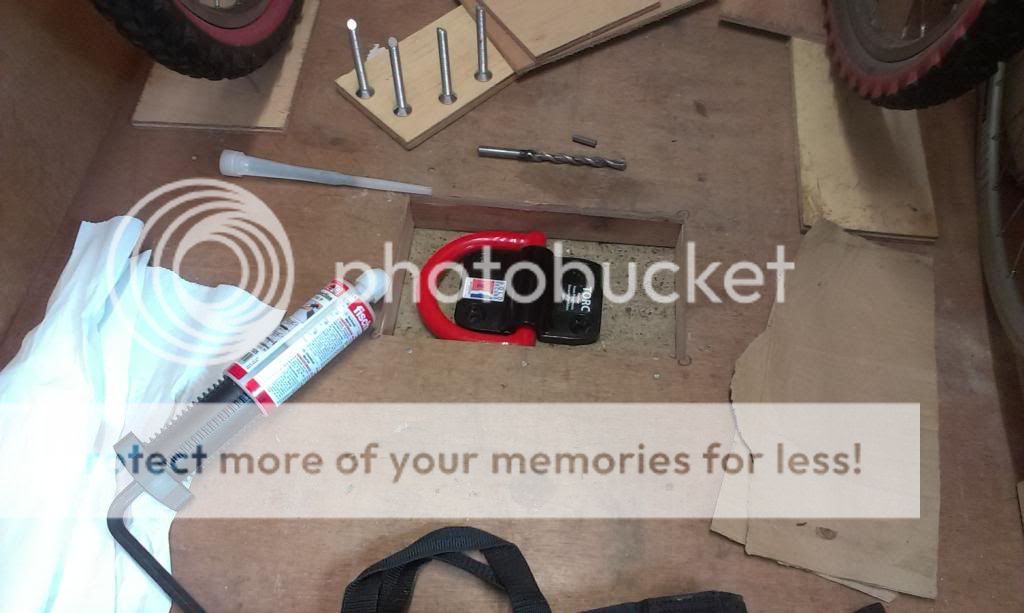
Instructions for the resin read twice over. All items in easy reach. All items clean. And we're off with the scary injection resin, which wasn't actually that bad! Resin in the holes, bolts in the holes, bearings in the bots and leave for a day.
The finished product. The resin dulled the stickers as a bit too much was used in some of the holes. Feels secure, very secure.

Some photos of how to put a ground anchor into a shed. It took me a number of months to get around to doing this. Partly working out how to cut a neat hole in the shed base, partly how to secure a ground anchor and mainly what one!
1) Hole cut with oscillating multi tool (on offer in Argos)
2) Anchor from Security for Bikes and I can't recommend them enough.
3) Complete, reassuring, instructions came with the anchor.
So, how I installed my injection resin kit into the shed. This of course assumes you have a concrete base and you're not trying to bolt it into mud..
Look under the shed for where the bearers run and make a good judgement. Locate the nails inside the shed to help you find them.
Place round anchor in position and measure up.
Cut out a tester hole. Partly to see how the new tool works / cuts. Luckily got it just in the right spot!
Cut out the access hole full size. Cut sections of wood to box in the new hole to keep the cold / mice out. Little did i know these would be extremely useful later..
Secure new bearers under floor and place anchor in desired spot. I drilled one hole first and the anchor drifted slightly. You can see in this photo that I boxed the ground anchor in with spare wood. This allowed you to use the base plate holes to guide the drill bit and keep it all square. Notice the cheap hammer drill. It survived and I wasn't concerned it if died during duty as it's £20 from argos. It would have cost me the same to hire one for HSS. It sparked, groaned, smelt and squealed. But it survived!
Holes complete & cleaned out with hover / air hose. Note the tester hole in the middle to see if the drill can cope..
Instructions for the resin read twice over. All items in easy reach. All items clean. And we're off with the scary injection resin, which wasn't actually that bad! Resin in the holes, bolts in the holes, bearings in the bots and leave for a day.
The finished product. The resin dulled the stickers as a bit too much was used in some of the holes. Feels secure, very secure.